Admin Onboarding - Item Workspace Header
You have configured types, fields, and tags. The item workspace (the drawer that opens when you click an item) is where all of that shows up, so the next few pages tour it. Open any item you created in the last step and follow along. This page covers the header and footer; the next ones cover the tabs, the icon strip, and the right sidebar.
The header row
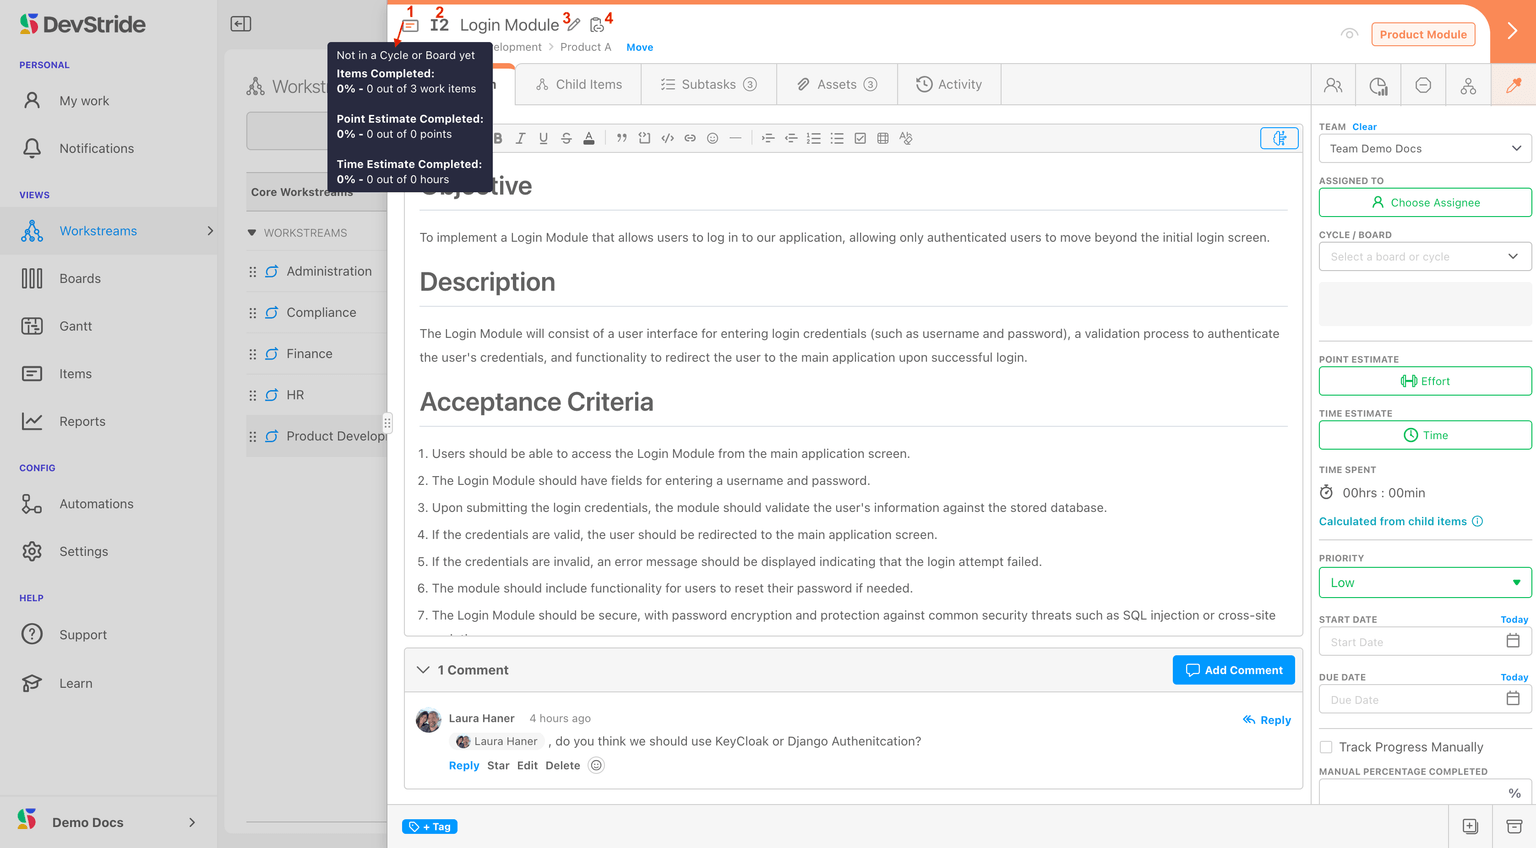
| Element | What it tells you or does |
|---|---|
| Item icon (1) | Coloured by item type. Hover for completion: Completed, Planned in a Cycle/Board, or Not in a Cycle or Board yet; parents add Items Completed: n out of m or a point or manual percentage. |
| Item number (2) | System-assigned, prefixed I for items (workstreams use a different letter). Type it anywhere DevStride accepts an item reference. |
| Name (3) | Click the name or its pencil to rename. The new name shows everywhere immediately. |
| Copy link (4) | Copies a link that opens this item for any signed-in user with access. Pasted into Teams, Outlook, OneNote, Slack, a document or another item's description, it shows as the item's name and number (for example Review Environment Differences - I2176); pasted into a plain-text field, it is the bare URL. Renaming the item later does not break a link you have already shared. |
Breadcrumb and Move
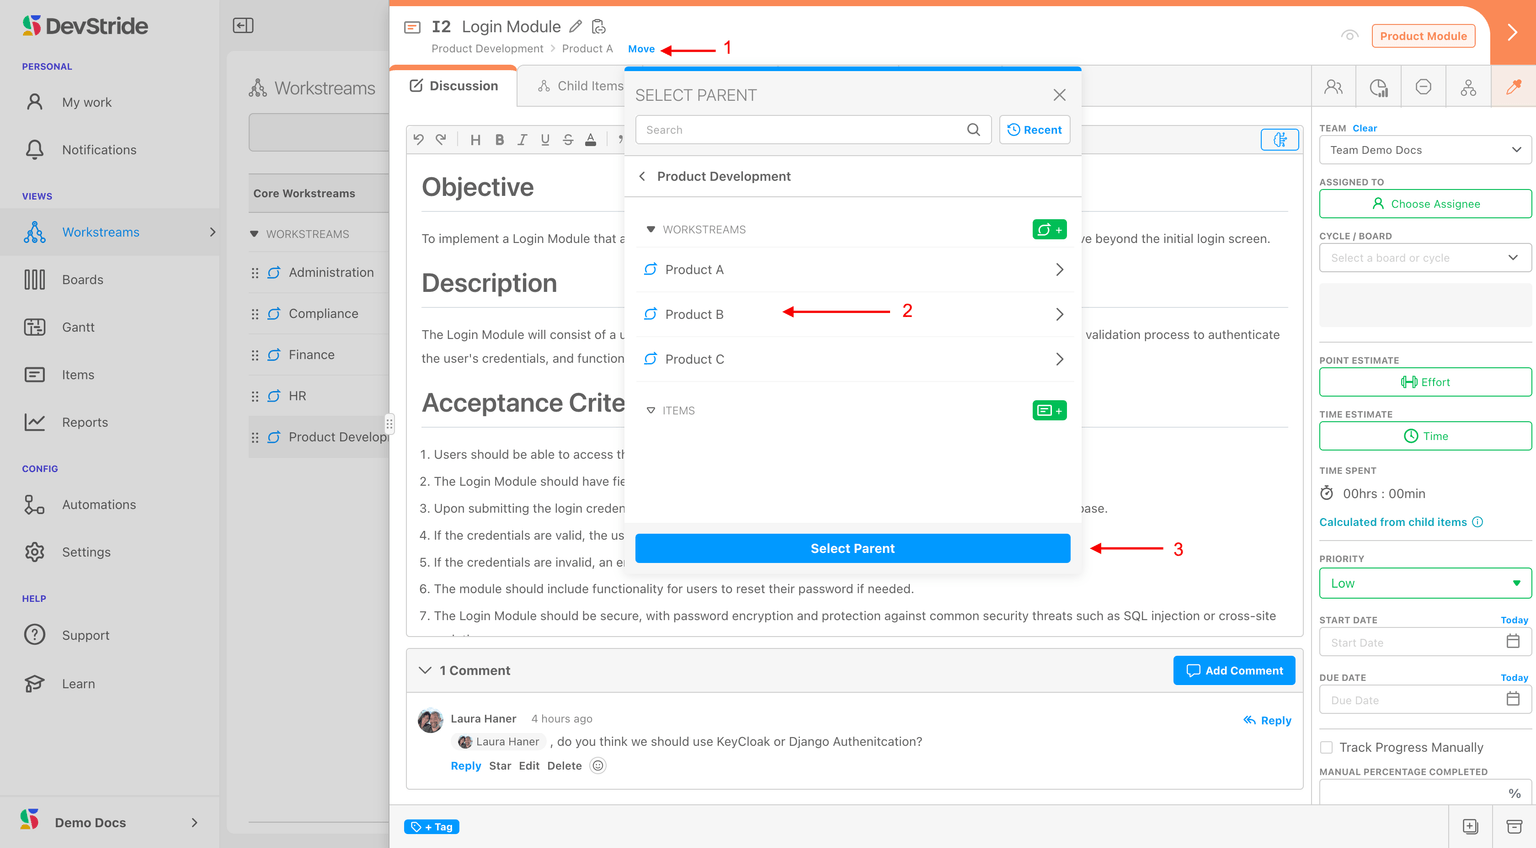
The breadcrumb under the name shows where the item sits in the workstream hierarchy; click any level to navigate. To relocate the item, click Move, navigate to the new location in the picker (only locations that can hold this item type are offered), and click Select Parent. Children move with it.
Watchers
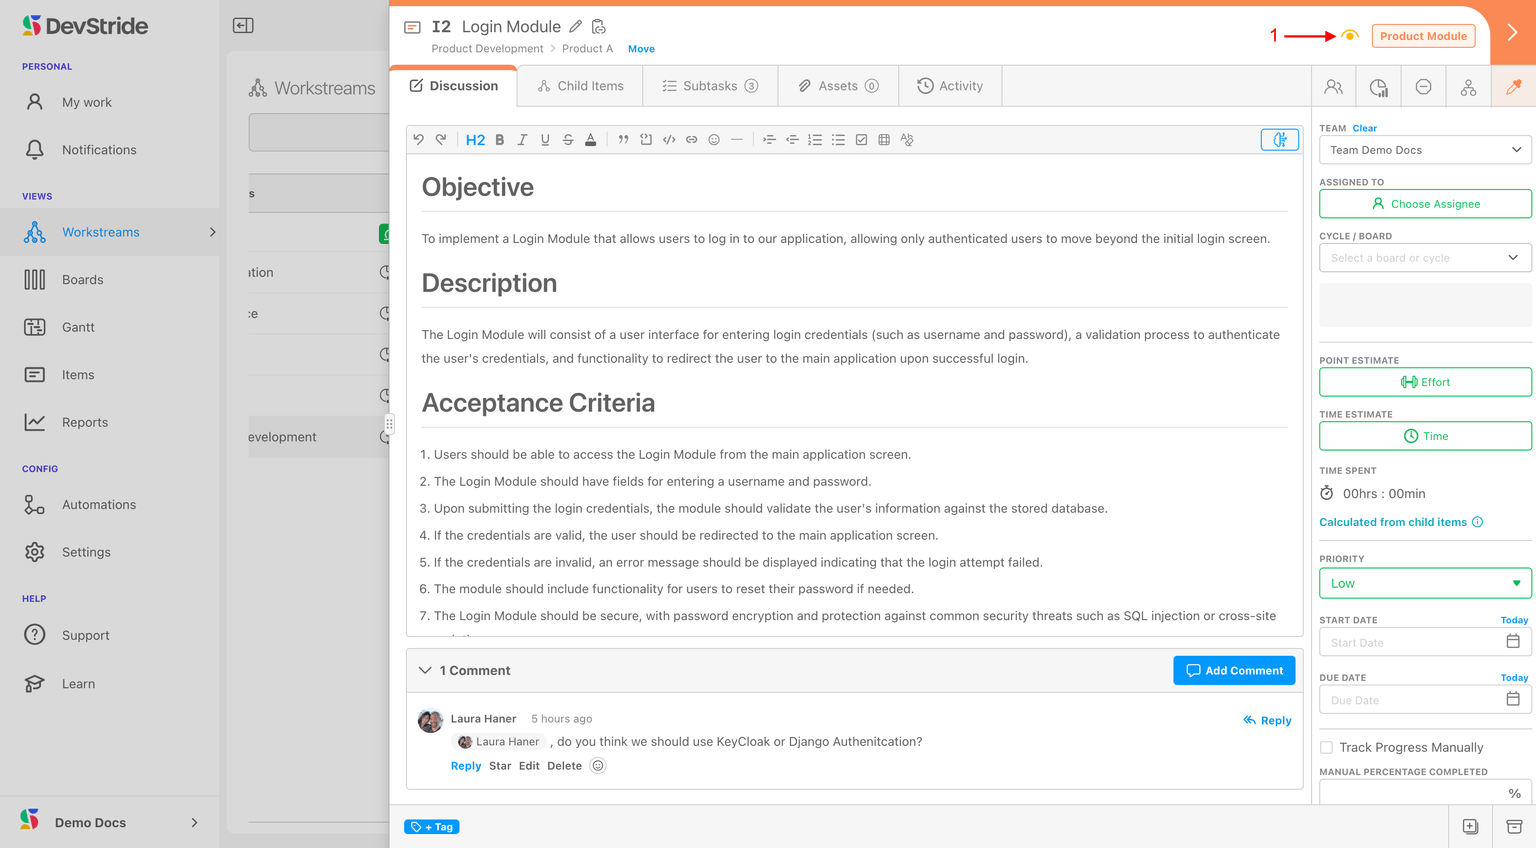
Watchers get notifications for changes on the item (status, assignment, comments, dates, relationships), per their own notification settings.
- Watch / Watching (eye icon): toggles you. Hover for Start Watching or Stop Watching.
- Avatar stack: shows up to three watchers plus +N. Click it to open Select watchers, add or remove anyone, and click Update Watchers. The eye icon in the icon strip (Add Watchers) opens the same picker.
You need edit access to change watchers; read-only items show the controls disabled.
Item type
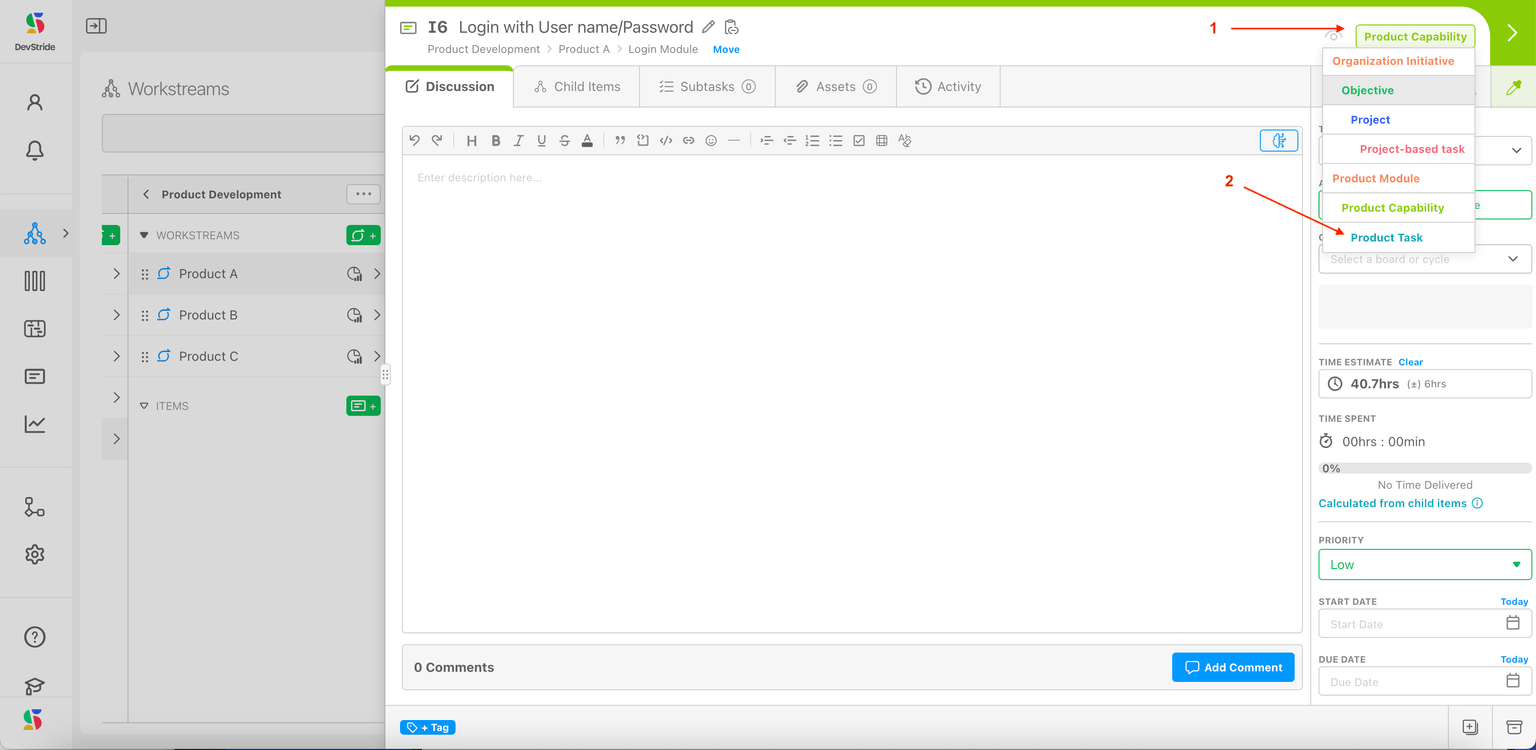
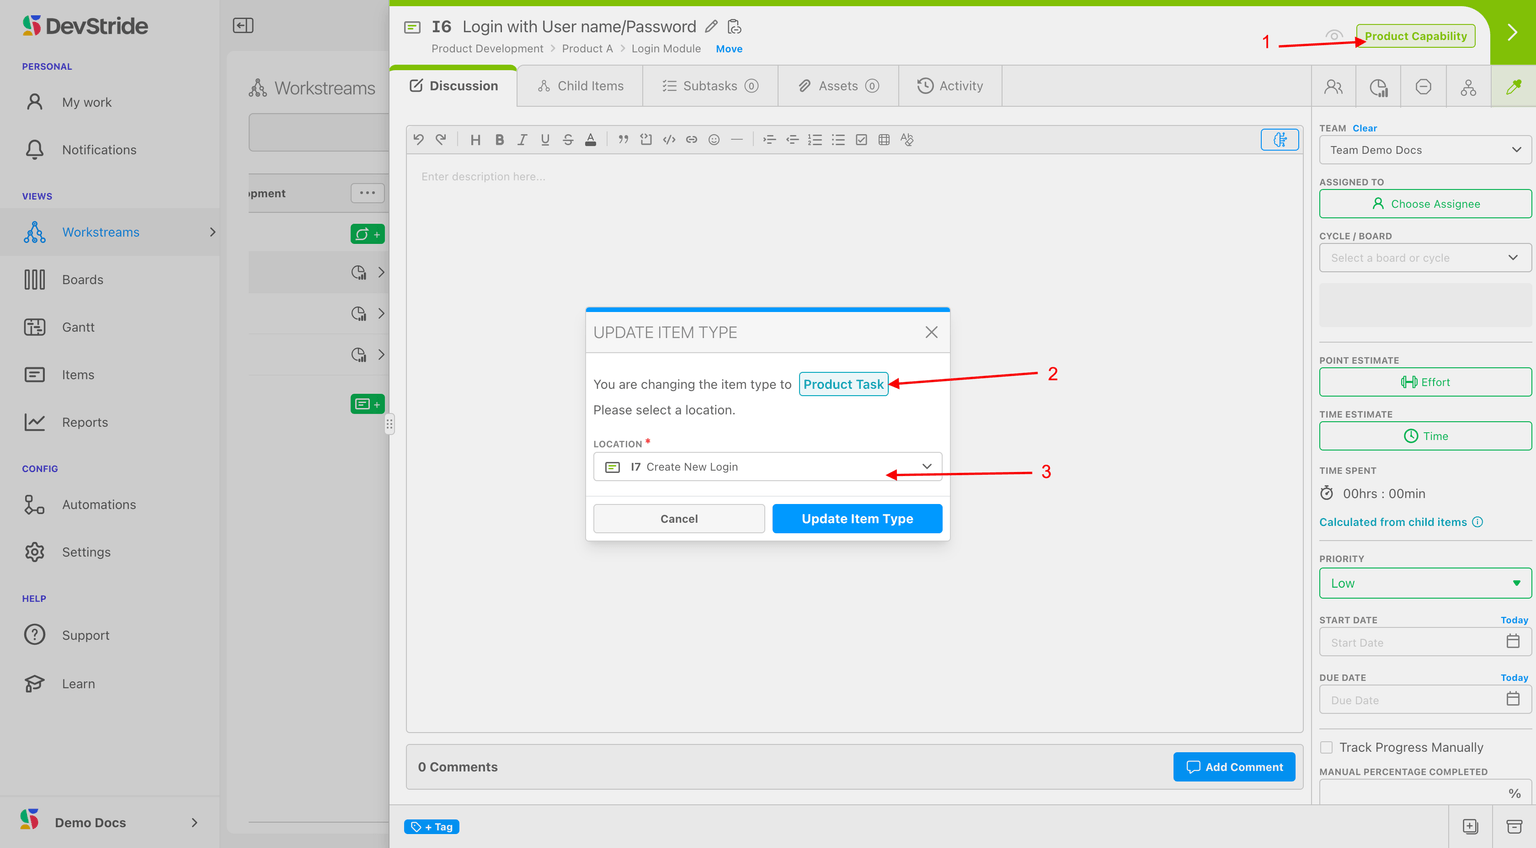
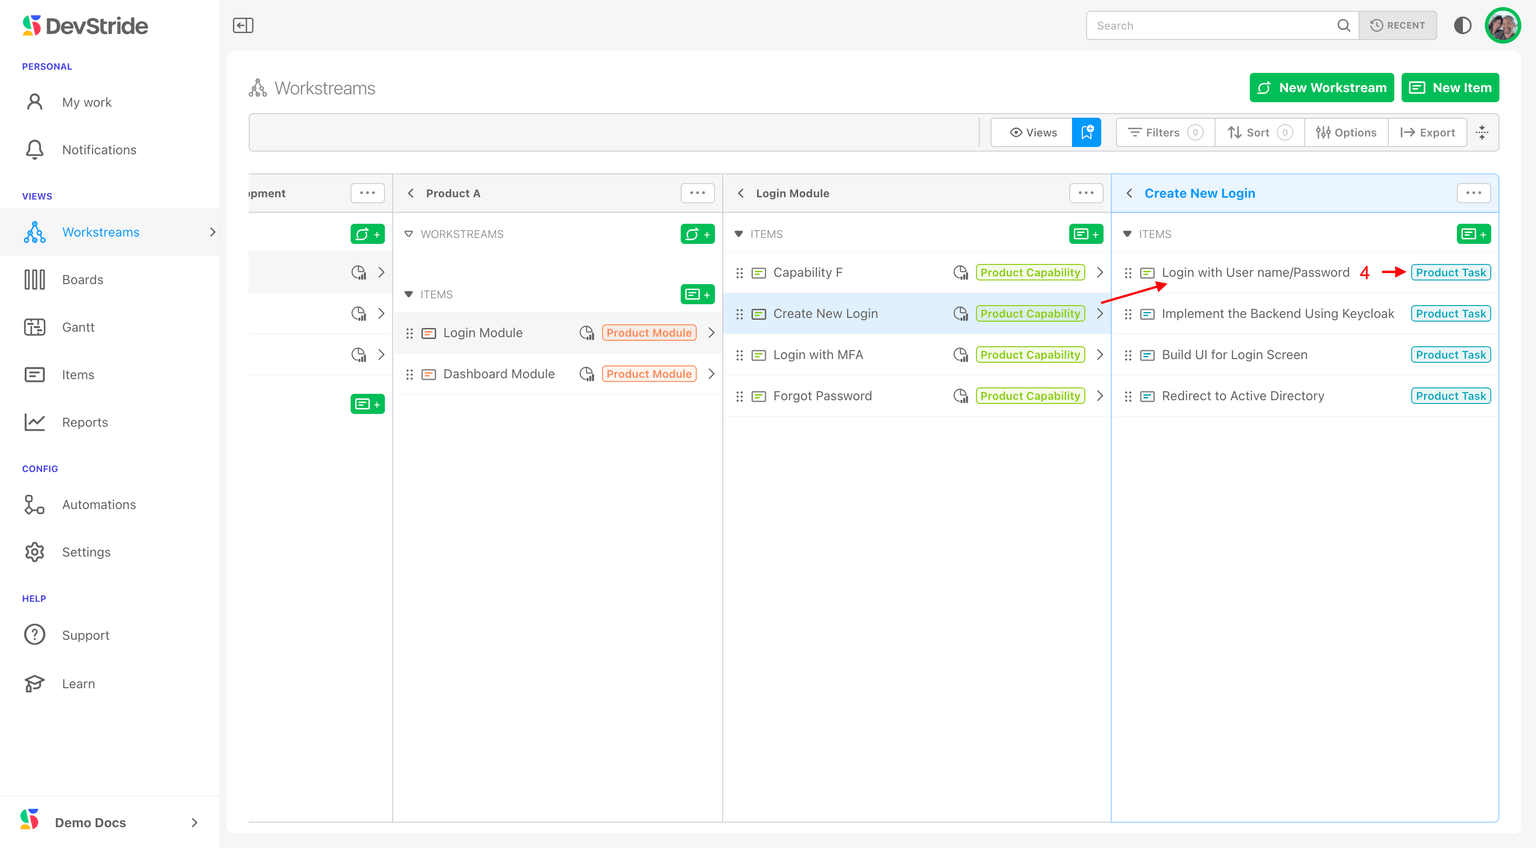
The type badge on the right opens Select Work Type. Picking a type opens Update Item Type, which shows what the change does to the item and asks for a location that can hold the new type (the current one is kept when it fits). When the item's children would not fit under the new type, it opens Change item types instead, which suggests new types for the children and converts the whole tree in one step; see Changing an item's type.
The footer
Along the bottom of the drawer:
- + Tag opens the tag picker (Edit Tags → Apply Tags), offering the tags in this item type's collection.
- Duplicate copies the item. Small trees (five items or fewer) copy at once; larger ones open Duplicate Item so you can confirm the title (… (copy)) and parent.
- Archive removes the item from active views; an archived item shows a red Archived chip and gains Delete and Unarchive (with an option to unarchive children too).
- Changes to the description are held as a draft and saved when you close the item (Unsaved changes — saved when you close this item).
Next: Item Workspace Tabs.
Admin Onboarding - Creating and Managing Forms
Step 6c of admin onboarding (optional) — build item request forms so colleagues or the public can submit standardized requests that become items in the workstream you choose.
Admin Onboarding - Item Workspace Tabs
Step 7b of admin onboarding — what each tab of the item workspace is for: Description (with AI templates), Discussion, Subtasks, Child Items, Time Tracking, Forms, Assets, GitHub, Agent Sessions, and Activity.