Setting the Stage: How Predictability becomes Reality in DevStride
Planned Value to Predictable Delivery
DevStride is for organizations that run many projects across several teams and need to know, reliably, when things will land. Everything you configure in this guide serves one idea, so it is worth getting it straight before you open Settings.
Two questions, two structures
Most project tools make you answer two different questions with one list:
- What are we delivering? The product, initiative, or outcome a sponsor cares about.
- Who is doing it, and when? The team's queue for this week or this sprint.
Mixing them is what produces boards named after products that nobody works from, and reports that cannot say how far an initiative has got because its work is scattered across six team boards.
DevStride keeps the two apart and links them:
| Question | Structure | Module | Who lives here |
|---|---|---|---|
| What are we delivering? | Workstreams holding a hierarchy of items (Epic → Story → Task) | Map Value | Product owners, sponsors, portfolio leads |
| Who does it, and when? | Folders of boards, perpetual or tied to a cadence | Plan Delivery | Teams, scrum masters, delivery managers |
An item exists once, in a workstream. Putting it on a board does not copy it; it places the same item in a team's queue. A parent Epic in the "Customer Portal" workstream can therefore have its design Stories on the Design board, its API Stories on the Backend board, and its test Stories on the QA board, and the Epic's progress still rolls up correctly because every Story is still its child.
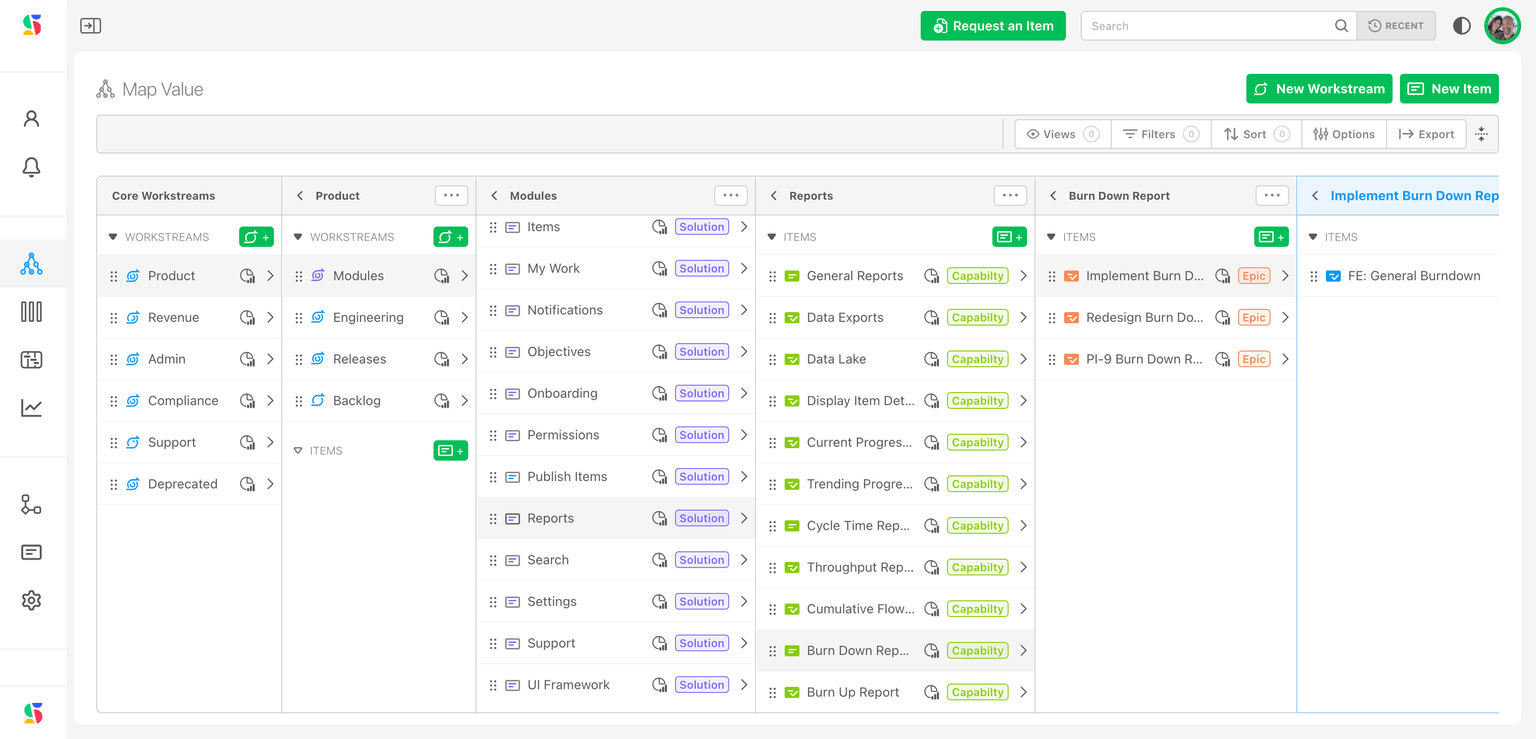
Name workstreams for value, not for teams
Because teams get their own structure in Plan Delivery, resist creating workstreams called "Frontend Team" or "QA". Name them for what is being built: "Customer Portal", "Q3 Product Launch", "Sales Acceleration". You will assign teams later, on boards.
The four modules you configure
- Map Value — workstreams and the item hierarchy inside them. Your planned-value view.
- Plan Delivery — working-group folders, boards, and the cadences that give cycle boards their dates. Your execution view.
- Track Progress — Gantt charts over the same items, for date-driven planning and dependencies.
- Measure Performance — reports on progress, throughput, velocity, cycle time, and churn.
Two supporting areas you will also touch: Configure Settings, where the data model (item types, statuses, fields, cadences) and people (users, teams, roles) are defined, and Automate Workflows, once the basics are running.
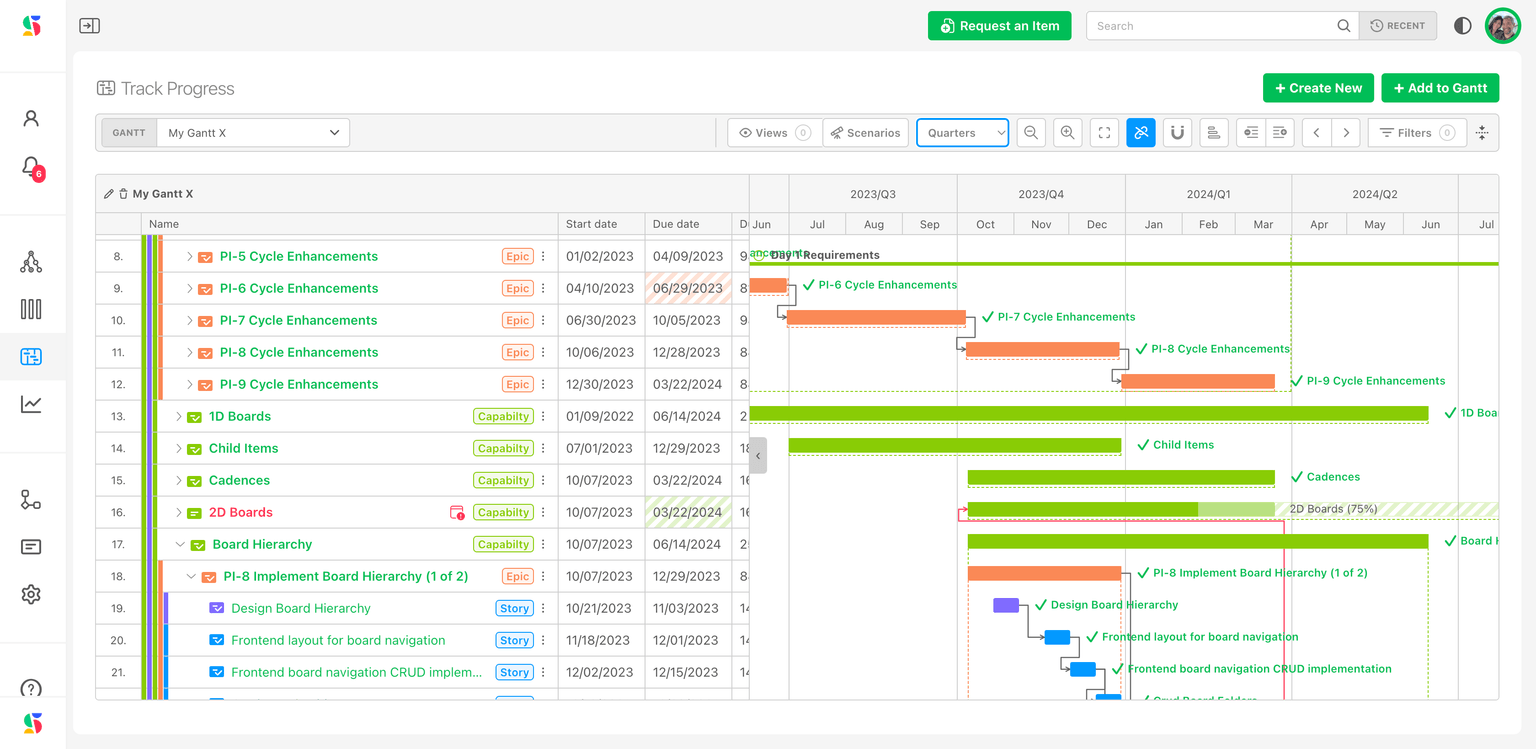
The order of this guide, and why
The steps that follow build on each other, so take them in order:
- Create your organization — the container everything else lives in.
- Learn the basic terms — six words the rest of the guide leans on.
- Users and teams — people first, so later steps can assign to them.
- Plan your work model — decide your hierarchy and workstreams on paper before clicking.
- Workstreams, then item types — the structure in Map Value, and the types that enforce it. Types are hard to change once items exist, so this is the step to get right.
- Fields, tags, forms — the data each item carries.
- The item workspace — a tour of where all that configuration shows up.
- Statuses — the columns boards will use.
- Boards and folders — where teams execute.
- Cadences — the heartbeat that gives cycle boards their dates.
- Gantt charts — a timeline over everything above.
- Permissions and API keys — tighten access before the wider roll-out.
Next: Create your organization.
Creating Your Account
How to sign up for DevStride — with Google or Microsoft, or with an email address and password — and what happens next depending on whether you were invited or are the first one in.
Admin Onboarding - Getting Started
Step 1 of admin onboarding — confirm your organization exists, complete your Organization Profile (name, domain, logo, timezone), choose the Global Automations defaults, and learn your way around Configure Settings.