Admin Onboarding - Item Workspace - Right Bar: Priority
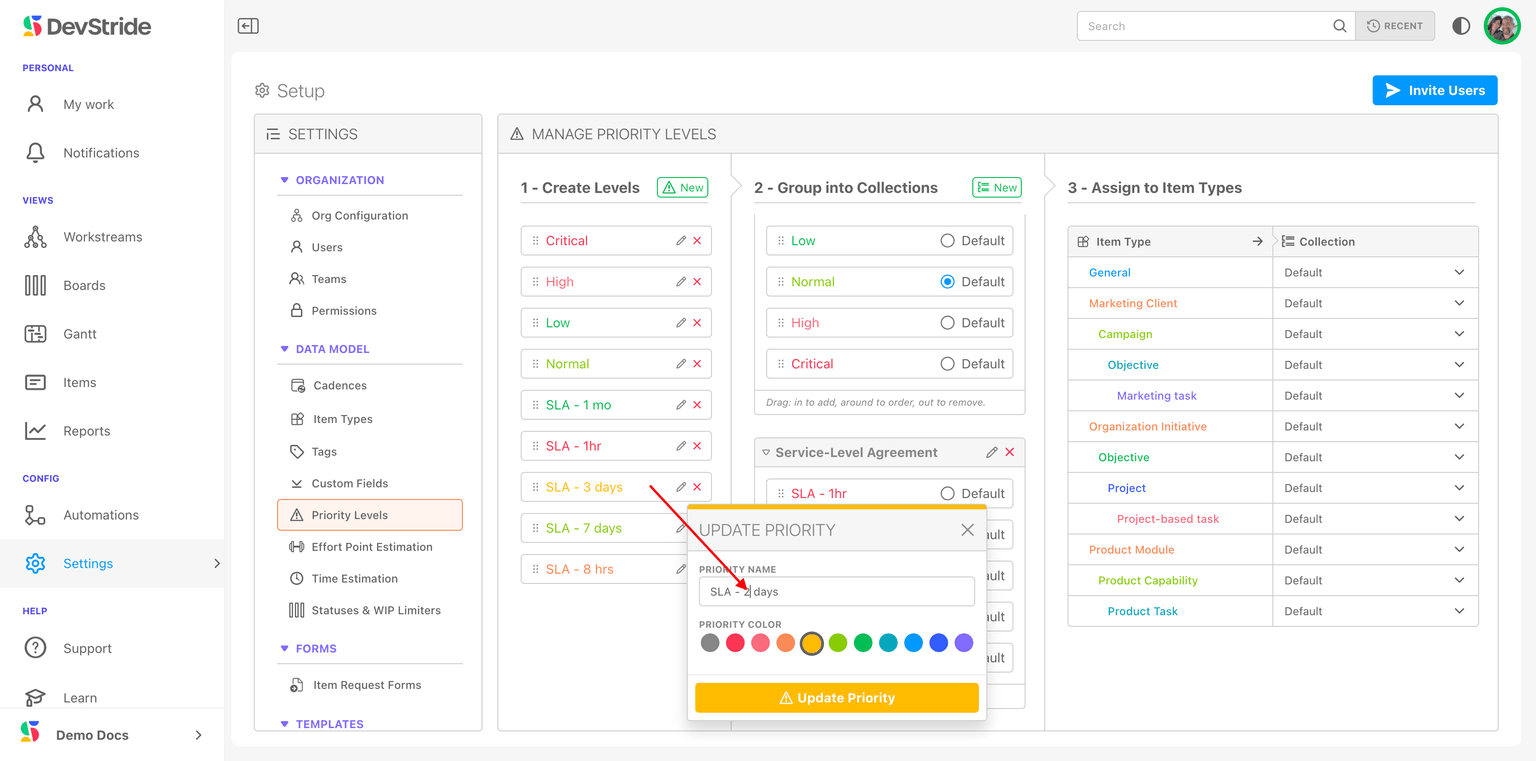
Priority is a ranked label on every item. DevStride starts you with Low, Normal, High, and Critical, with Normal as the default. Keep those for most types and add a specialised collection only where a type needs different language, such as SLA response tiers for support tickets.
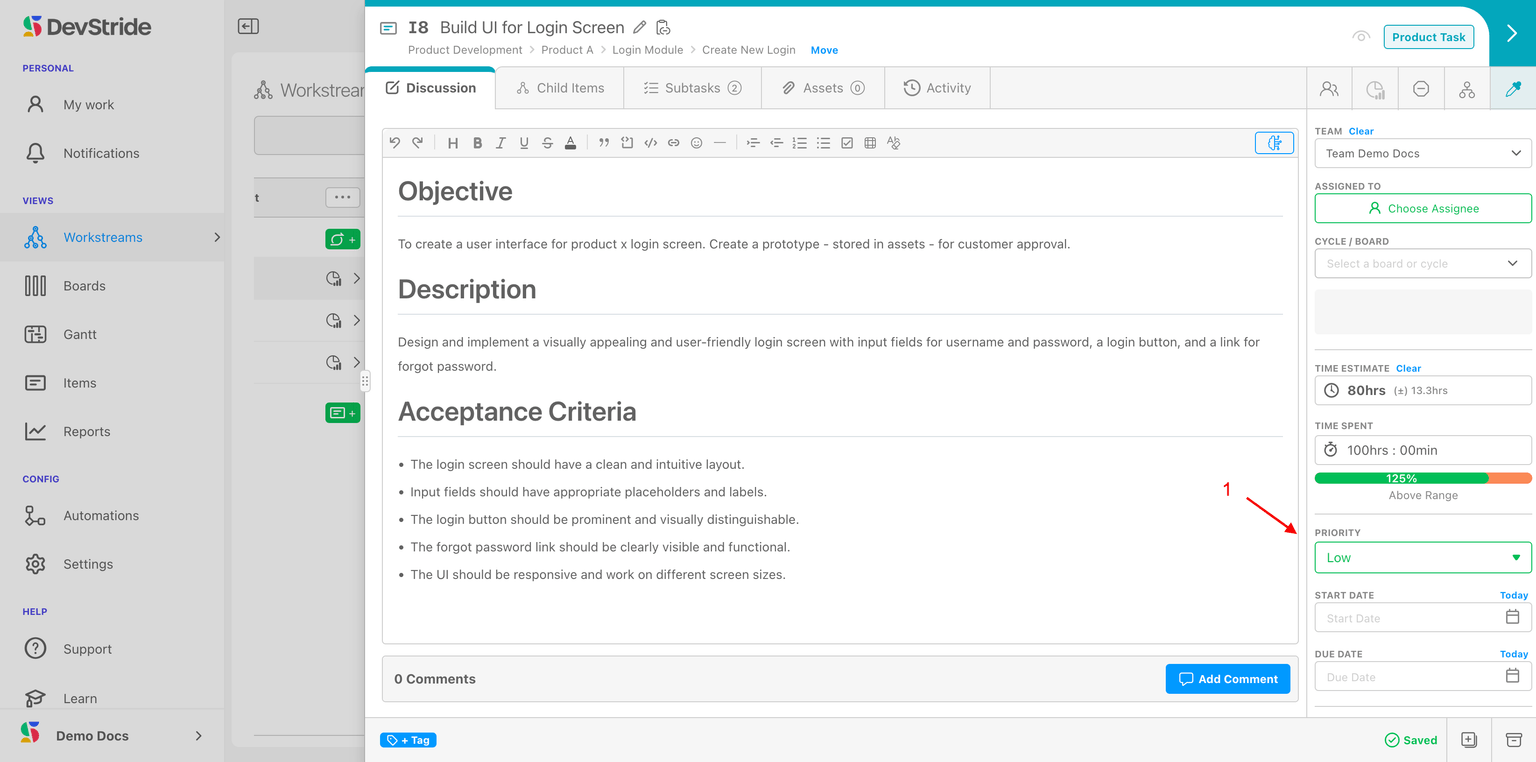
Step 1: Create levels
Open Configure Settings → Data Model → Priority Levels. Next to 1 - Create Levels, click New and enter a Priority Name and Priority Color. The left pane is the pool of all levels available to any collection.
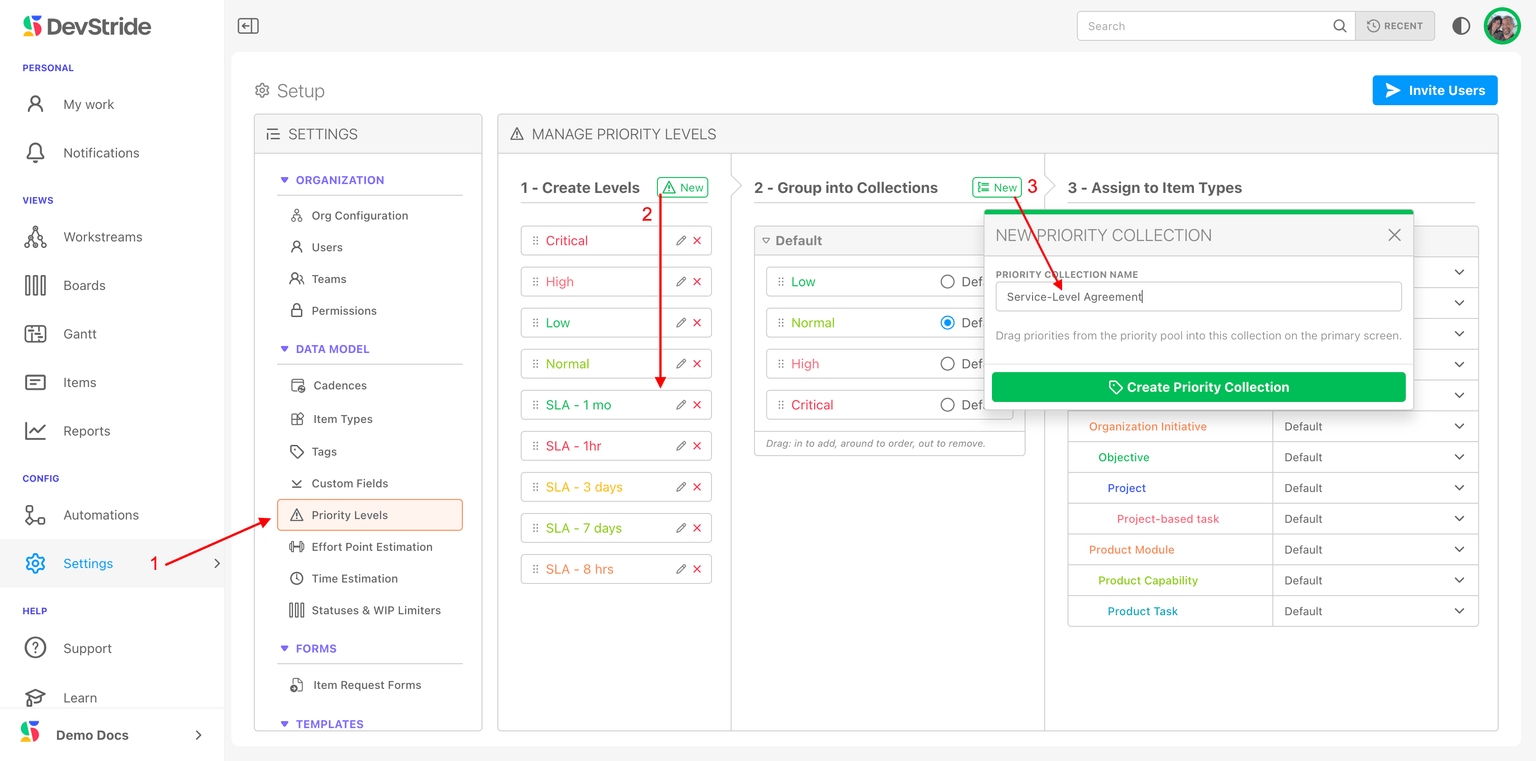
Step 2: Group into collections
Click New next to the collections pane (New Priority Collection), name it, and drag levels in from the pool. Mark one level as the collection's Default; every new item of a type using this collection starts at that level. Drag to reorder.
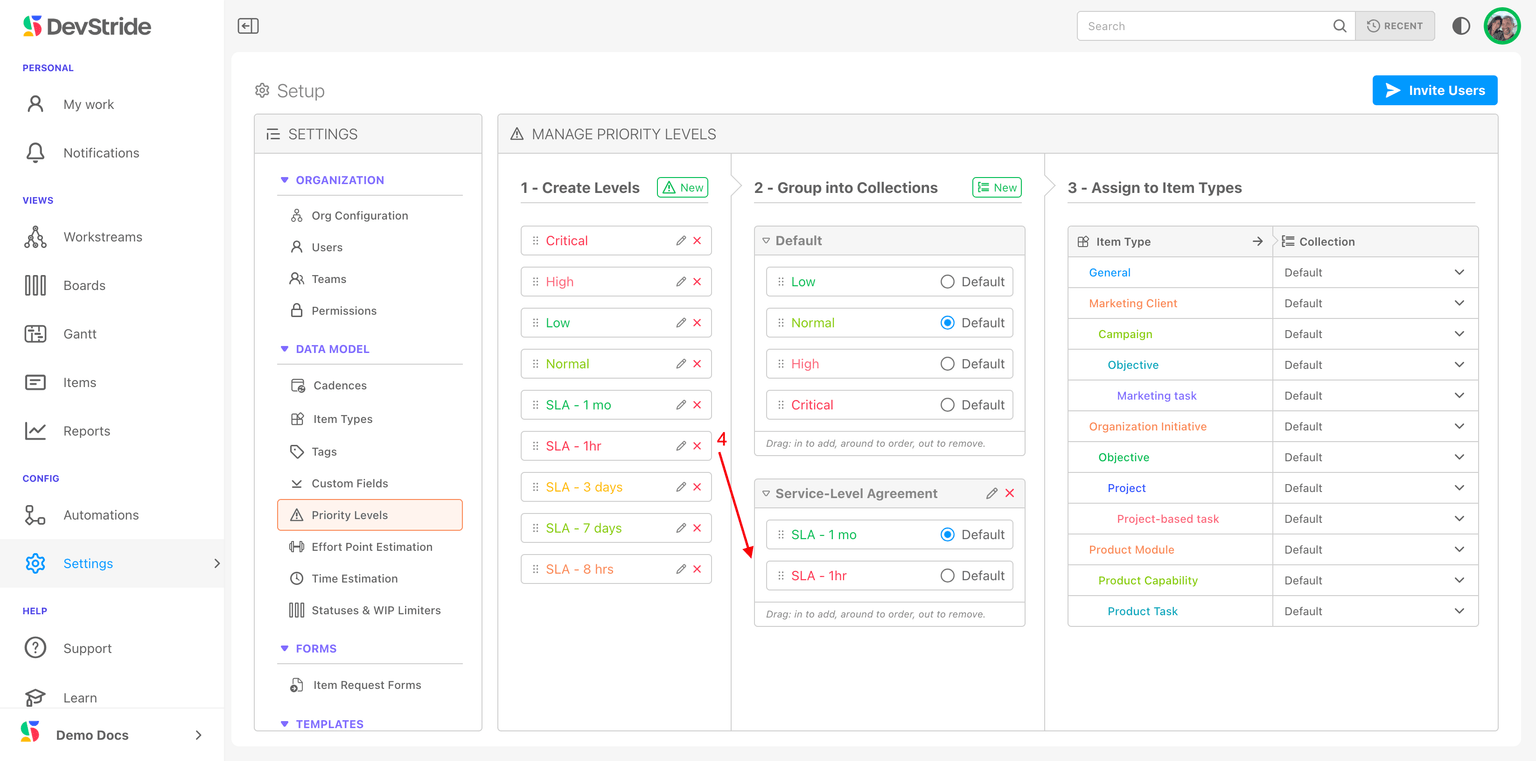
Step 3: Assign to item types
Choose a collection for each item type. Items of that type now offer those levels everywhere.
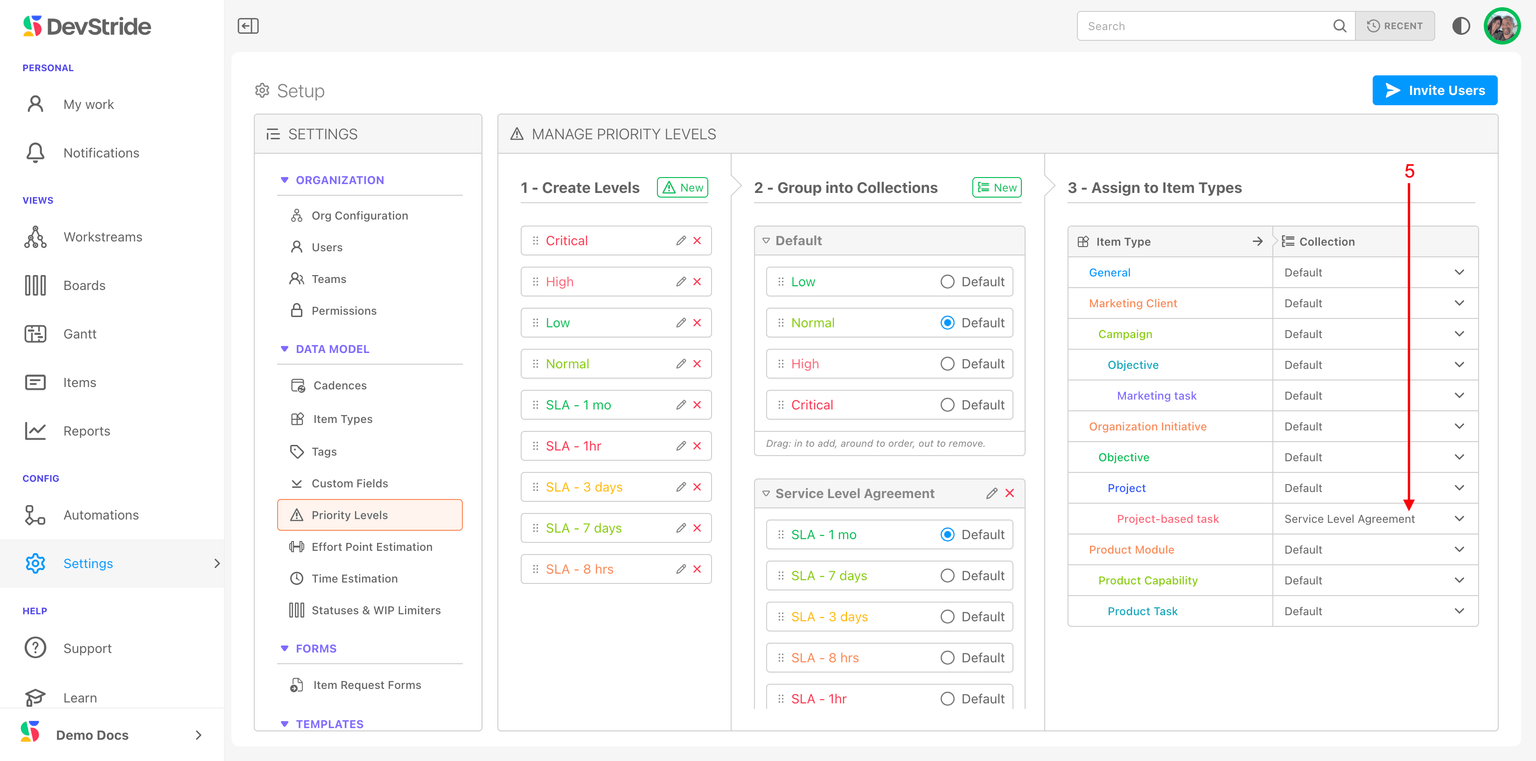
Edit a level with the pencil; the change applies to every item using it. Removing a level from a collection resets items at that level to the collection's first level, after a confirmation.
Where priority shows up
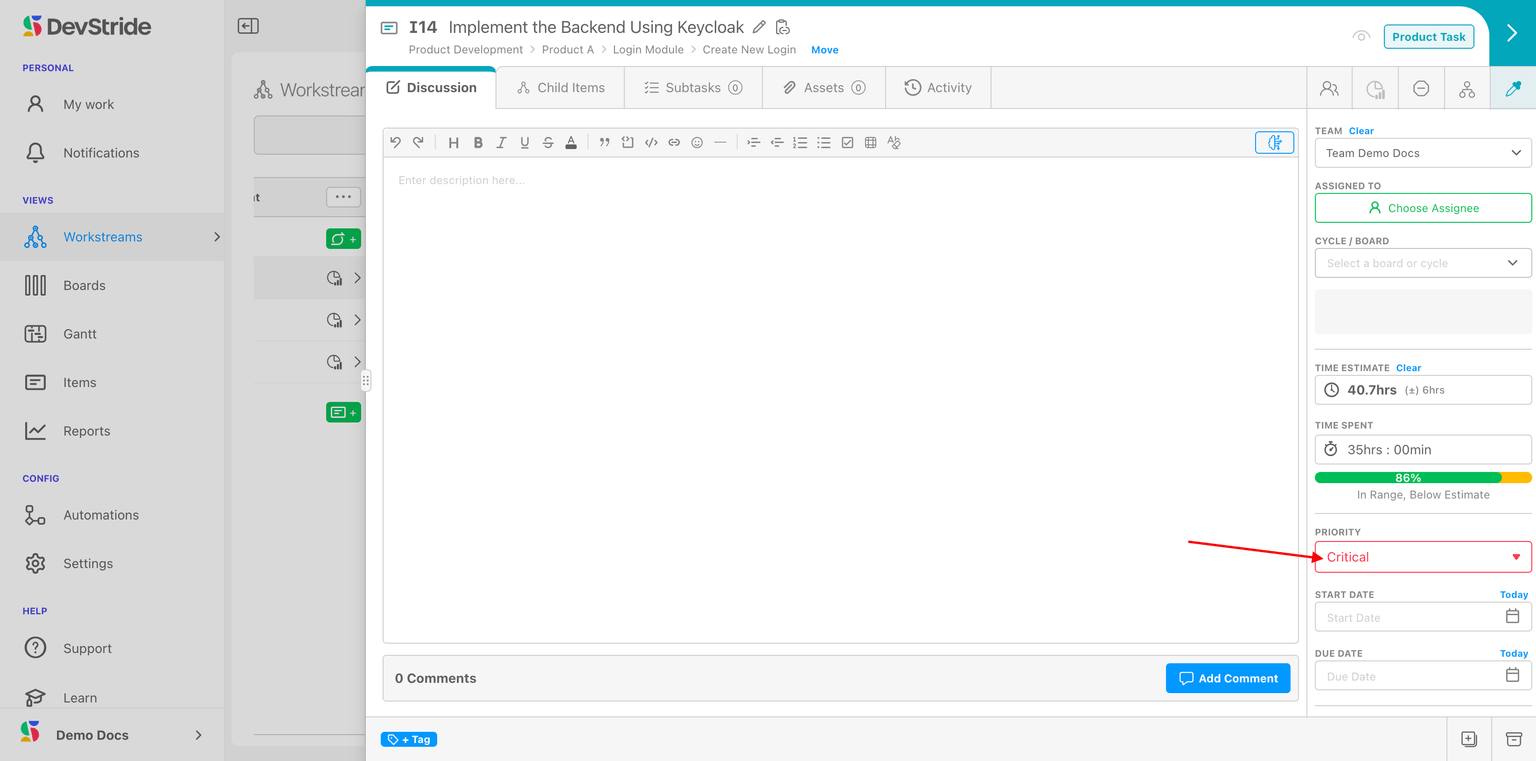
On the item (Select Priority), as a column and filter in tables and boards, in reports, and as a trigger or condition in automations: a change to Critical can notify a channel or reassign the item.
Next: Start Dates and Due Dates.
Admin Onboarding - Item Workspace - Right Bar: Time Spent
Step 7h of admin onboarding — log time on an item, read how it rolls up and compares with the estimate, log time for a teammate or on subtasks, and review time across users.
Admin Onboarding - Item Workspace - Right Bar: Start Dates and Due Dates
Step 7j of admin onboarding — set start and due dates by hand on an item, or let cycle boards set them automatically through the organization-wide date sync setting.