Admin Onboarding - Creating and Managing Forms
An item request form is a structured intake: someone fills in a form, and DevStride creates an item of a chosen type, in a chosen location, with the answers in its fields. Use one when the same kind of request keeps arriving by email: feature ideas, bug reports, access requests, new-hire setup, client change requests.
Forms are optional and sit at the end of the item steps because they depend on everything before them: an item type to create, a workstream to file into, and custom fields to collect. Skip this page if you have no intake need yet.
Private or public
| Who can use it | How they reach it | |
|---|---|---|
| Private | Signed-in members of your organization | Request an Item, at the top of the sidebar's Help section, lists every private form |
| Public | Anyone with the link, no DevStride account needed | A public link you copy from the forms list and share or embed |
Public forms are how customers, partners, or other departments submit requests without being invited. If Create as Service Desk ticket is turned on for a form, each submission becomes a Service Desk ticket from the requester and falls under your SLA policies; see Request Forms.
Step 1: Create a group (optional)
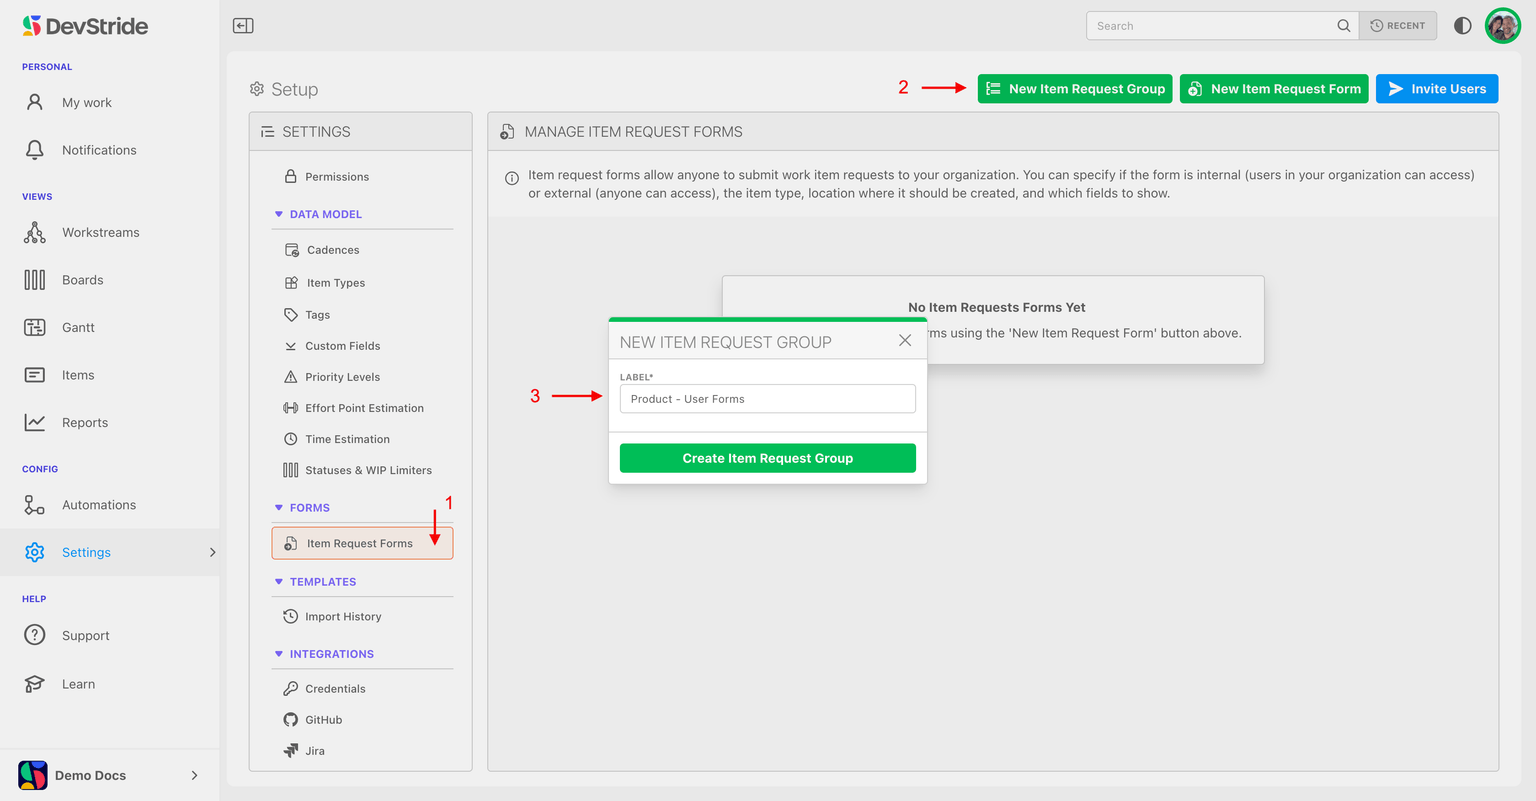
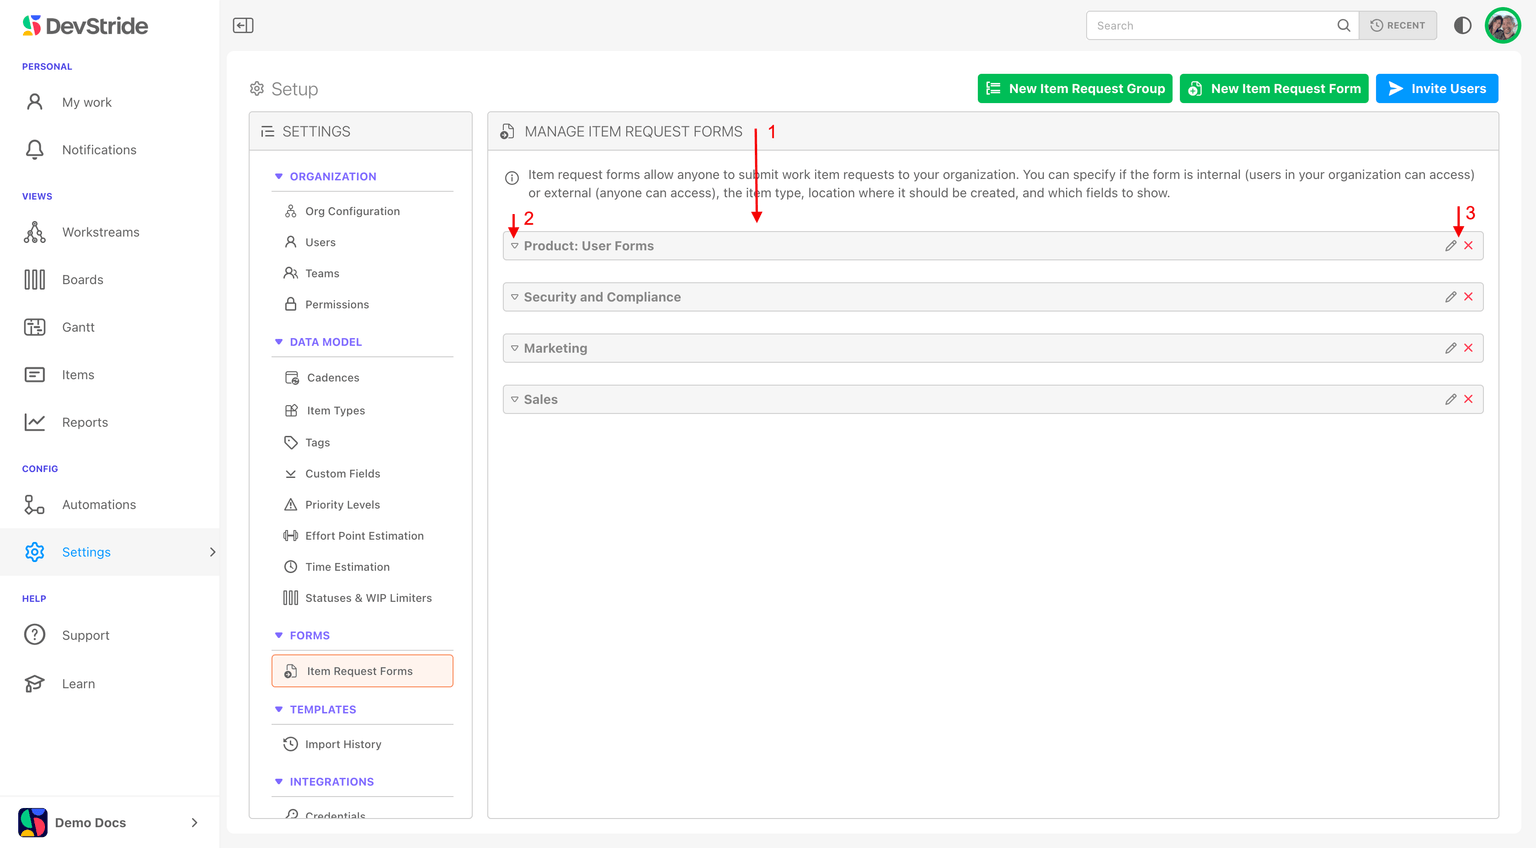
Open Configure Settings → Service Desk → Request Forms. The Manage Item Request Forms page lists forms by group; ungrouped forms sit under Other. To add a group, click New Item Request Group, name it (Security and Compliance), and save. Drag a group by the grip in its header to set the order groups appear in, here, in the Request an Item menu and on the customer portal.
Step 2: Create the form
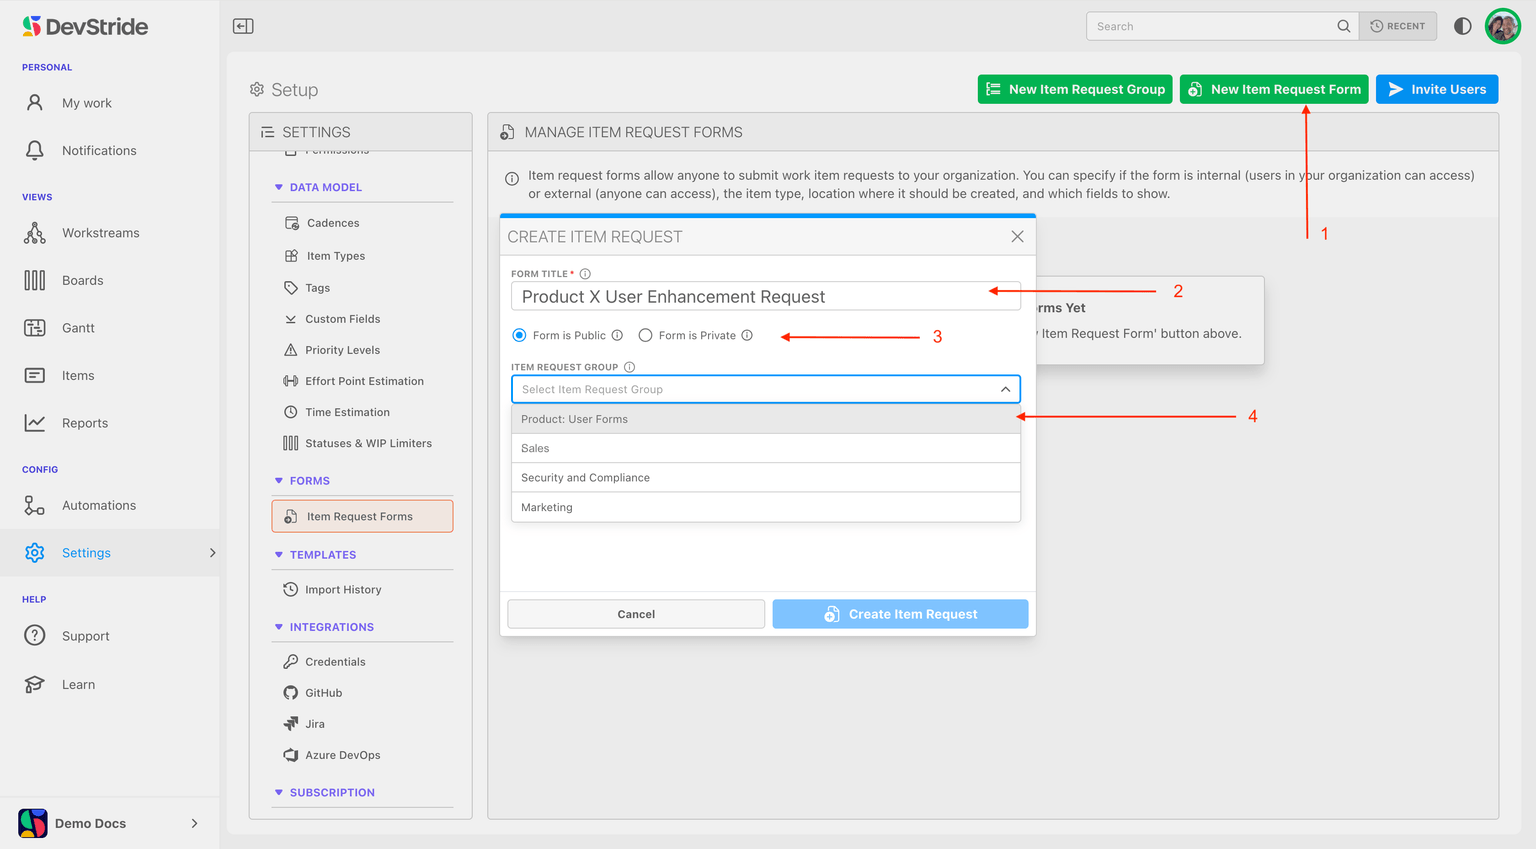
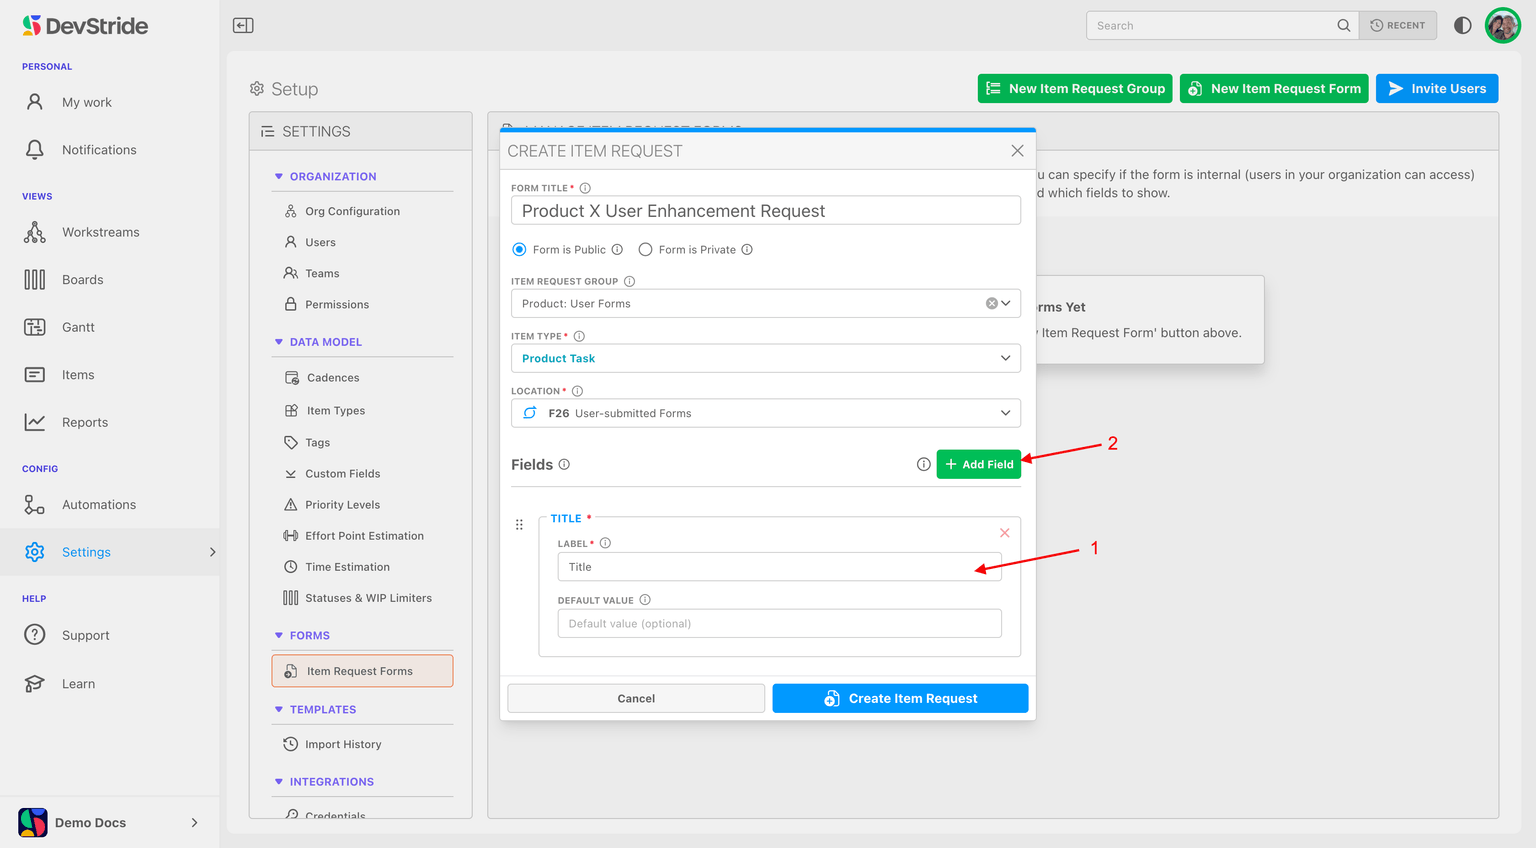
- Click New Item Request Form.
- Enter the form title people will see (at least three characters).
- Choose Form is Private or Form is Public, and optionally an item request group.
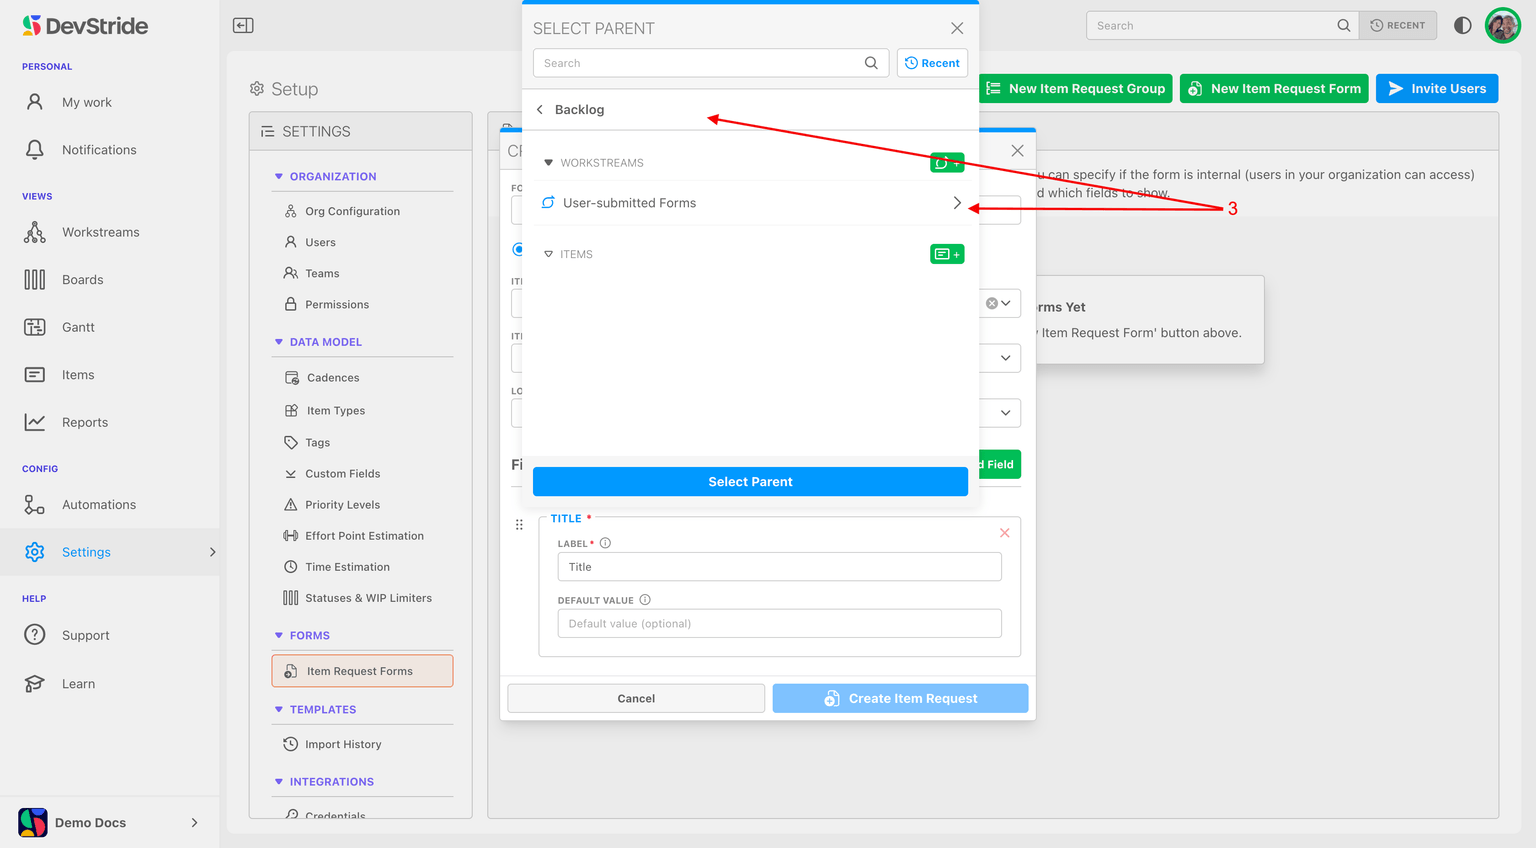
- Choose the item type the form creates and, under the location picker, Select Parent to pick the workstream or item submissions are filed under. For enhancement requests you might create a User-Submitted Requests workstream under your product backlog.
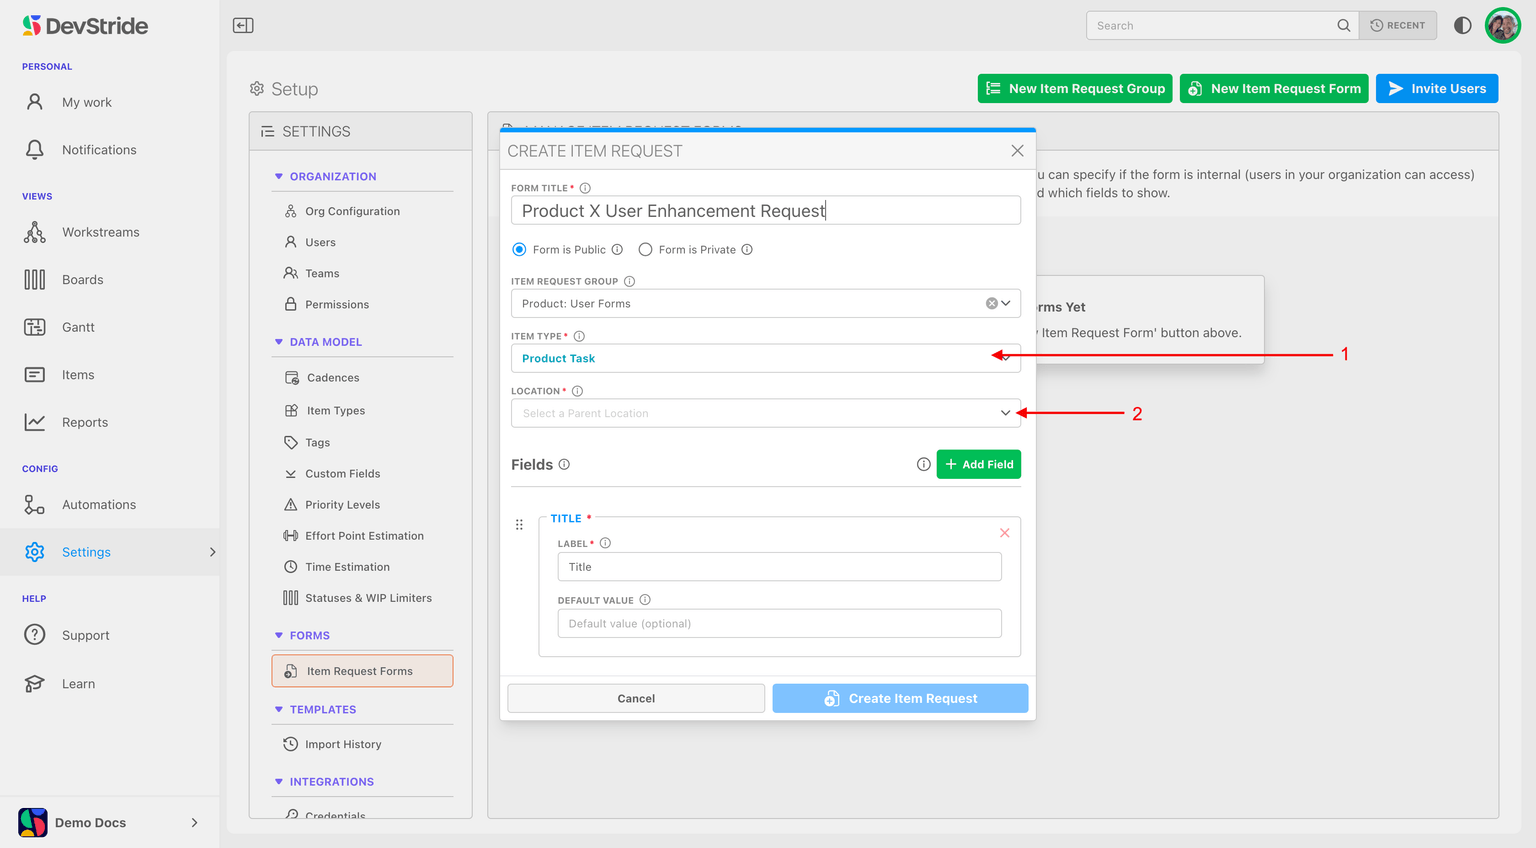
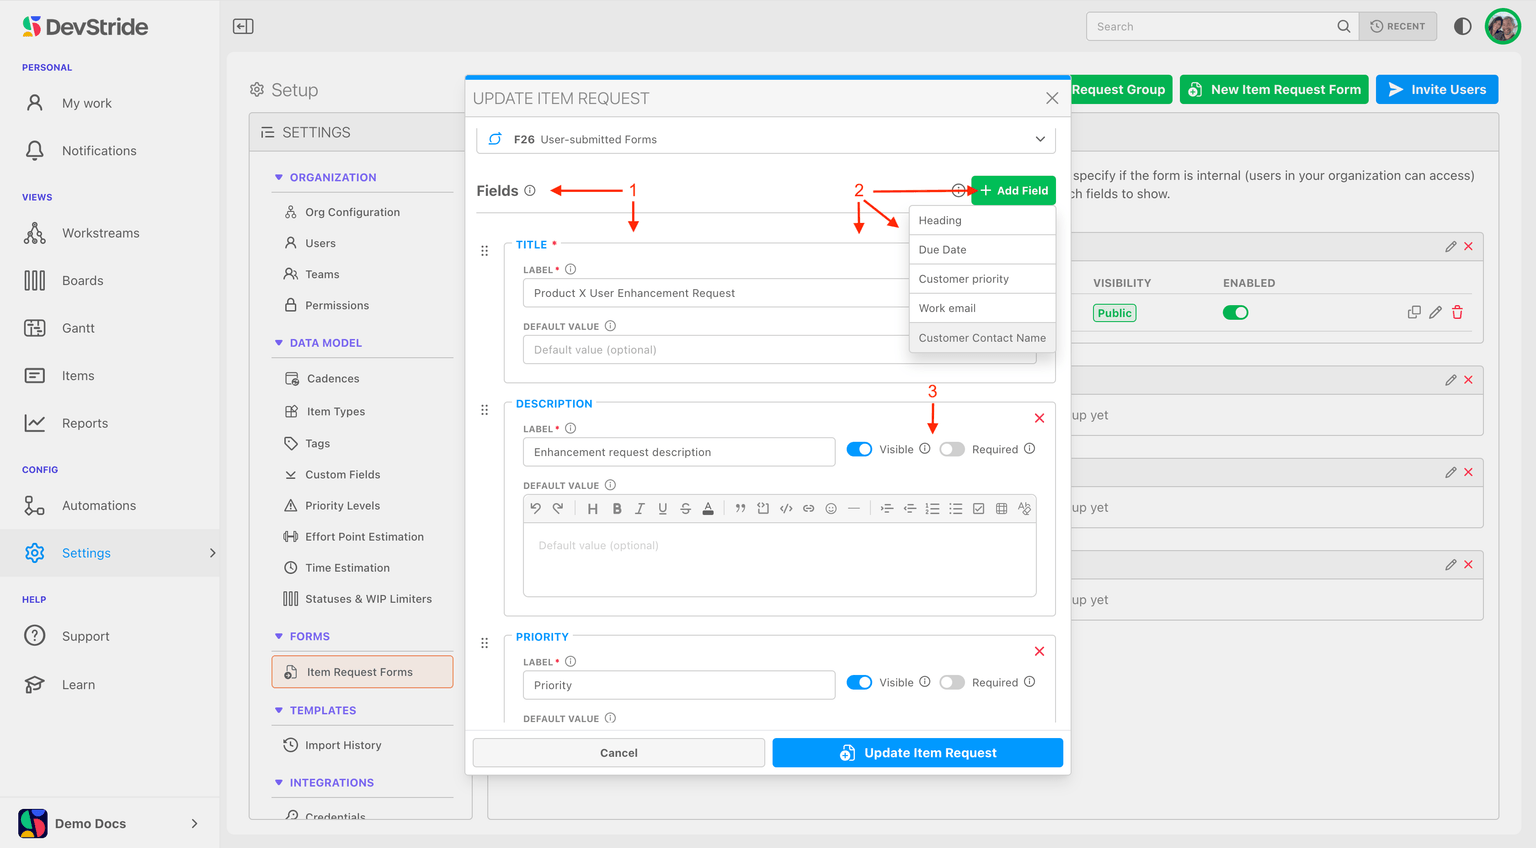
- Click Add Field to build the form from the item's built-in fields (title, description, priority, headings) and the custom fields in the chosen item type's collection. Only fields in that collection are offered, so submissions always land in real fields.
- For each field, set its label, whether it is Visible, and whether it is Required. A hidden field with a default value is how you stamp every submission with, say, Priority = High.
- Save.
Managing forms
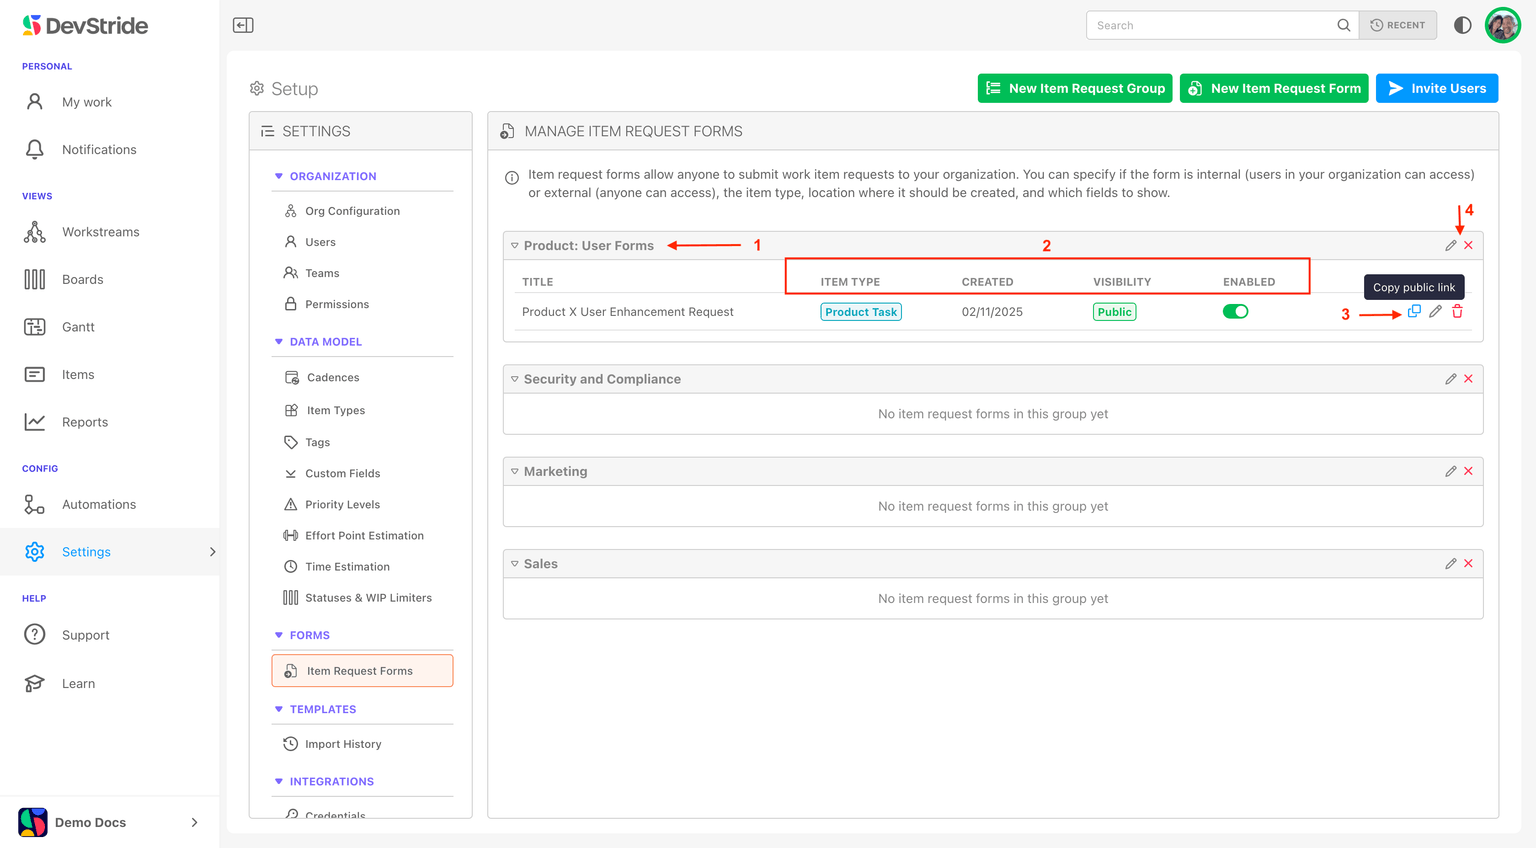
The list shows each form's Title, Item Type, Created, Visibility, and Enabled toggle, with actions to copy the public link, edit, or delete. Turn Enabled off to stop accepting submissions without deleting the form. A badge marks forms that create Service Desk tickets. Drag a form by its handle to change the order; forms listed in the customer portal appear there in that order.
Full reference, including how required checkboxes and calculated fields behave: Item Request Forms.
Next: Create Items with AI, then the Item Workspace Tour.
Admin Onboarding - Setting up Tags
Step 6b of admin onboarding — create the few tags that flag items for attention, group them into collections per item type, and know when a custom field is the better tool.
Admin Onboarding - Item Workspace Header
Step 7a of admin onboarding — open an item and read its header: completion icon, number, name, copy link, breadcrumb and Move, watchers, item type, and the footer actions (tags, duplicate, archive).