Using Cycle Boards
What a cycle board is
A cycle board (or simply a cycle) is a board for one period of time: Sprint 12, October, PI 3. You never create one directly. You give a folder a cadence, add timeboxes to that cadence in settings, and DevStride creates a cycle board in the folder for each timebox — named after the timebox and carrying its start and end dates.
If cadences and timeboxes are new to you, read How DevStride manages the When first.
| Set where | Changes what | |
|---|---|---|
| Cadence | Configure Settings → Cadences | The rhythm (every 2 Weeks) and the label template (Sprint ${counter}). |
| Timebox | Configure Settings → Cadences → New Timebox | One dated period on the cadence. Creating one creates a cycle in every folder using that cadence. |
| Folder | Plan Delivery → New Folder / Edit | Which cadence, status collection and default team the folder's cycles use. |
| Cycle board | generated | Name and dates come from the timebox; statuses and team from the folder. |
What a cycle does to the items on it
- Dates. An item created on a cycle starts on the cycle's start date and is due on its end date. An item moved onto a cycle is re-dated to it when the organization setting Sync work item dates with their cycles (Configure Settings → Admin → Global Automations) is on — the default. Start moves to the cycle start; the due date keeps the item's previous duration, capped at the cycle end. With the setting off, only empty dates are filled. Nothing is changed when an item leaves a cycle.
- Gantt. Track Progress places items by those dates, so committed work lands in the right period without typing dates.
- Children. With Child items inherit their parent's sprint and team on (same settings page), new child items land on the parent's cycle.
- Reports and filters know current, past and future cycles — the Cycle Carry-Forward report shows what each cycle completed and what carried over.
Set up
Step 1: Create the cadence and its first timeboxes (admin)
In Configure Settings → Cadences, click New Planning Cadence. Give it a Label (Sprints), set New Timebox Every (2) and the Frequency Unit (Week), and a Timebox Label Template such as Sprint ${counter}. Optionally pick a Parent Cadence (a 12-week Program Increment cadence makes Sprint ${ancestor.1.counter}.${timeboxCounter} produce Sprint 3.1 … 3.6). Click Create Cadence.
A cadence has no dates of its own, so now click New Timebox. Pick the Cadence; DevStride pre-fills the Label from the template and the Start date / End date / Length (days) from the cadence (the day after the last timebox, or today). Adjust if needed and click Create. Repeat for as many periods ahead as you want to plan. Timeboxes on one cadence cannot overlap; gaps are allowed. If the cadence has child cadences, turn on Recursively create child timeboxes to generate the sprints inside a PI in one go.
Full field reference: Cadences.
Step 2: Put the folder on the cadence
In Plan Delivery, create or edit the team's folder (Adding a folder). Turn on Can contain cycles and set Cadence for Cycles, Status Collection for Cycles and, usually, Default Team for Cycles. Click Create folder.
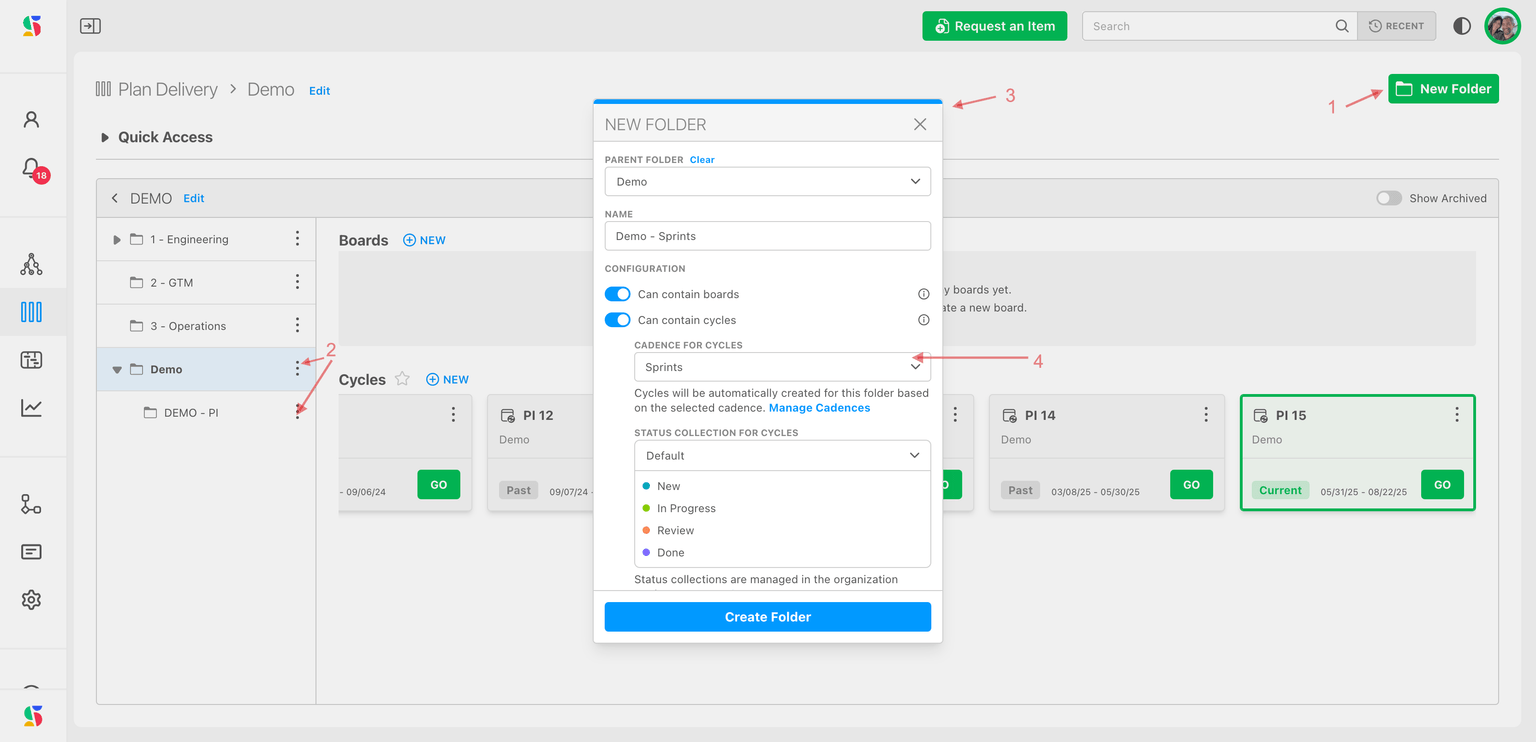
DevStride immediately creates a cycle board for every existing timebox on the cadence. From now on, each new timebox adds a cycle here automatically.
Step 3: Add the next period
When the team needs a new cycle, click New under Cycle Boards in the folder (or New Timebox in Cadences). The timebox dialog opens pre-filled with the next dates; click Create. Every folder on that cadence gets the new cycle.
Plan a cycle
Open the folder. Cycle cards are listed newest first under Cycle Boards, each with its dates and a Past, Current (green) or Future badge (1–3). Click GO (4).
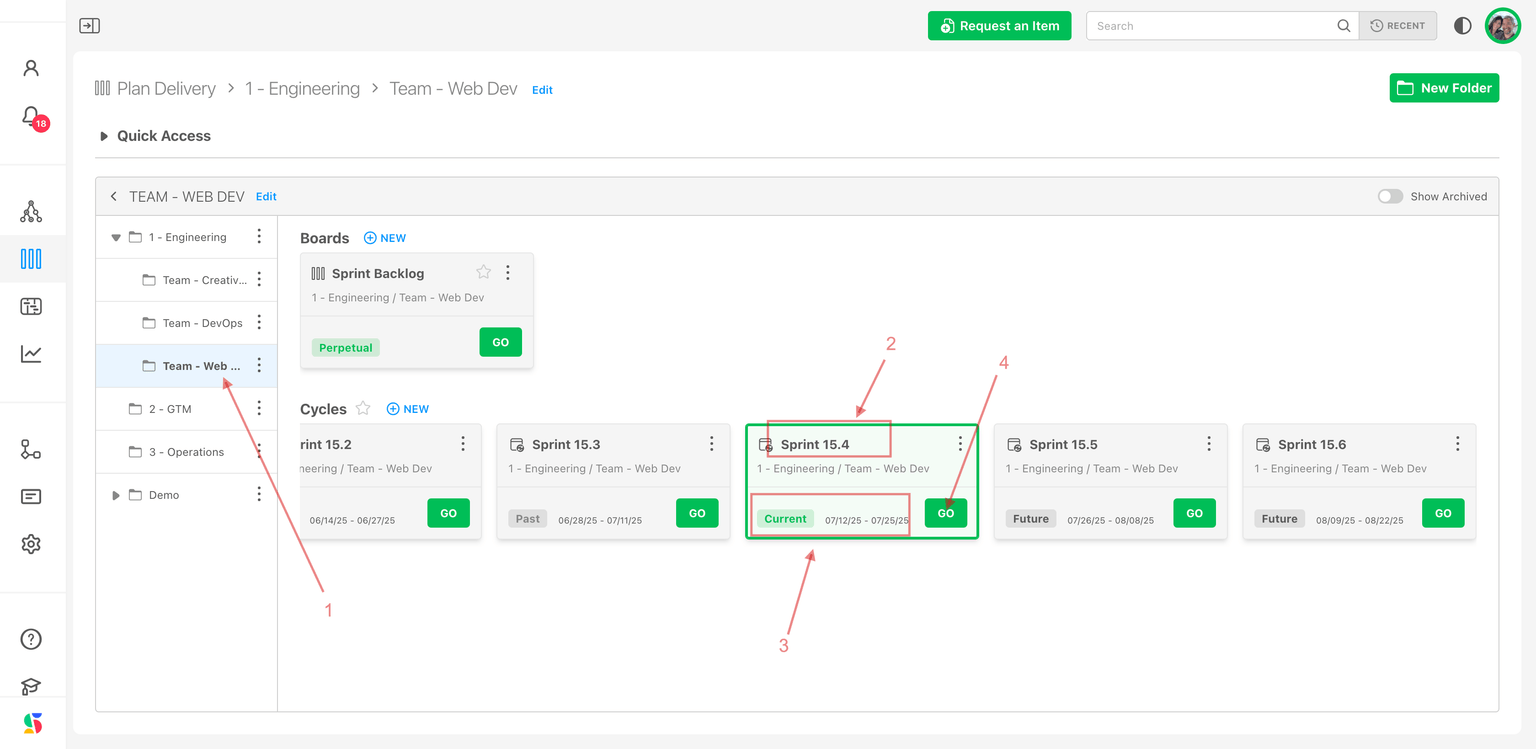
Inside a cycle, the breadcrumb shows the cycle name and Day X of Y; use the arrows beside it (or the < and > keys) to step to the previous or next cycle.
Pull in work
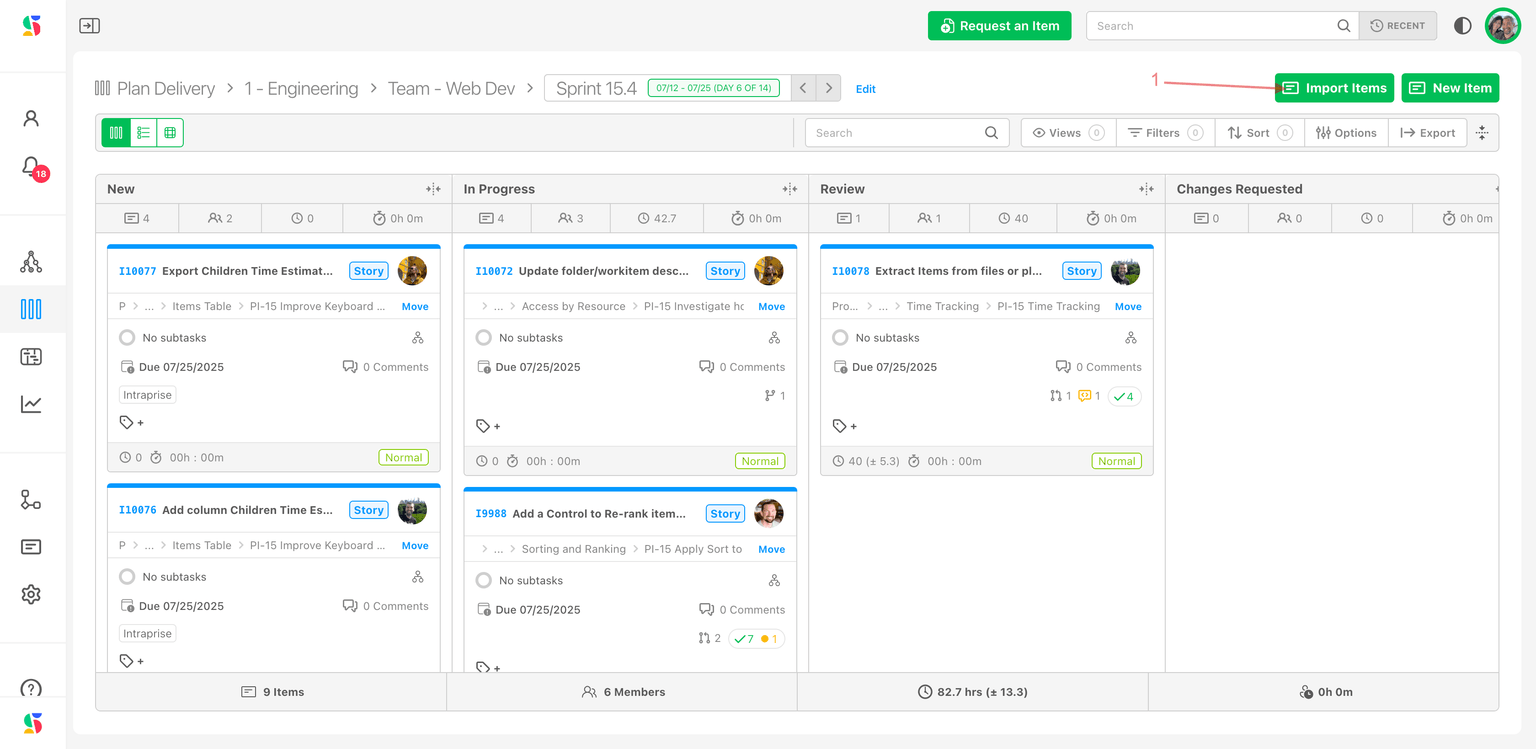
Click Import (1).
In Import Items to Board, drill through your workstreams (2), search with Find items... (3), or narrow with Filters (4) — by assignee, type, priority, status, tag, team or the board an item is currently on, which is how you pull from the backlog board.
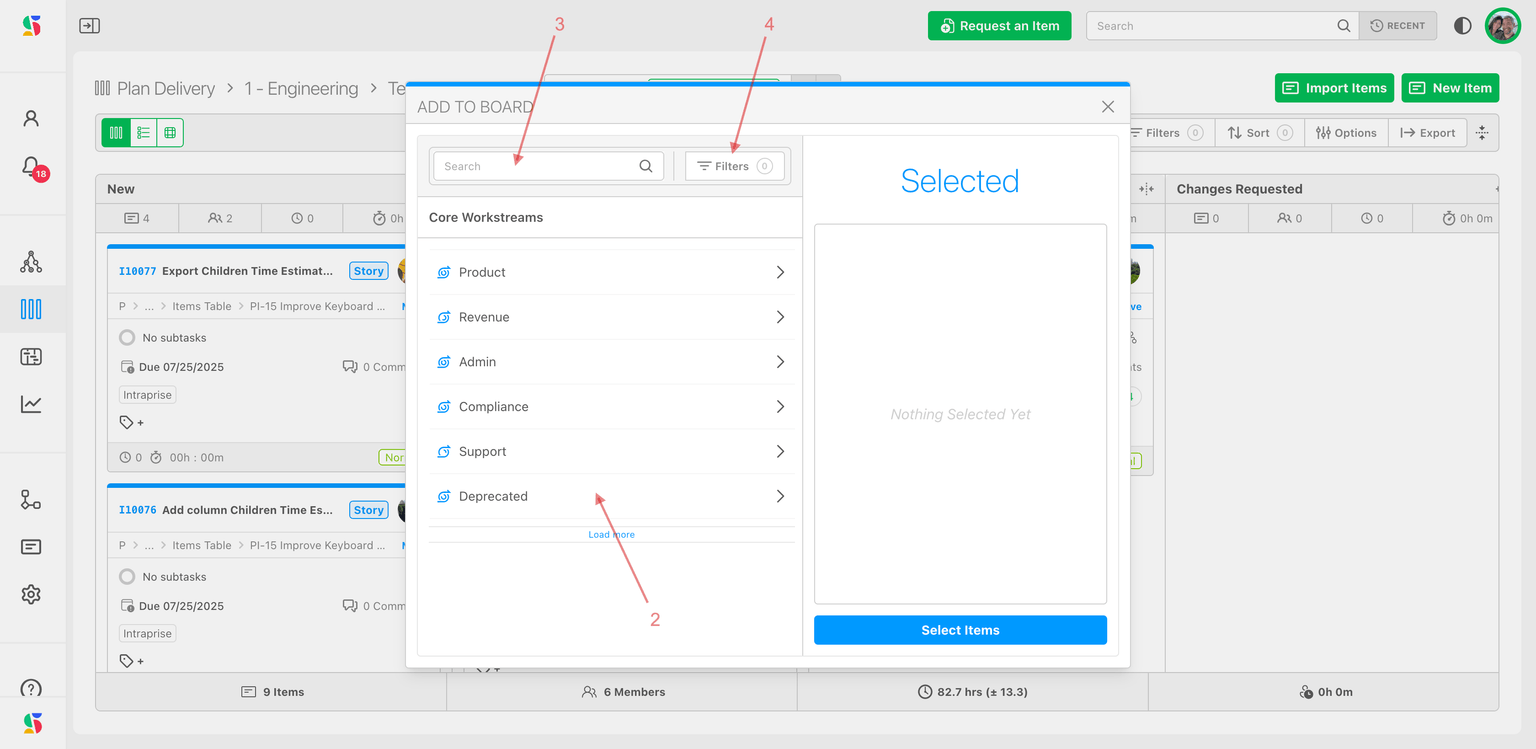
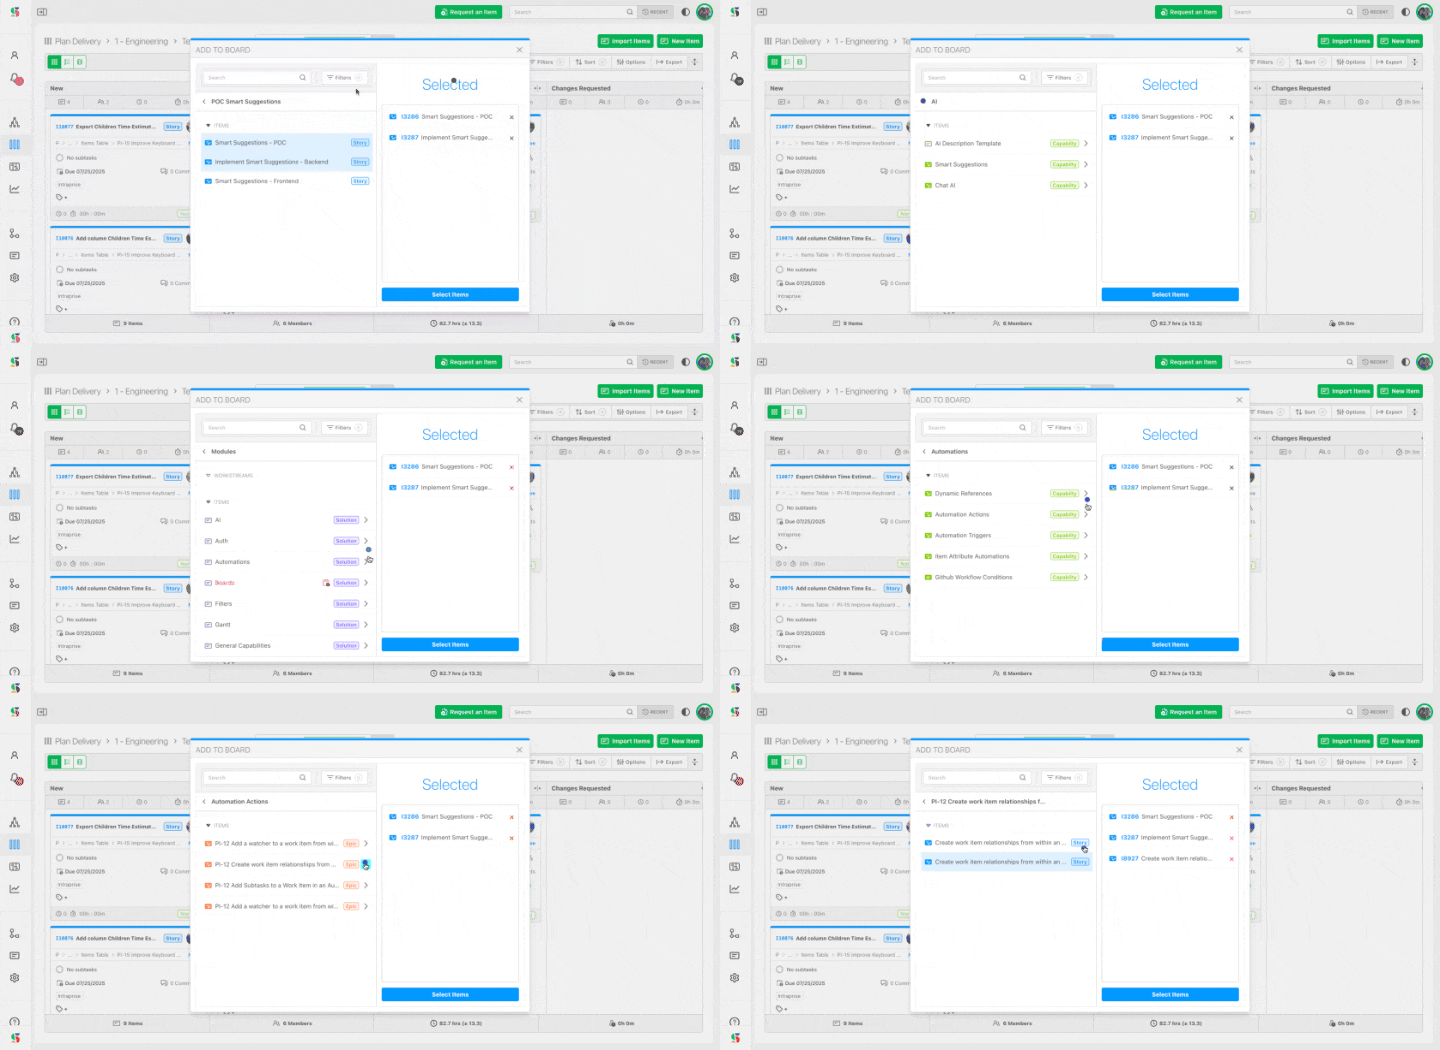
Selected items collect in the right-hand Selected pane; keep browsing other parts of the map and add more.
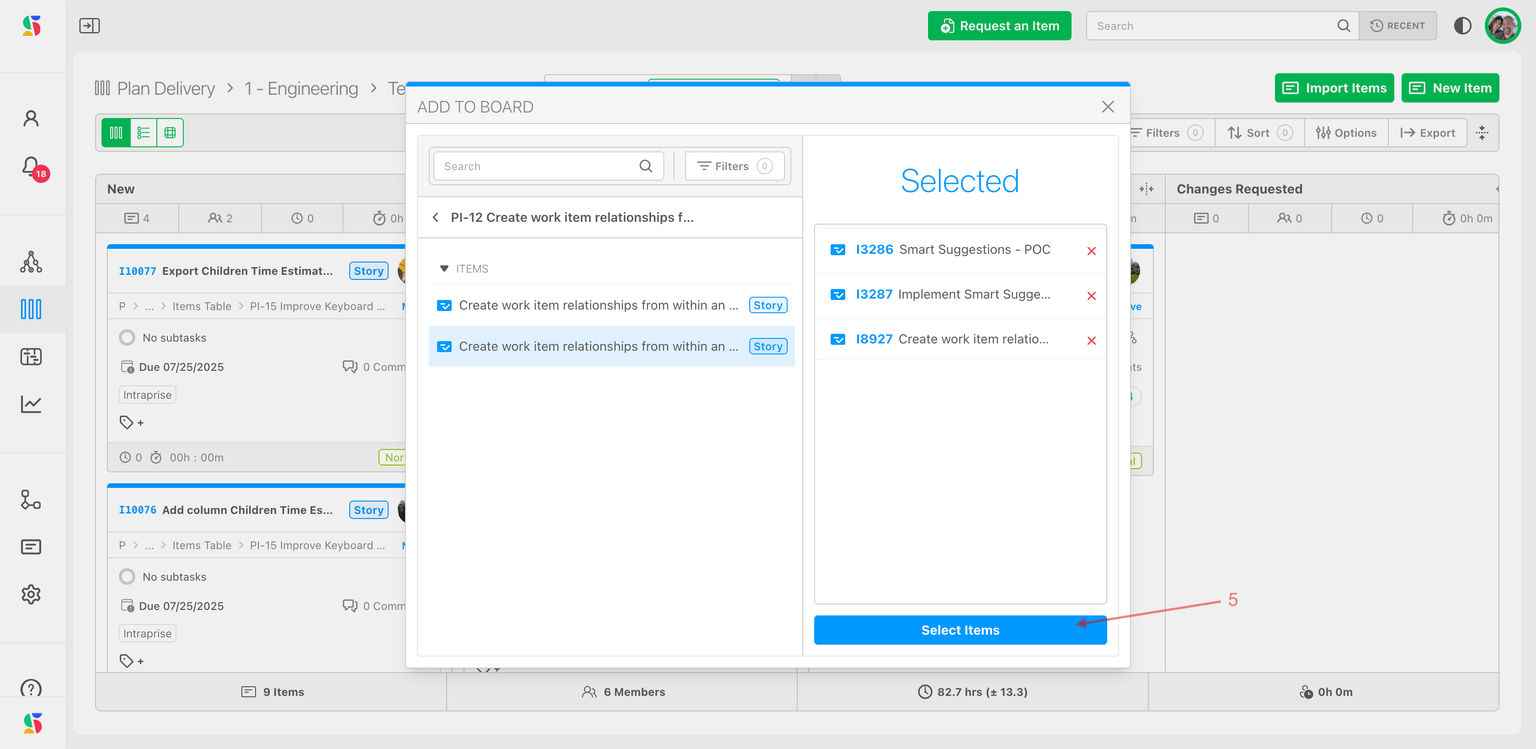
Click Import Items (5). The items appear on the cycle and take its dates.
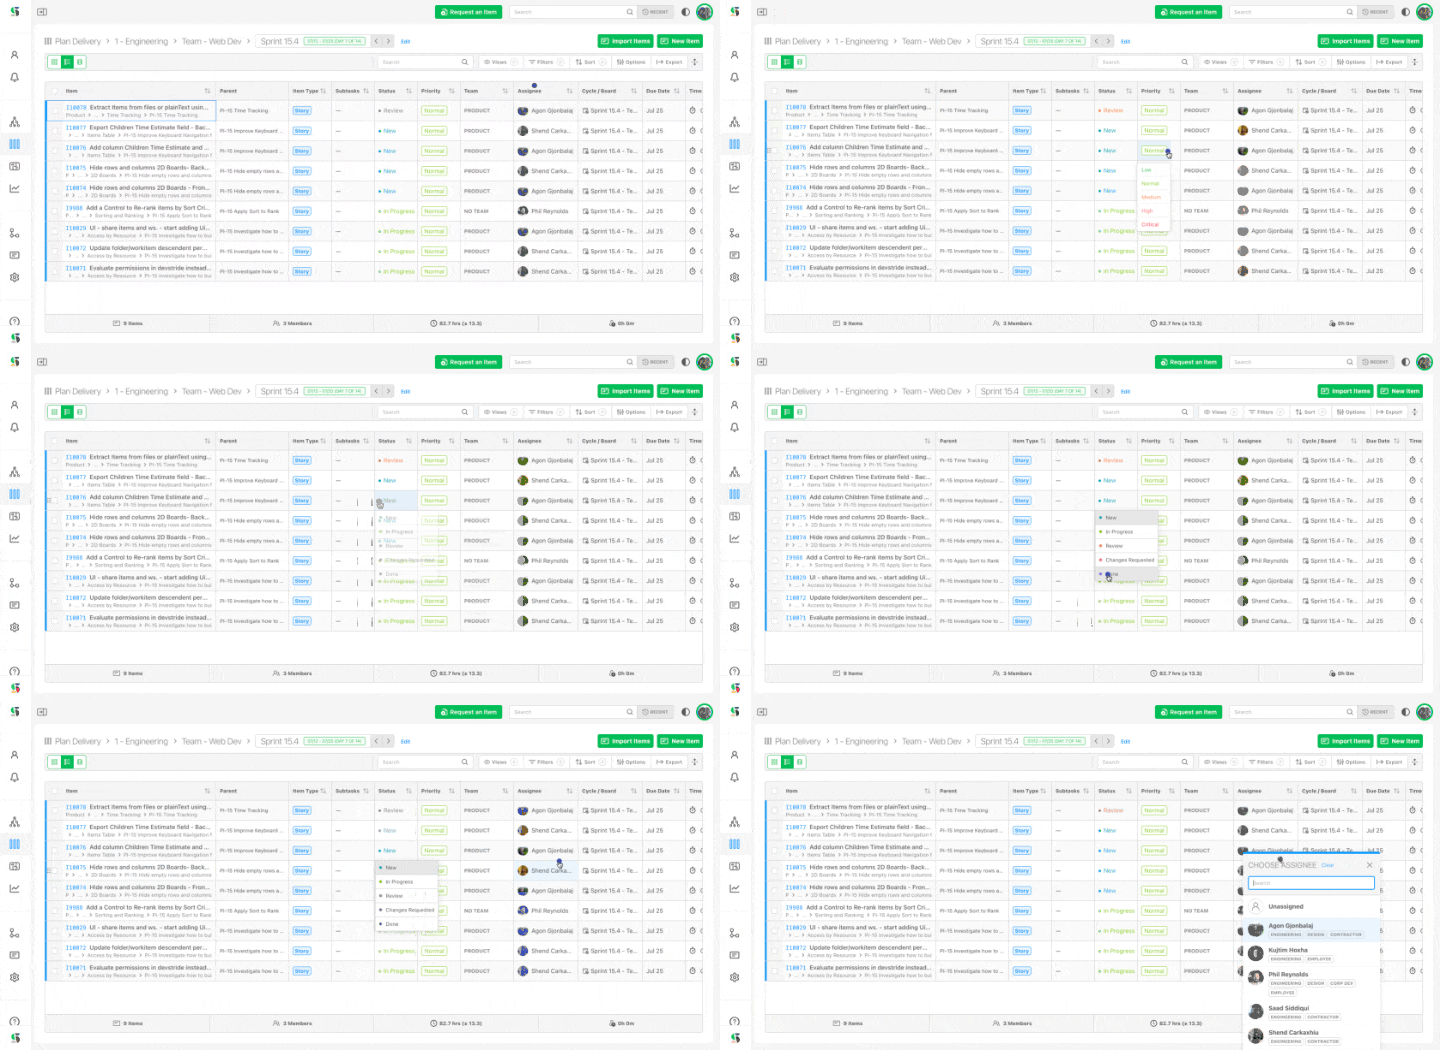
Only work items can be imported, not workstreams, and importing a parent does not bring its children — select the level you actually plan at. Some teams plan objectives on a quarterly cycle and the stories that deliver them on sprint cycles.
Create work that isn't in the map yet
Click Item (1) on the cycle. In Create an Item, type a Title, choose the Location in your workstreams (2) and the Item Type; tick View detail after creating (3) to open the item straight away. The item is added to Map Value and to this cycle, dated to the cycle, in the cycle's first status, with the folder's default team.
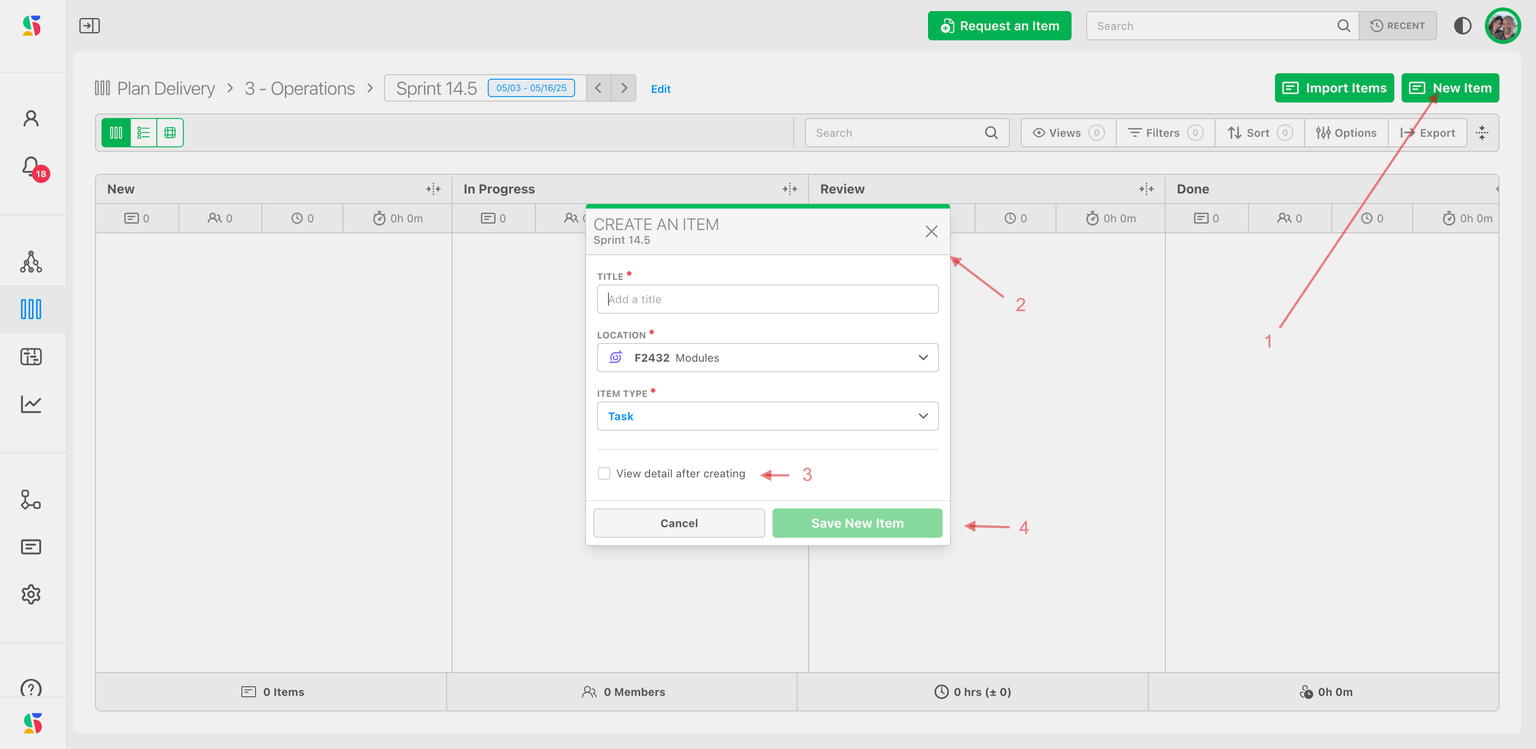
Plan from elsewhere
- Item drawer: the Cycle / Board field → pick the cycle.
- Manage Items, My Work, Map Value, tables, Gantt: select items → Edit → Cycle/Board → Choose Board.
- Automations: the Change Cycle/Board action can target a Relative Cycle — the current cycle or N cycles from now in a chosen folder.
Run the cycle
Use the three board views exactly as on a perpetual board — drag cards across statuses, rank in the table, balance load in 2D. See Track and move work with board views.
When the cycle ends
DevStride does not move unfinished items for you, and a cycle never "closes" — its items simply stay on a board that is now Past. To carry work forward:
- Open the past cycle (step back with
<) and switch to Table view. - Filter Status to exclude Done, select the remaining rows, and choose Edit → Cycle/Board → the next cycle. Their dates move with them.
- Check the Cycle Carry-Forward report under Measure Performance to see what each cycle completed, carried forward or dropped, with the item's blocker note as the reason.
Setting up and Using Perpetual Boards
Create an evergreen board for a queue of ongoing work, fill it with items, run it day to day, and keep it clean with archiving or an automation.
Track and Move Work with Board Views
Work a board day to day: the control ribbon, grouping the board into swimlanes in Card and Table view, dragging and ranking cards, Board Totals, hierarchy in the Table view, axes and empty-cell hiding in the 2D view, WIP warnings, and jumping to a board from an item.