Item Request Forms
An item request form turns a request into a work item. Build one for each kind of intake — bug reports, feature requests, access requests, new-hire setup — choose the item type and location it files into, and decide who can reach it: people in your organization (private), anyone with the link (public), or customers on your support portal. Each submission creates one item with the submitted values filled in, so the request lands in your workflow instead of an inbox.
Where to find it
Configure Settings → Service Desk → Request Forms (the page is headed Manage Item Request Forms). It needs the Manage service desk settings permission; the default Owner and Admin roles have it. Forms depend on your Item Types and Custom Fields: a form offers the built-in item fields plus the custom fields of the item type it creates.
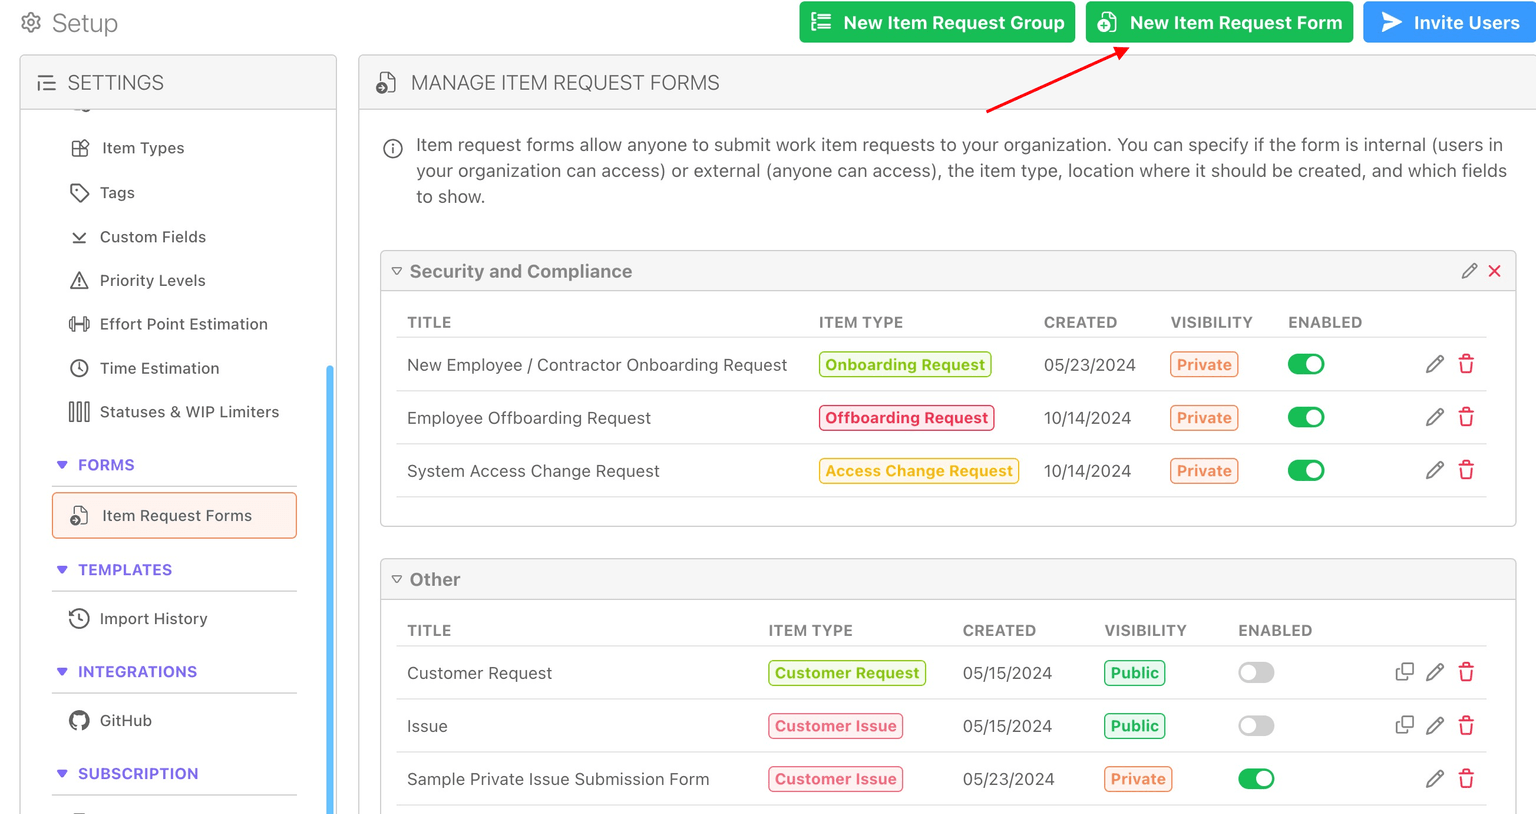
Forms are listed in groups (the default group is Other). Click New Item Request Group to add one, for example Security and Compliance; groups are how forms are organized in the Request an Item menu. Each form row shows its Title, Item Type, Created date, Visibility (Public or Private, plus a Portal badge when it is listed in the customer portal and a Ticket badge when it creates Service Desk tickets) and an Enabled switch. Turn Enabled off to stop accepting submissions without deleting the form. Drag a form by the handle beside its title to change its place in its group, and drag a group by the grip in its header to change the order of the groups (Other always stays last). The Request an Item menu and the customer portal's Submit a request page both follow these orders (see Put forms and groups in order).
Creating a form
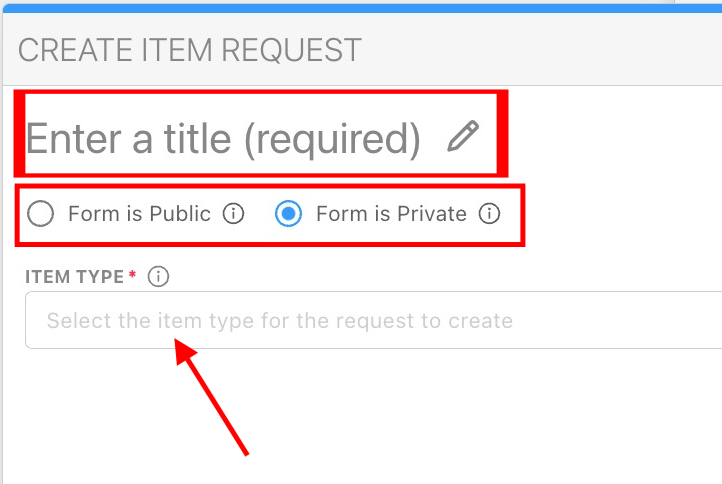
Click New Item Request Form and work through the dialog.
Basic settings
| Setting | What to choose |
|---|---|
| Form Title | Shown at the top of the form (at least 3 characters). |
| Form is Public / Form is Private | Public forms are reachable by anyone with the link. Private forms have no public link; members reach them from Request an Item in the sidebar's Help section. |
| Create as Service Desk ticket | Each submission becomes a Service Desk ticket from the person who submitted it; the form gains required name and email fields and the ticket comes under your SLA policies. See Service Desk request forms. |
| List in customer portal | Offer the form on the Submit a request page of every customer portal in your organization. See Customer support portal. |
| Item Request Group | The group the form is listed under. |
| Item Type | The type of item each submission creates. This decides which custom fields are available. |
| Location | The workstream or item the new items are created under; it must be able to hold the item type. |
Fields
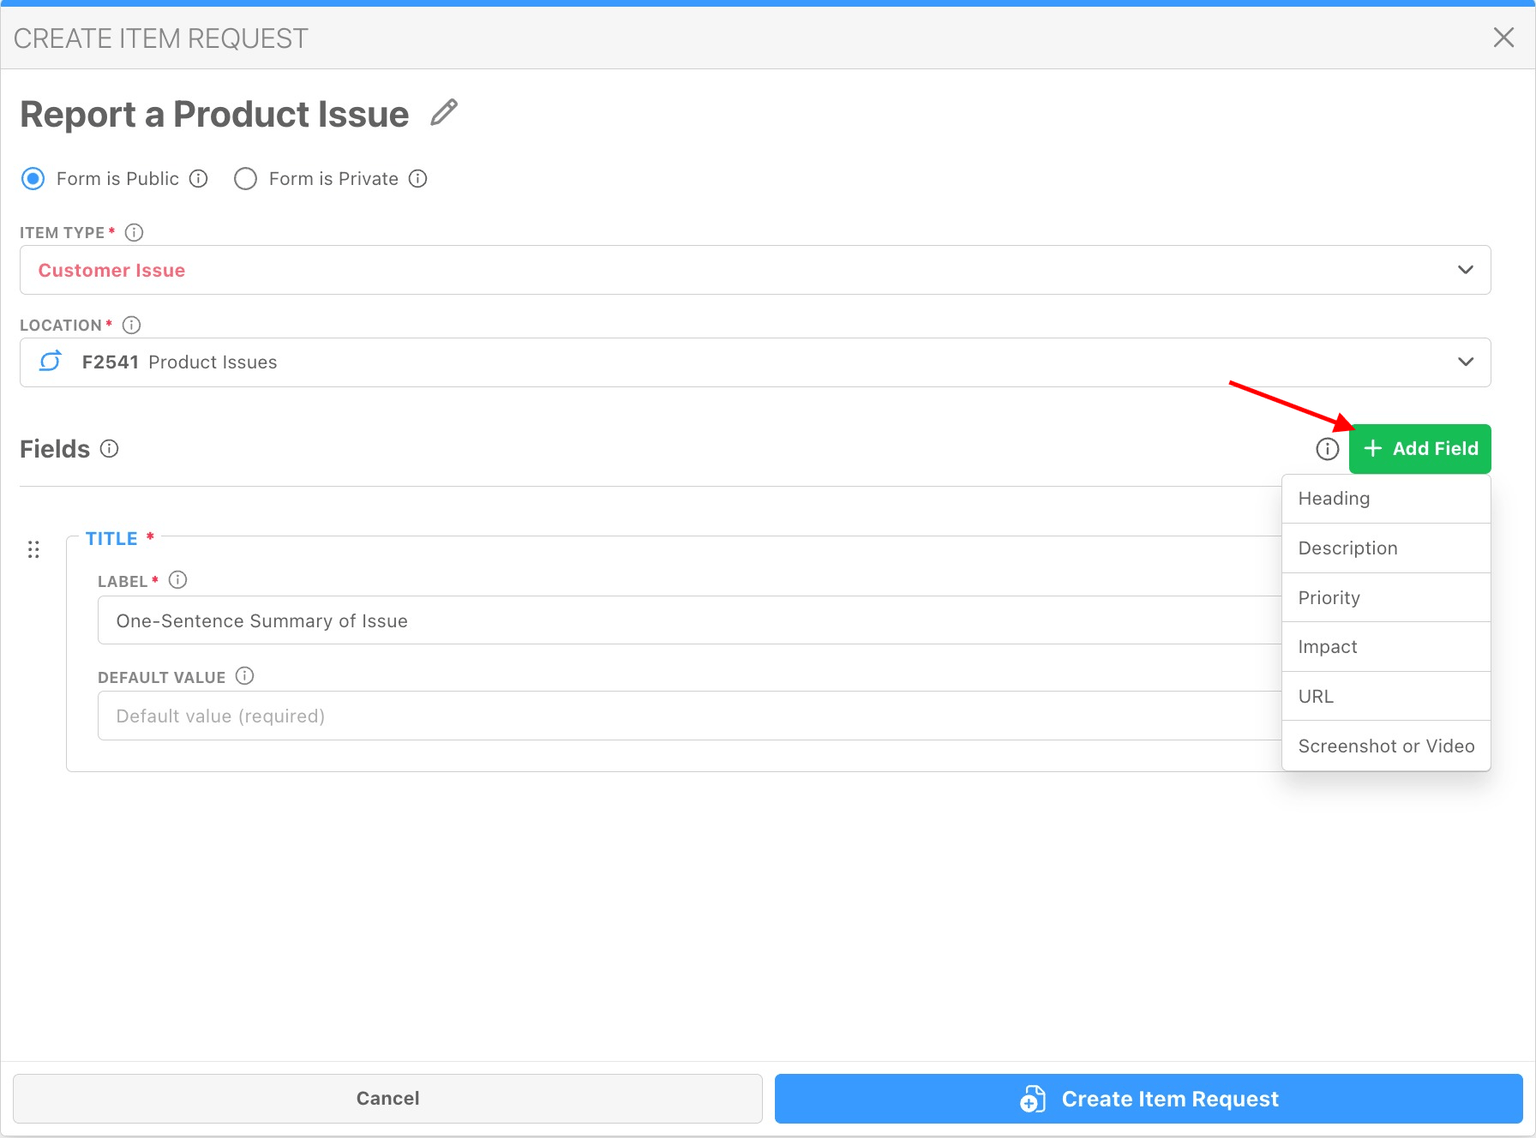
Click Add Field to add fields in the order the submitter will see them. Available fields are Heading (a section label with instructions), the built-in Title, Description, Priority, Due Date and Relationships (preset Depends On items), and every custom field in the item type's collection. Drag fields to reorder them.
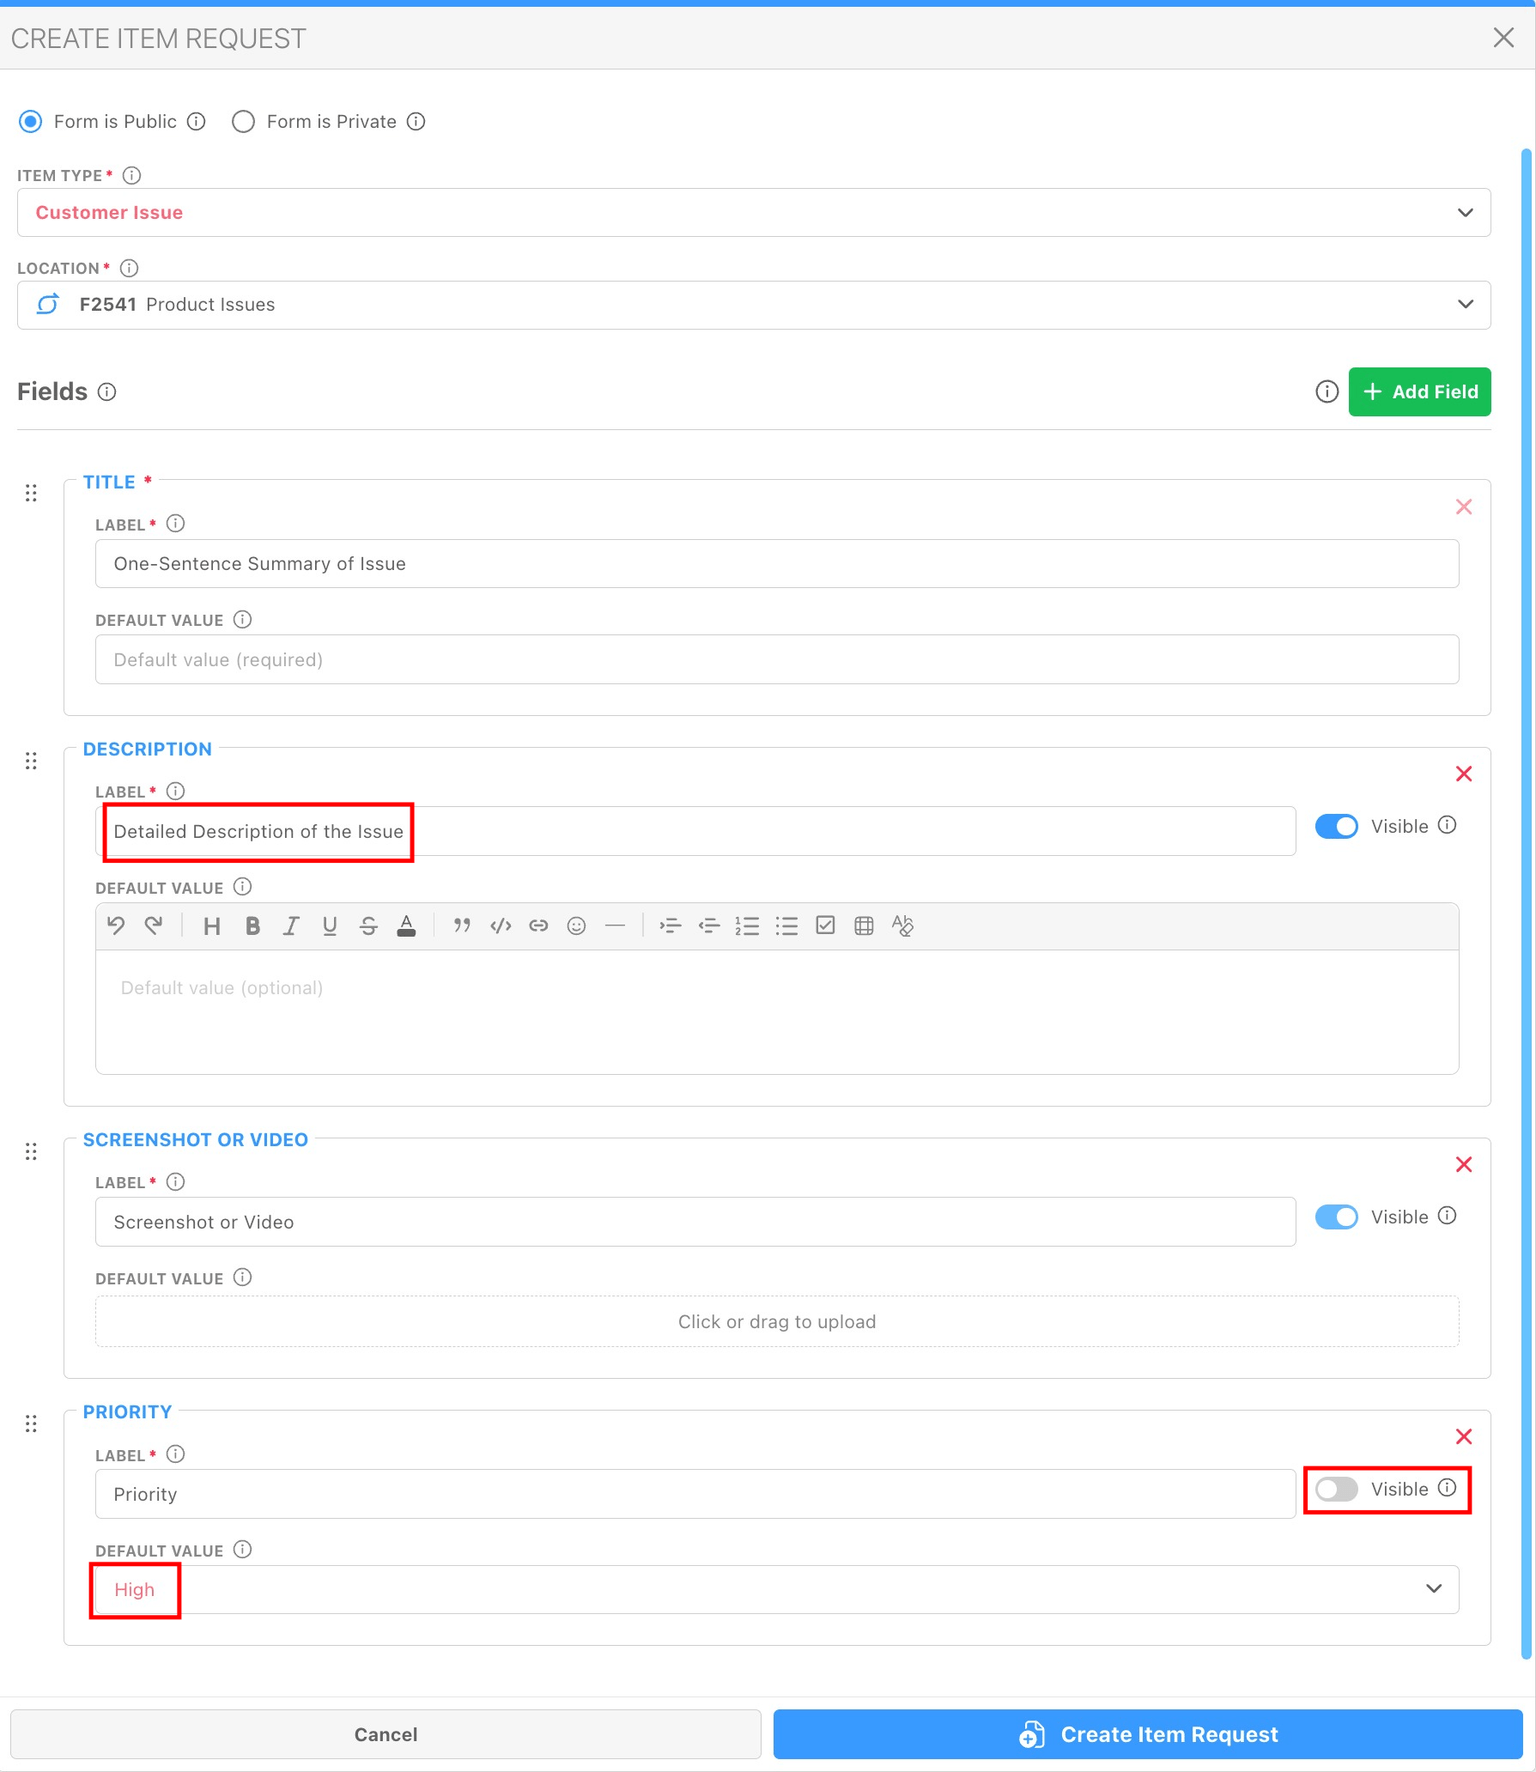
Each field has its own settings:
- Label — the text the submitter sees; change it if the field's own name is not clear to outsiders.
- Visible — turn off to hide the field from the submitter while still setting its value on the created item.
- Required — the submitter must answer. A required field that is hidden must have a default.
- Default Value — pre-filled for the submitter, or applied silently when the field is hidden. For example, to file every submission from a Report a Bug form as High priority, add Priority, set its default to High and turn Visible off.
The form's Title field is always required and cannot be removed. User-picker and item-reference fields are not shown on public forms or to portal customers; a hidden default on such a field still applies.
How answers are saved
An explicit No or numeric 0 is a valid answer and is kept as entered, not replaced by a default or treated as blank. A required checkbox left unticked counts as No. Calculated fields are filled from their formulas after the item is created, so submitters never answer them even when they are required. Required fields are enforced when the form is submitted, on every route in.
Using a private form
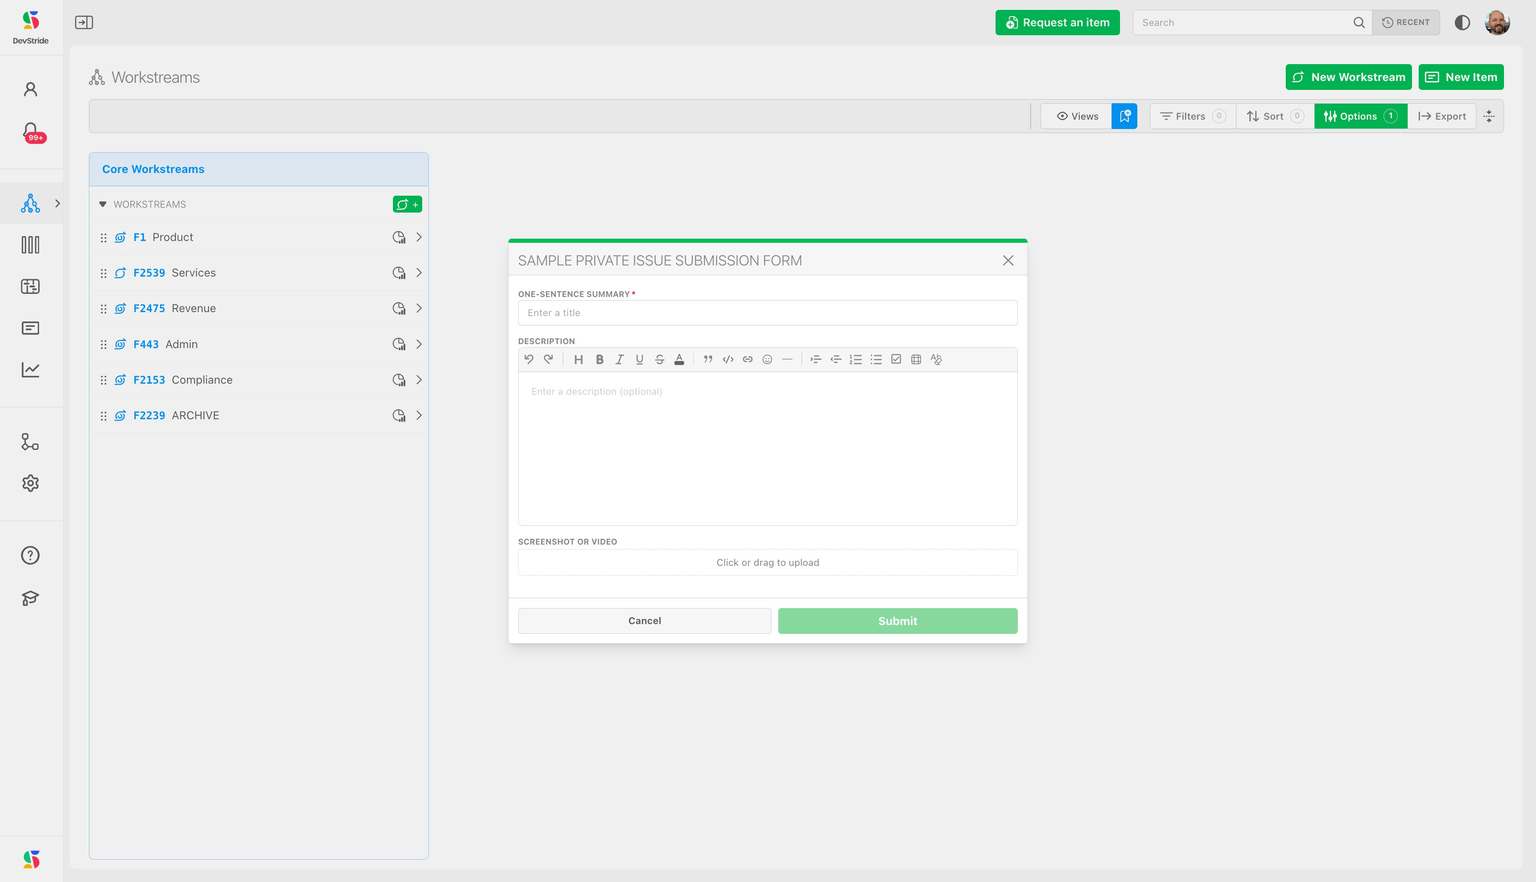
Once at least one private form is enabled, members see Request an Item at the top of the sidebar's Help section. Click it, pick the form from its group in the menu that opens beside the sidebar, and fill it in as a dialog inside DevStride; the item is created at the form's location.
Using a public form
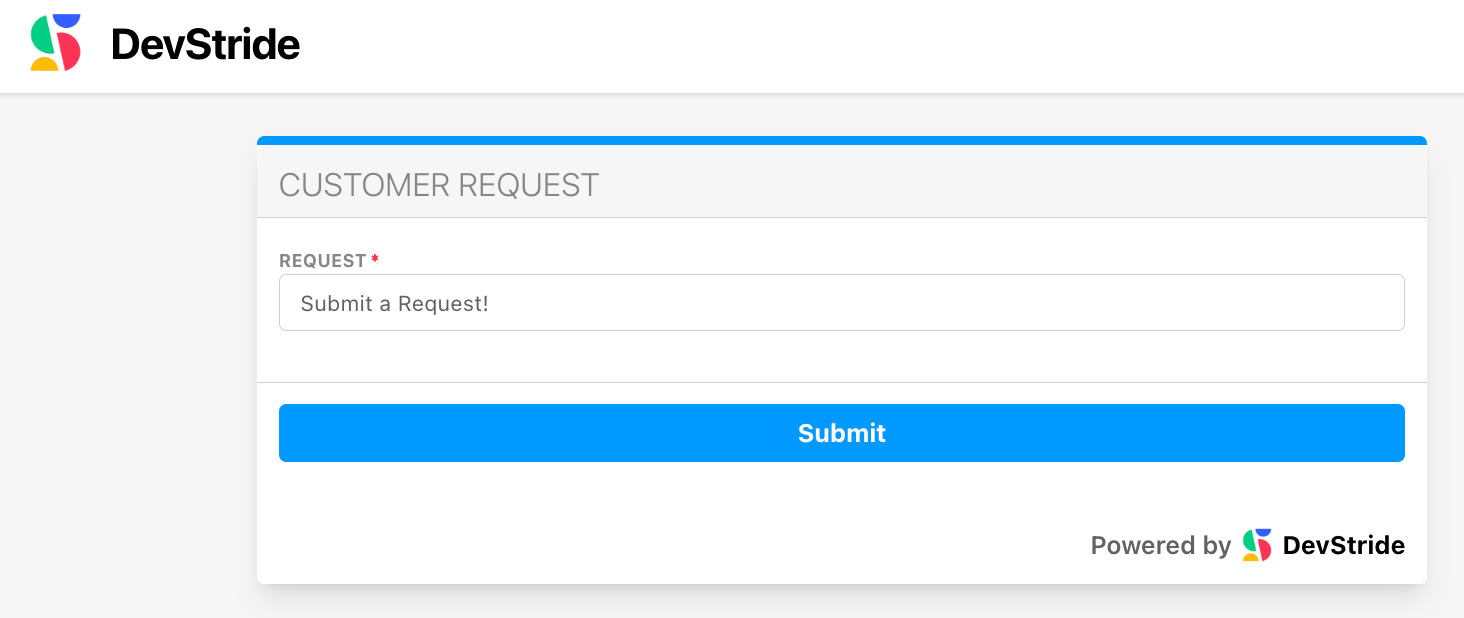
Click Copy public link on a public form's row and share the link. Anyone who opens it sees a DevStride-branded page with your form and a Submit button; no DevStride account is needed. If the form is disabled or the link is wrong, the page says the form is not valid and to contact your organization's administrator. (Private forms have a Copy link action too, which only works for signed-in members.)

Forms that create tickets
When Create as Service Desk ticket is on, the public form asks for Your name and Your email, and a customer already signed in to your support portal sees Submitting as their name with a Not you? link. The submitter becomes a requester and is emailed a receipt. If your desk holds new requesters for verification, or the spam brake is active, they are emailed a link to confirm their address first and the request waits until they do; the confirmation page then reads "Your email is confirmed". The full behaviour, including the spam brake and file uploads, is on Service Desk request forms.
Examples
- Feature requests — a public form creating Feature items under a Backlog workstream, with a Requested by text field and a Business value options list.
- Reporting defects — a private form creating Defects with Priority defaulted to High and a hidden Source: Internal field.
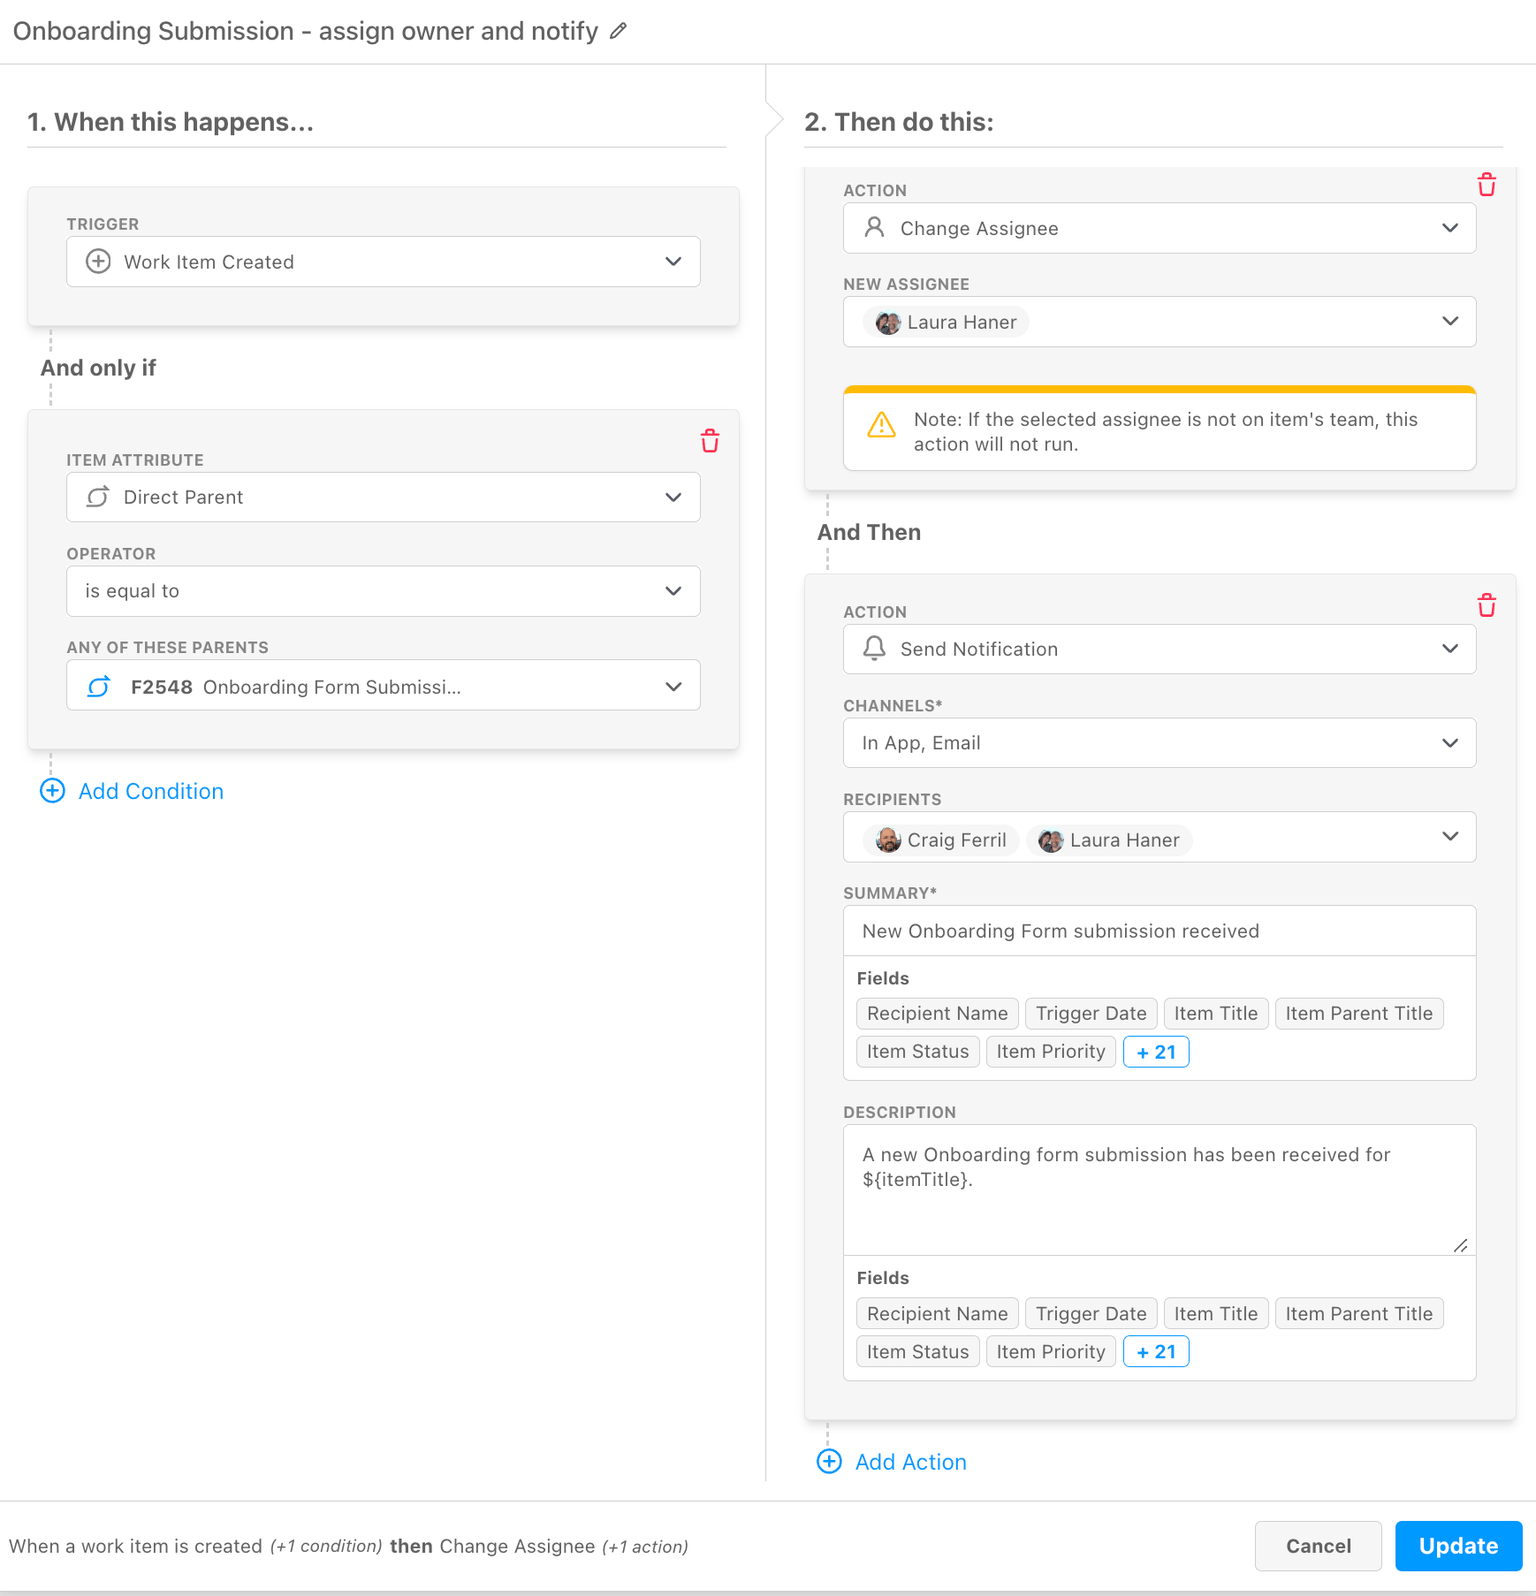
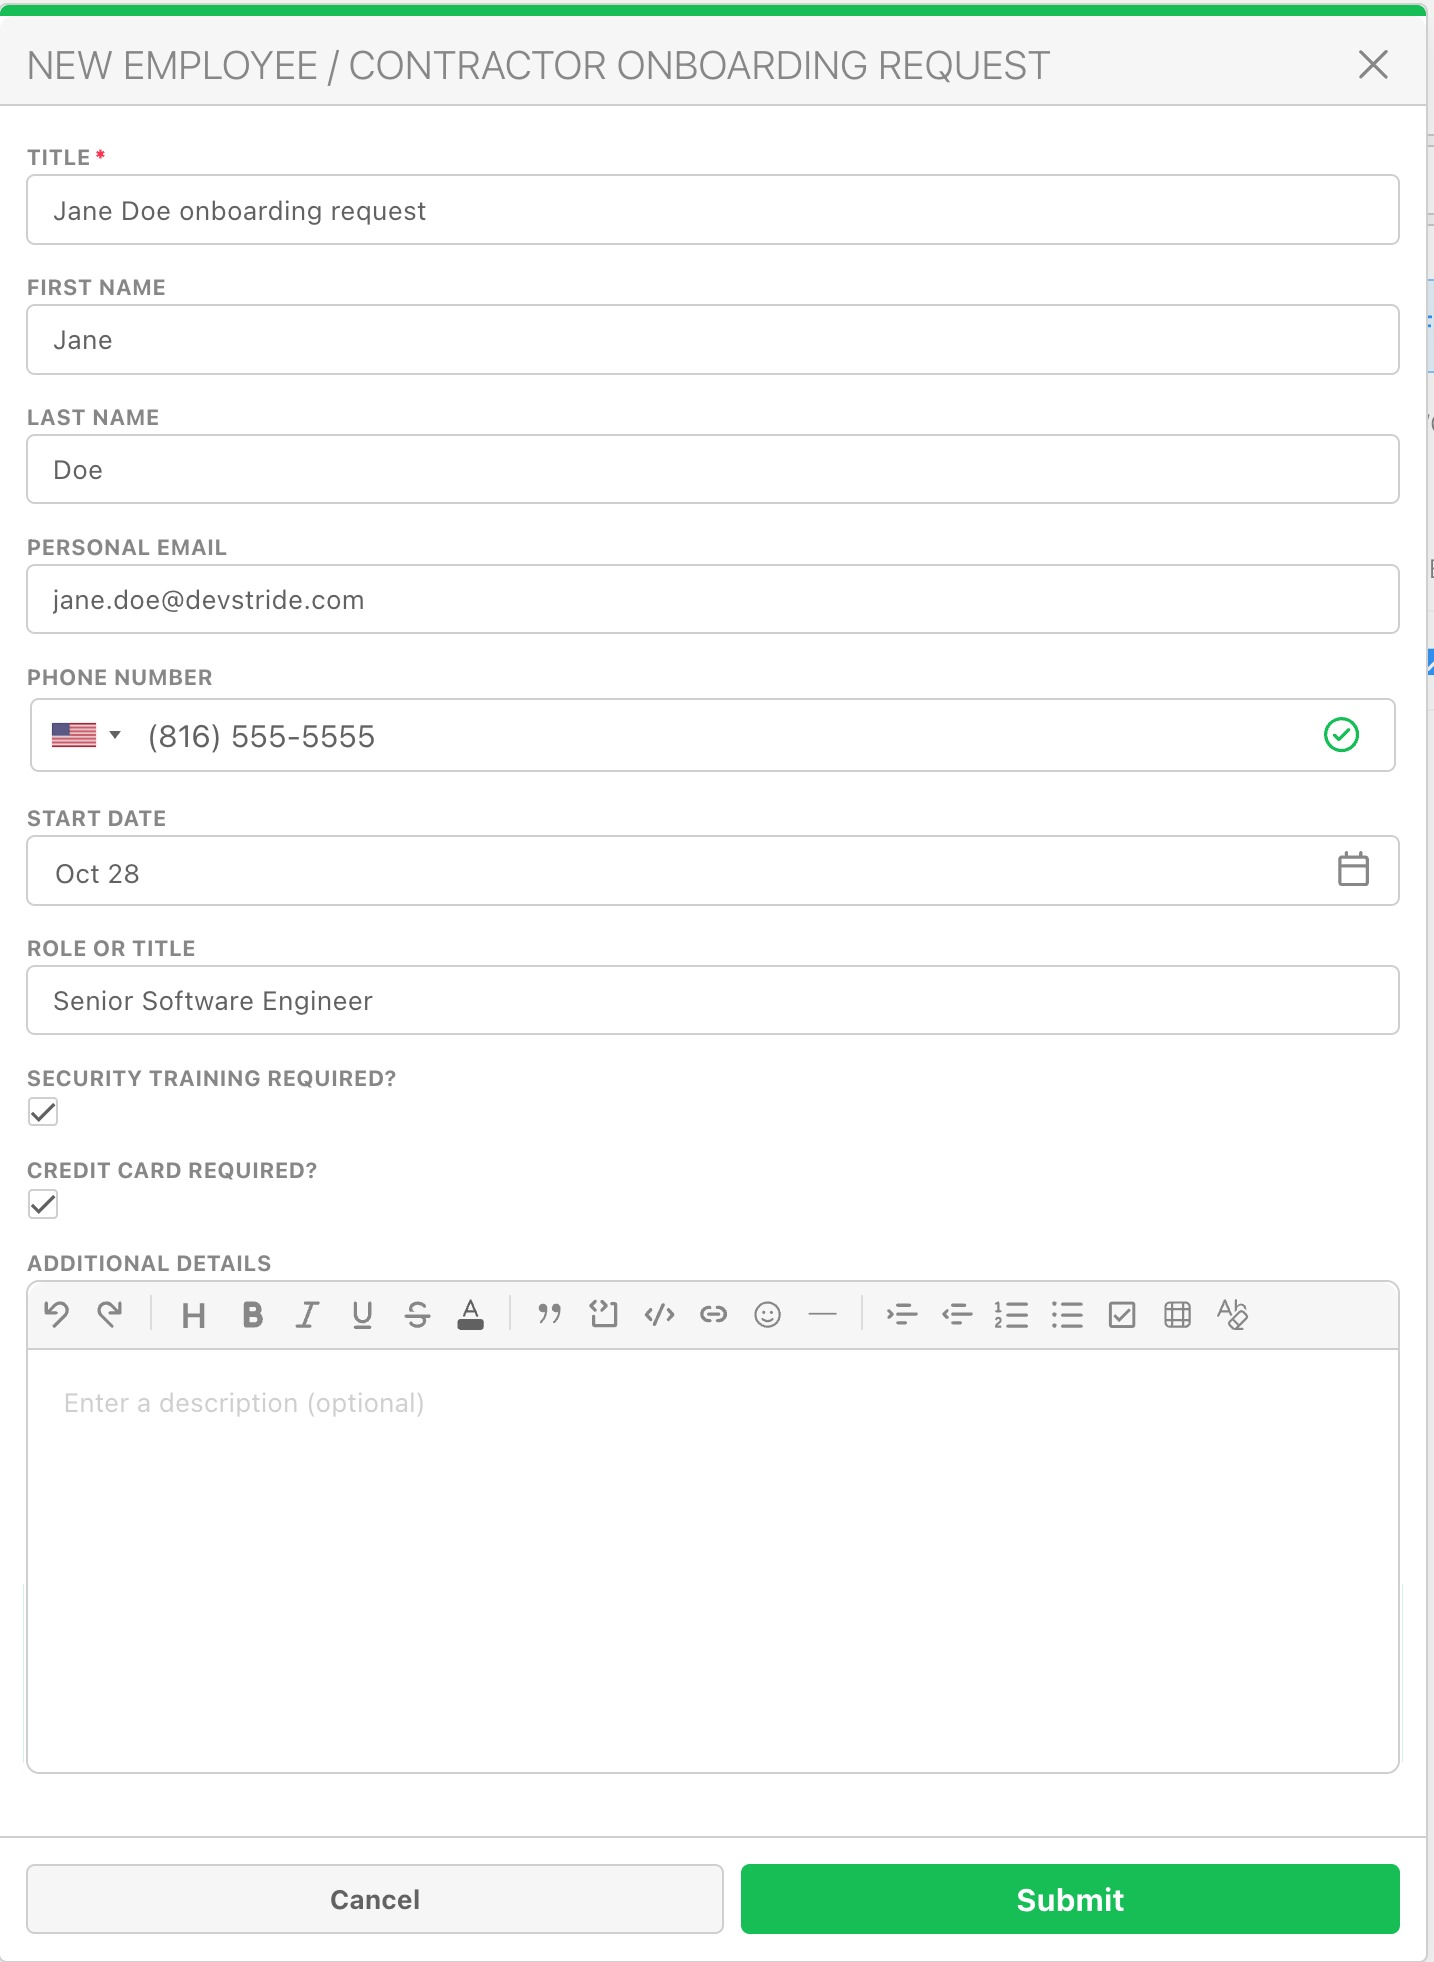
- Access requests — a private form whose custom fields capture the system and justification, paired with an automation that assigns the security lead and emails the team when a request arrives.
Related
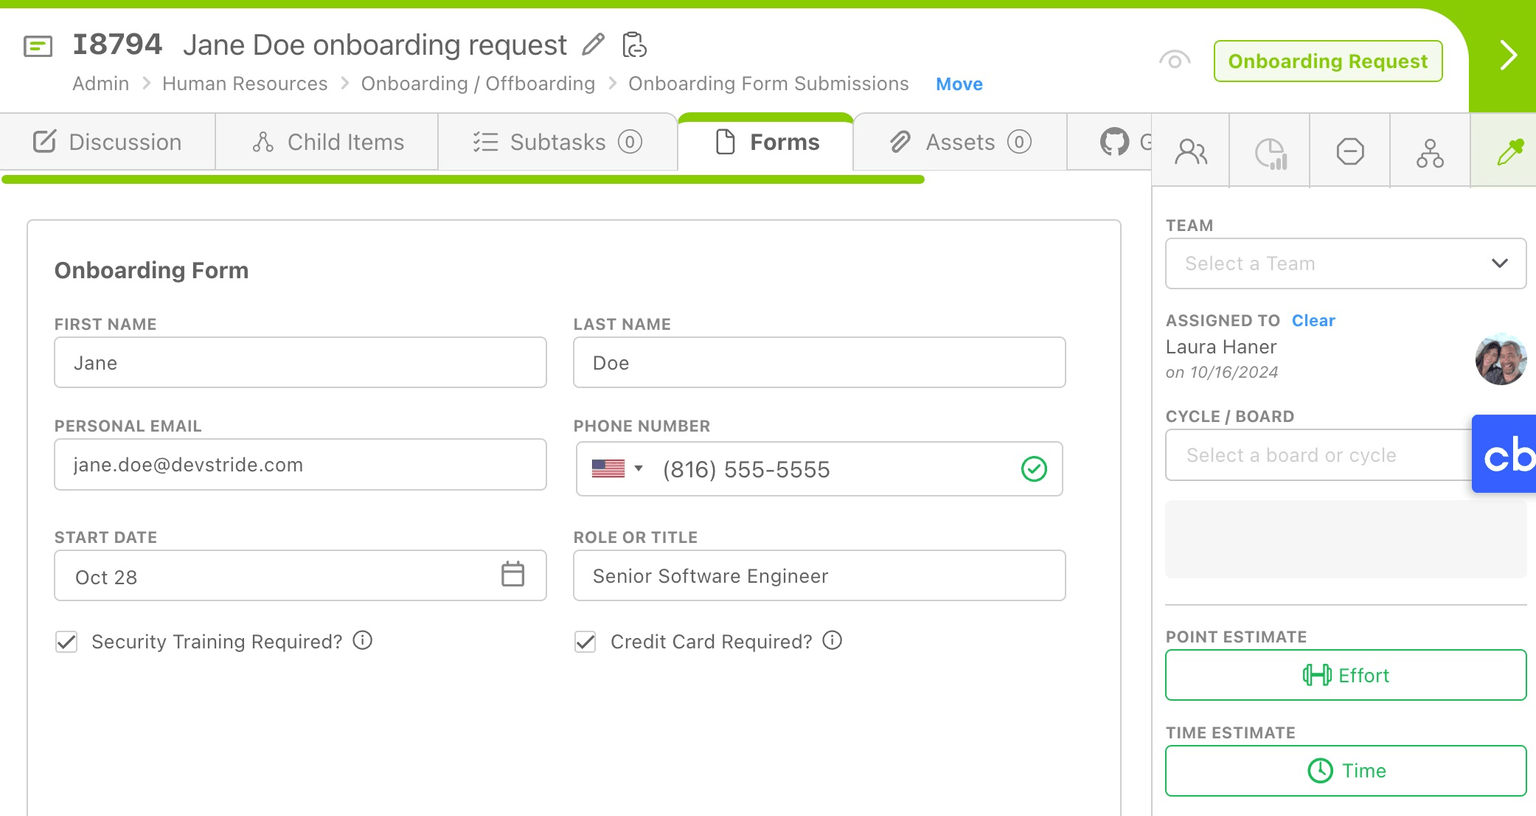
- Custom Fields — fields placed in a form group appear on the item's Forms tab rather than its sidebar.
- Service Desk request forms and the customer support portal.
- Automations — react to new submissions.
Customizing the Item Drawer
Per item type, choose which tabs and sidebar fields the item drawer shows and in what order, arrange the sidebar's field groups, and promote individual custom fields to their own sidebar pill.
GitHub
Install the DevStride GitHub App, then link pull requests, branches, and commits to work items by putting the item number in your branch name, commits, or PR — or attach a PR by URL.