Setting up Your Item Type Hierarchy
An item is a unit of work. An item type says what level of your hierarchy it sits at and which types may nest beneath it. DevStride enforces the hierarchy everywhere: in the Map, the item drawer, imports, forms, and AI item creation. Reports roll up by it.
This is the most consequential step in the guide, and it comes before populating workstreams for a reason: once items exist as a type, moving that type around the hierarchy means converting those items. Spend ten minutes on the design now.
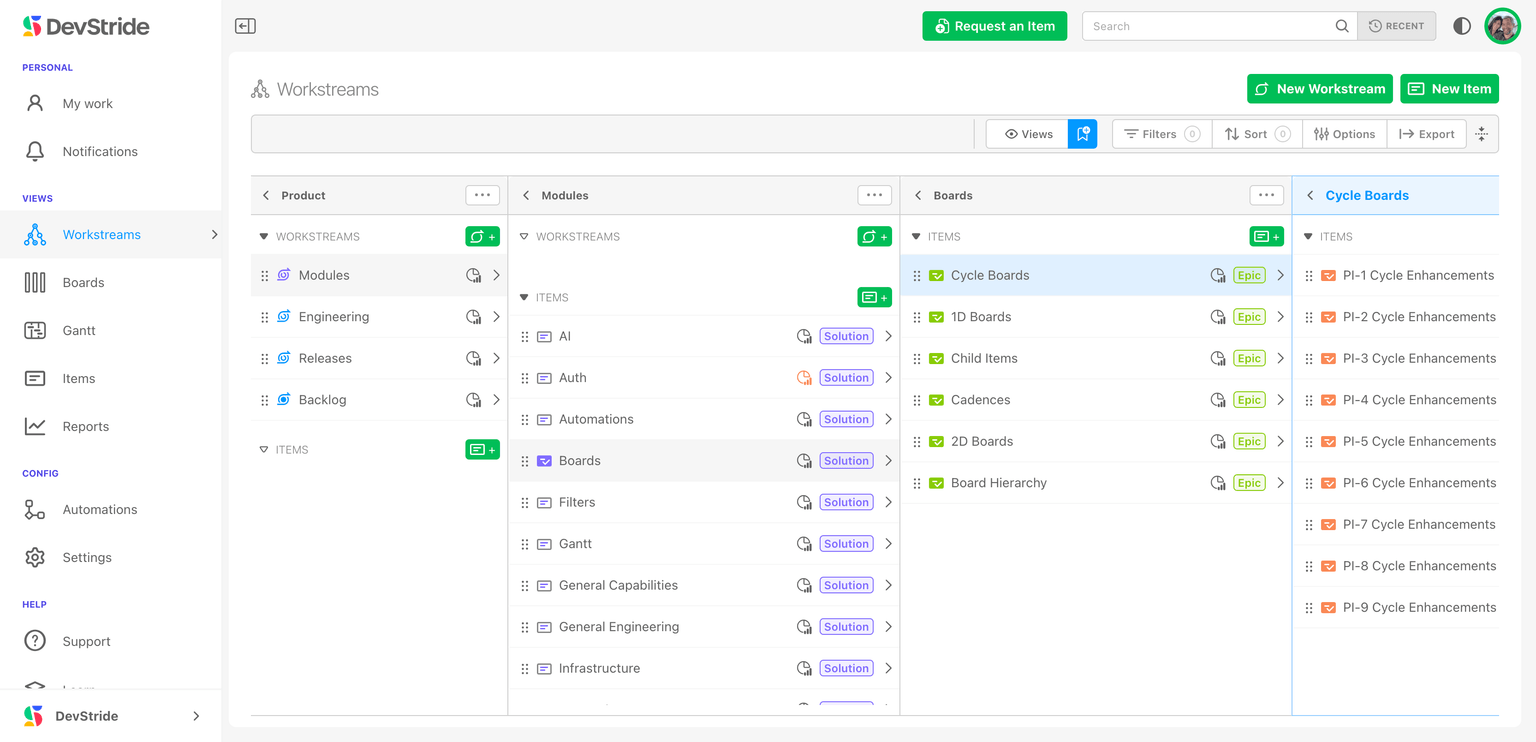
Designing the hierarchy
Ask what you call the big things, the middle things, and the small things, and what you want to report on. Some examples:
| Kind of work | Hierarchy |
|---|---|
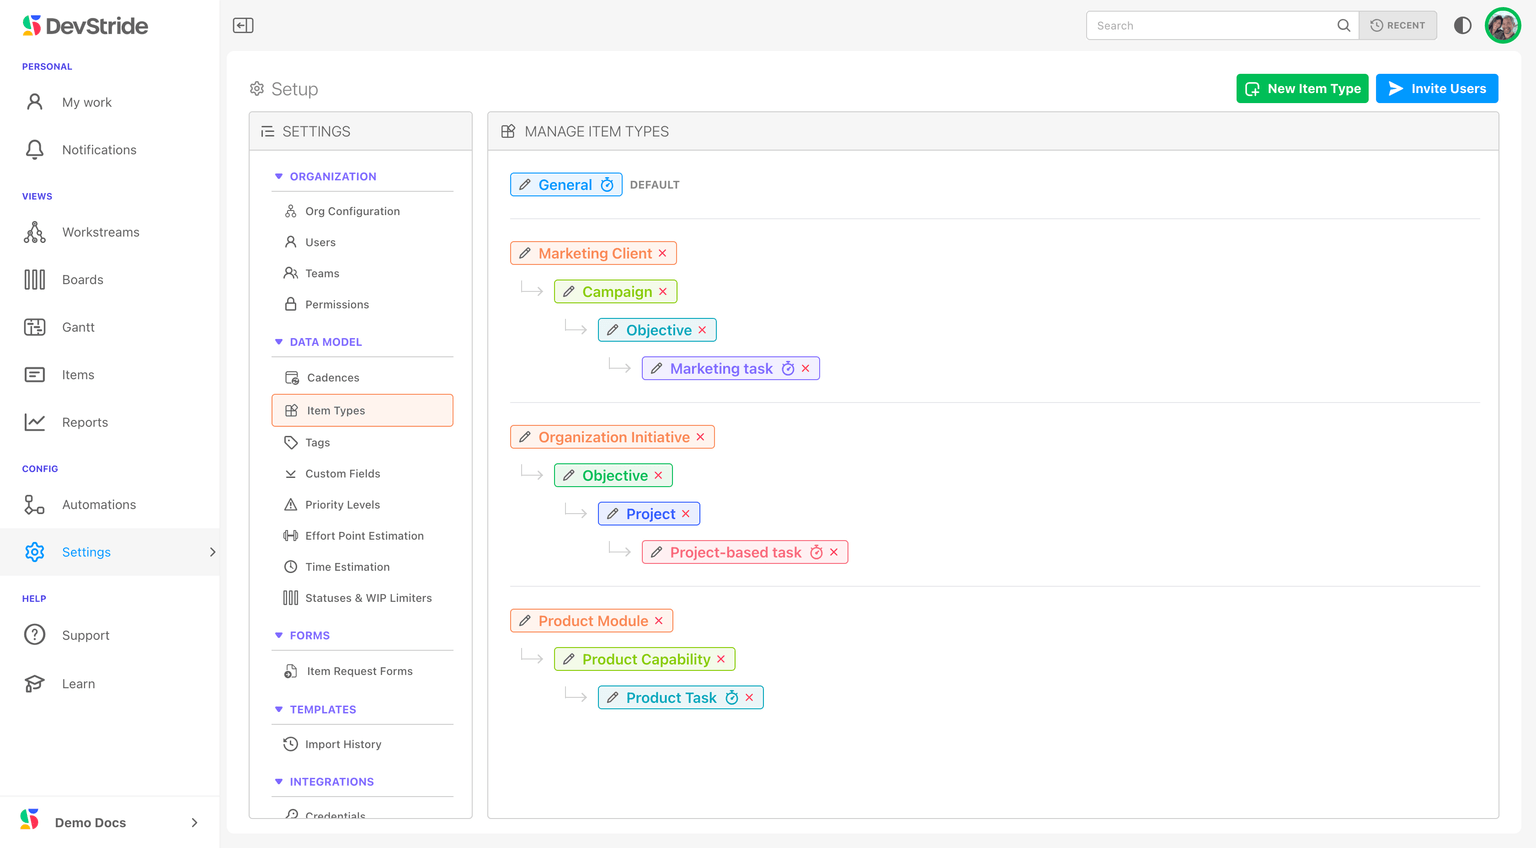
| Product engineering | Module → Capability → Epic → Story and Defect |
| Scaled agile | Epic → Feature → Story and Defect (the starter set) |
| Simple projects | Objective → Task (also in the starter set) |
| Marketing | Client (or Initiative) → Campaign → Objective → Task |
Rules of thumb:
- One hierarchy per kind of work is fine; a marketing tree and a product tree can coexist. Different workstreams simply use different trees.
- Three or four levels cover most organizations.
- Add a level you might want later now. You can add types at any time, but existing items do not move into a new middle level by themselves.
- A type can have more than one parent type: allow Story under both Feature and Epic so small work can sit directly on an Epic.
A new organization starts with a default type Item (which cannot be deleted or given a parent), plus Epic → Feature → Story / Defect and Objective → Task. Rename, re-parent, or delete these to fit your design.
Teams whose work looks nothing alike should not share a hierarchy. This example shows three side by side: marketing, organizational initiatives, and product engineering.
Create your item types
Open Configure Settings → Data Model → Item Types. The Manage Item Types tree shows every type under each of its parents.
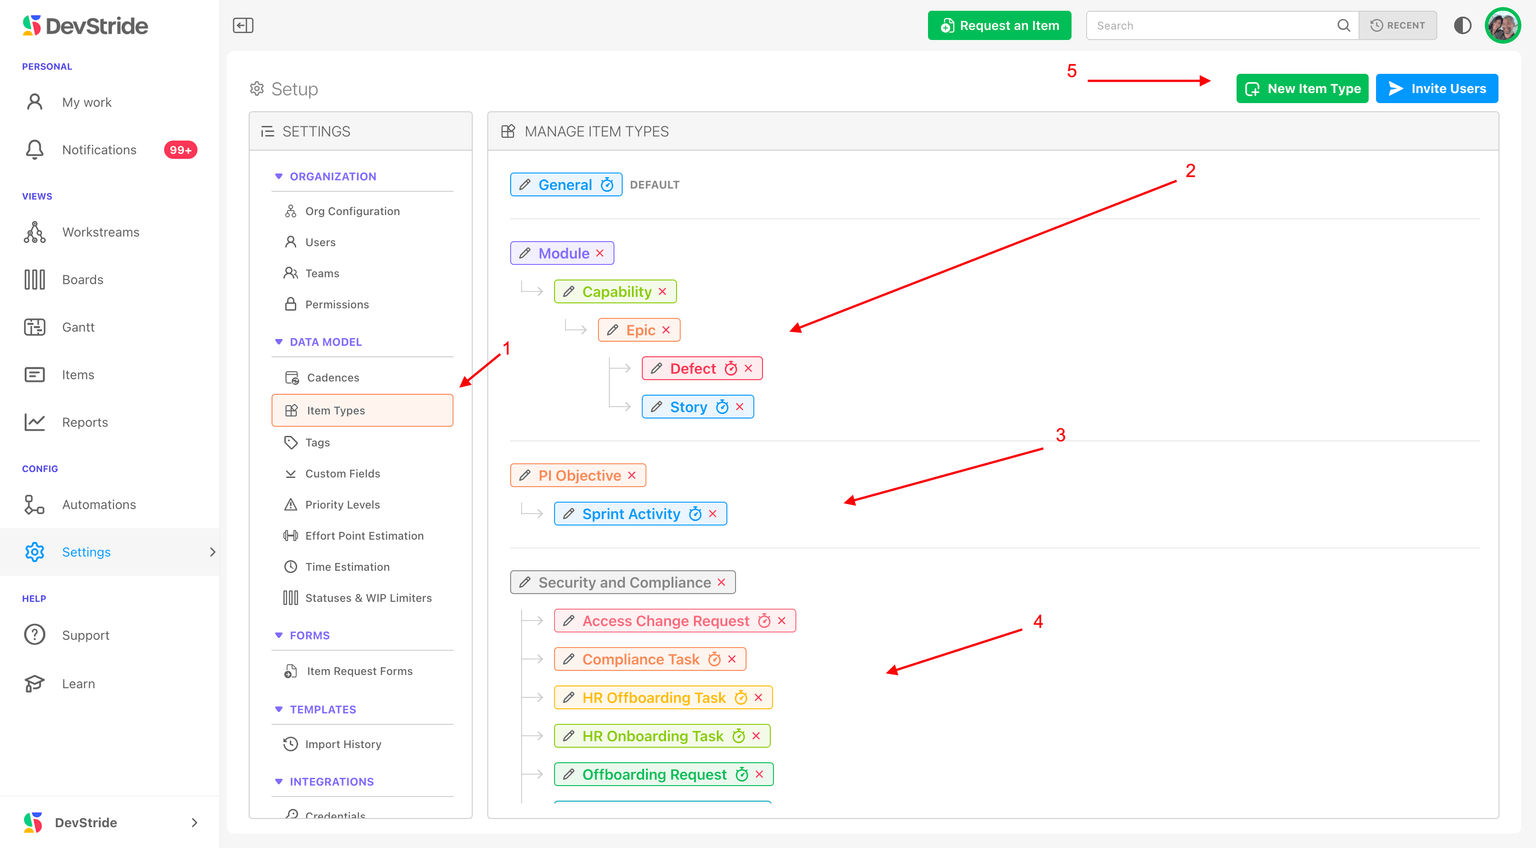
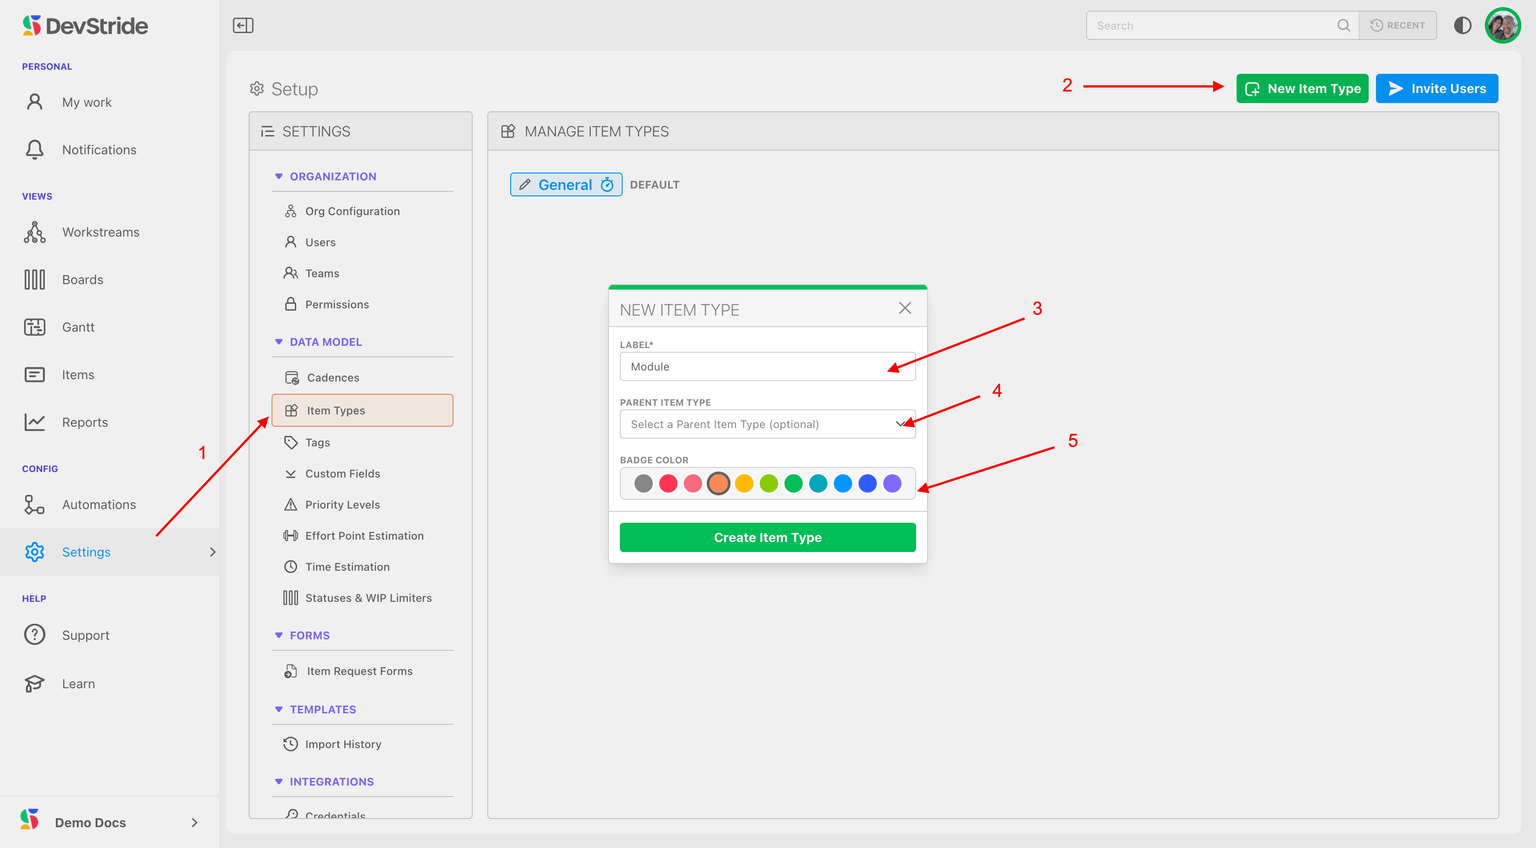
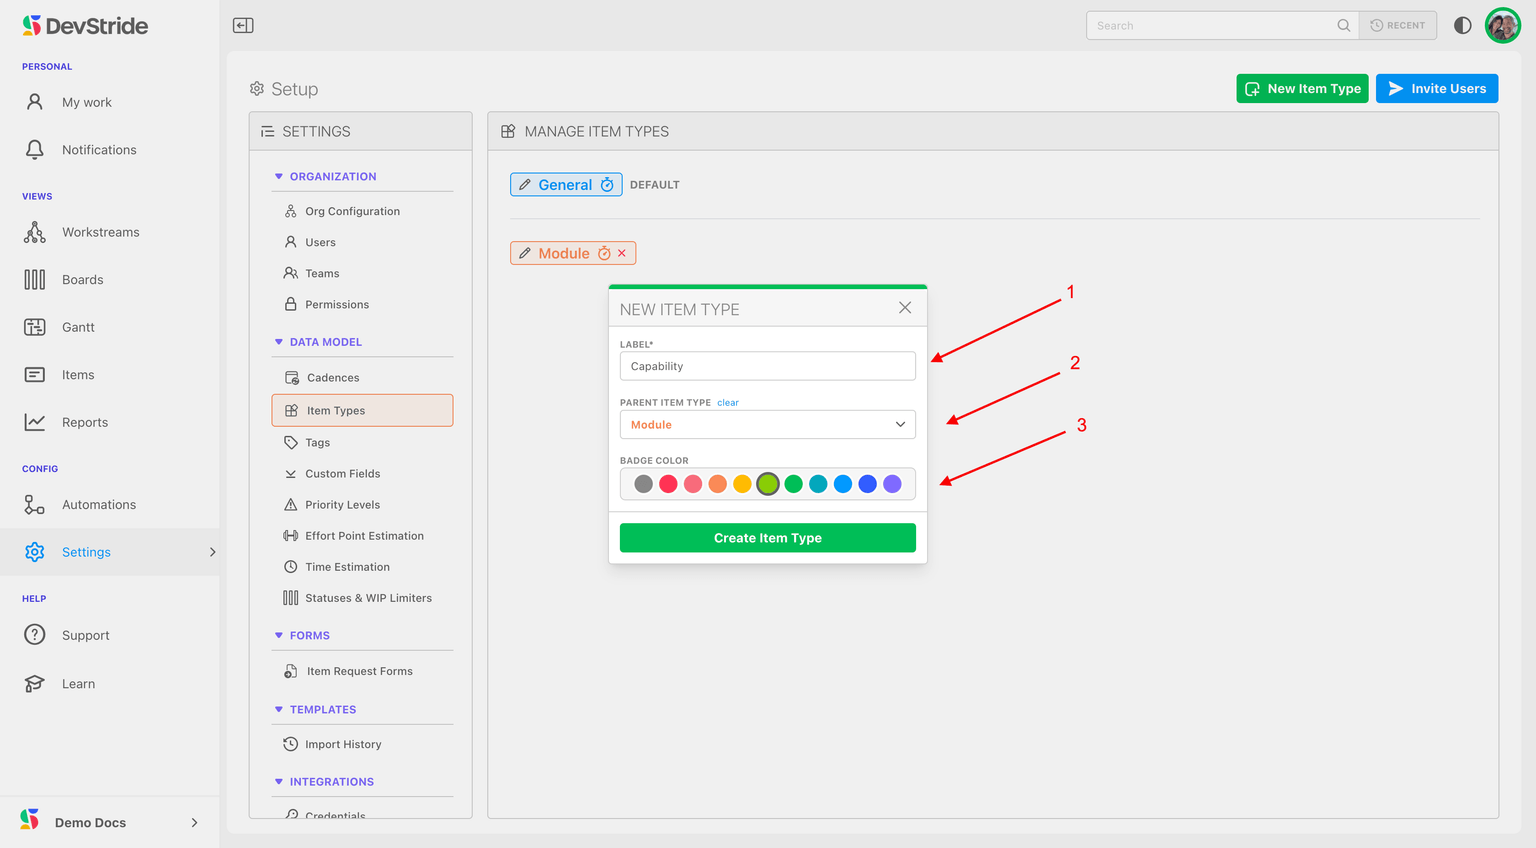
- Click New Item Type.
- Enter a Label (at least three characters), for example Module.
- Leave Parent Item Types empty, shown as None (top level), for the top of a hierarchy.
- Pick a Badge Color and click Create.
- Repeat for the next level down, this time choosing the parent in Parent Item Types, for example Capability under Module.
Forgot the parent? Click the pencil on the type and set Parent Item Types there.
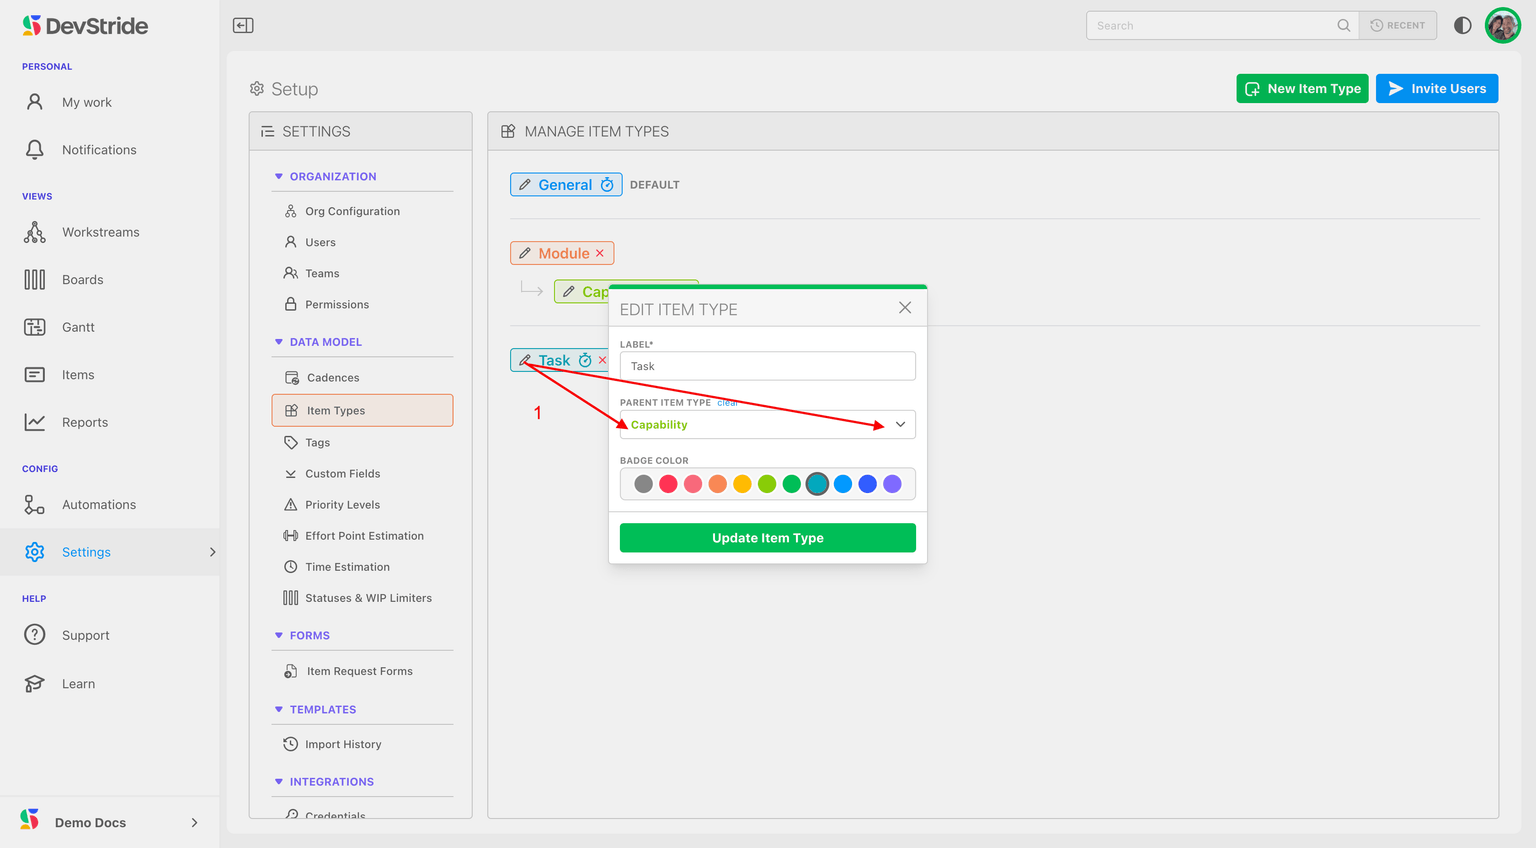
Several parents. Pick more than one type in Parent Item Types and the type is allowed under each; the tree draws it under every parent and edits apply to all copies. The first parent is the primary one, used where only one place can be shown; change it with Make primary. You can add a parent at any time, but removing one is refused while items of that type still sit under items of that parent type. See Choosing parent item types.
Changing the hierarchy later
- Adding a type or an extra parent is always safe; nothing existing changes.
- Deleting a type is only possible while no items (including archived ones) use it. Its child types move up to its parents.
- Changing one item's type is done from the item itself; converting a parent and all its children at once is done with Item Type in the bulk-edit menu, which checks that every item still fits before committing. See Changing an item's type.
Next: Populating and Managing Workstreams to create items of these types, then come back for Custom Fields.
Admin Onboarding: Understanding Workstreams
Step 5a of admin onboarding — what a workstream is, how core and nested workstreams organize the Map Value module, and the two-level rule of thumb before you create any.
Admin Onboarding - Setting up Custom Fields
Step 6a of admin onboarding — add the data each item type must carry (customer, cost centre, RICE score) as custom fields, group them into collections, and decide what shows in the sidebar versus the Forms tab.