Admin Onboarding - Setting up Tags
A tag is a coloured label on an item. It is for drawing attention or grouping across the hierarchy: Needs client approval, Ideation, Compliance. Tags can be set by hand or by an automation, filtered on, and reported on. An item can carry many tags; a tag can sit on many items.
Tags come right after custom fields because the two are easy to confuse. Decide this first:
| Use a tag when | Use a custom field when |
|---|---|
| It is a flag you want to see at a glance on cards and lists | It is data every item of a type should carry |
| An item may have several at once | Exactly one value applies (a pick list) |
| An automation will apply or react to it | You will calculate, sort, or report on the value |
Most organizations need 10 to 20 tags. More than that and the cards become noise.
DevStride reserves two tags you cannot edit or remove: Bug (red) and Blocked (orange). Blocked is set by the blocked indicator on an item.
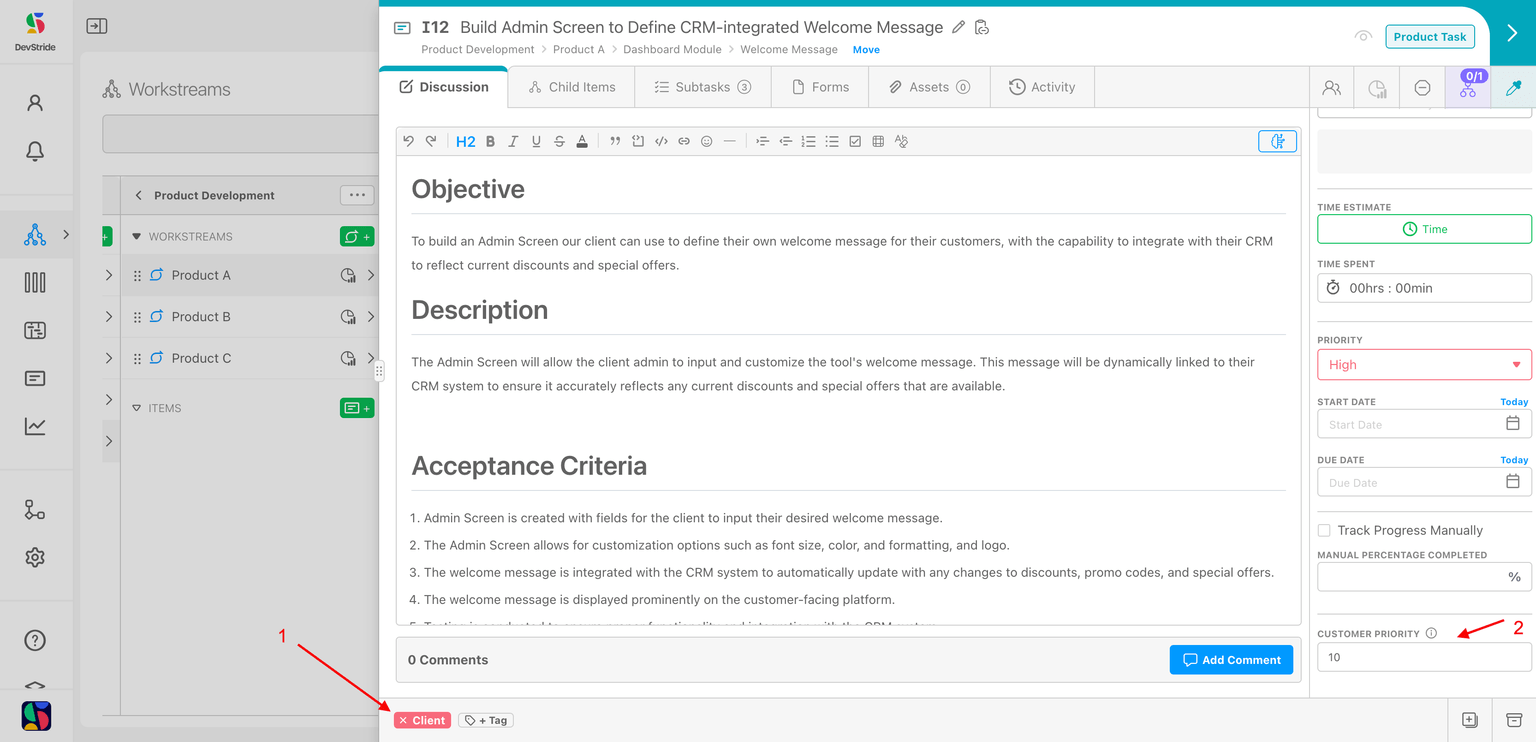
In this example a Client tag is applied automatically whenever an item's Customer Priority custom field is 5 or higher, so high-value requests stand out on every board. Automations are covered later; see Setting up automations.
Step 1: Create tags
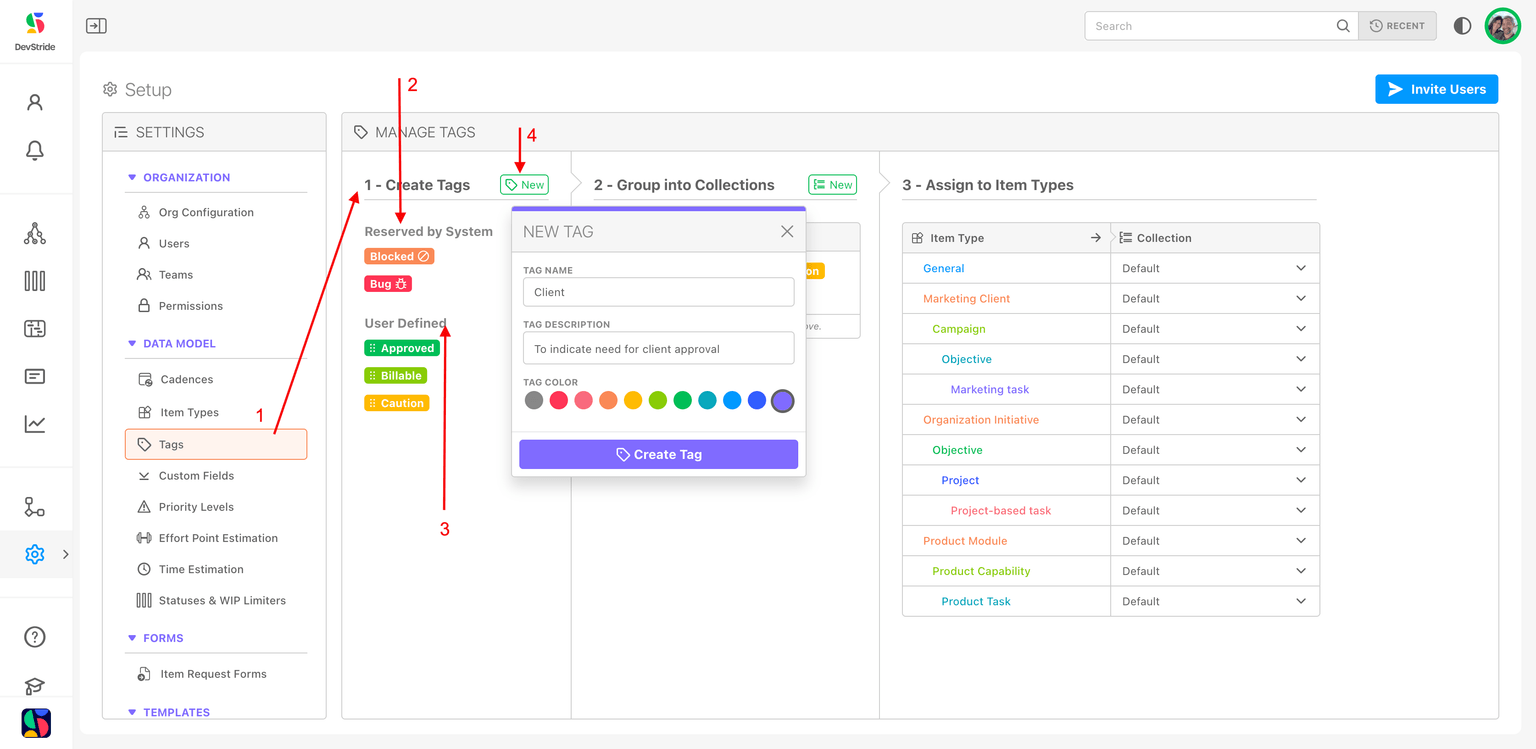
Open Configure Settings → Data Model → Tags. The left pane, 1 - Create Tags, lists Reserved by System and User Defined tags. Click New, then fill in Tag Name, an optional Tag Description, and Tag Color, and save.
Step 2: Group into collections
Collections decide which tags each item type offers.
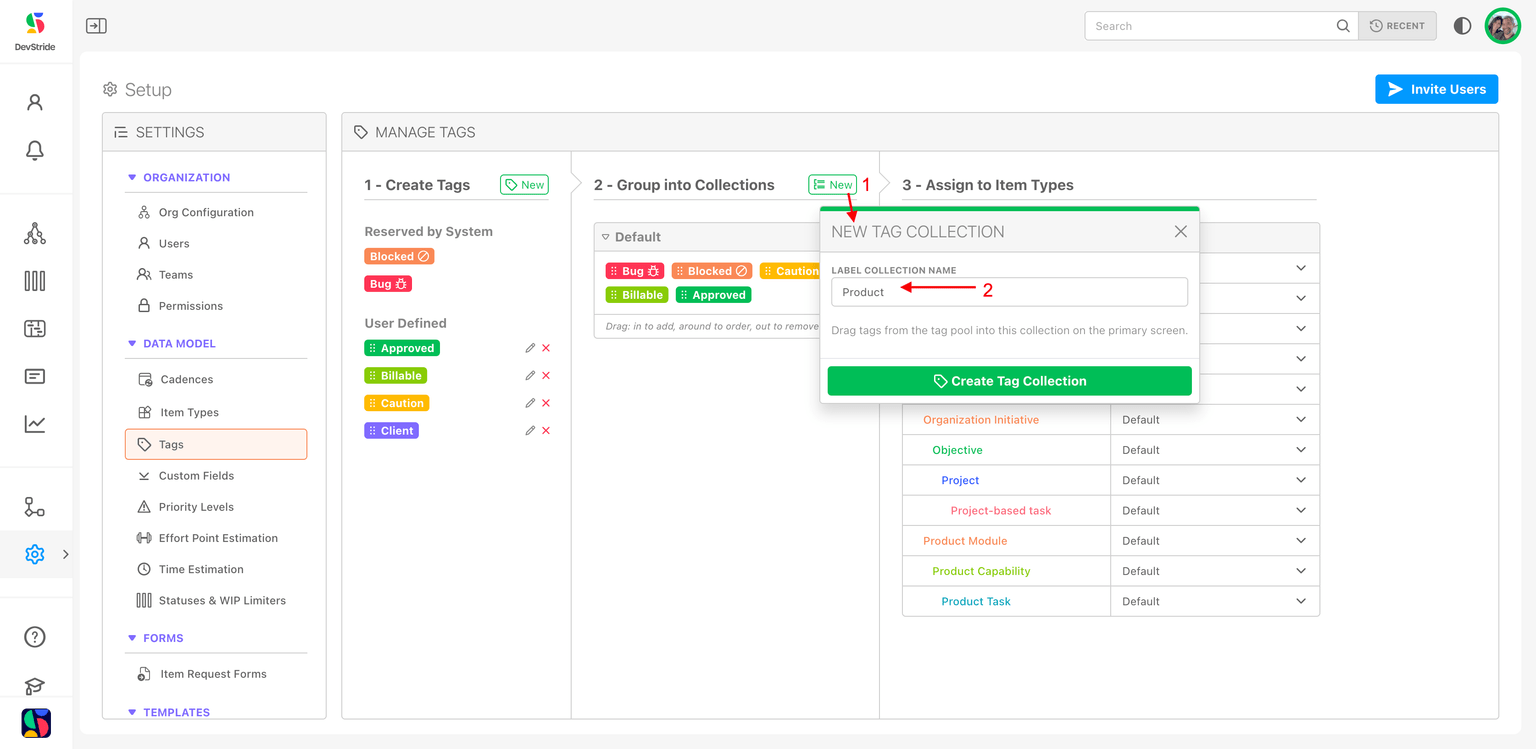
- In 2 - Group into Collections, click New, name the collection (Product), and click Create Tag Collection. The system tags are added automatically and cannot be removed from it.
- Drag the tags you want from the left pane into the collection. Drag to reorder; drag out to remove.
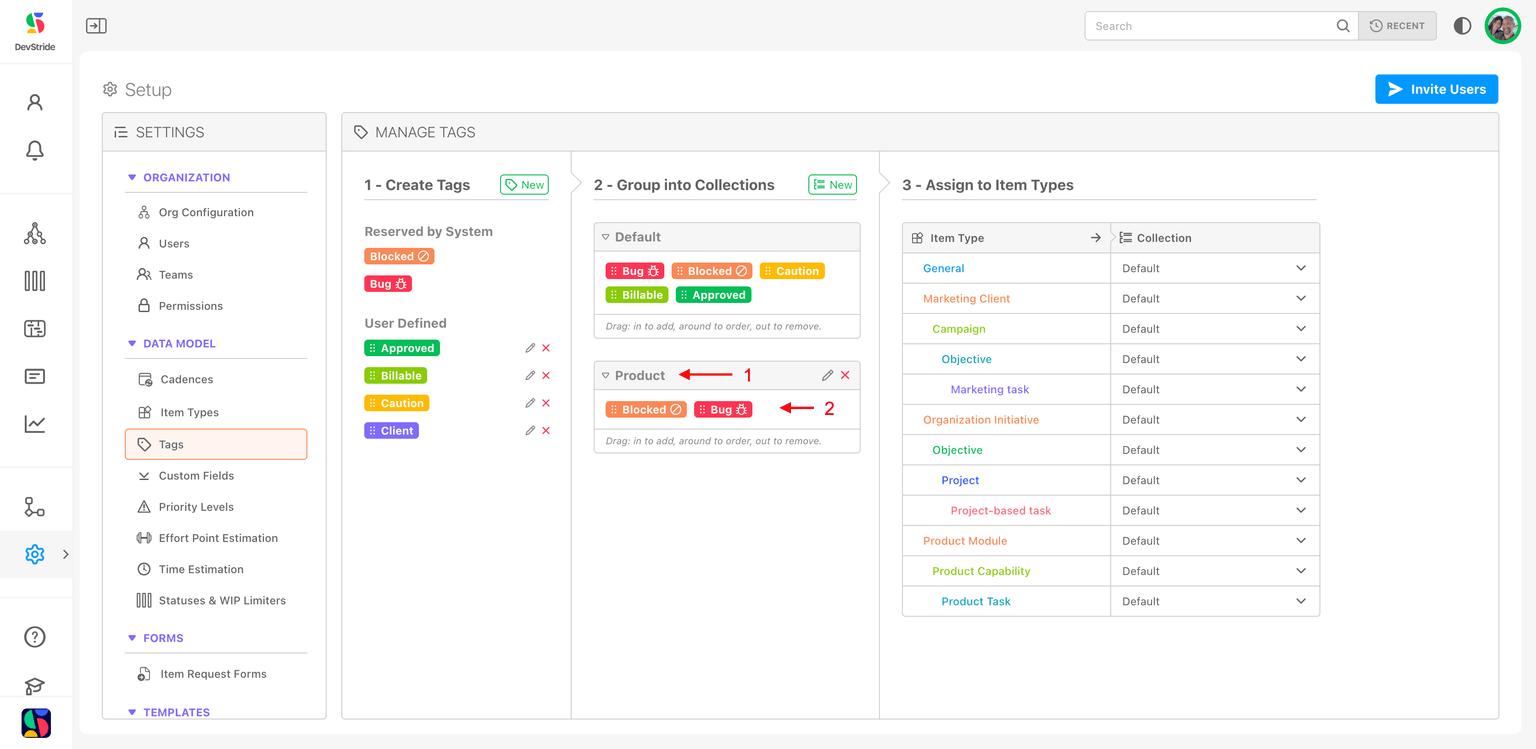
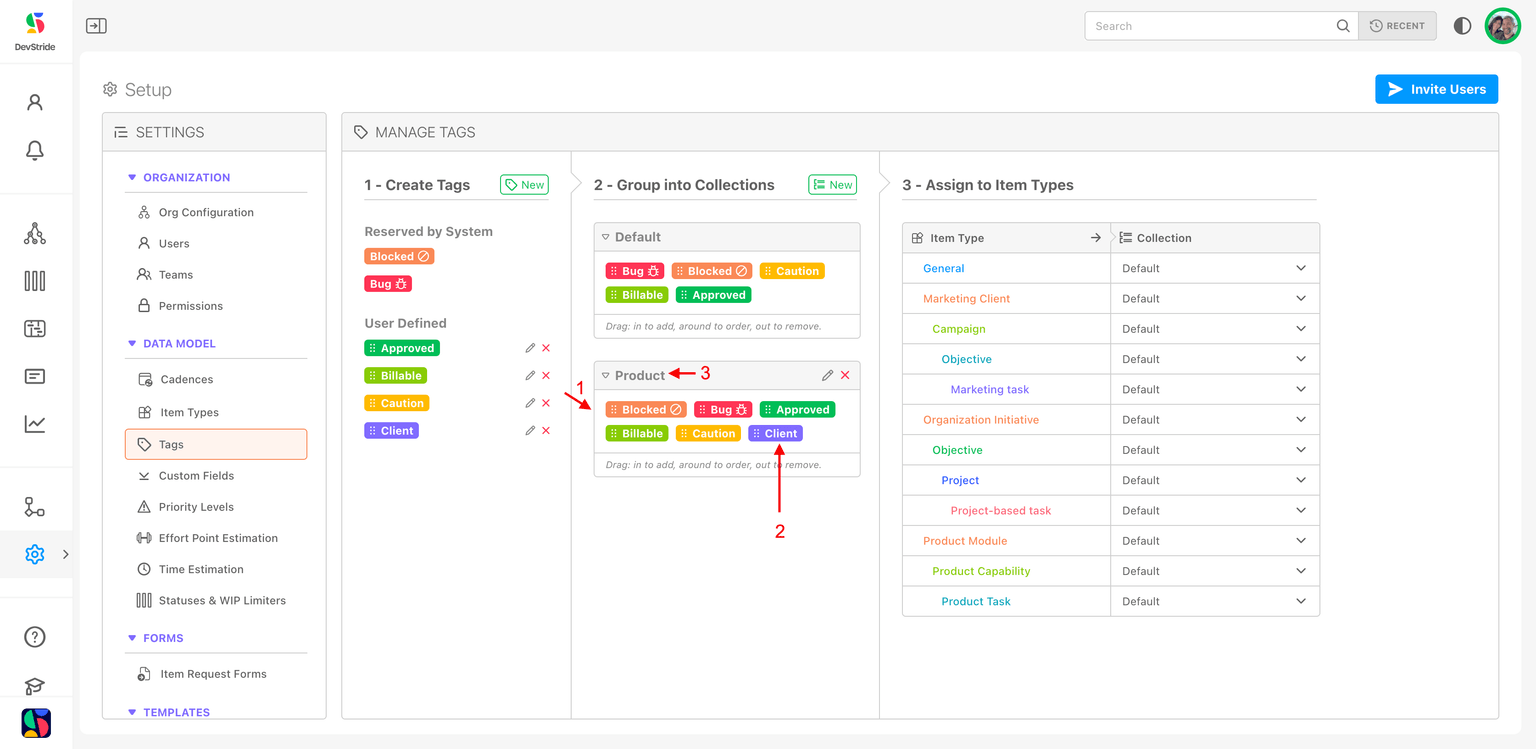
The Default collection (which cannot be renamed or deleted) is what every item type uses until you assign another; tags you add to it are available everywhere.
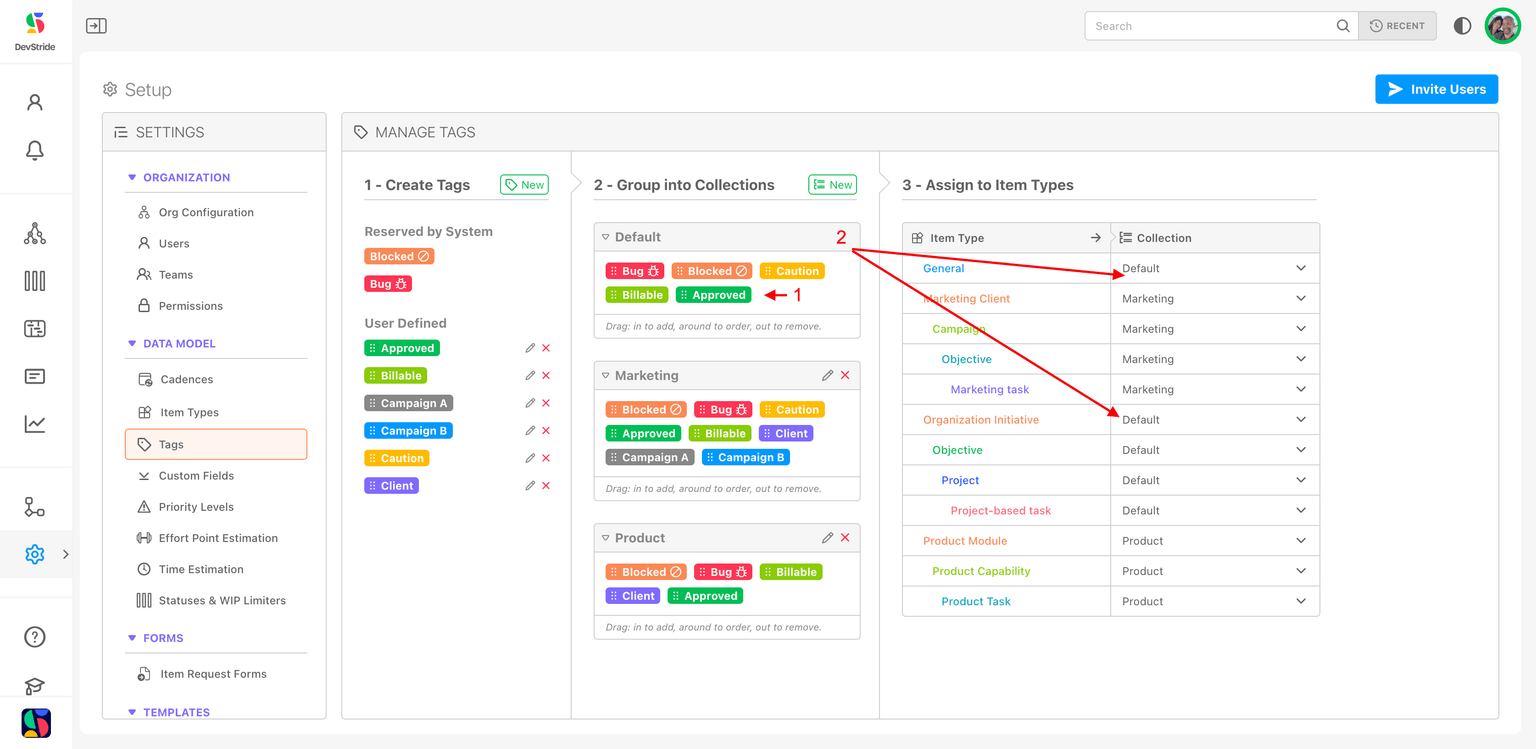
Step 3: Assign to item types
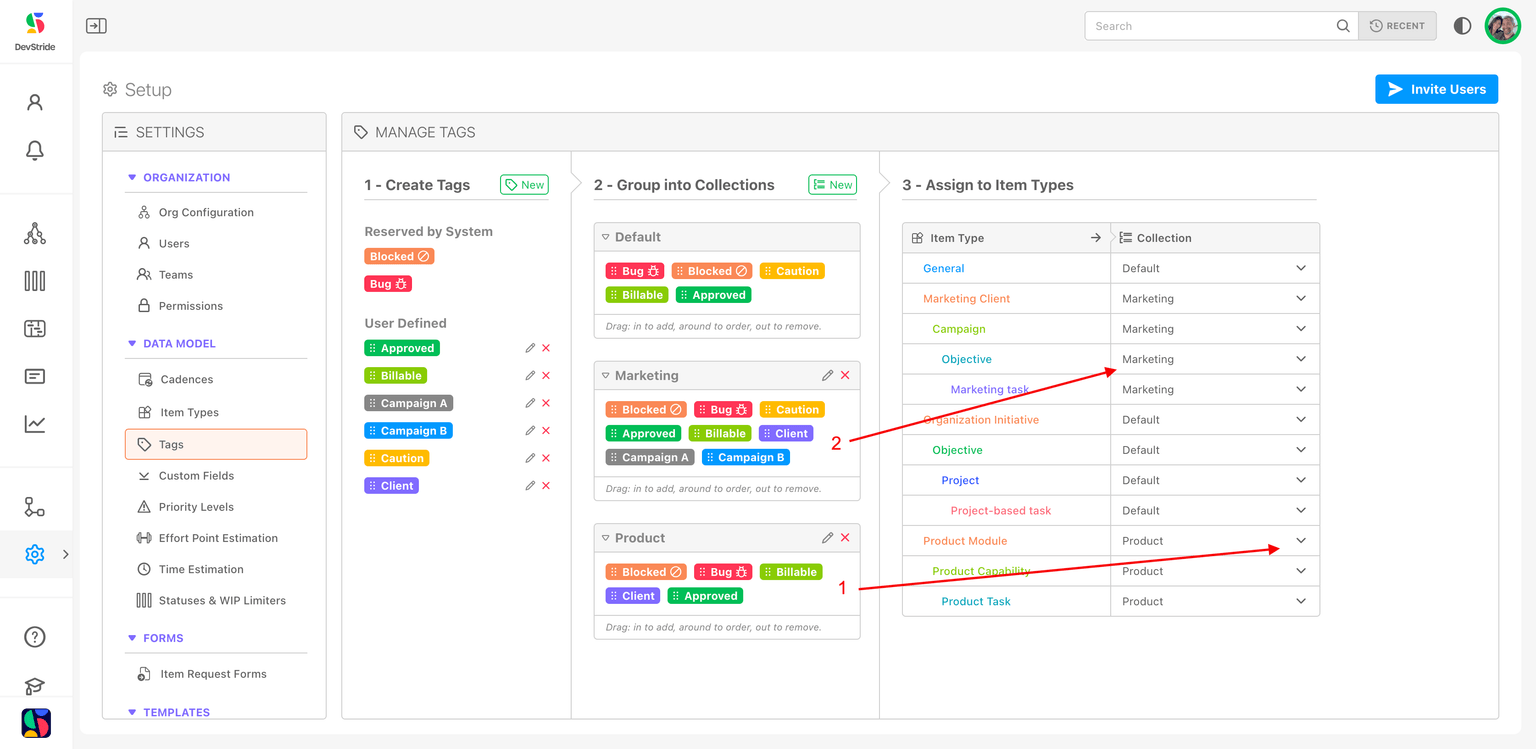
In 3 - Assign to Item Types, choose a collection for each type. Here the Product collection is assigned to the product types and a Marketing collection to the marketing types.
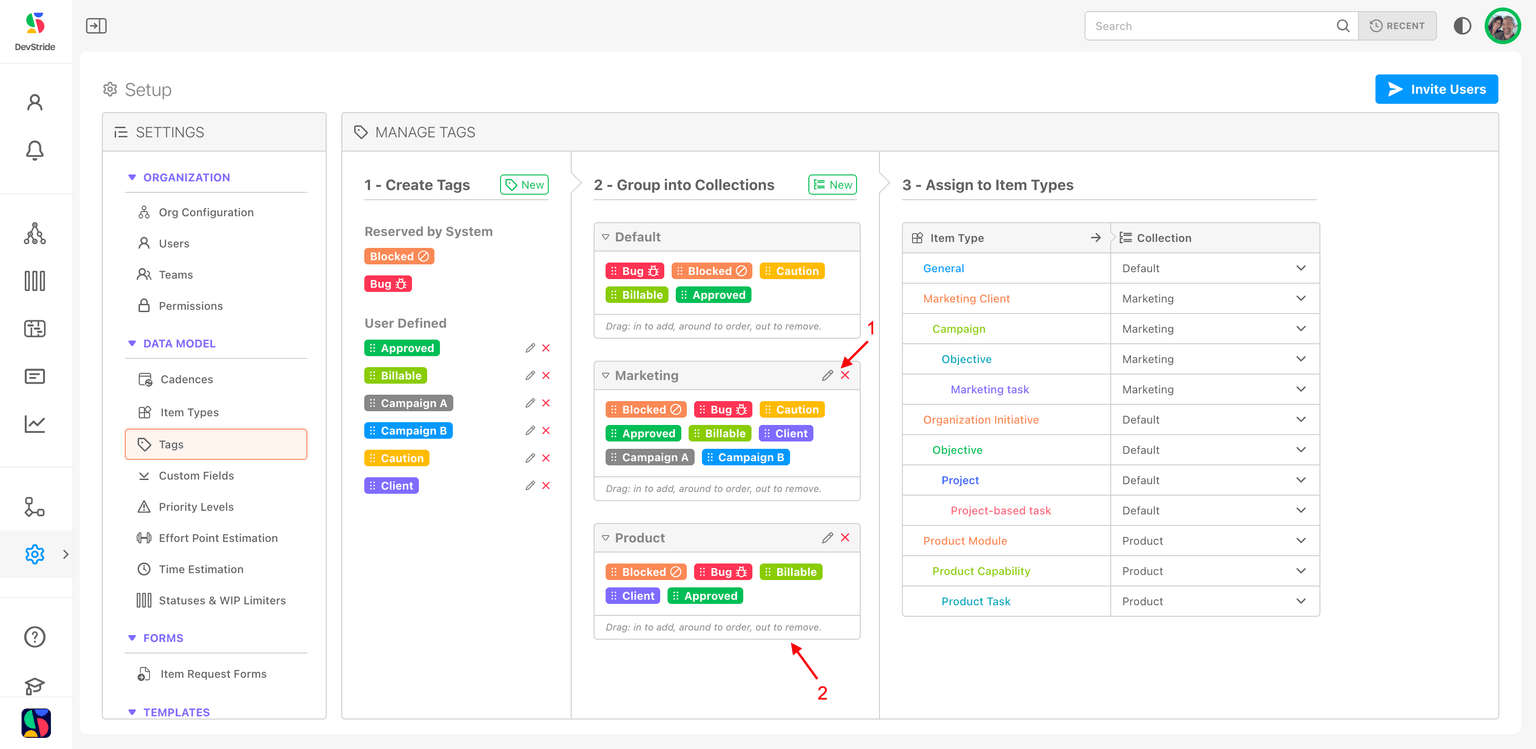
Edit a collection's name with the pencil or remove it with the x; the grab bars reorder tags inside it.
Next: Creating and Managing Forms, or skip ahead to Statuses if you do not need intake forms yet.
Admin Onboarding - Setting up Custom Fields
Step 6a of admin onboarding — add the data each item type must carry (customer, cost centre, RICE score) as custom fields, group them into collections, and decide what shows in the sidebar versus the Forms tab.
Admin Onboarding - Creating and Managing Forms
Step 6c of admin onboarding (optional) — build item request forms so colleagues or the public can submit standardized requests that become items in the workstream you choose.