Admin Onboarding - Populating and Managing Workstreams
With your item types defined, go back to Map Value and build the map: workstreams first, then items inside them. A workstream has no dates; it is where work lives. Two levels of workstream is the rule of thumb; the item hierarchy carries the depth and drives reporting.
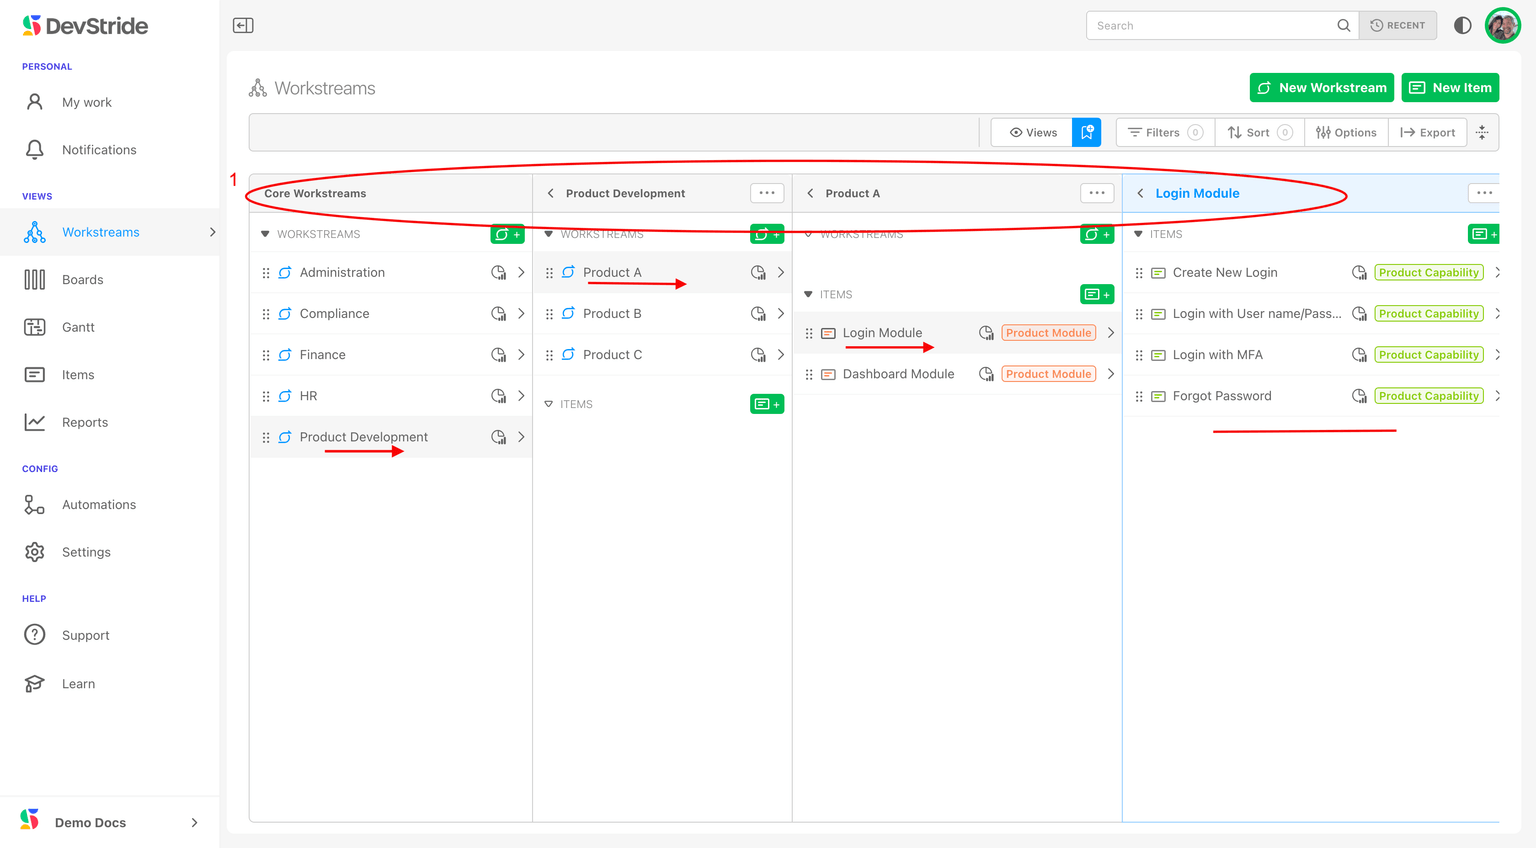
Example. A product engineering group has a core workstream Product Development with nested workstreams Product A, Product B, Product C. Inside each product, items follow the hierarchy Module → Capability → Task.
Step 1: Create workstreams
- Open Map Value (1) and click the Add Workstream icon (2) at the top of the core column. Name it in Create a Workstream and save; it appears in the column (3).
- To nest one, click the arrow beside the core workstream (4) to open its column, then the Add Workstream icon there (5). The location is prefilled (7); change it if you like, then Save New Workstream (8). Press w anywhere on the Map as a shortcut.


Click a workstream's name to rename it in place. Right-click for other actions (permissions, export, import template, archive), and drag the grab bar to reorder.


Step 2: Add items
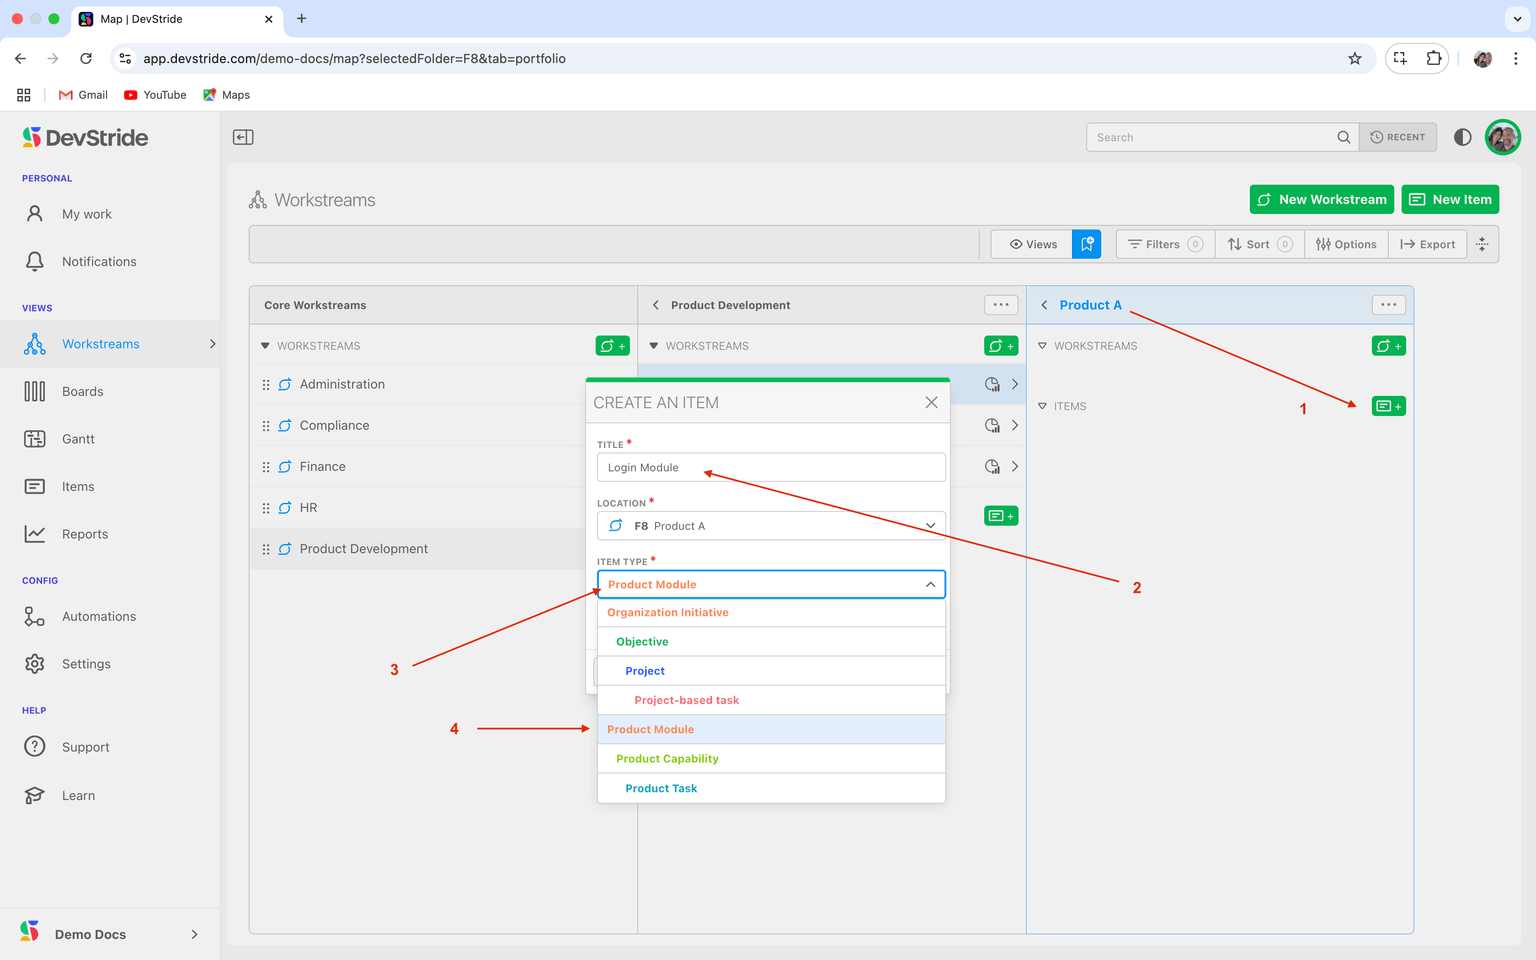
- In the workstream's column (Product A), click the Add Item icon (1), or press i.
- Enter a title (2), for example Login Module. The type name does not have to be in the title.
- Choose the item type (3–4): a top-level type for an item directly under a workstream.
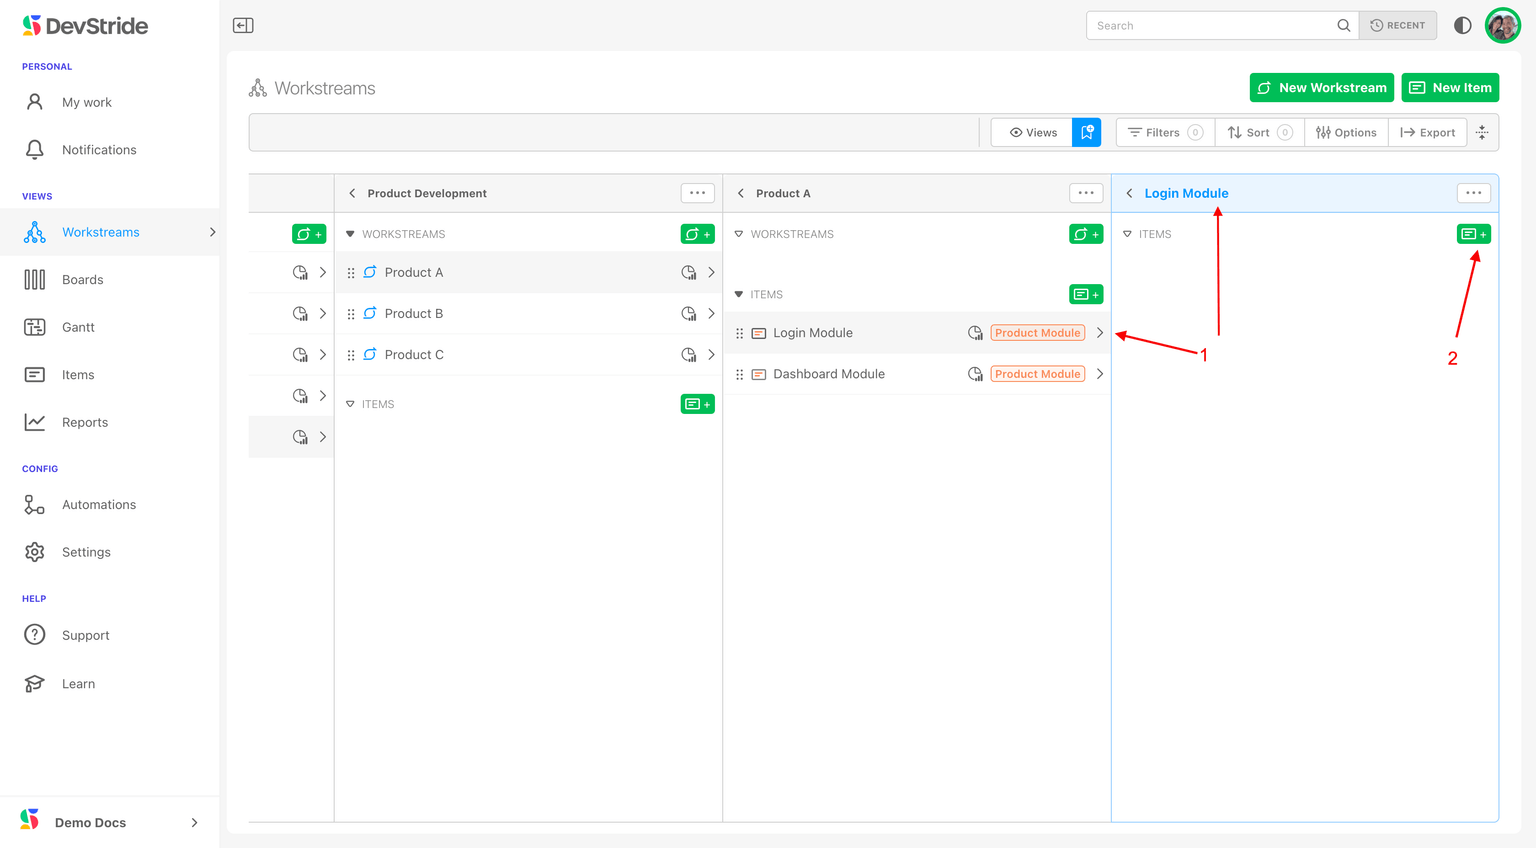
- Click the new item's row (1) to open its column, and Add Item there (2) to nest under it.
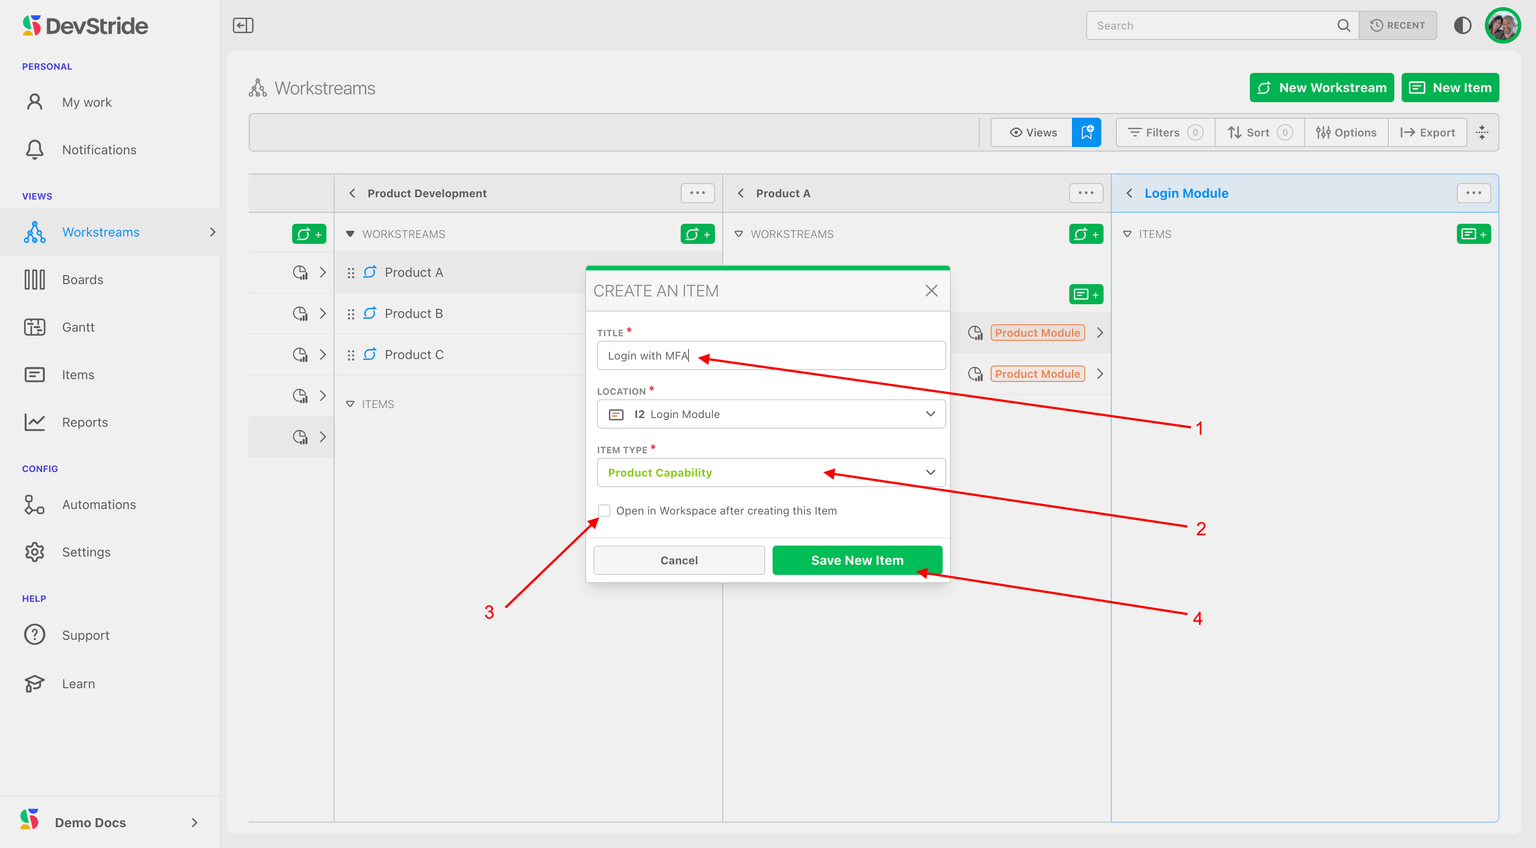
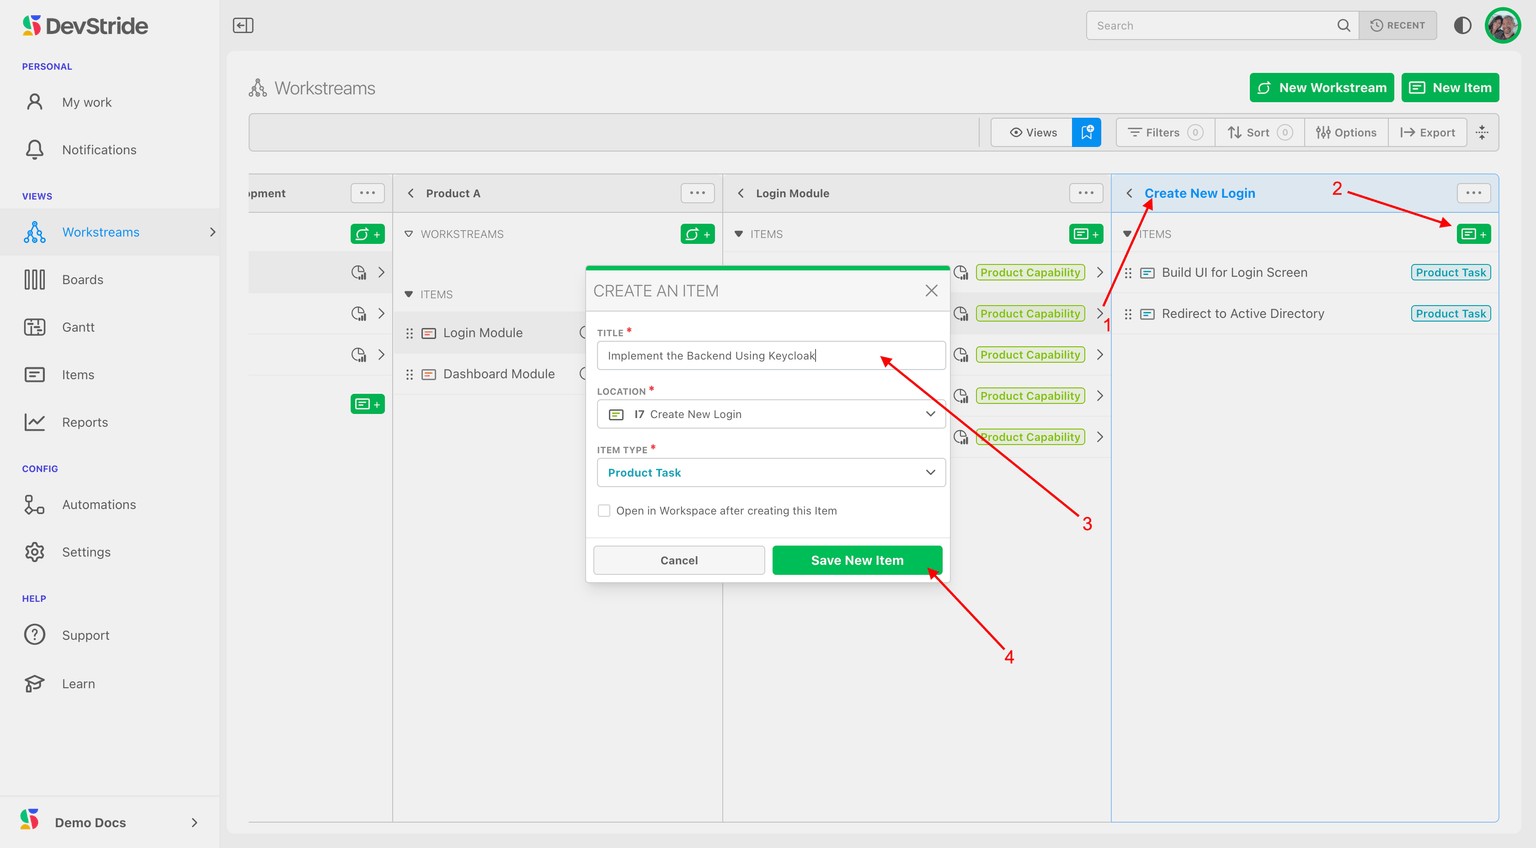
- Name the child (1). The type is prefilled with the next level down (2) because the parent's type only allows that. Tick the option to open the workspace after saving (3) if you want to add a description straight away, then Save New Item (4).
What the map gives you
Every Task rolls up to its Capability, Module, and workstream, so the Product A column shows progress, estimates, time, and defects for the whole product.
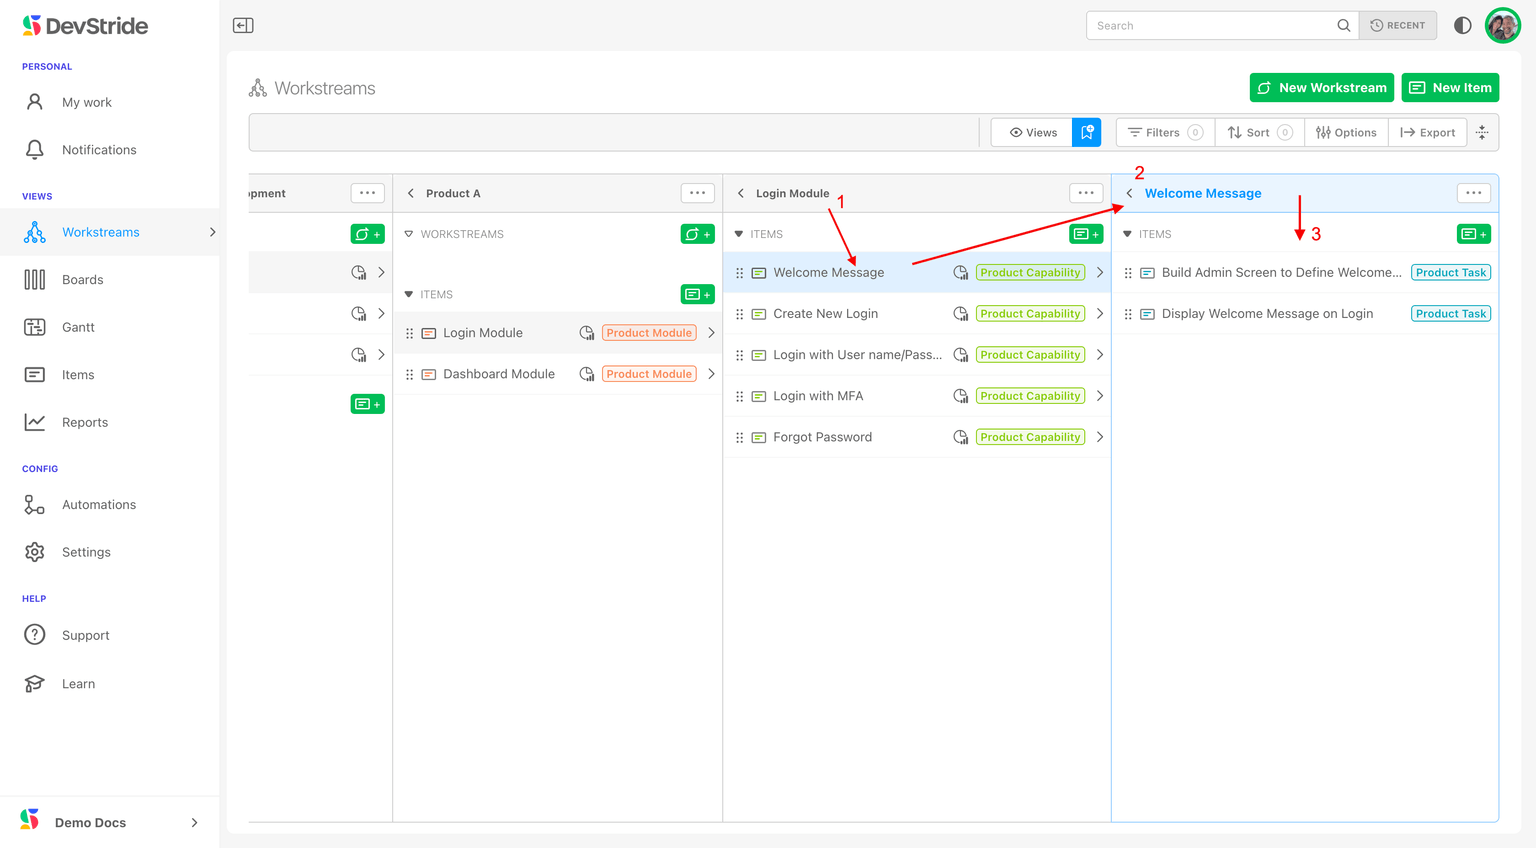
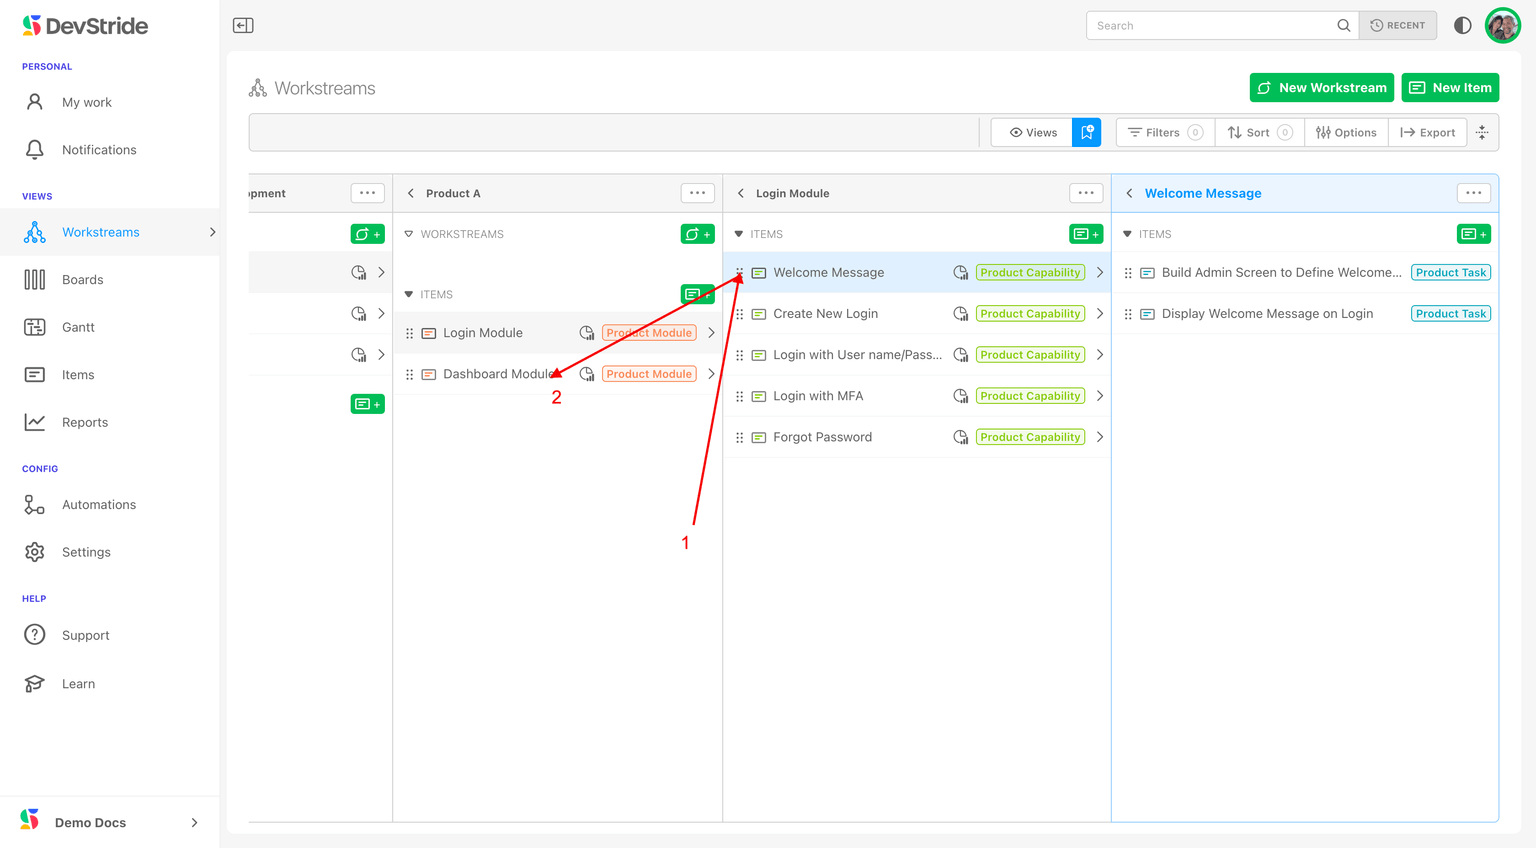
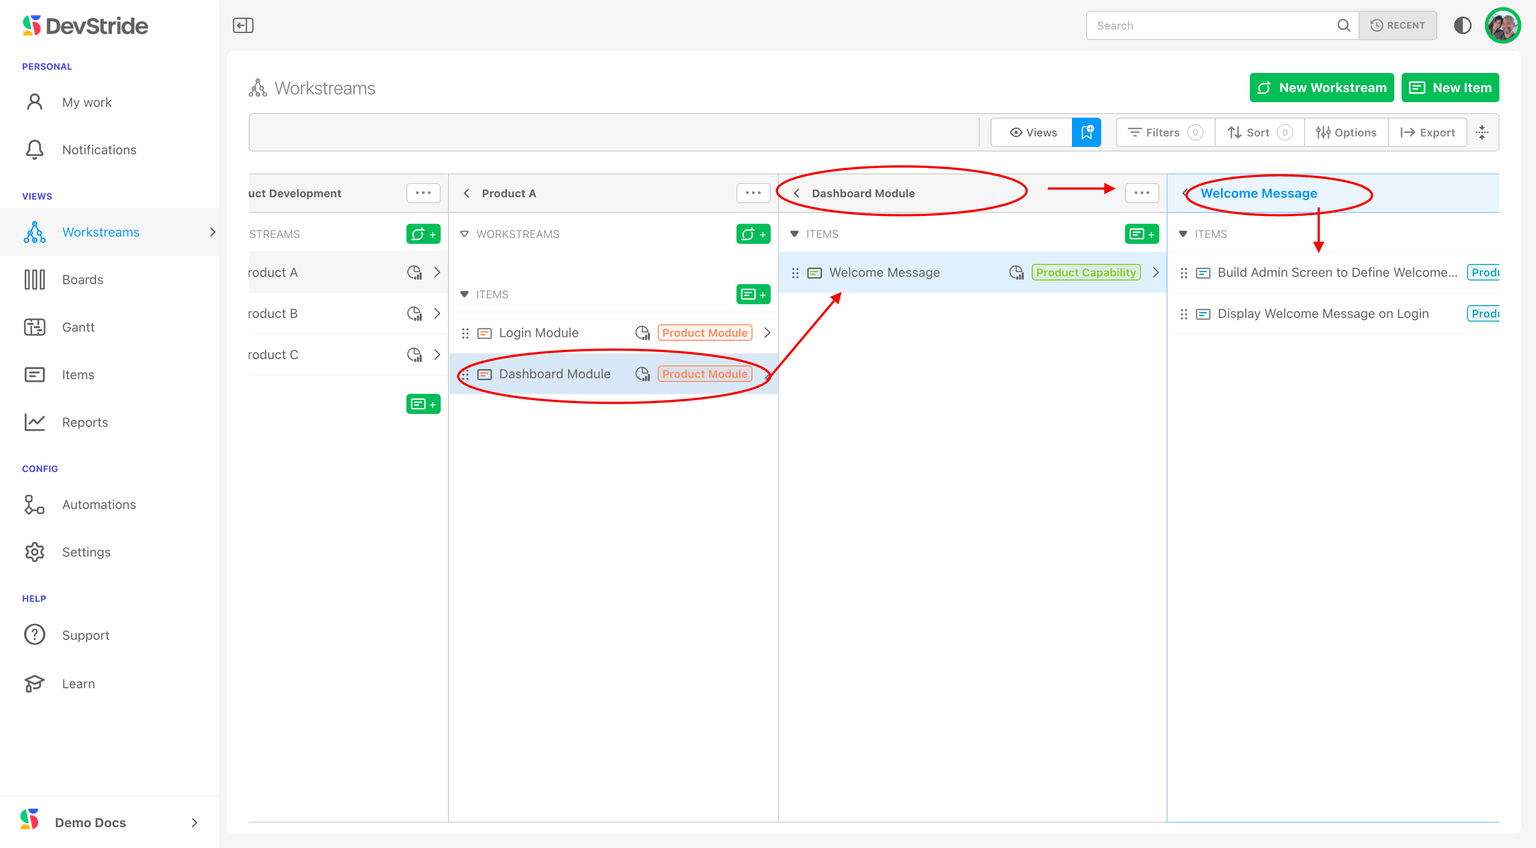
Reorganizing by drag and drop
Plans change. Drag an item's grab bar (1) to a new parent (2) and everything beneath it moves too, with all its data. Here the Welcome Message Capability and its Tasks move from the Login module to Dashboard.
Bulk edits, filters, selection, and the column menus are covered in Using the Map.
Next: back to Setting up Custom Fields, or if you have done that, the Item Workspace Tour.
Admin Onboarding - Create Custom Status Collections
Step 8b of admin onboarding — create statuses, group them into a collection with optional WIP limits, and assign the collection when you create a board.
Import Templates
Orientation for new admins: build an entire branch of workstreams and items from an Excel template — the fastest way to bring an existing plan or a large body of work into DevStride.