Creating Items
Use this page when you need to put work into DevStride by hand: a new workstream, a new item under it, or a child item under an existing one. It assumes your organization has already defined its item types and at least one root workstream.
Workstreams and items: what's the difference
Think of a workstream as a folder and an item as a document inside it. Both live in the same tree, but they hold different things:
| Workstream | Work item | |
|---|---|---|
| Can contain | Workstreams and items | Child items (of a permitted type) |
| Carries a status, board, team, assignee | No | Yes |
| Carries dates, color, description, relationships | Yes | Yes |
| Progress | Rolled up from the items beneath it (or tracked manually) | From its own status and its children |
| Item type | None, it is always a workstream | Required, from your organization's item types |
Root workstreams sit in the Core Workstreams column of the Map and are the only place you choose Public or Private visibility; everything nested underneath inherits access from its parent. See Workstream & Item Permissions.
Where you can add items
- Map Value — the green Item and Workstream buttons at the top right, or press
i(item) orw(workstream) anywhere on the page. New work lands in the workstream you last opened. - Manage Items — the Item button in the toolbar, or press
i. - An item's Child Items tab — adds a child under the item you have open.
- Boards — the add control on a board.
The add buttons appear only for roles with the Create new work items and workstreams permission.
Create an item
- Click Item (or press
i). The Create an Item dialog opens. - Title (required) — type a short name. Pressing
Enterin the title saves. - Location (required) — click Select a Parent Location and choose the workstream or item the new item belongs under. DevStride remembers your last location.
- Item Type (required) — pick the type. Only types that are allowed under the selected parent are offered, and the next type down the hierarchy is pre-selected for you. If the type has required custom fields, they appear here and must be filled in.
- Description (optional) — the same rich-text editor as the item's Description tab. If you paste an image, wait for it to finish uploading before saving.
- Read the Permissions note: Items inherit permissions from the selected location.
- In the Map and on a Gantt, choose where the new row is placed with Insert after the other Item(s). Ticked (the default) adds it to the bottom of its list, so items you create one after another read in the order you made them; unticked adds it to the top. Your choice is remembered, and items you create from other pages follow it too. With an item selected in that column, the dialog instead offers Insert immediately after that item, ticked by default; see Insert right after a selected item.
- Tick View detail after creating to open the new item's workspace as soon as it saves. This is remembered too.
- Click Save New.
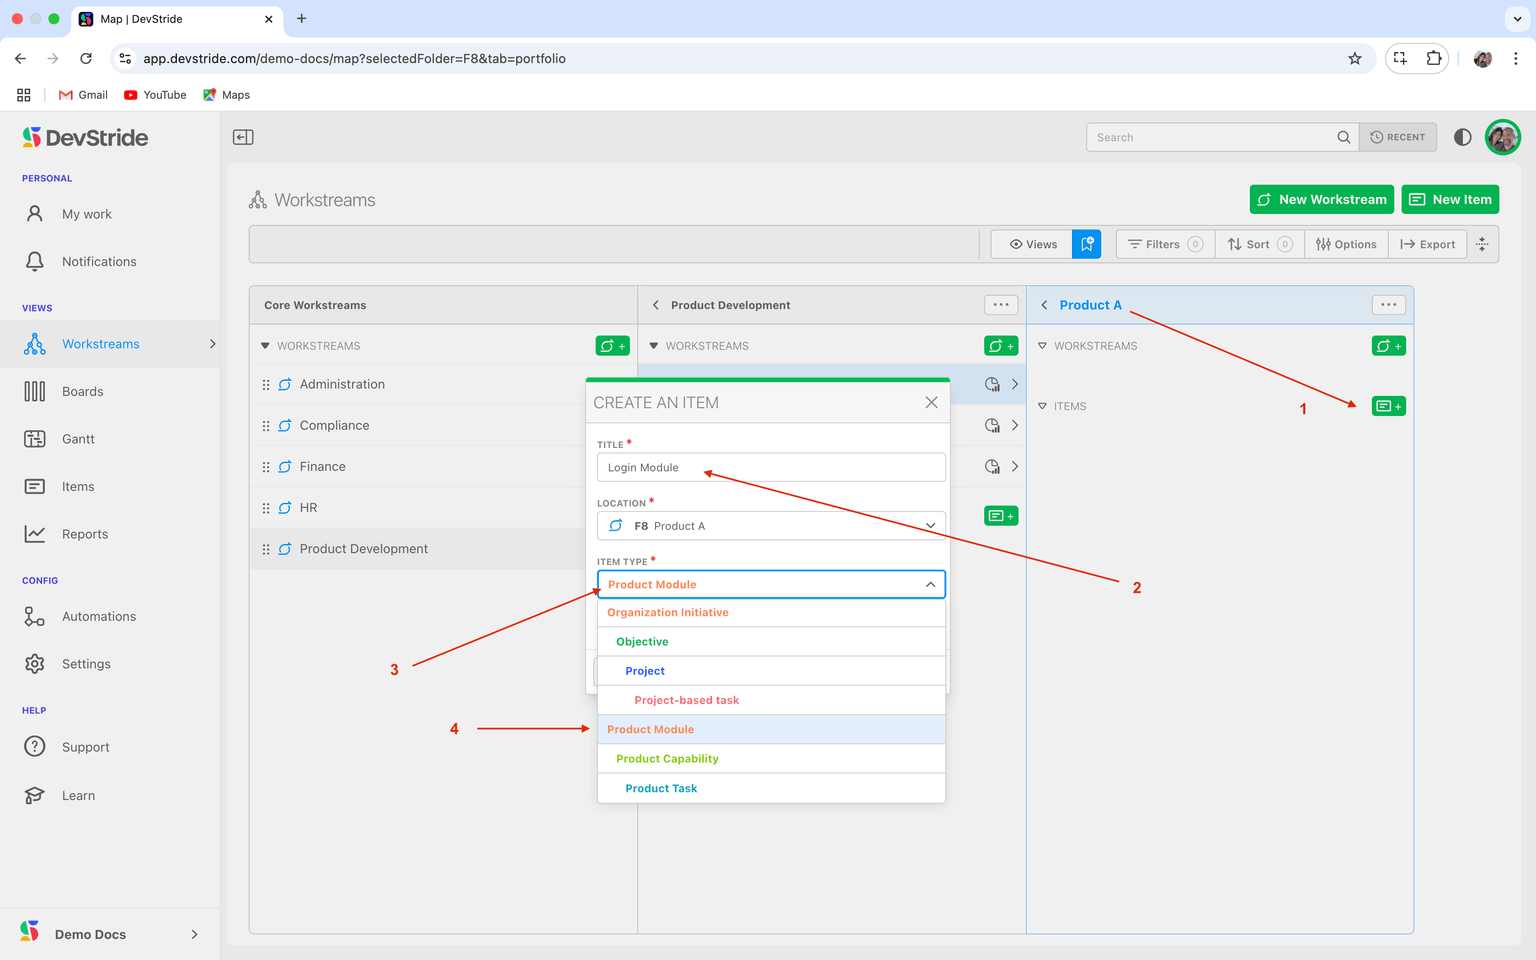
Nesting work by item type
Each item type declares which parent types it may sit under. Your organization might define Module → Capability → Task, or Epic → Story, or Engagement → Deliverable → Task. To add the next level down, open the parent (in the Map, click its row so its column opens) and click Item again. The location is pre-filled with the parent, and the dialog offers only types permitted under it.
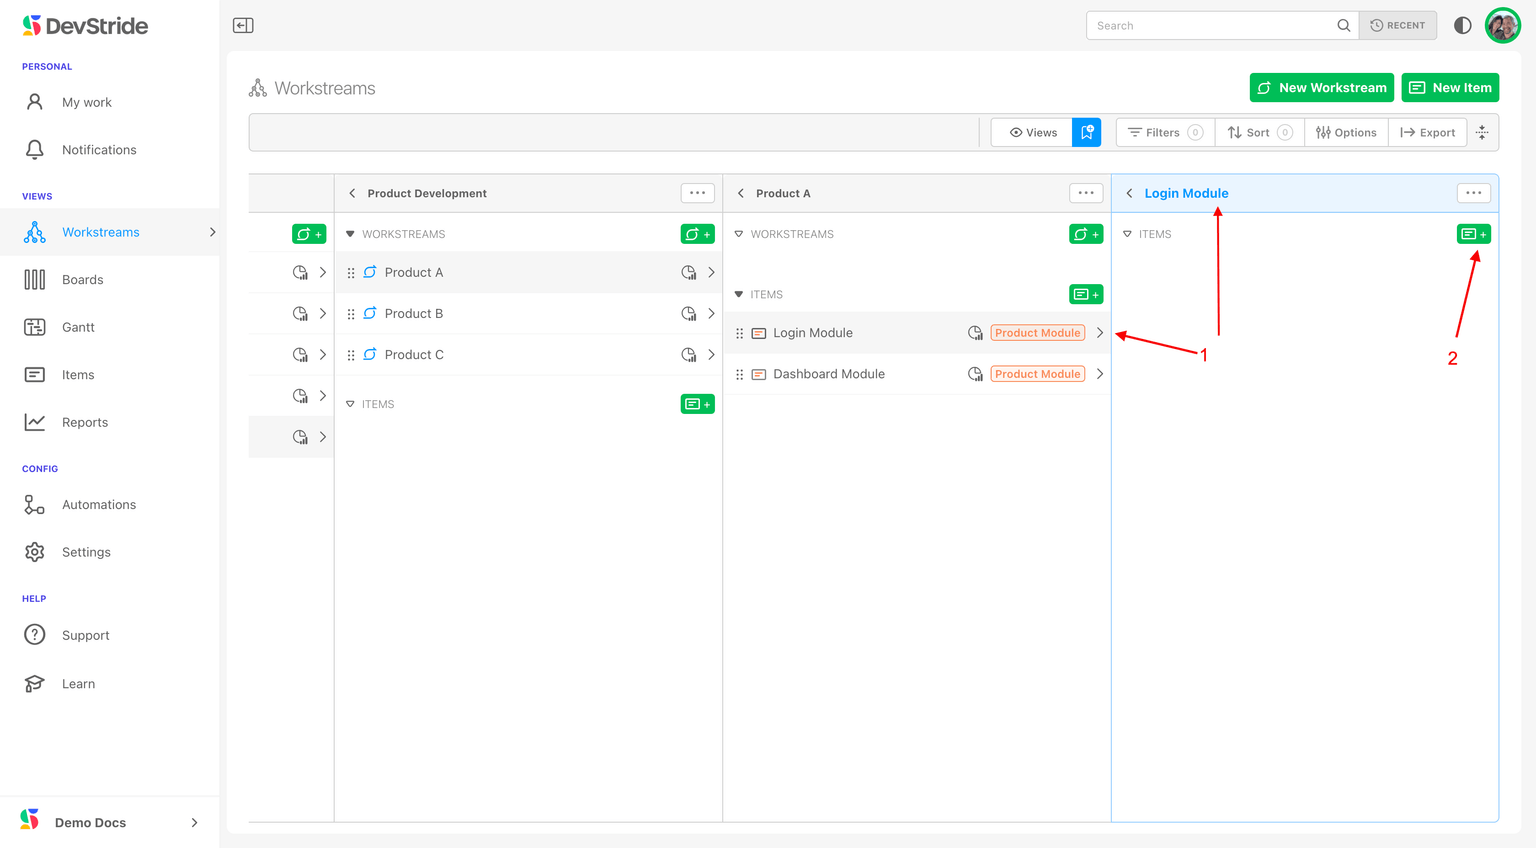
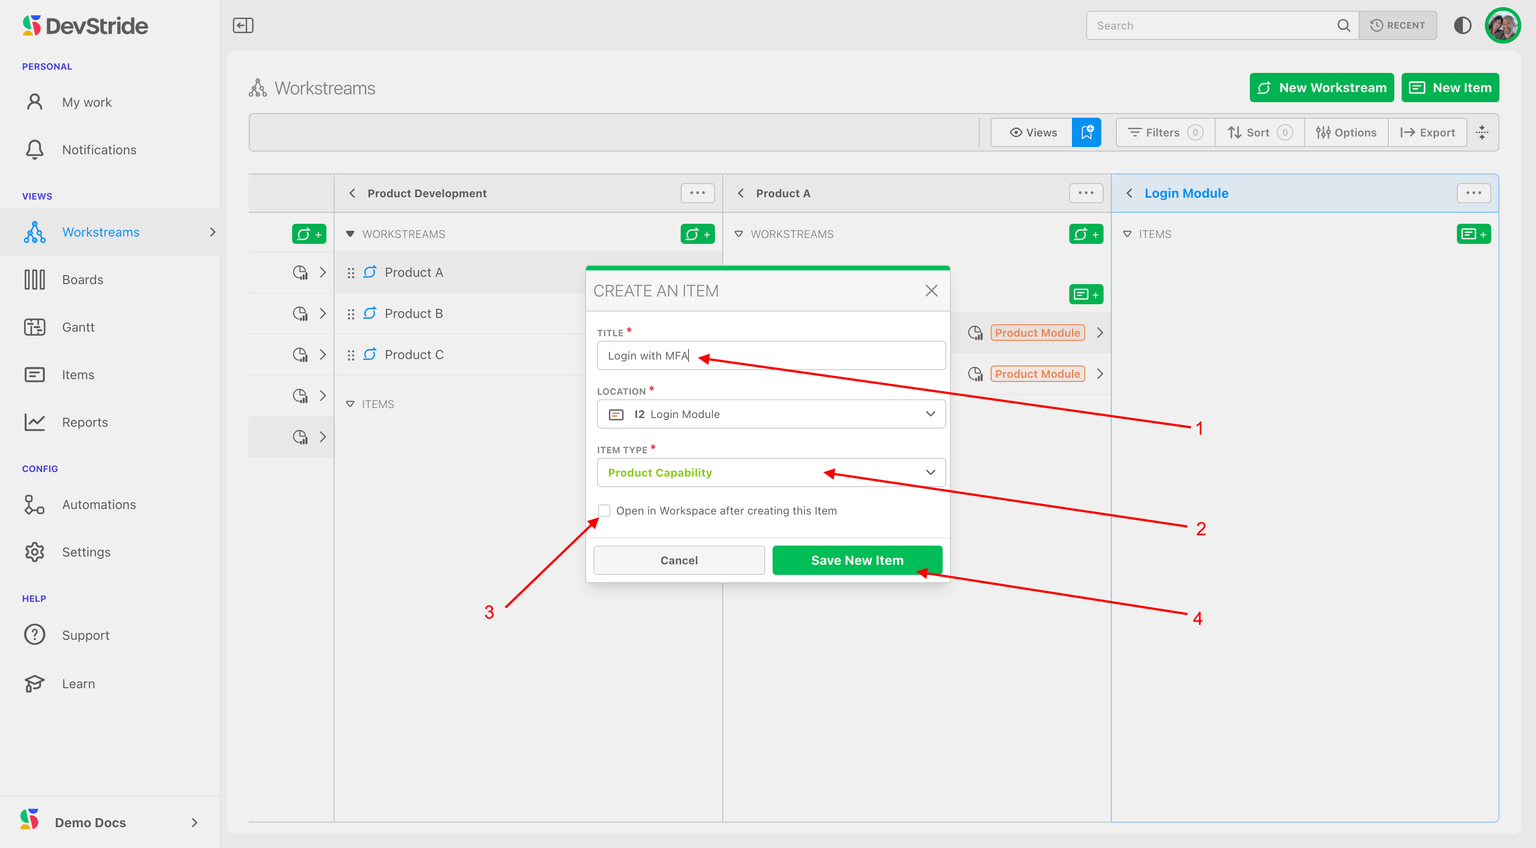
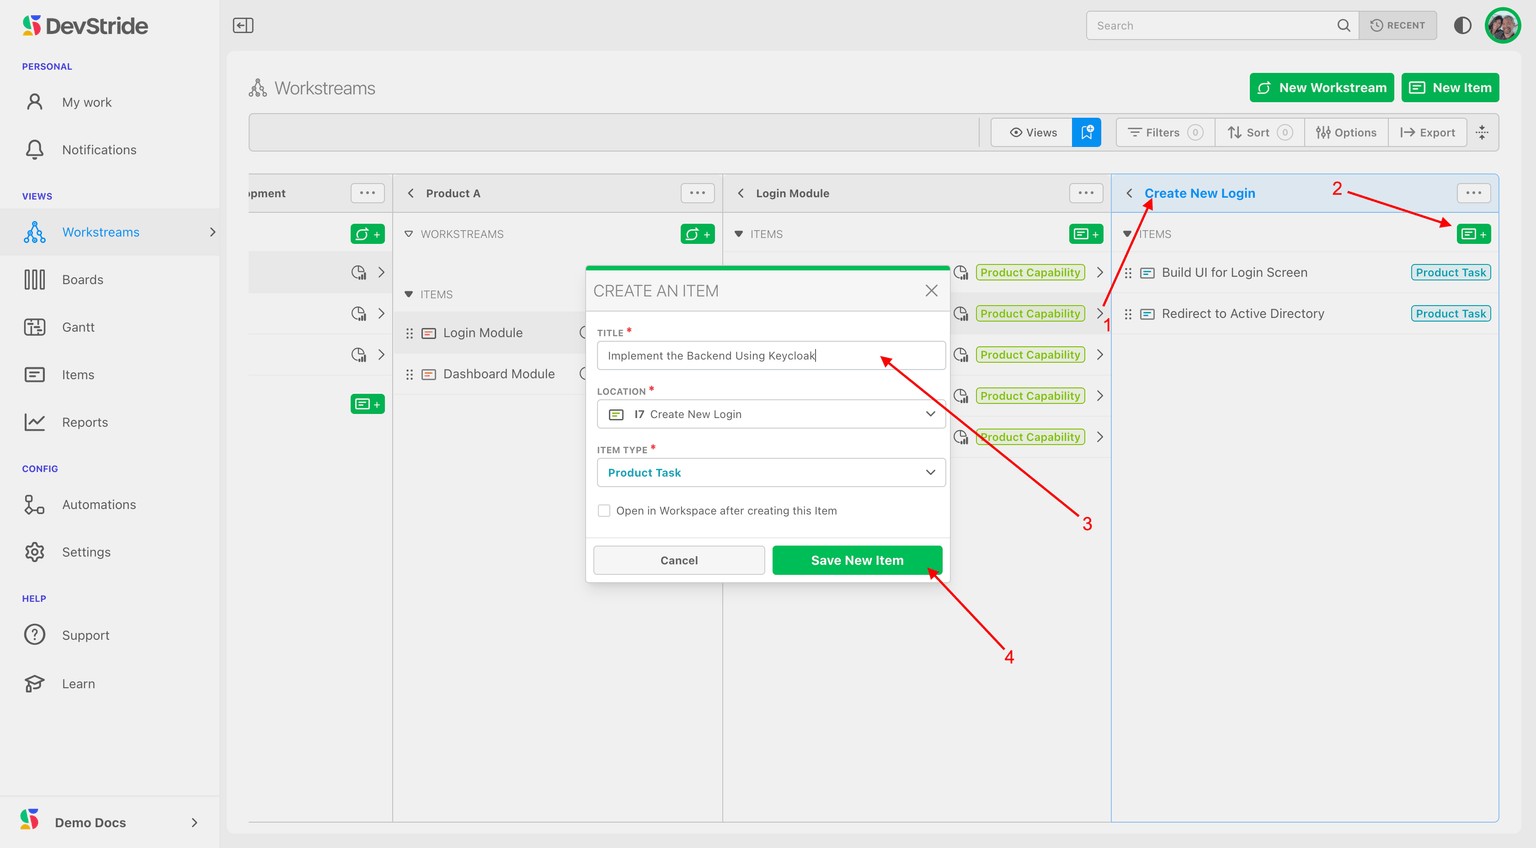
An item type can have more than one permitted parent type (a Story under either an Epic or a Feature, for example). When it does, the dialog offers the type under any of those parents, and rollup columns tell you which kind of parent each child sits under. Administrators manage this in Item Types.
Create a workstream
- Click Workstream (or press
w). The Create a Workstream dialog opens. - Enter a Title.
- For a nested workstream, choose a Location (workstreams can only sit under other workstreams). For a root workstream there is no location; instead choose Visibility: Public — anyone in your organization (everyone can view and edit immediately) or Private — only to you (invite people later).
- Add an optional Description and click Save New.
What the hierarchy gives you
Everything under a workstream rolls up into it: estimates, time, completion, counts by type. Open the workstream in the Map to see the whole branch, or open it in the drawer to see its aggregated progress. A workstream's progress can also be set by hand (Track Progress Manually in the workstream drawer, with a Manual Percentage Completed value) when the work beneath it is not tracked in DevStride.
Reorganize by drag and drop
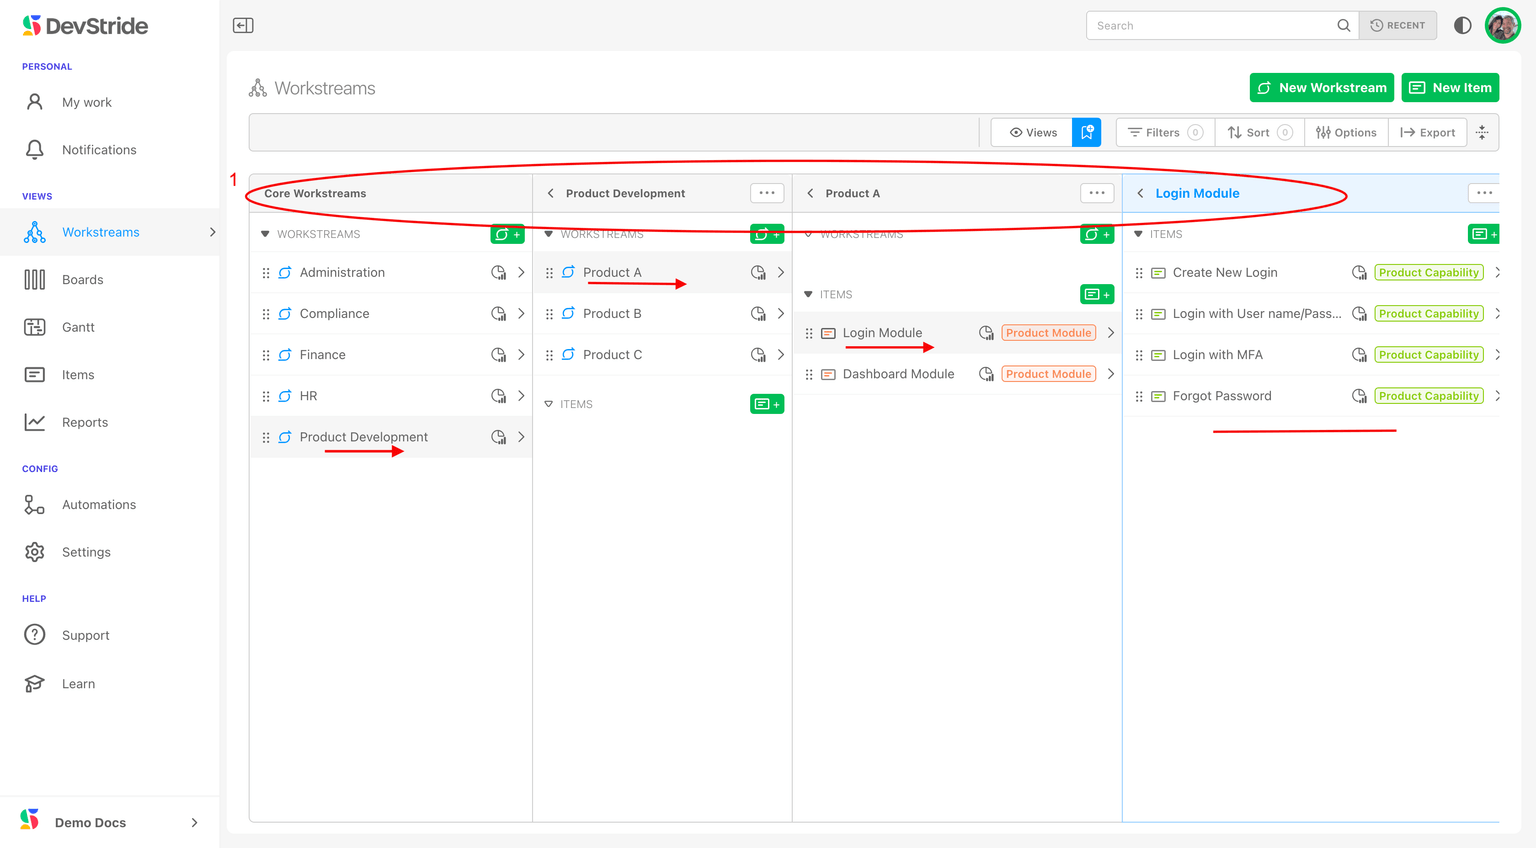
Plans change. In the Map, drag any workstream or item (grab the dotted handle at the left of its row) and drop it on a new parent. Everything beneath it moves with it, including children, data, history and reporting.
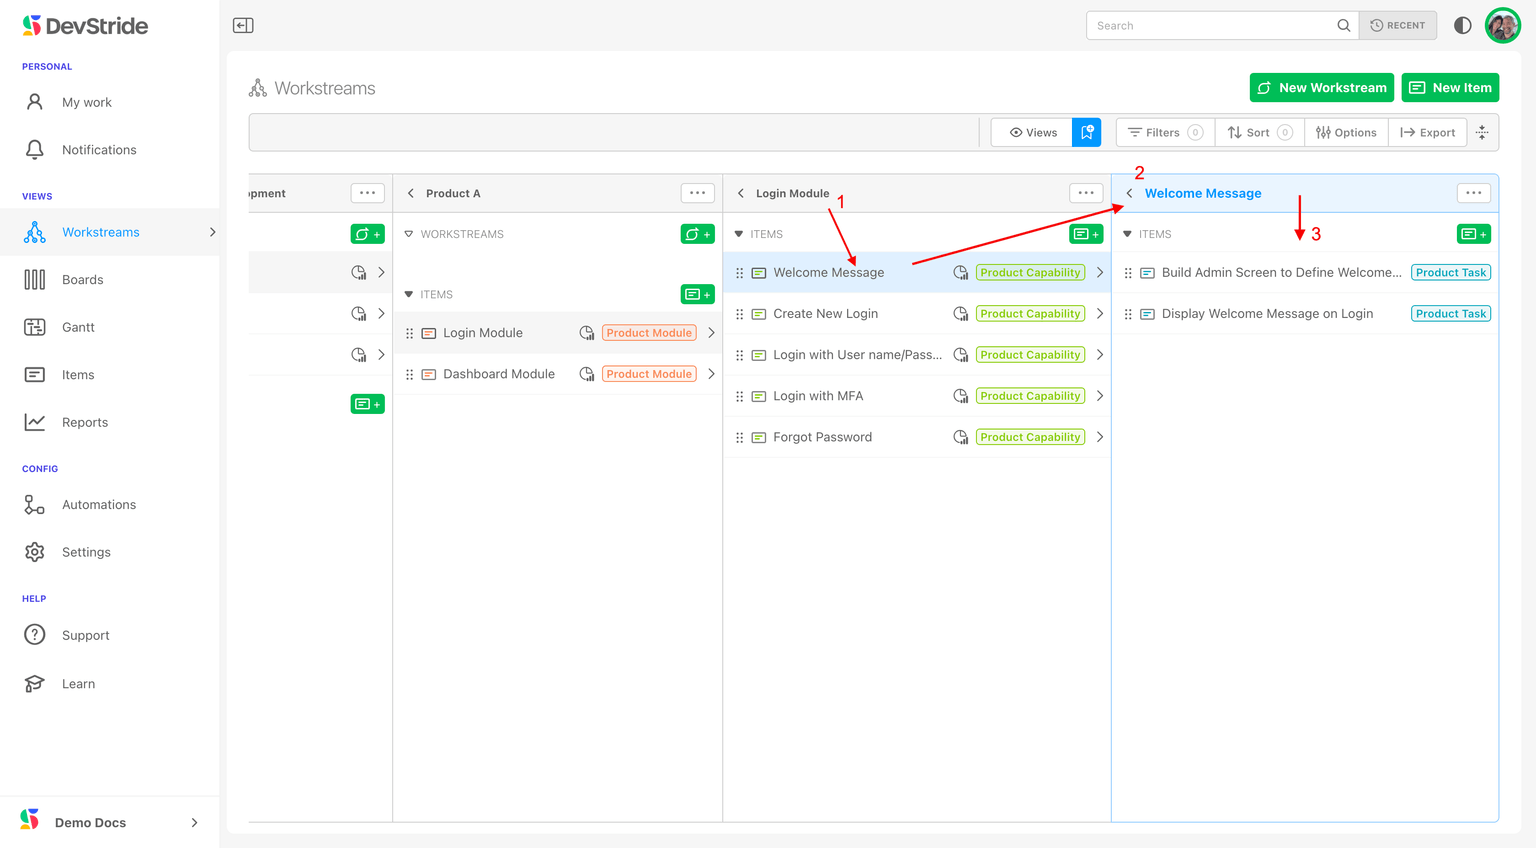
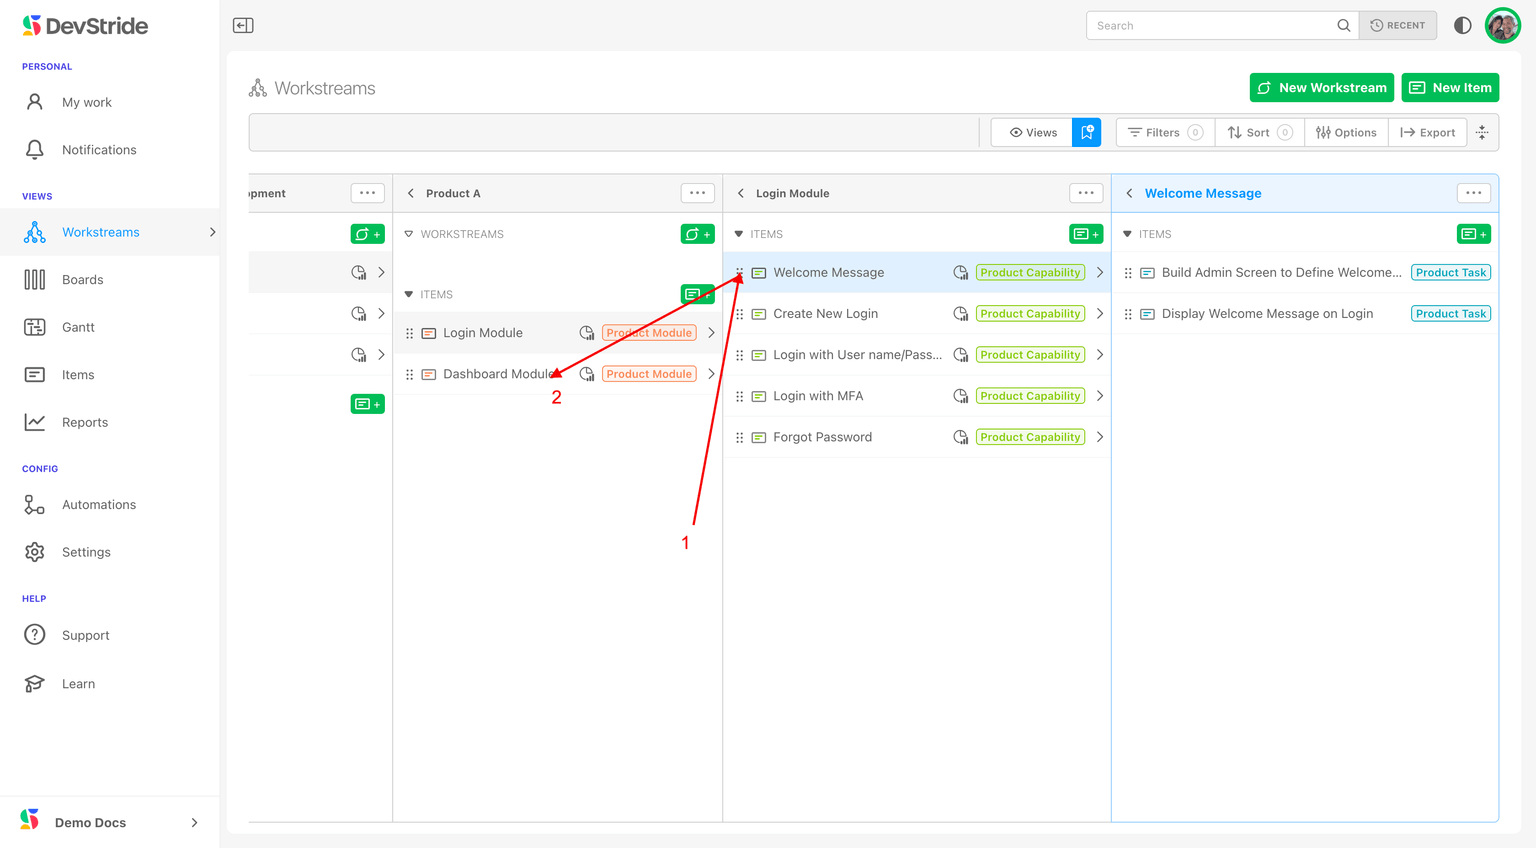
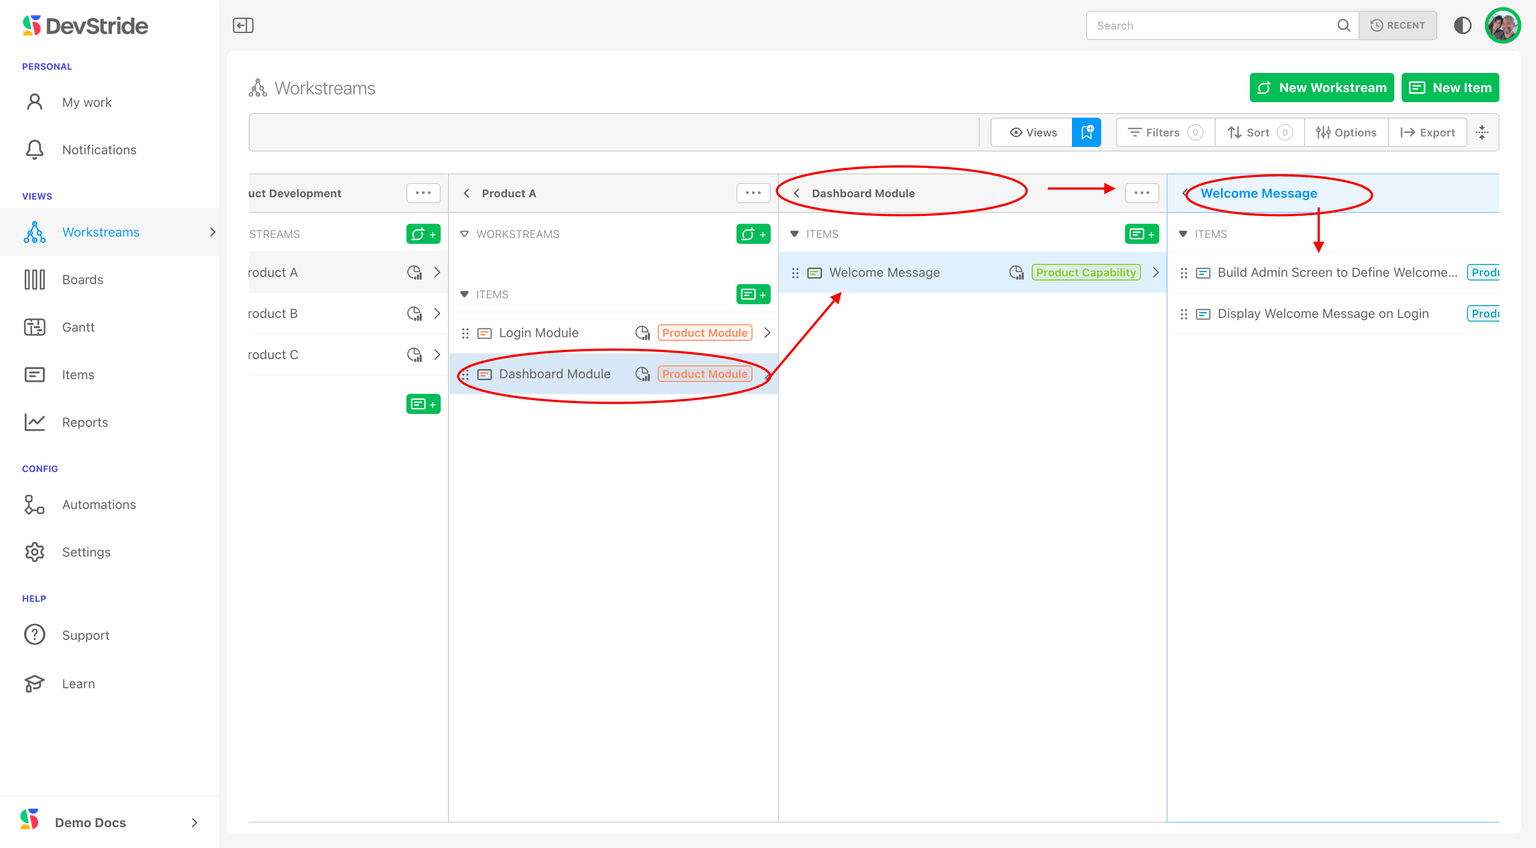
You can also move an item from its drawer: click Move in the breadcrumb under the title, pick the destination, and click Select Parent.
Assigning a person or persona
Assignment is optional when you create an item. Open the Assignee control later and choose from the People or Personas tab. The same chooser is used for subtasks, table and Gantt columns, and bulk edits. It lists the people who work in your organization now, plus pending invitations; archived members and people an import created who never signed in are left out until you turn on Archived at the bottom of the chooser (or press A). An item already assigned to someone who has left still shows their name. The other people choosers (watchers, user fields, mentions and filters) leave the same people out.
Choose a persona such as Engineer when you know what kind of work is needed but not who will do it. A persona-only item counts as assigned while showing it is waiting for a person.
The person and persona stay compatible: assigning Jane keeps a persona she holds (or picks her first active one); choosing a persona Jane does not hold clears her. Clear removes both.
Administrators define personas in organization settings. Personas do not grant access to items.
Next: The Item Workspace Tour
Keyboard Shortcuts
Every keyboard shortcut in DevStride, verified against the app — global keys, dialogs, tables, boards, the Map, Gantt charts, the dependency graph, the item drawer, the editor, dates, and time entries.
The Items Table
Work in the Manage Items data grid: keyboard navigation, inline editing, hierarchy, columns, bulk edits and CSV export.