Admin Onboarding - Create Custom Status Collections
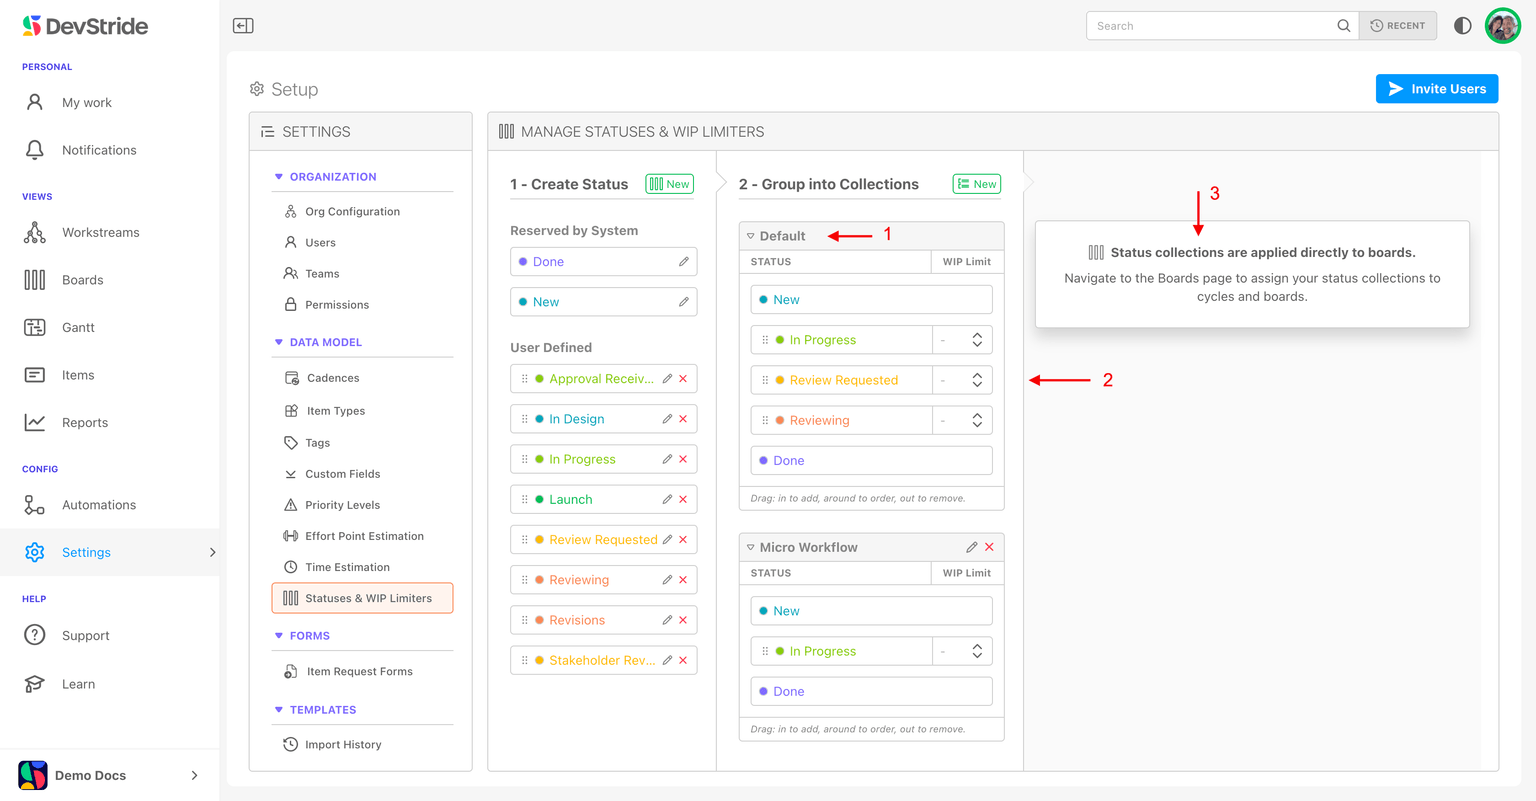
Open Configure Settings → Data Model → Item Statuses (its heading reads Manage Item Statuses). Like the other data-model pages it has three panes; the third explains that collections are assigned on boards, not here.
Step 1: Create statuses
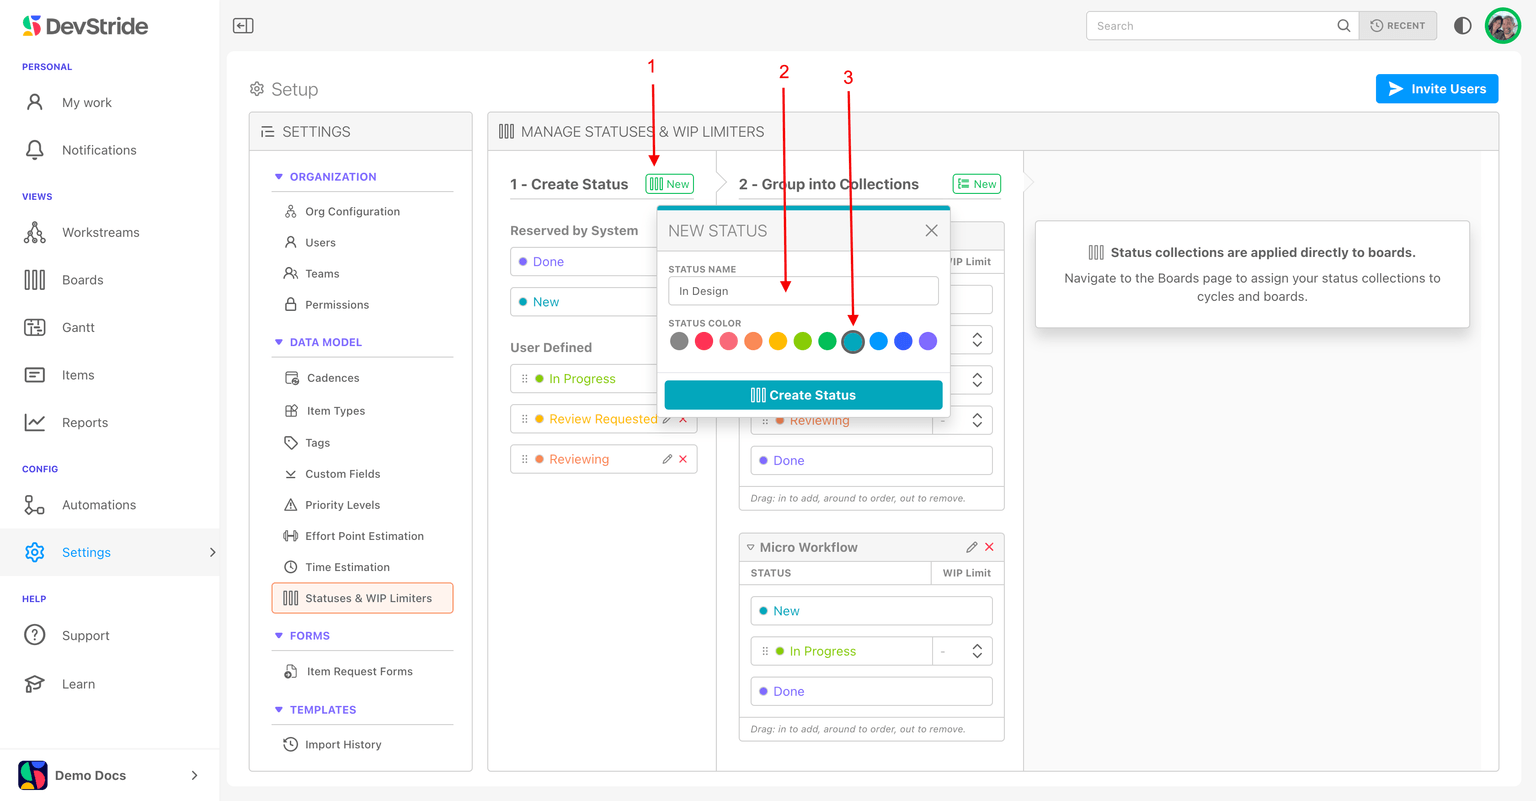
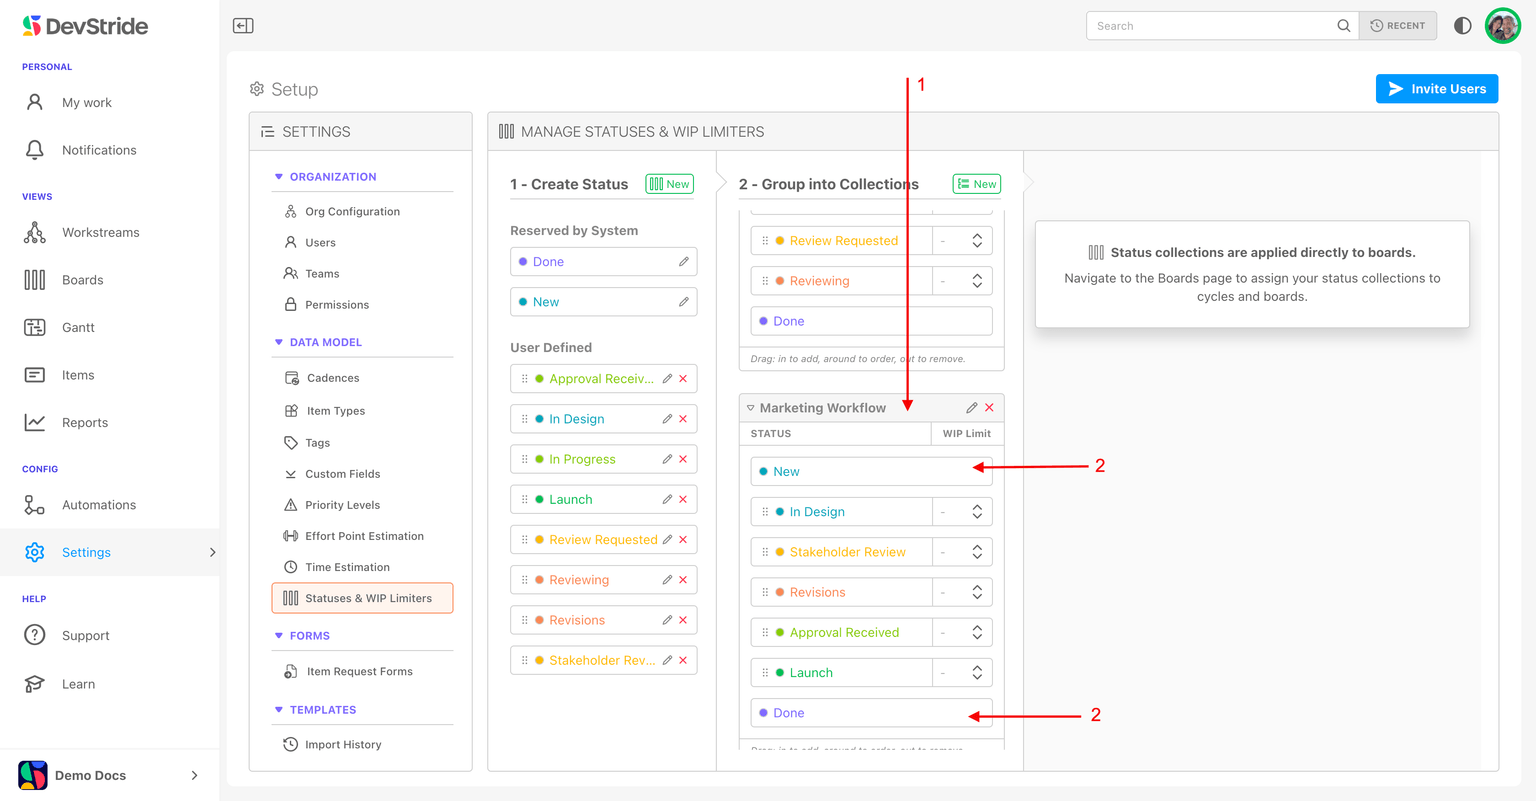
The left pane, 1 - Create Status, lists Reserved by System (New, Done) and your user-defined statuses. Click New, enter a Status Name and Status Color, and save. Repeat for every stage you need.
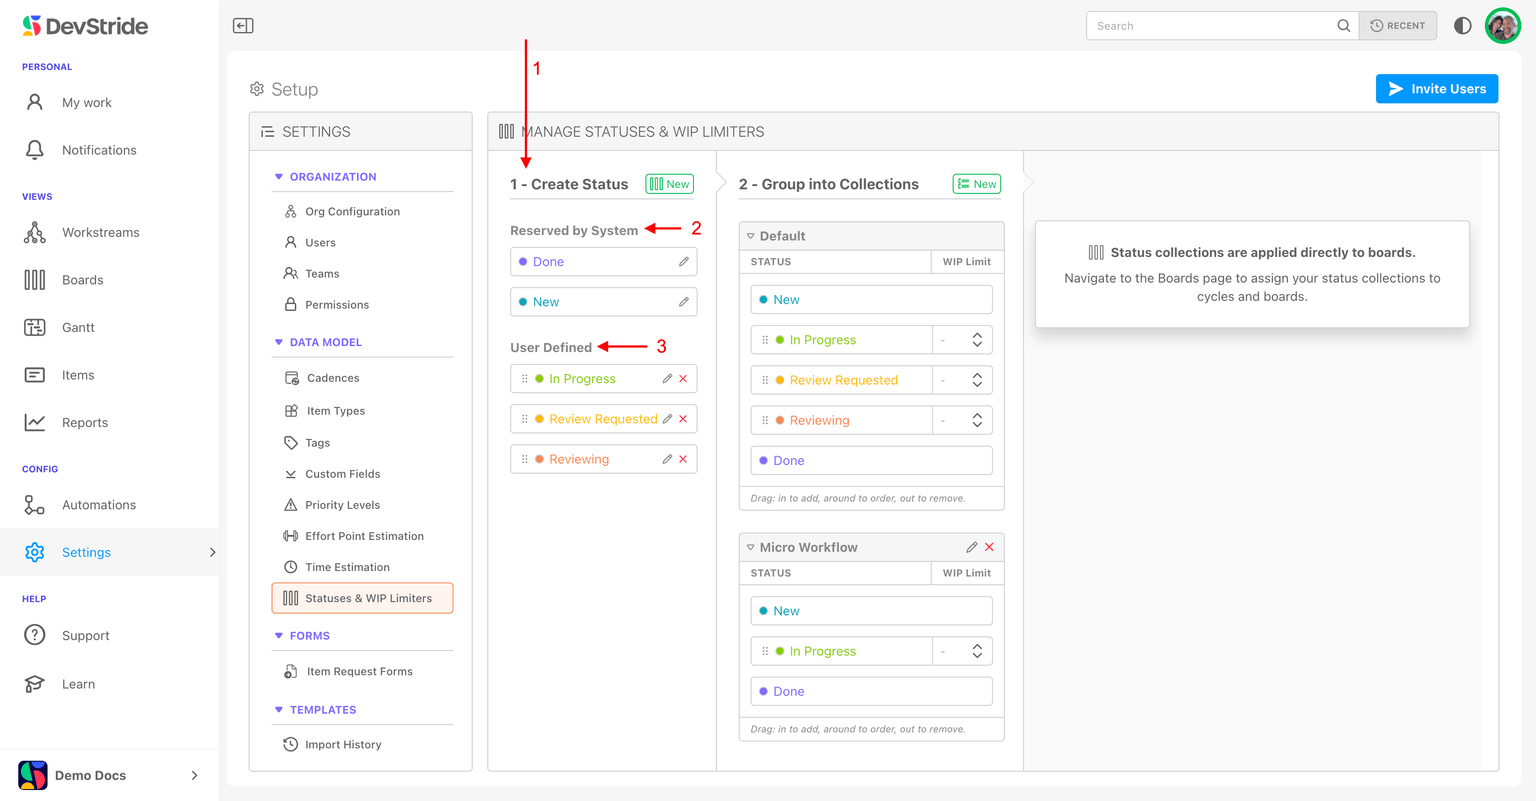
For a marketing workflow, you might add In Design, Stakeholder Review, Revisions, Approval Received, and Launch.
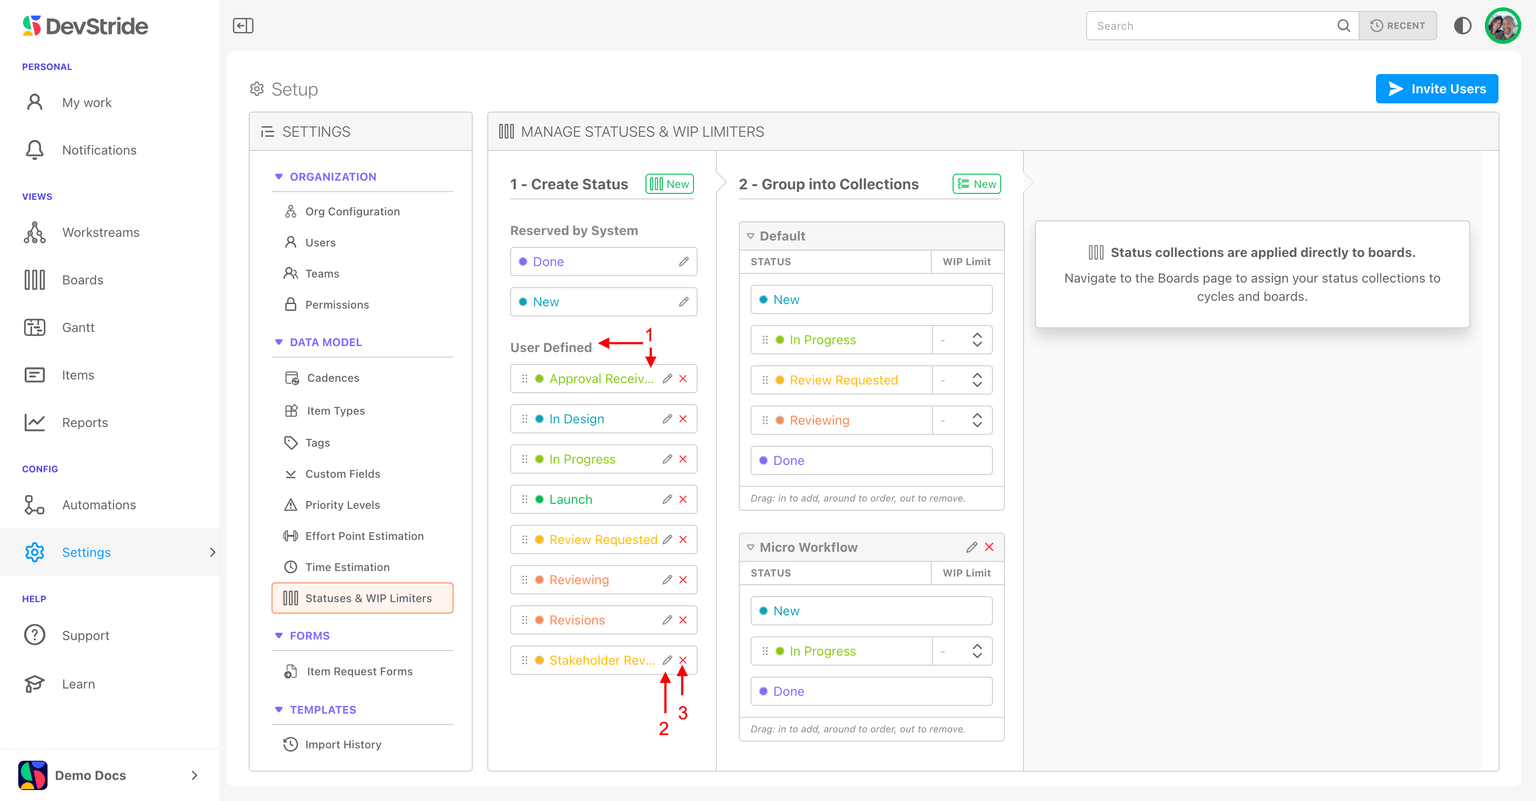
Rename or recolour a status with the pencil; changes apply everywhere it is used. Remove a user-defined status with the x. Deleting a status moves any items still in it to the first valid status of their collection; a status holding more than 1,000 items must be drained first.
Step 2: Group into a collection
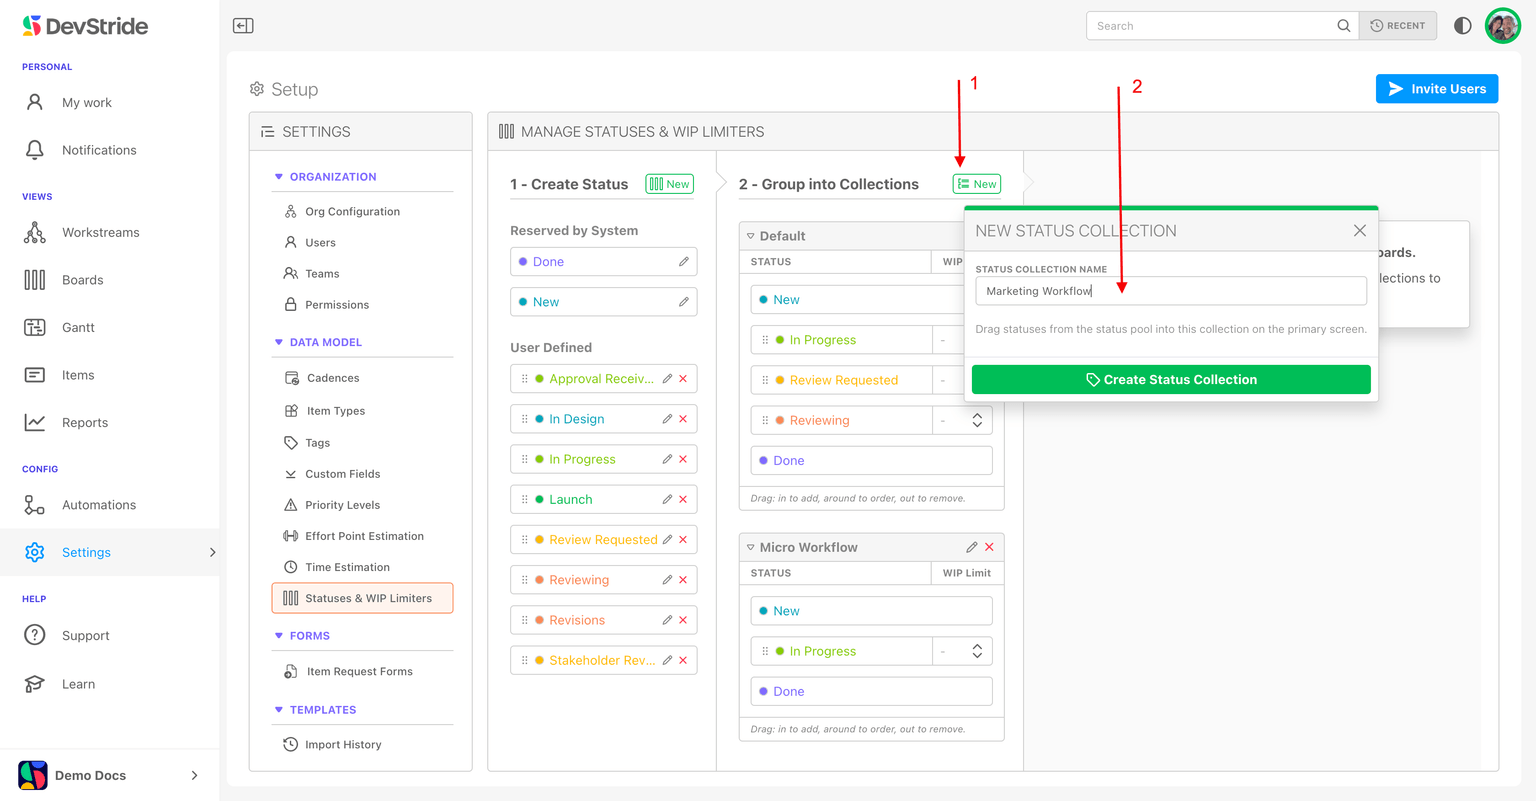
- Click New in 2 - Group into Collections (New Status Collection), name it (Marketing Workflow), and save. New and Done are placed in it automatically, pinned first and last.
- Drag statuses from the pool into the collection in workflow order. Drag to reorder; drag out to remove (its items move to the default status).
- Optionally set a WIP Limit on a status. The board shows a WIP Limit (n) indicator when a column exceeds it. See Boards and WIP limiters.
The Default collection cannot be renamed or deleted; statuses you add to it become available on every board using it.
Step 3: Assign the collection to a board
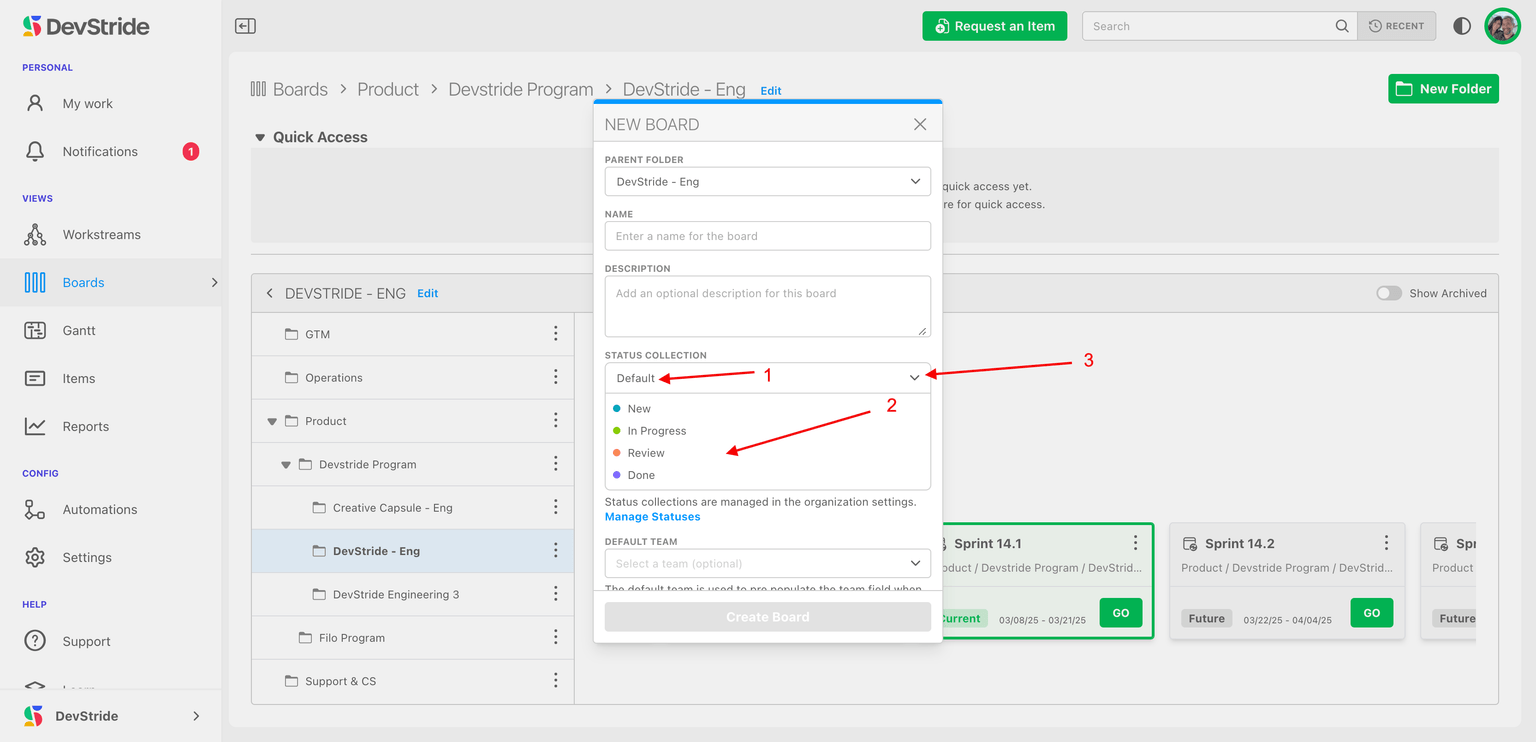
Collections meet boards in Plan Delivery. When you create a board, the New Board dialog shows the status collection (Default is pre-selected) and its statuses beneath; open the dropdown to pick another. Existing boards can switch collections from their settings.
Next: Populating and Managing Workstreams if you have not created items yet, otherwise Boards.
Admin Onboarding - Setting Up Workflow Statuses
Step 8a of admin onboarding — statuses are the columns of your boards; learn why New and Done are fixed, how collections let different teams have different workflows, and how to pick the stages in between.
Admin Onboarding - Populating and Managing Workstreams
Step 5c of admin onboarding — create core and nested workstreams in Map Value, add items of your new types beneath them, and reorganize by drag and drop.