My Work
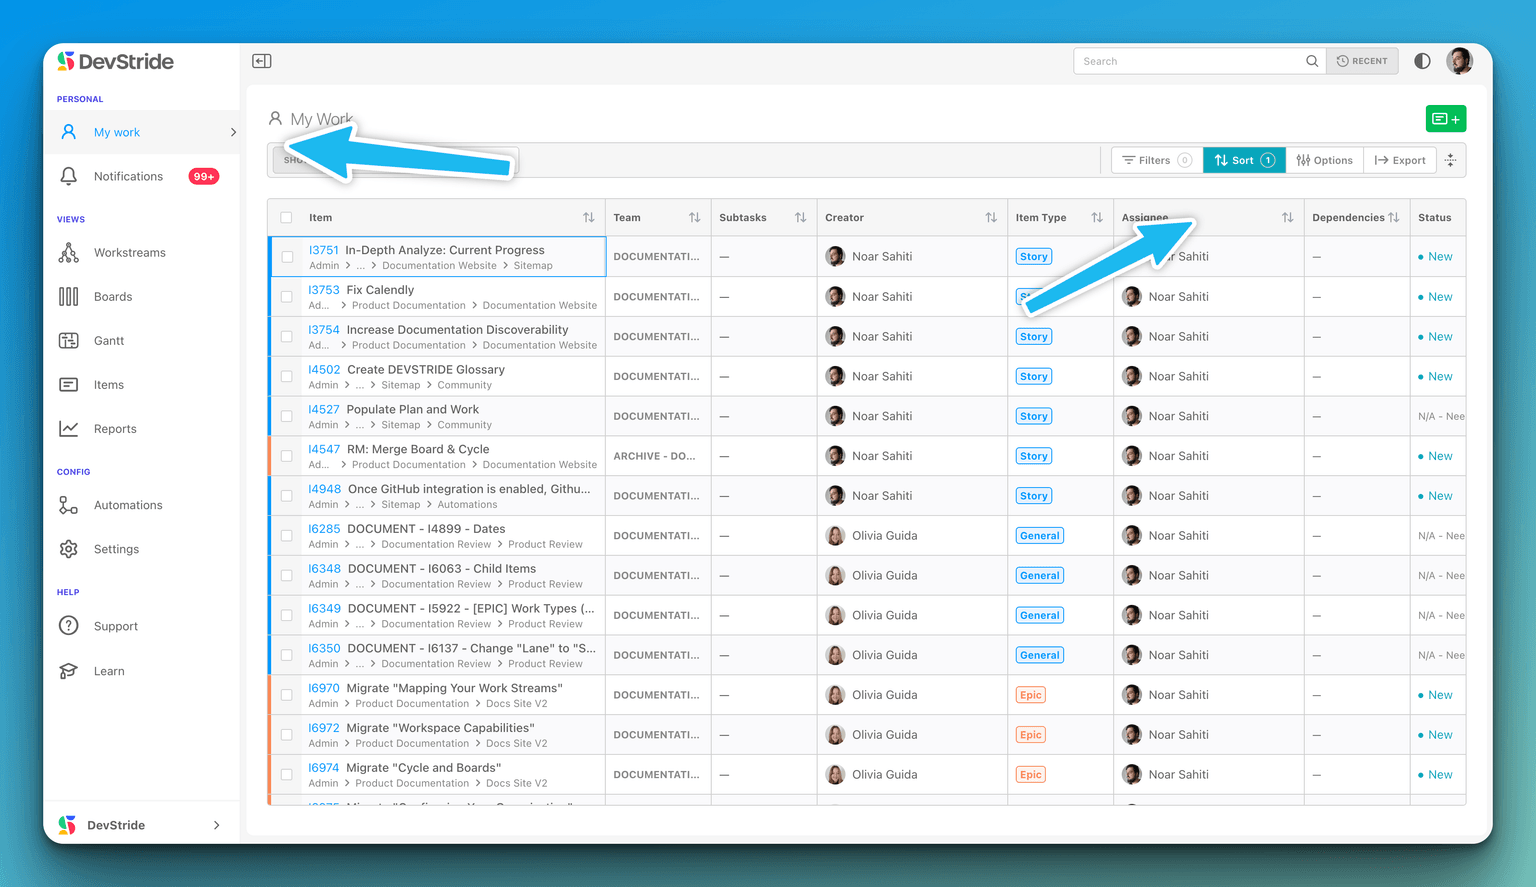
My Work gathers the items that are yours, across every workstream, board and cycle, into one table. Open it when you want to know what to do next without hunting through the portfolio. Every member has it (under Personal in the left navigation) and there is nothing to set up.
What it lists
My Work always lists the items assigned to you; the Assigned to me pill in the filter bar shows it, and the rest of the toolbar narrows within it. It opens on your open items: the Open only filter is on by default, and switching it off brings in the items you have finished. The table is sorted newest first by Date Added until you choose another sort.
To follow items you watch rather than own, use a Watchers filter on Manage Items and save it as a view. You become a watcher with the Watch toggle in the item header.
Working from the table
My Work is the Manage Items page limited to your items, so you can act without leaving it:
- Open an item — click its row to open the item drawer.
- Select several — click, Shift-click for a range, and use the Edit menu (or right-click) to change status, cycle or board, assignee, team, priority, tags, estimates or custom fields on everything selected, add items to a Gantt, or archive and delete.
- Edit a cell — click a cell such as Status, Assigned To or Due Date and change it in place.
Adding items
The Add Item button at the top right is a split control:
- Click it to open the Create an Item dialog, pre-filled with you as the assignee (Assigned to Me) and your first team. Give the item a title, a location (its parent) and a type, plus any fields your organization requires. An optional Description lets you write the details up front, and View detail after creating opens the new item as soon as it is saved.
- Open the dropdown for Create Items with AI (paste text or upload a PDF, Word file or image and DevStride extracts several items at once) or to add from a template.
The button appears when there is at least one workstream to add into and you have permission to create items.
Shaping the view
Four toolbar controls tailor the table. Each is documented in full on its own page:
- Filters — narrow by item type, team, priority, tag, custom field, cycle, board, status, creator and more. The Status filter offers every status in your organization until you pick a Board, which narrows it to that board's statuses.
- Sort — order by Date Added, Start Date, Due Date, priority and other fields.
- Options — choose the Table columns, and toggle Hide Subtasks, Line Wrap and Show Hierarchy.
- Group by — split your items into groups by status, team, priority, item type, parent and more, or by the Project (or other item type) each one rolls up to, exactly as on Manage Items: see Group the list.
Your filters, sort, grouping, columns and toggles are remembered per organization, separately from Manage Items, so My Work looks the way you left it next time.
Viewing work as a hierarchy
Show Hierarchy displays your items as a nested parent–child tree with expand and collapse controls, the same ones described in Item hierarchy. Two further choices appear once it is on:
- Show Duplicates — when an item matches both as a top-level row and as a child of another matched item, show it As Children Only (default), As Primary Rows Only or As Both.
- Show Matching Children Only — limit the tree to children that match your filters, rather than every child under a matched parent.
Grouping wins over the hierarchy: while a Group by field is set the list is flat, and Show Hierarchy is unavailable with the reason Set Group by to None to show the hierarchy. Set Group by back to None and your hierarchy returns.
Saving views
When you land on a setup you will want again, save it as a named view and switch back to it in one click. My Work keeps its own views, apart from Manage Items', and a view saved here always stays limited to your items. A view saved before this page changed opens with the open or finished filter its old Show choice stood for. See Creating & sharing views.
Exporting your list
Export in the toolbar sends the current view to a CSV file. It includes every item matching your current filters and sort, not just selected rows. In Export Items to CSV you name the export and choose the columns; the columns your view shows are ticked for you, in its order, and the file ends with an Export details section recording the filters, search, sort and grouping used (see Exporting to CSV). Exports run in the background and appear under Measure Performance → Exports when ready; see Measure Performance. The button is available to members with reporting access.
Selecting Custom Fields as a column gives the export one column per custom field that is filled in on at least one exported item, with option labels rather than ids and file names for file fields, alongside the original combined column. Values a spreadsheet would read as a formula (starting with =, +, - or @) are written with a leading apostrophe.
When the list is empty
If nothing matches, My Work shows No items found for the applied filters. Broaden or clear your filters, or switch Open only off to include finished items.
Settings, Permissions & Your Data
Switch the AI Assistant on for your organization, choose what it may use and which models members may pick, see what each model costs and how paid models are billed, set a budget, decide who may use and manage it, and know where conversations are processed.
Notifications in DevStride
What DevStride notifies you about, how the Notifications inbox works, and the four channels — Notification Center, email, Slack and Microsoft Teams — you can route notifications to.