Admin Onboarding - Setting up Users and Teams
People come before structure. Every later step (boards, assignments, sharing, forms) needs users and teams to point at, and inviting early lets co-administrators help with the rest of the setup. Invitations can go out before the workspace is finished; invitees land in an empty but working organization.
Both pages are under Configure Settings → Organization: Users and Teams. The Invite Users button sits in the header of both.
Step 1: Invite users
- Click Invite Users.
- Enter email addresses, separated by spaces or commas (pasting a list works), and click Send Invitations.
- Each person appears in the table immediately with the status Invited until they accept.
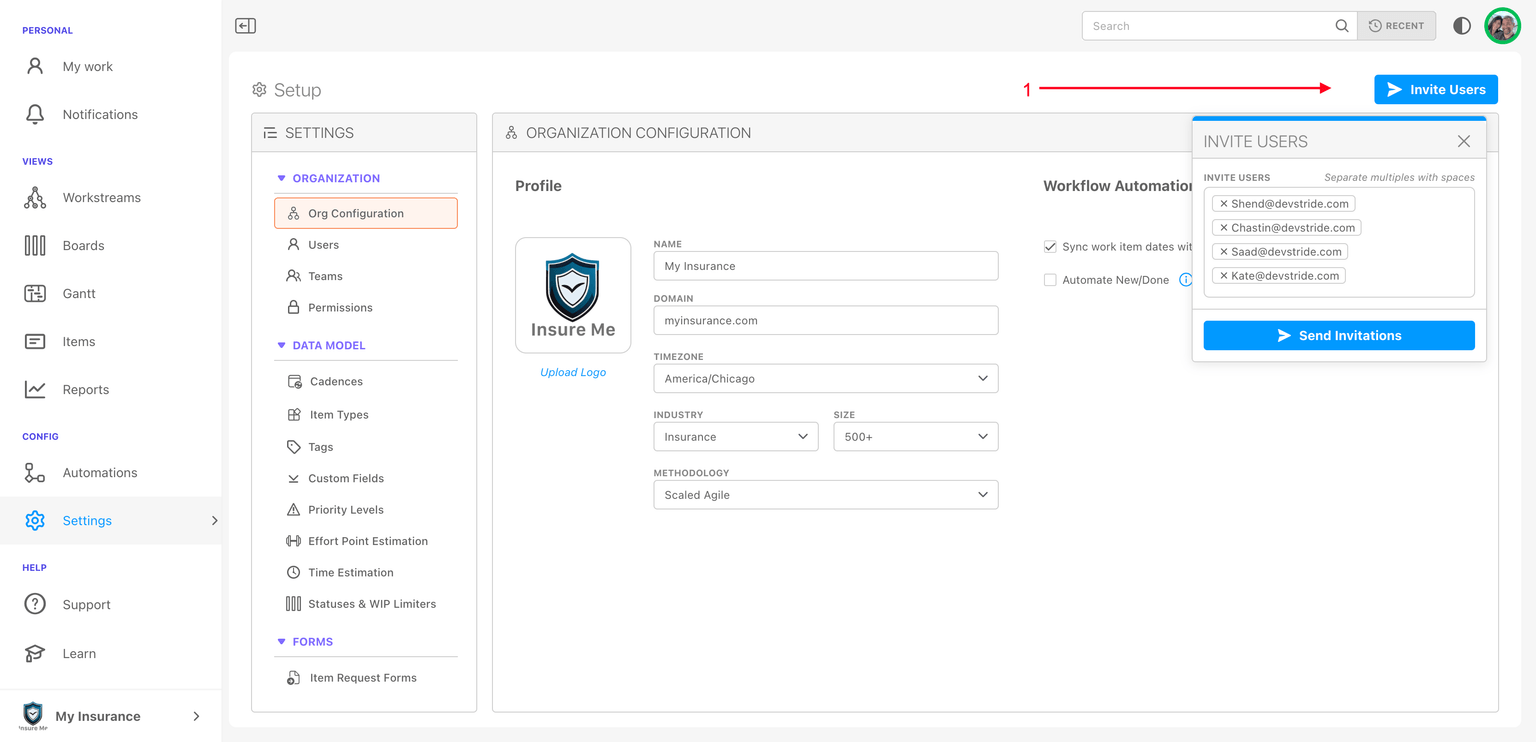
Everyone you invite gets the organization's default role, which is Member unless you change it under Admin → Permissions. There is no per-person role picker in the invite dialog, so set roles afterwards.
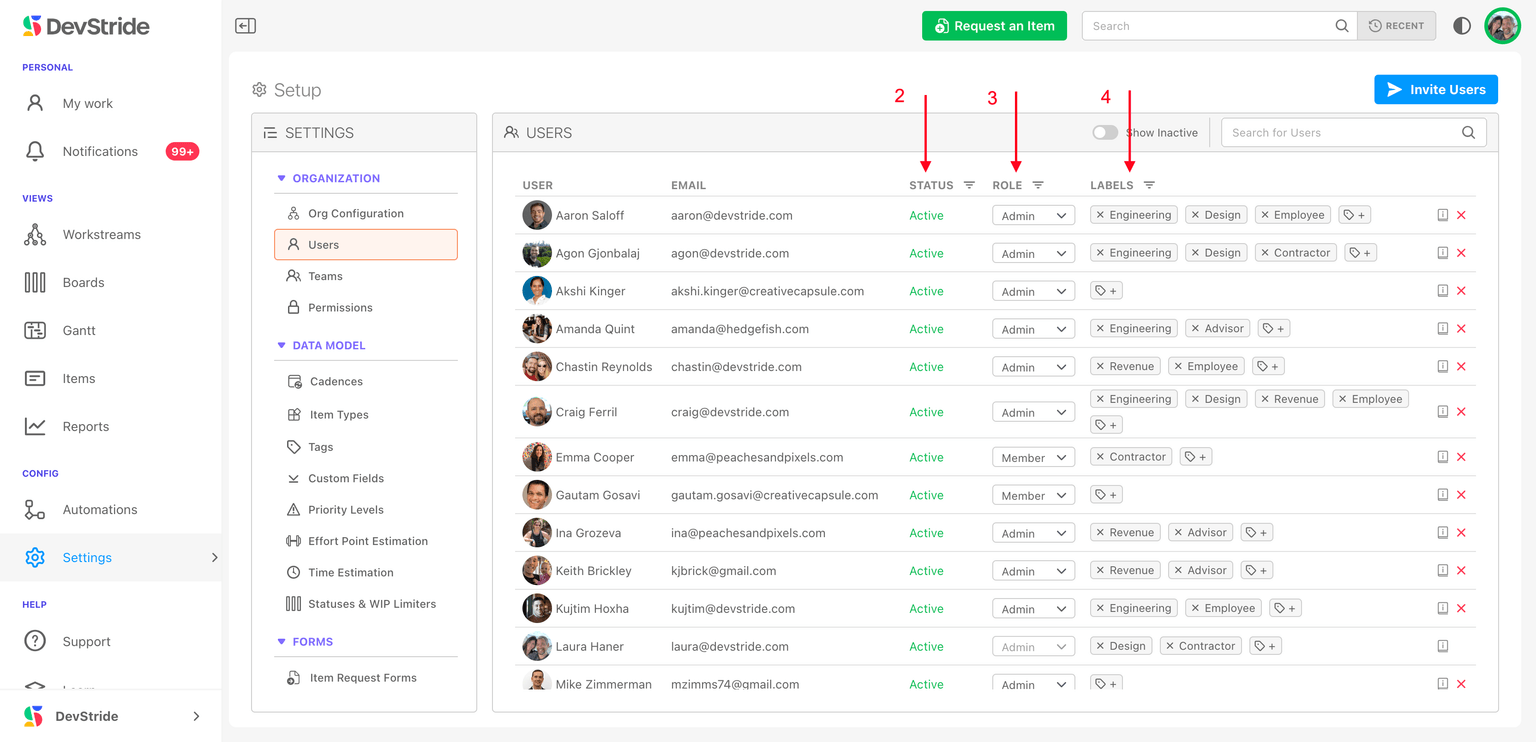
Reading the Users table. Columns are User, Email, Status, Access role, Labels, and, when enabled, Personas. Status is one of Active, Invited, Inactive (archived), Pending (a join request awaiting approval), or Imported. A red Email failed marker next to Invited means the invitation did not send; click Resend.
Make your co-administrators Admins
During setup you usually want more than one person who can open Configure Settings. Click the pencil on each of those people and change Access role to Admin. Leave everyone else as Member; you can tune roles, or create custom ones, later (see More on Permissions).
Labels on a user are free-form markers (Contractor, Vendor, Customer, a skill group) you can filter this table by. Custom fields of type User Picker can also restrict their choices to users with a given label. They grant no permissions.
Inviting someone you archived before prompts Previously Archived User → Re-enable User, which restores their history. Full detail: Users, Roles & MFA.
Step 2: Set up teams
A team is a working group that pulls from a shared queue. It does not have to match your org chart, and people can belong to several teams. Each team will typically get a folder and boards in Plan Delivery, and items can be assigned to a team as a whole or to a person on it.
Create one team per working group you want to manage in DevStride. If engineers work on two products, put them on both product teams; if those teams roll up into a program, create the program team too. There is no limit.
DevStride starts you with one team named Team (your organization name), containing only you. Rename it or archive it.
Create a team
- On the Teams page click New Team.
- Enter a Team Name. Optionally start typing in Add Users to add people one at a time, or click Add multiple users, select people in Add Users to Team, and click Add Users.
- Click Create Team.
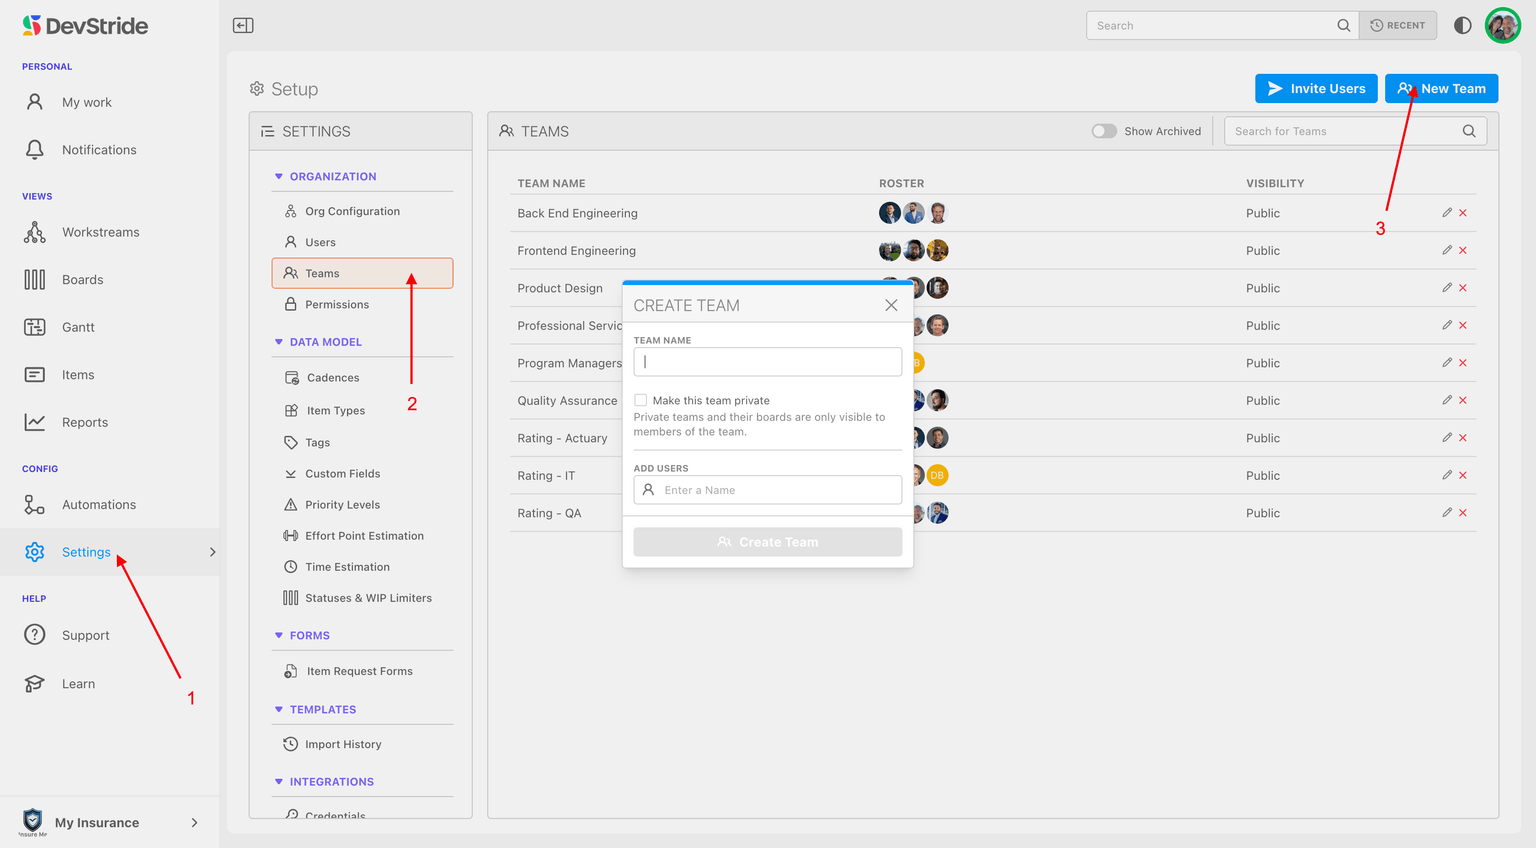
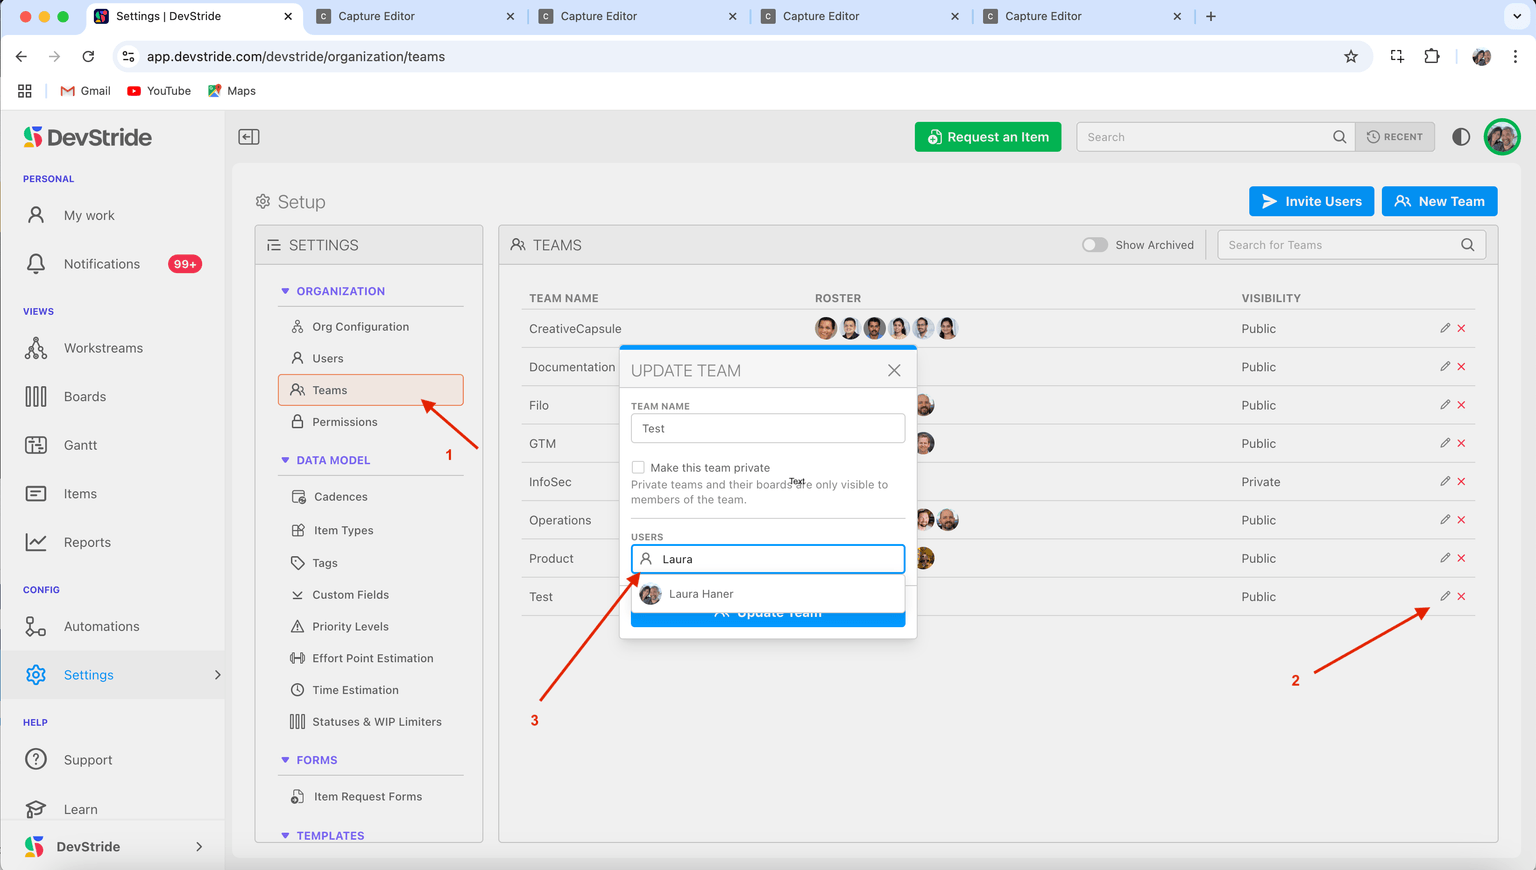
To edit a team later, click the pencil beside it, adjust Users, and click Update Team. Teams are archived rather than deleted (Archive Team; Show Archived reveals them for Unarchive). A team with zero members is allowed and useful for marking ownership by a group you do not track individually.
If Business Hours appears in the team dialog, Service Desk is enabled and it sets the hours SLA clocks run for that team; ignore it for now.
Next: Configuring Your Work Model.
Basic Terms
The handful of DevStride words you need before configuring anything — workstream, item, item type, board, cadence, cycle — with a link to the full glossary.
Admin Onboarding - Configuring Your Work Model
Step 4 of admin onboarding — decide your workstreams, item type hierarchy, teams, statuses, and cadences on paper before configuring them, because some of these are expensive to change once items exist.