Admin Onboarding - Item Workspace Quick Links
- 28 Feb 2025
- 2 Minutes to read
- Contributors

- Print
- DarkLight
Admin Onboarding - Item Workspace Quick Links
- Updated on 28 Feb 2025
- 2 Minutes to read
- Contributors
- Print
- DarkLight
Article summary
Did you find this summary helpful?
Thank you for your feedback!
Workspace Tour: Item Header Quick Links
The following Quick Links are available for other useful information right from the Item Header:
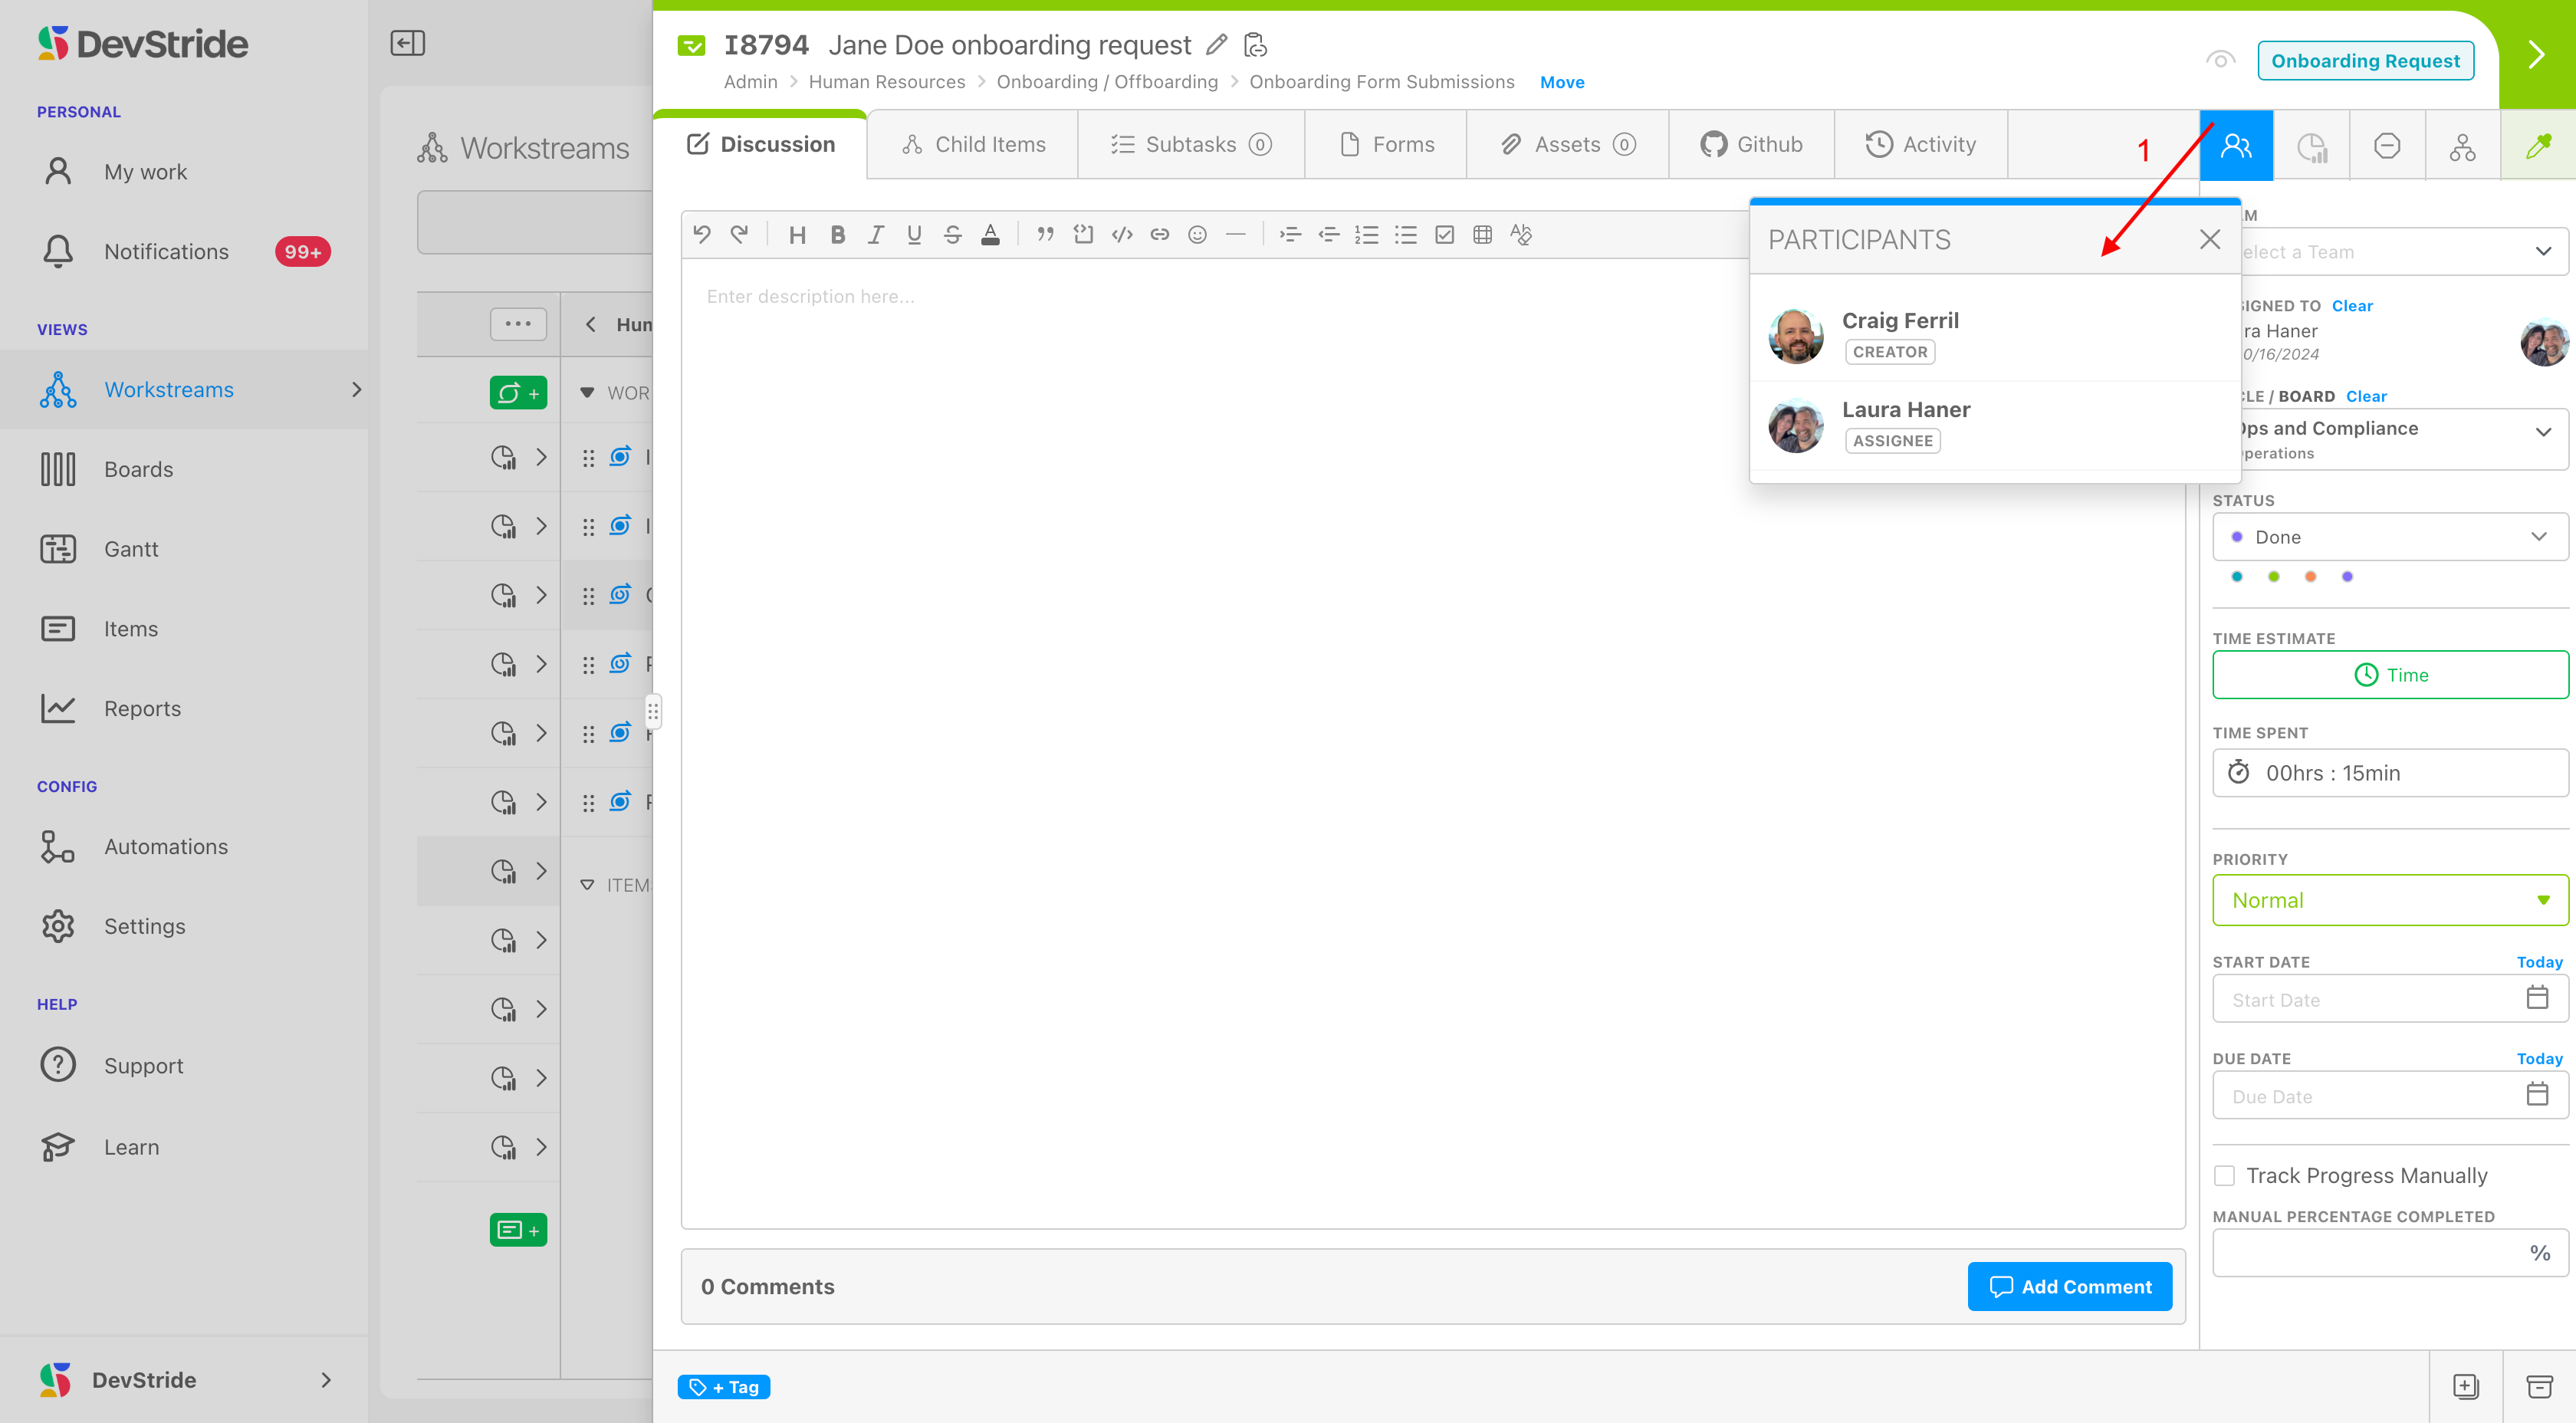
Participants
Clicking on Participants icon (1) allows you to see at a glance who is involved with this item, including creators, assignees, and watchers.
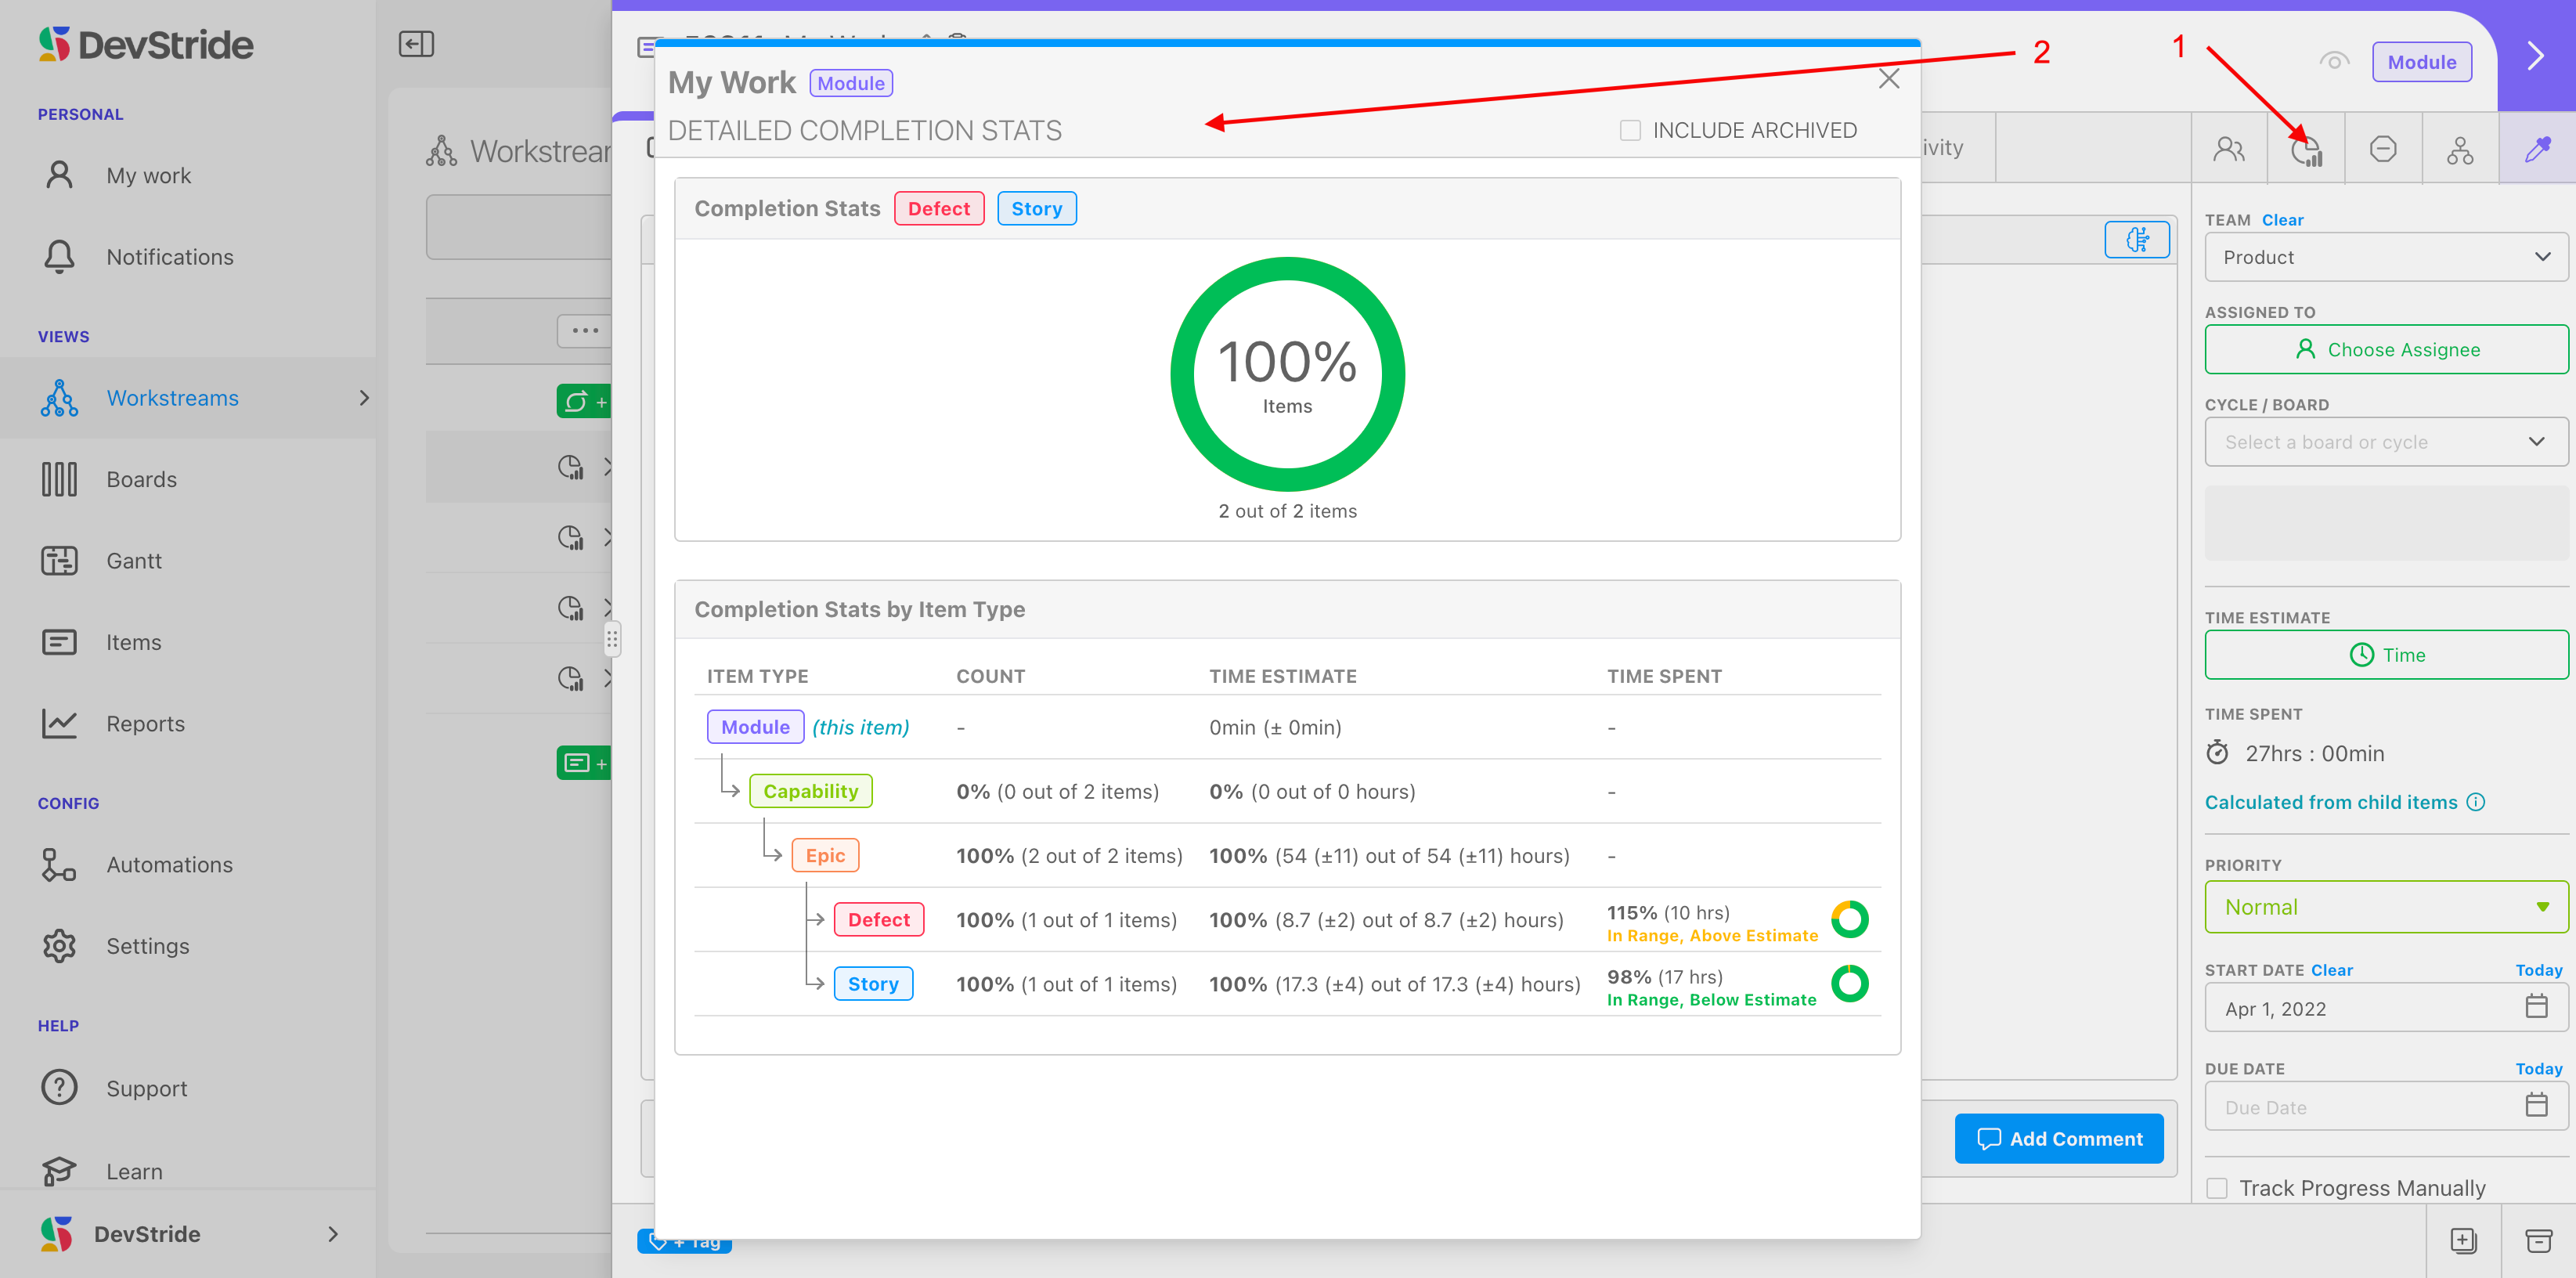
Completion Stats
The Completion Stats icon (1) displays a pop-up widget (2) with information about the progress of the item. We will detail this more later.
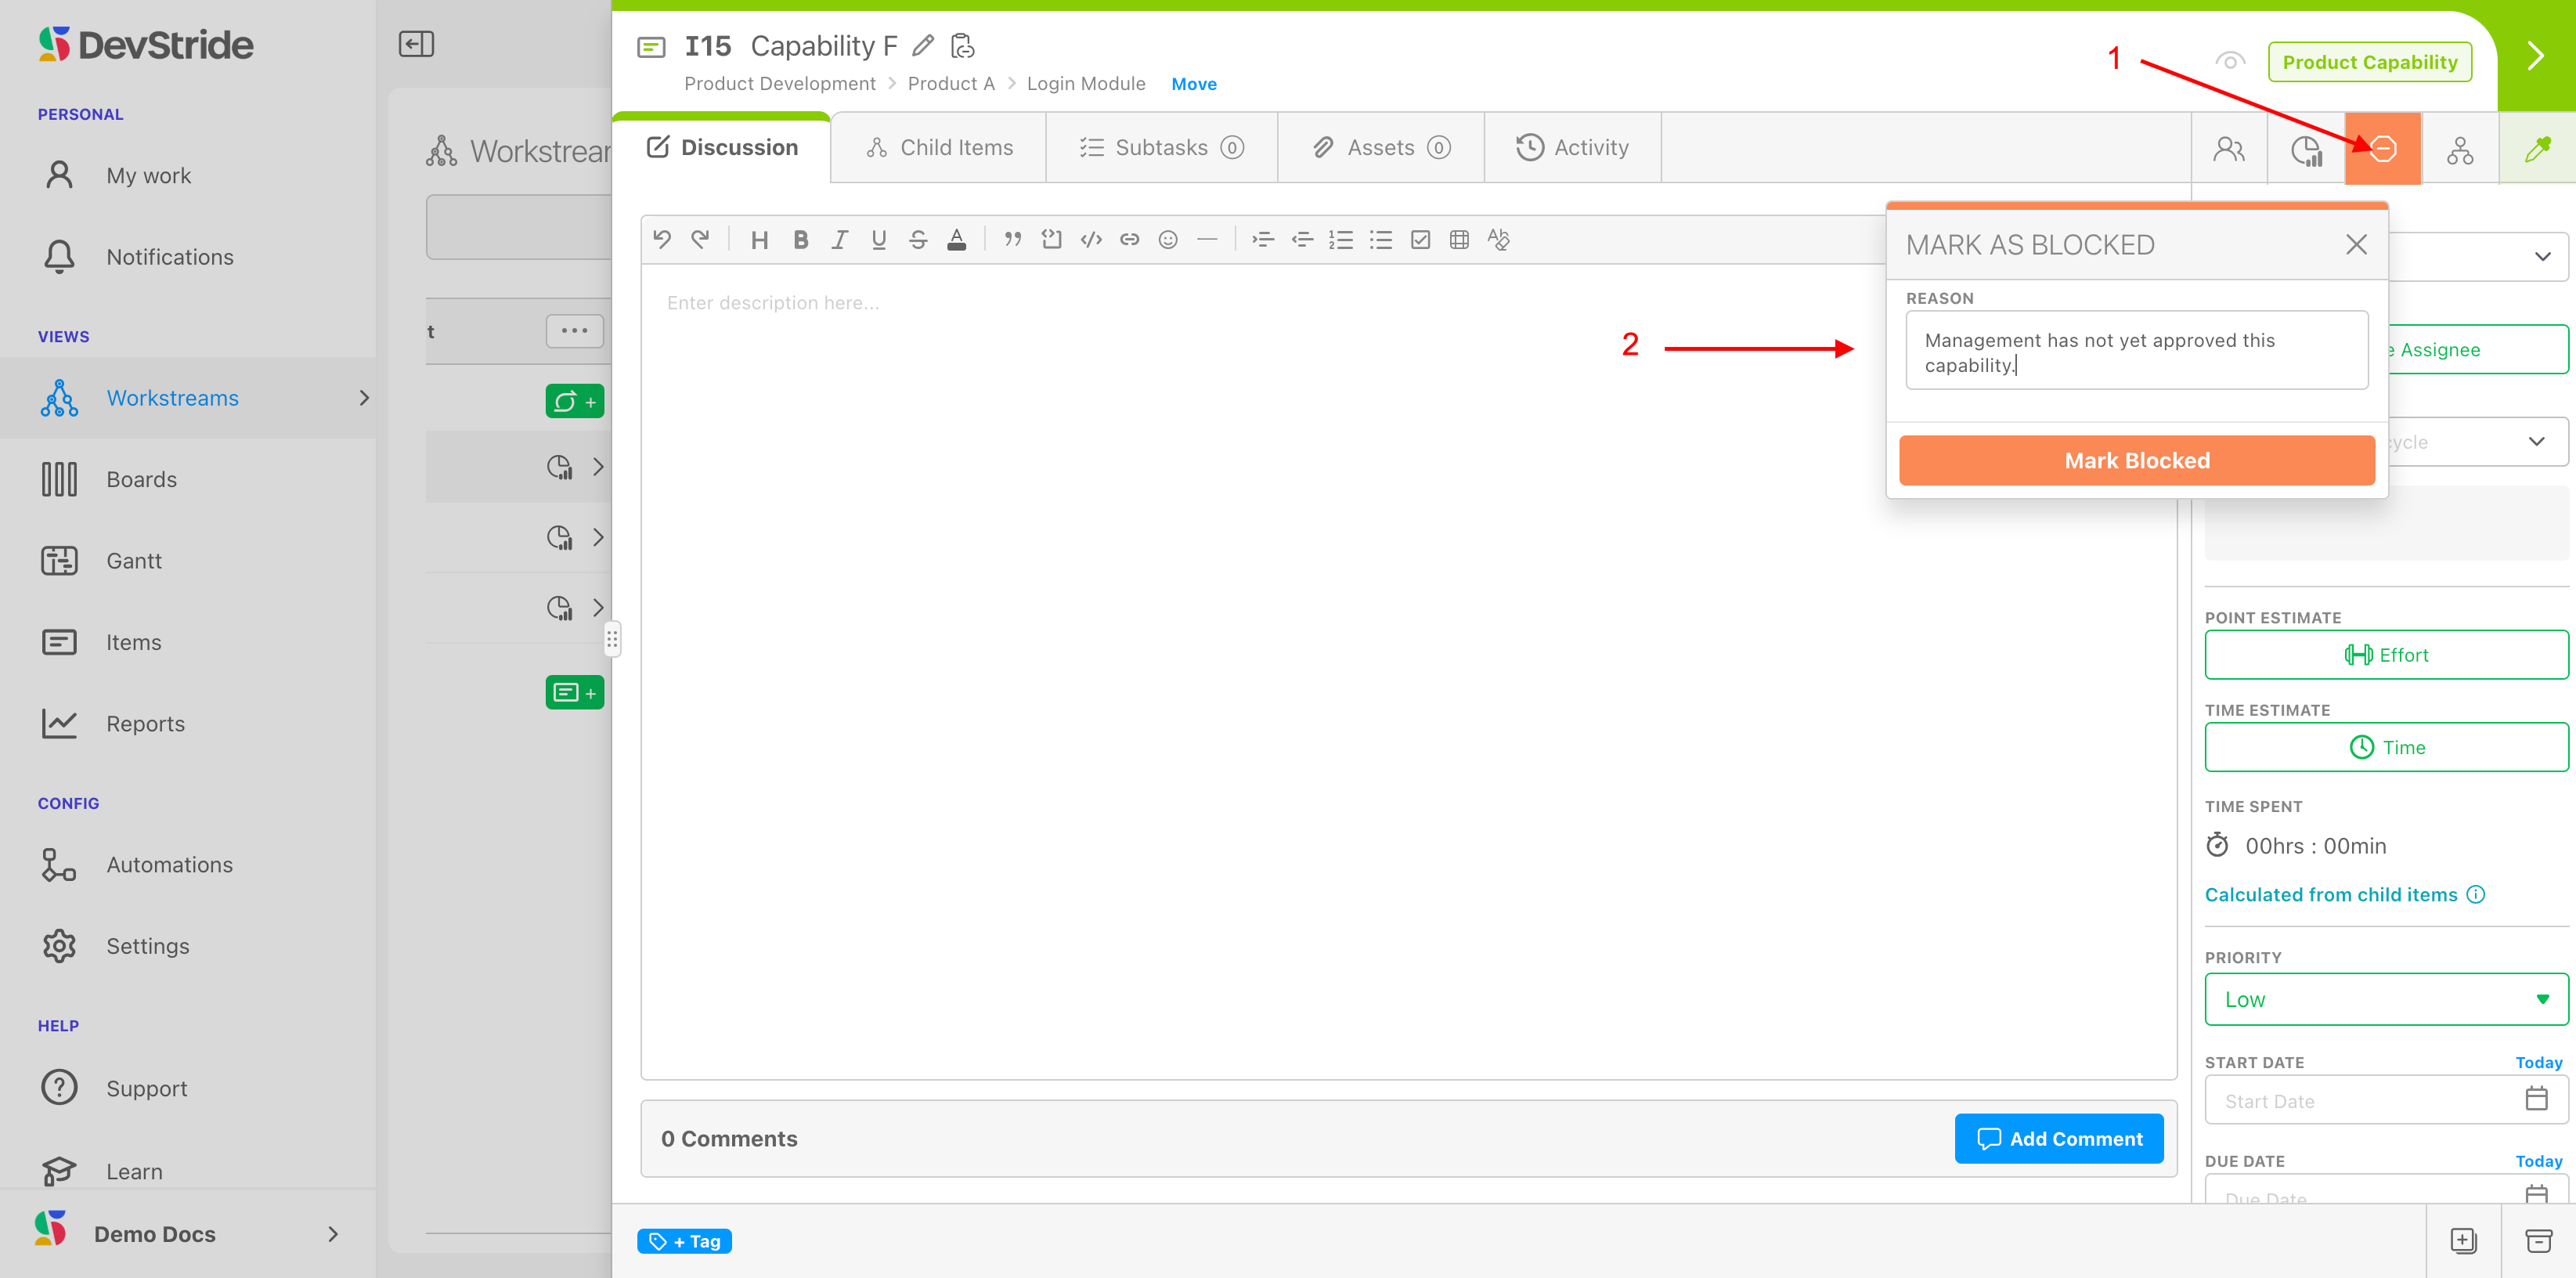
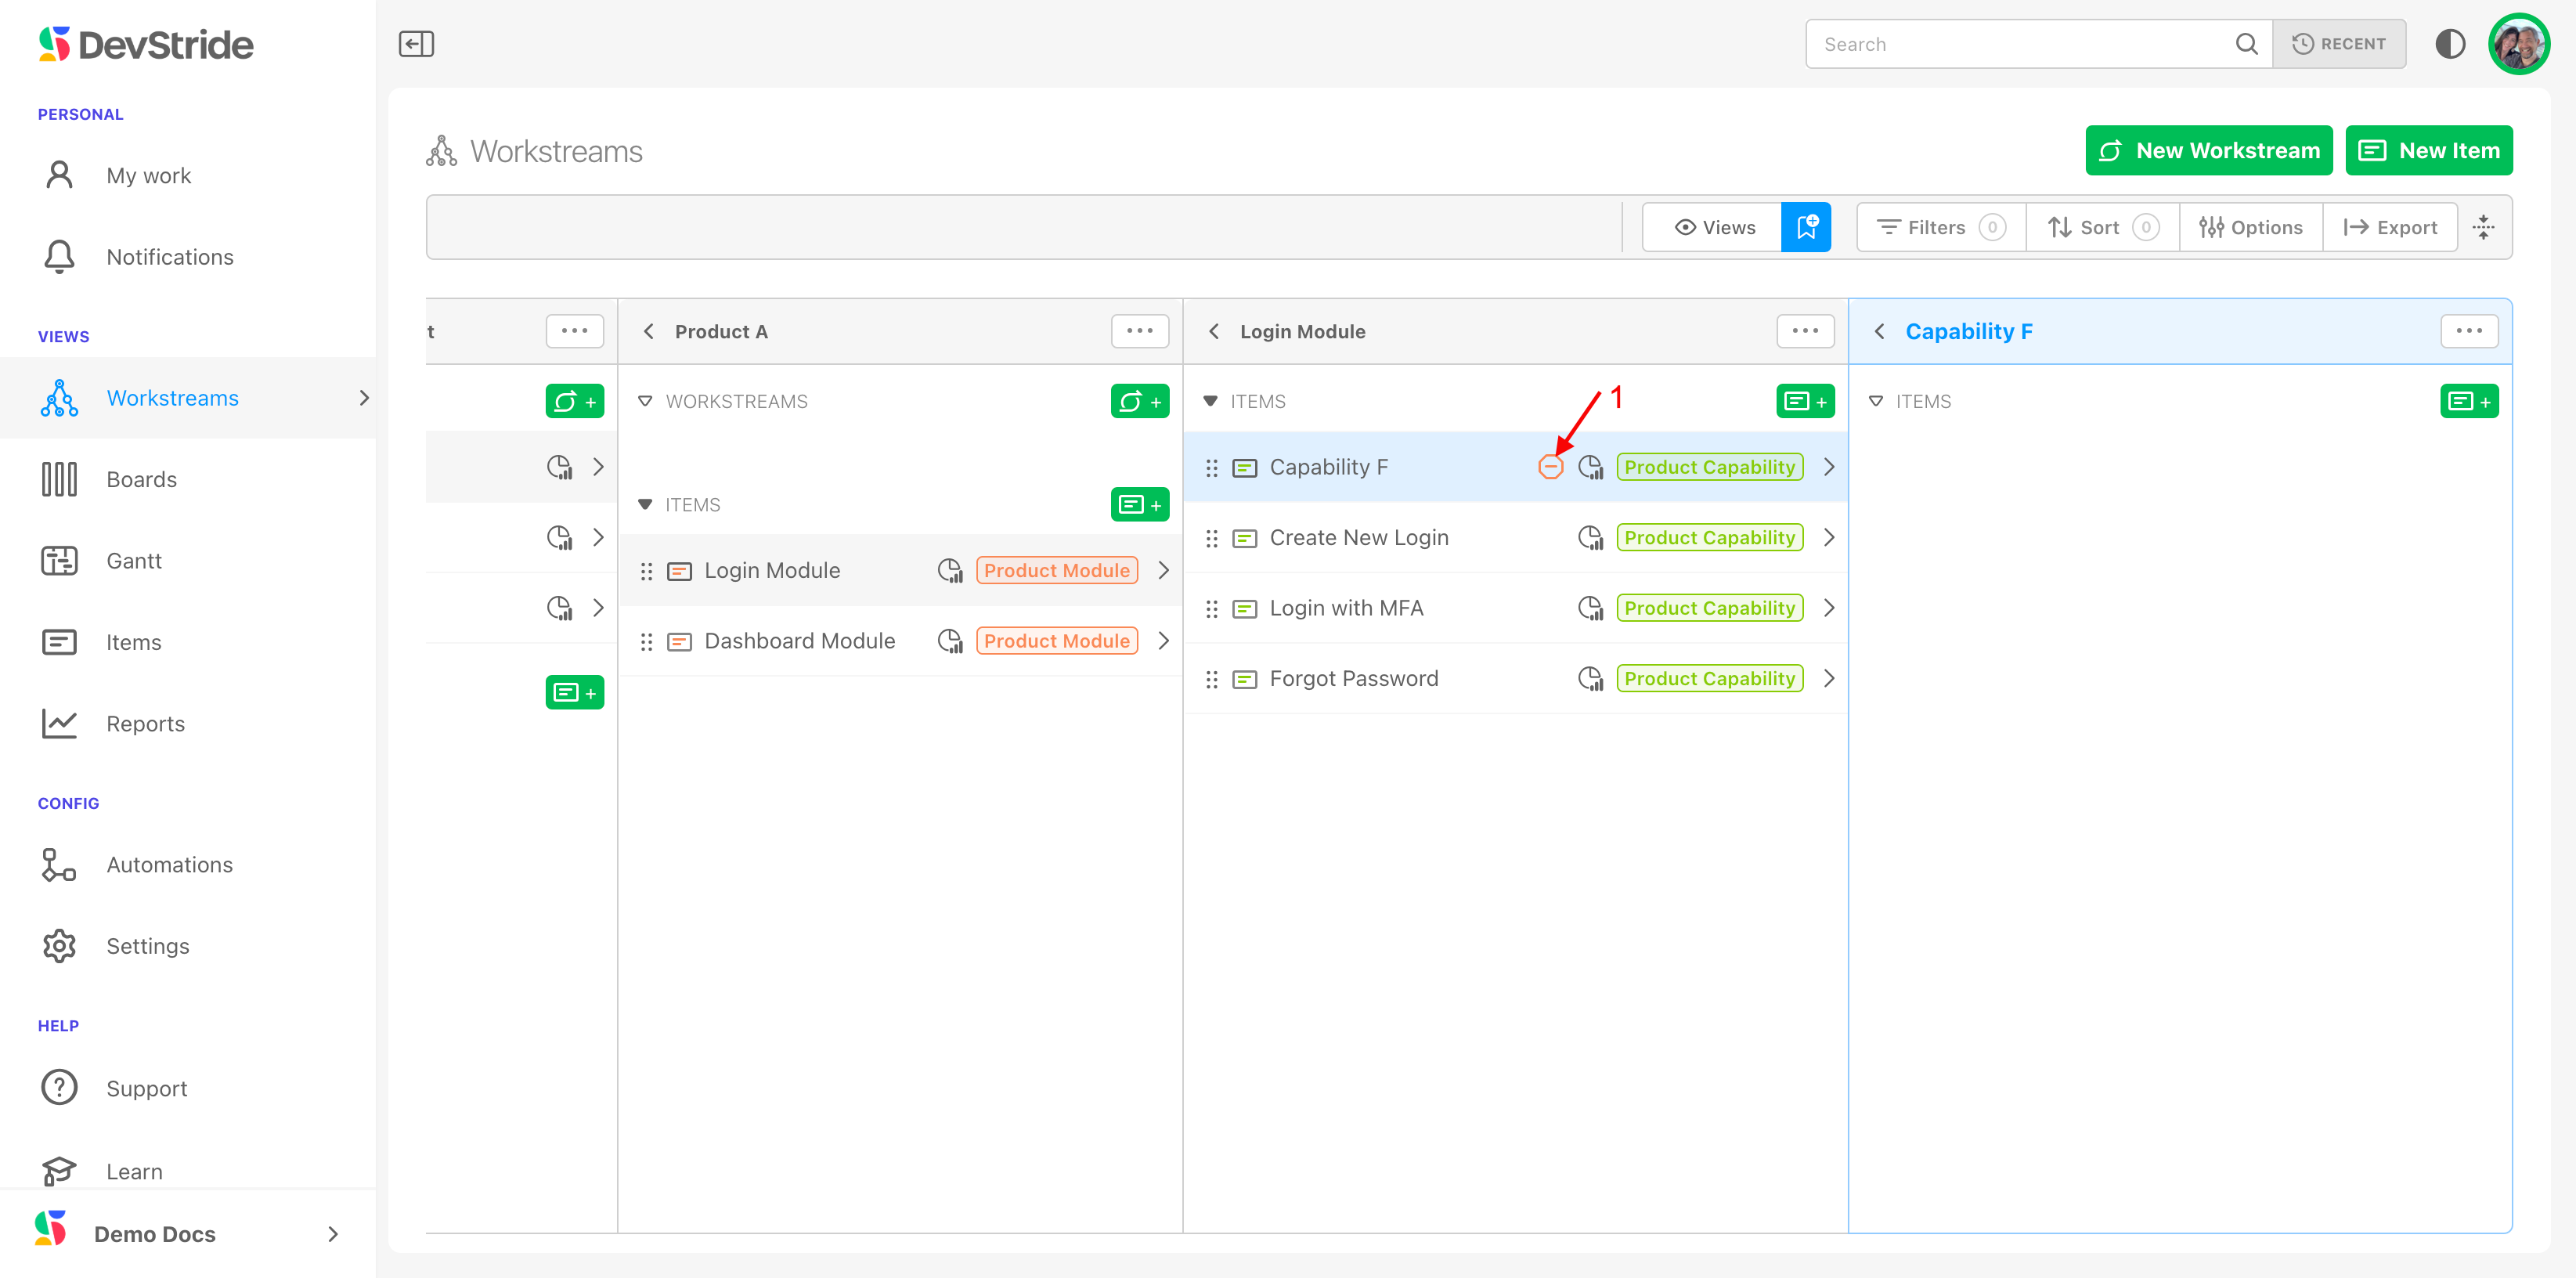
Blocked Indicator
The blocked indicator is extremely valuable for raising a flag on work that cannot move forward. You can mark any item as blocked by simply clicking on the the block icon (1) and typing in the reason the item is blocked (2).
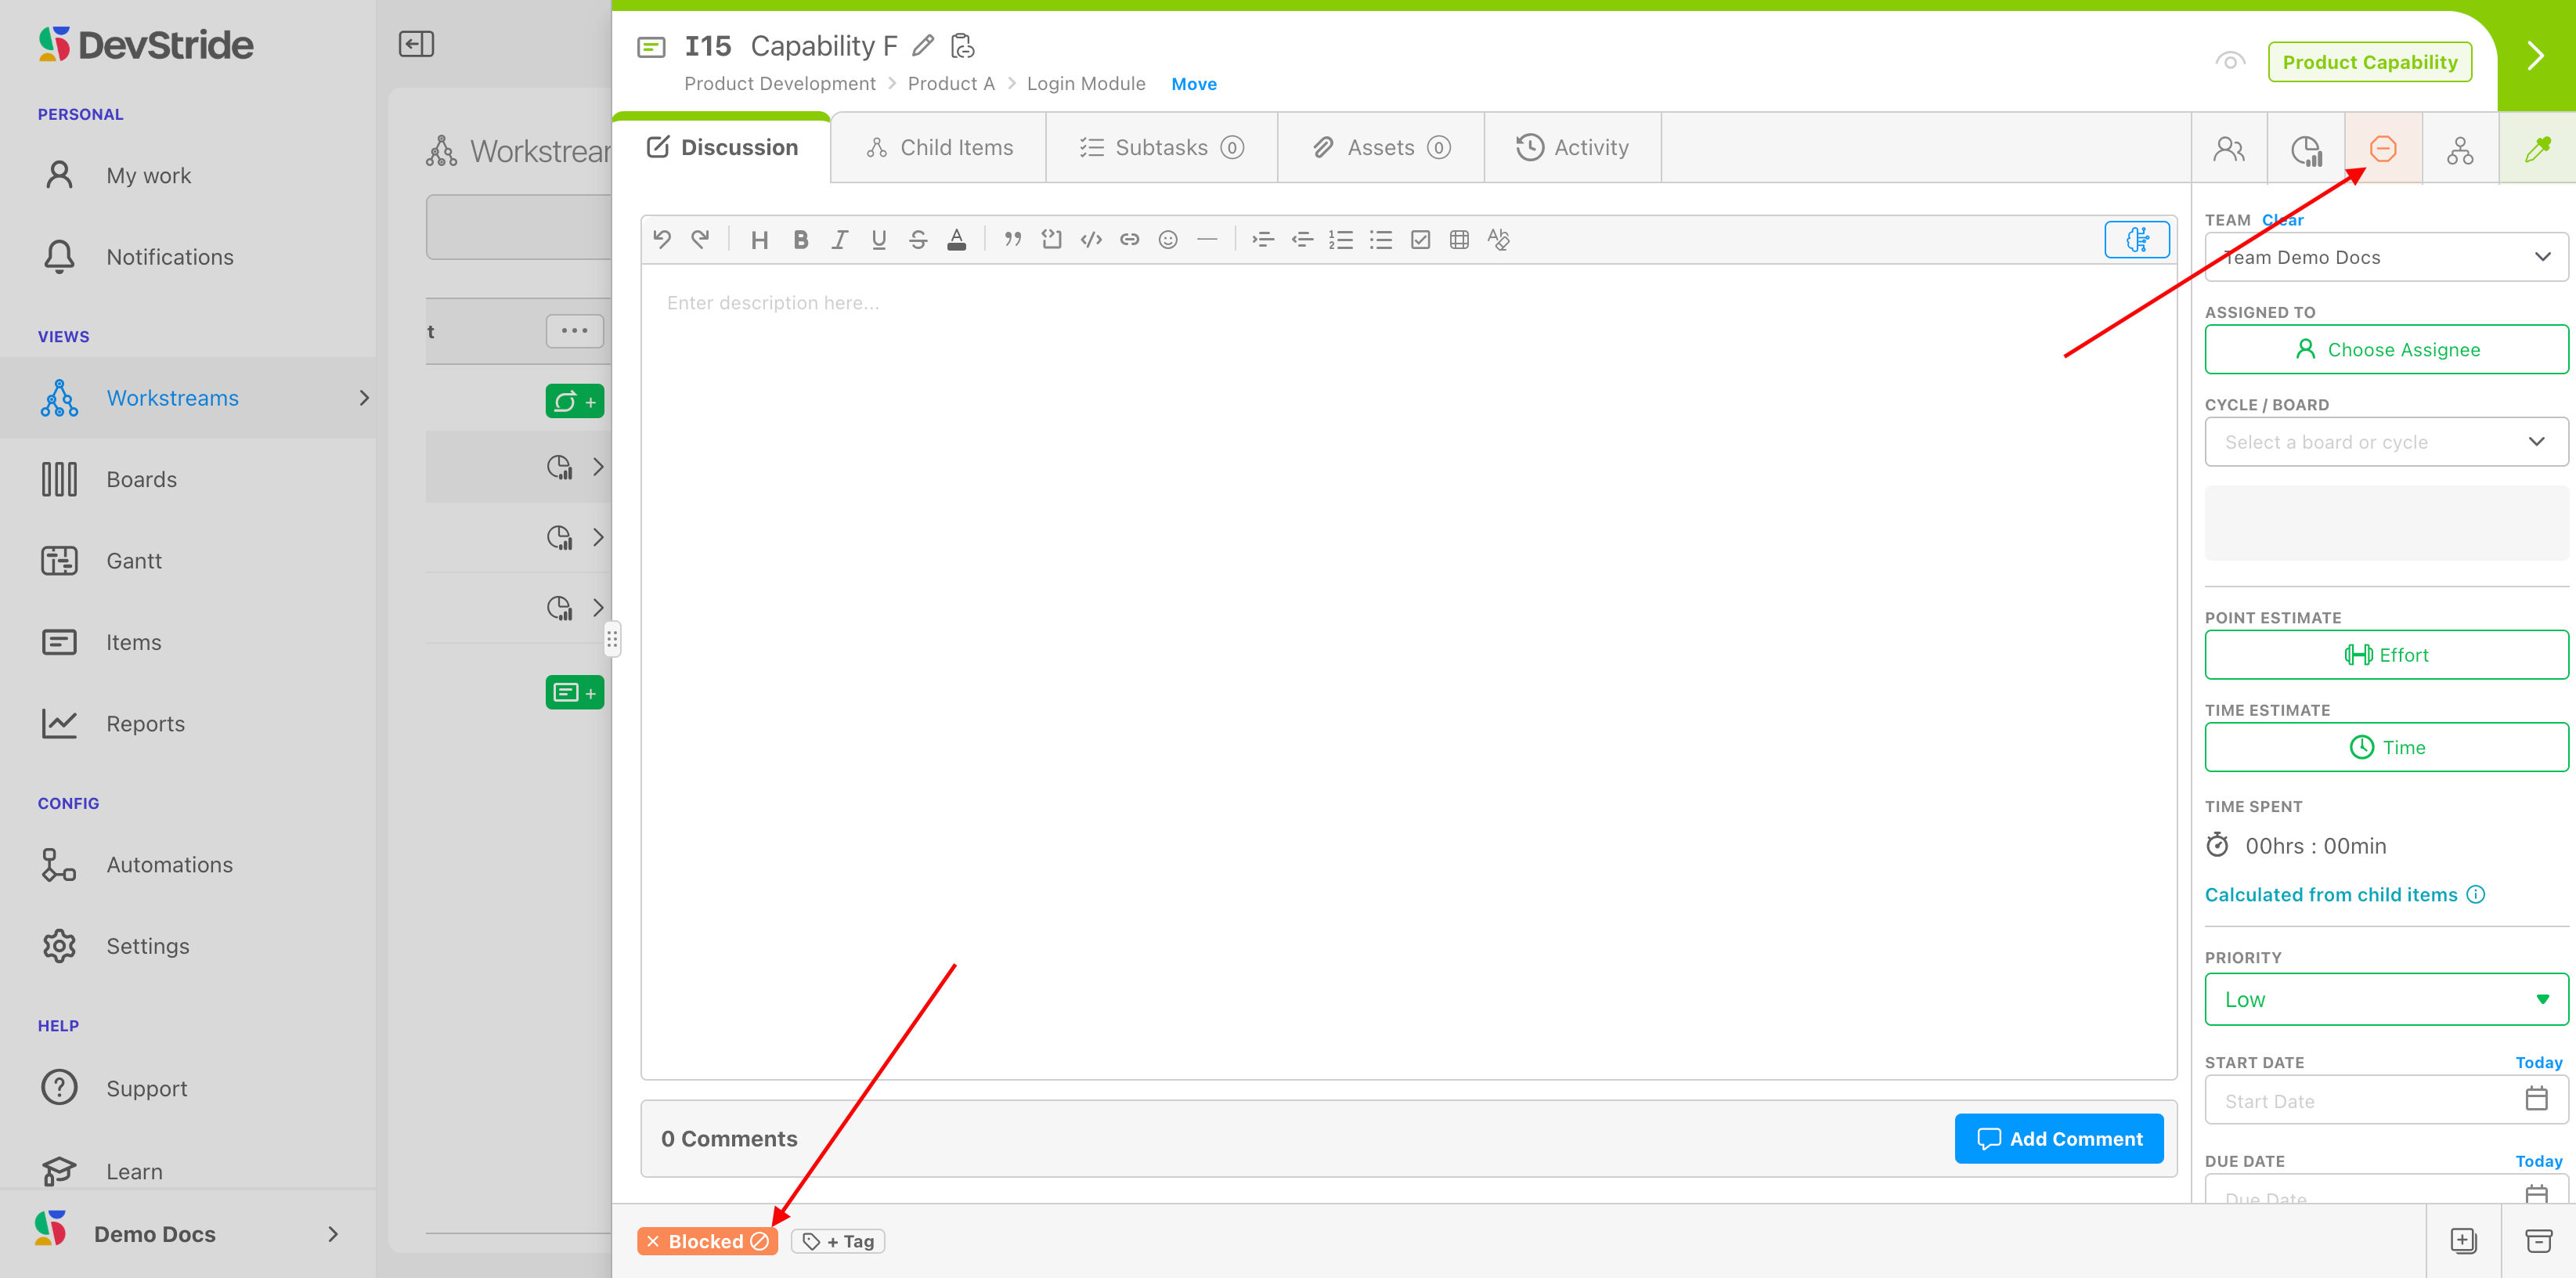
You can see that the item is blocked right from the item's workspace:
The Workstream Map also indicates the item's blocked status:
What This Gives You
A powerful way to raise a red flag, the blocked indicator displays wherever it is relevant throughout the system. It shows up on boards, tables, reports, and gantt charts as well, features which we will visit later.
Manage Relationships
Relationship management is a concept that exists in several different places in DevStride and this is one of them. We will discuss more about Relationship Management and the places you can see relationships in other sections.
The Manage Relationship view helps you to see or edit any of the following relationships that exists for the item:
Dependencies - something that has to happen first before this item can be completed
Related - something that is associated in some way but is not directly dependent. This item is related to another item in some way that should be tracked.
Example: a feature-based item might be related to a documentation item.
Dependents - items that rely on this item to be done before they can be completed
This view is a useful way to create relationships, view relationships, and quickly jump back and forth between items that have some kind of relationship.
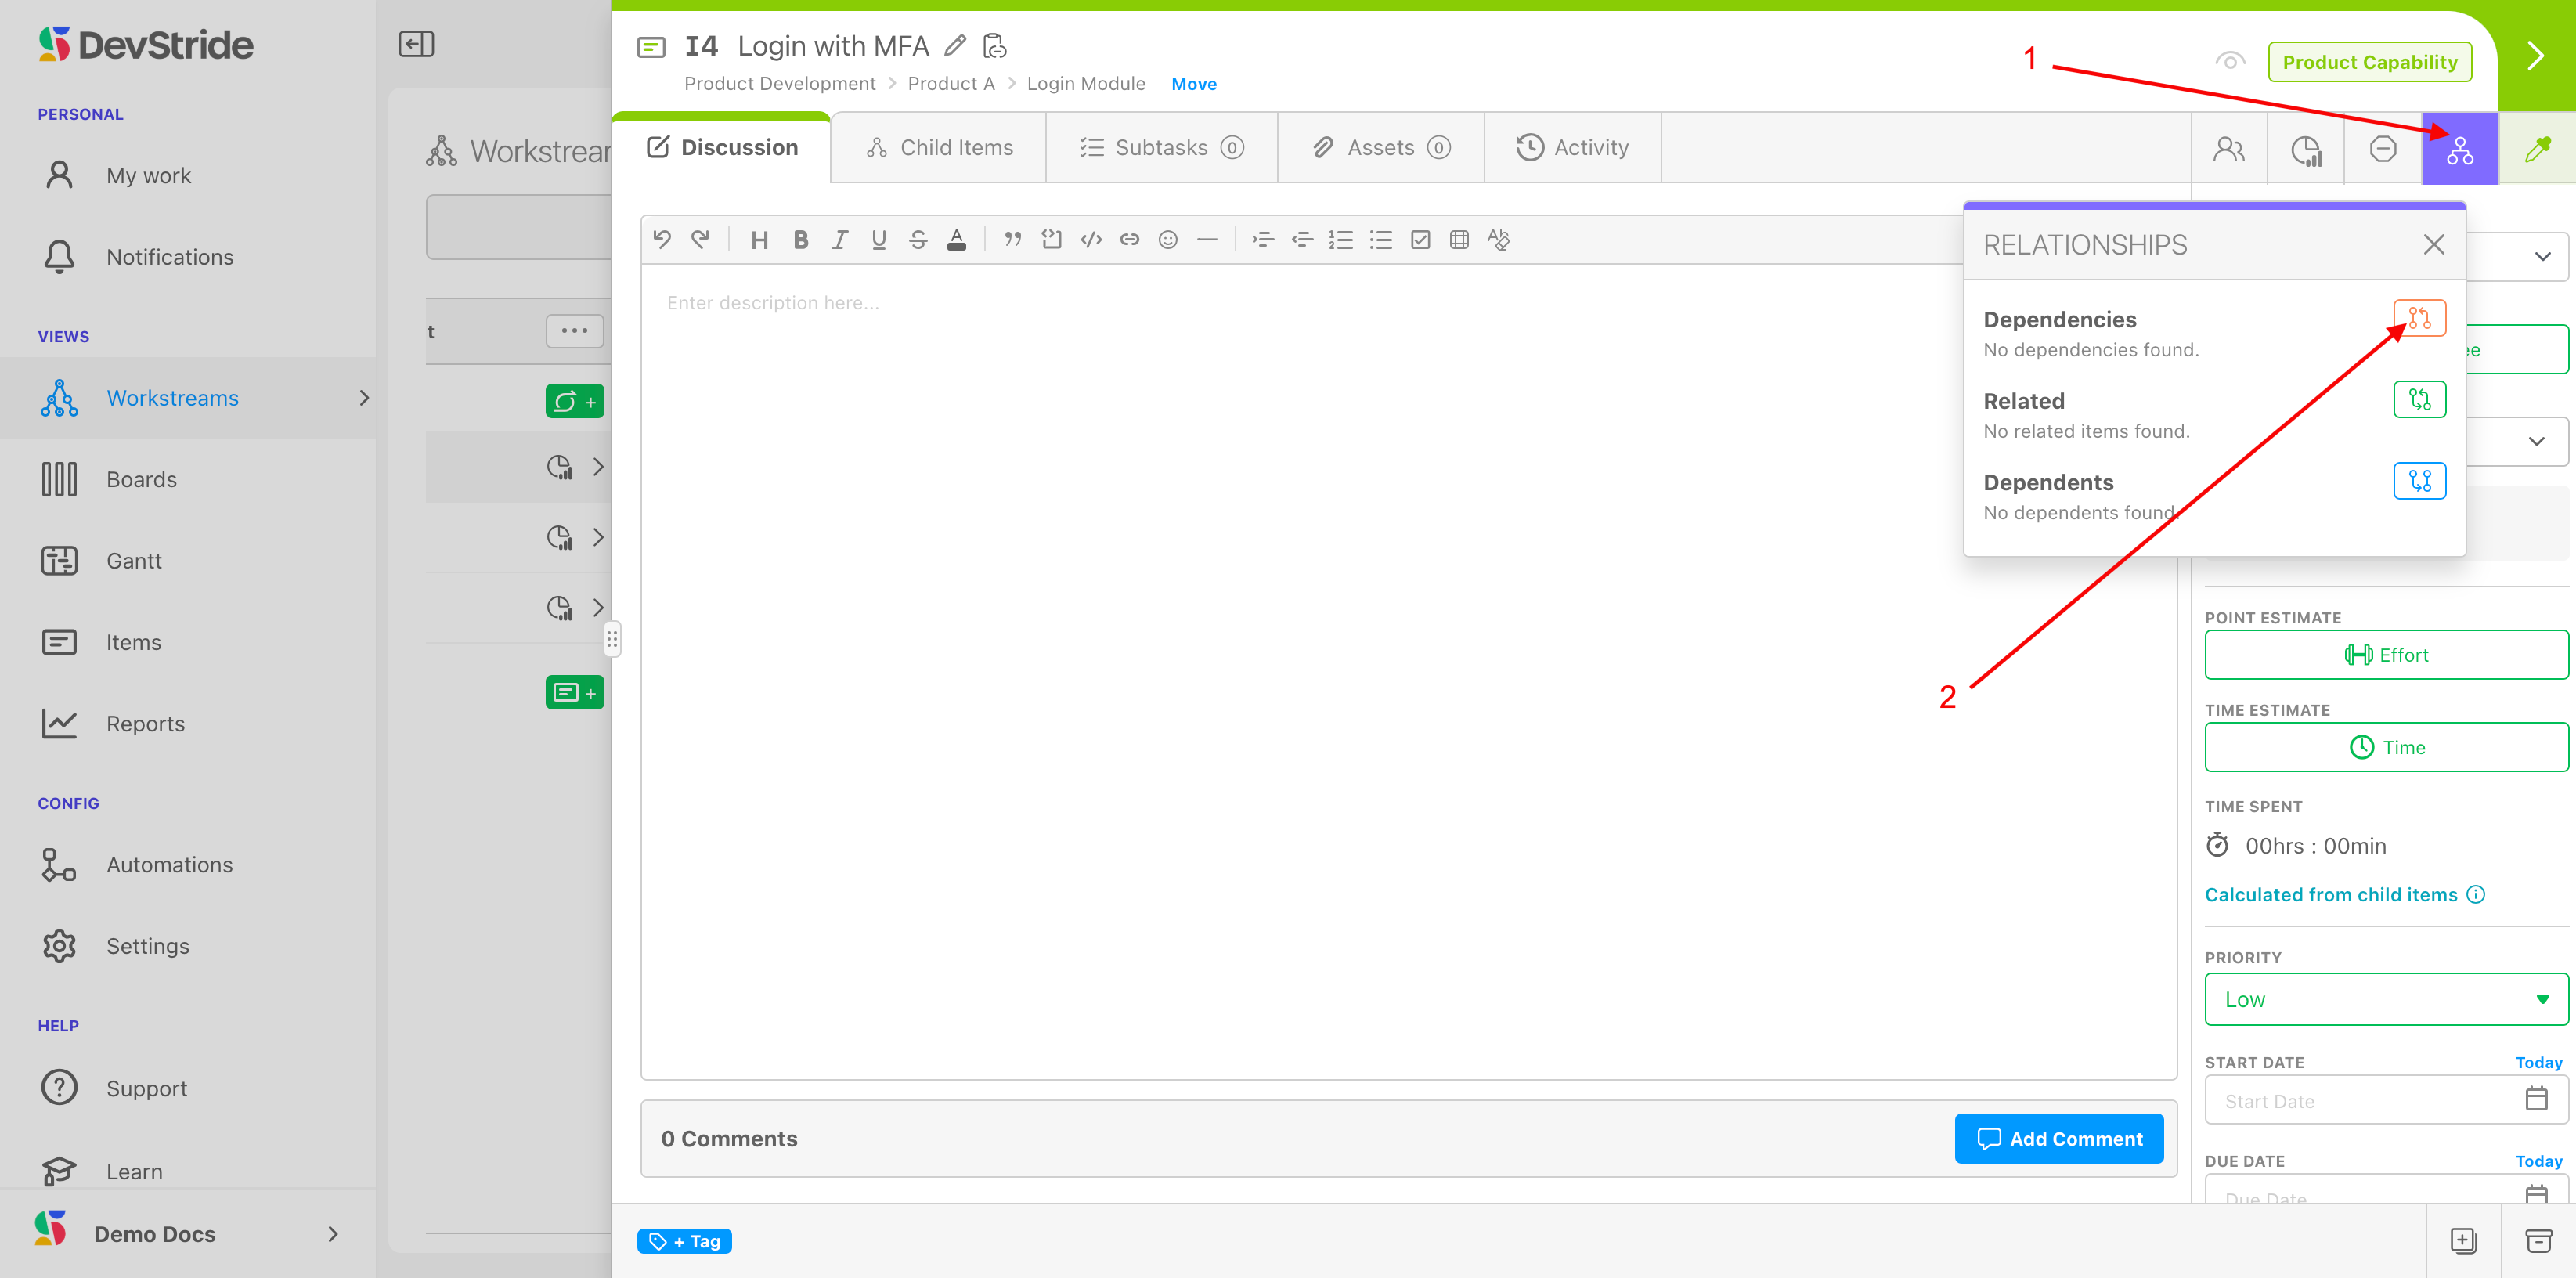
To create a relationship, click on the Relationship icon (1) in the relevant item. Click on the type of relationship you would like to create (2).
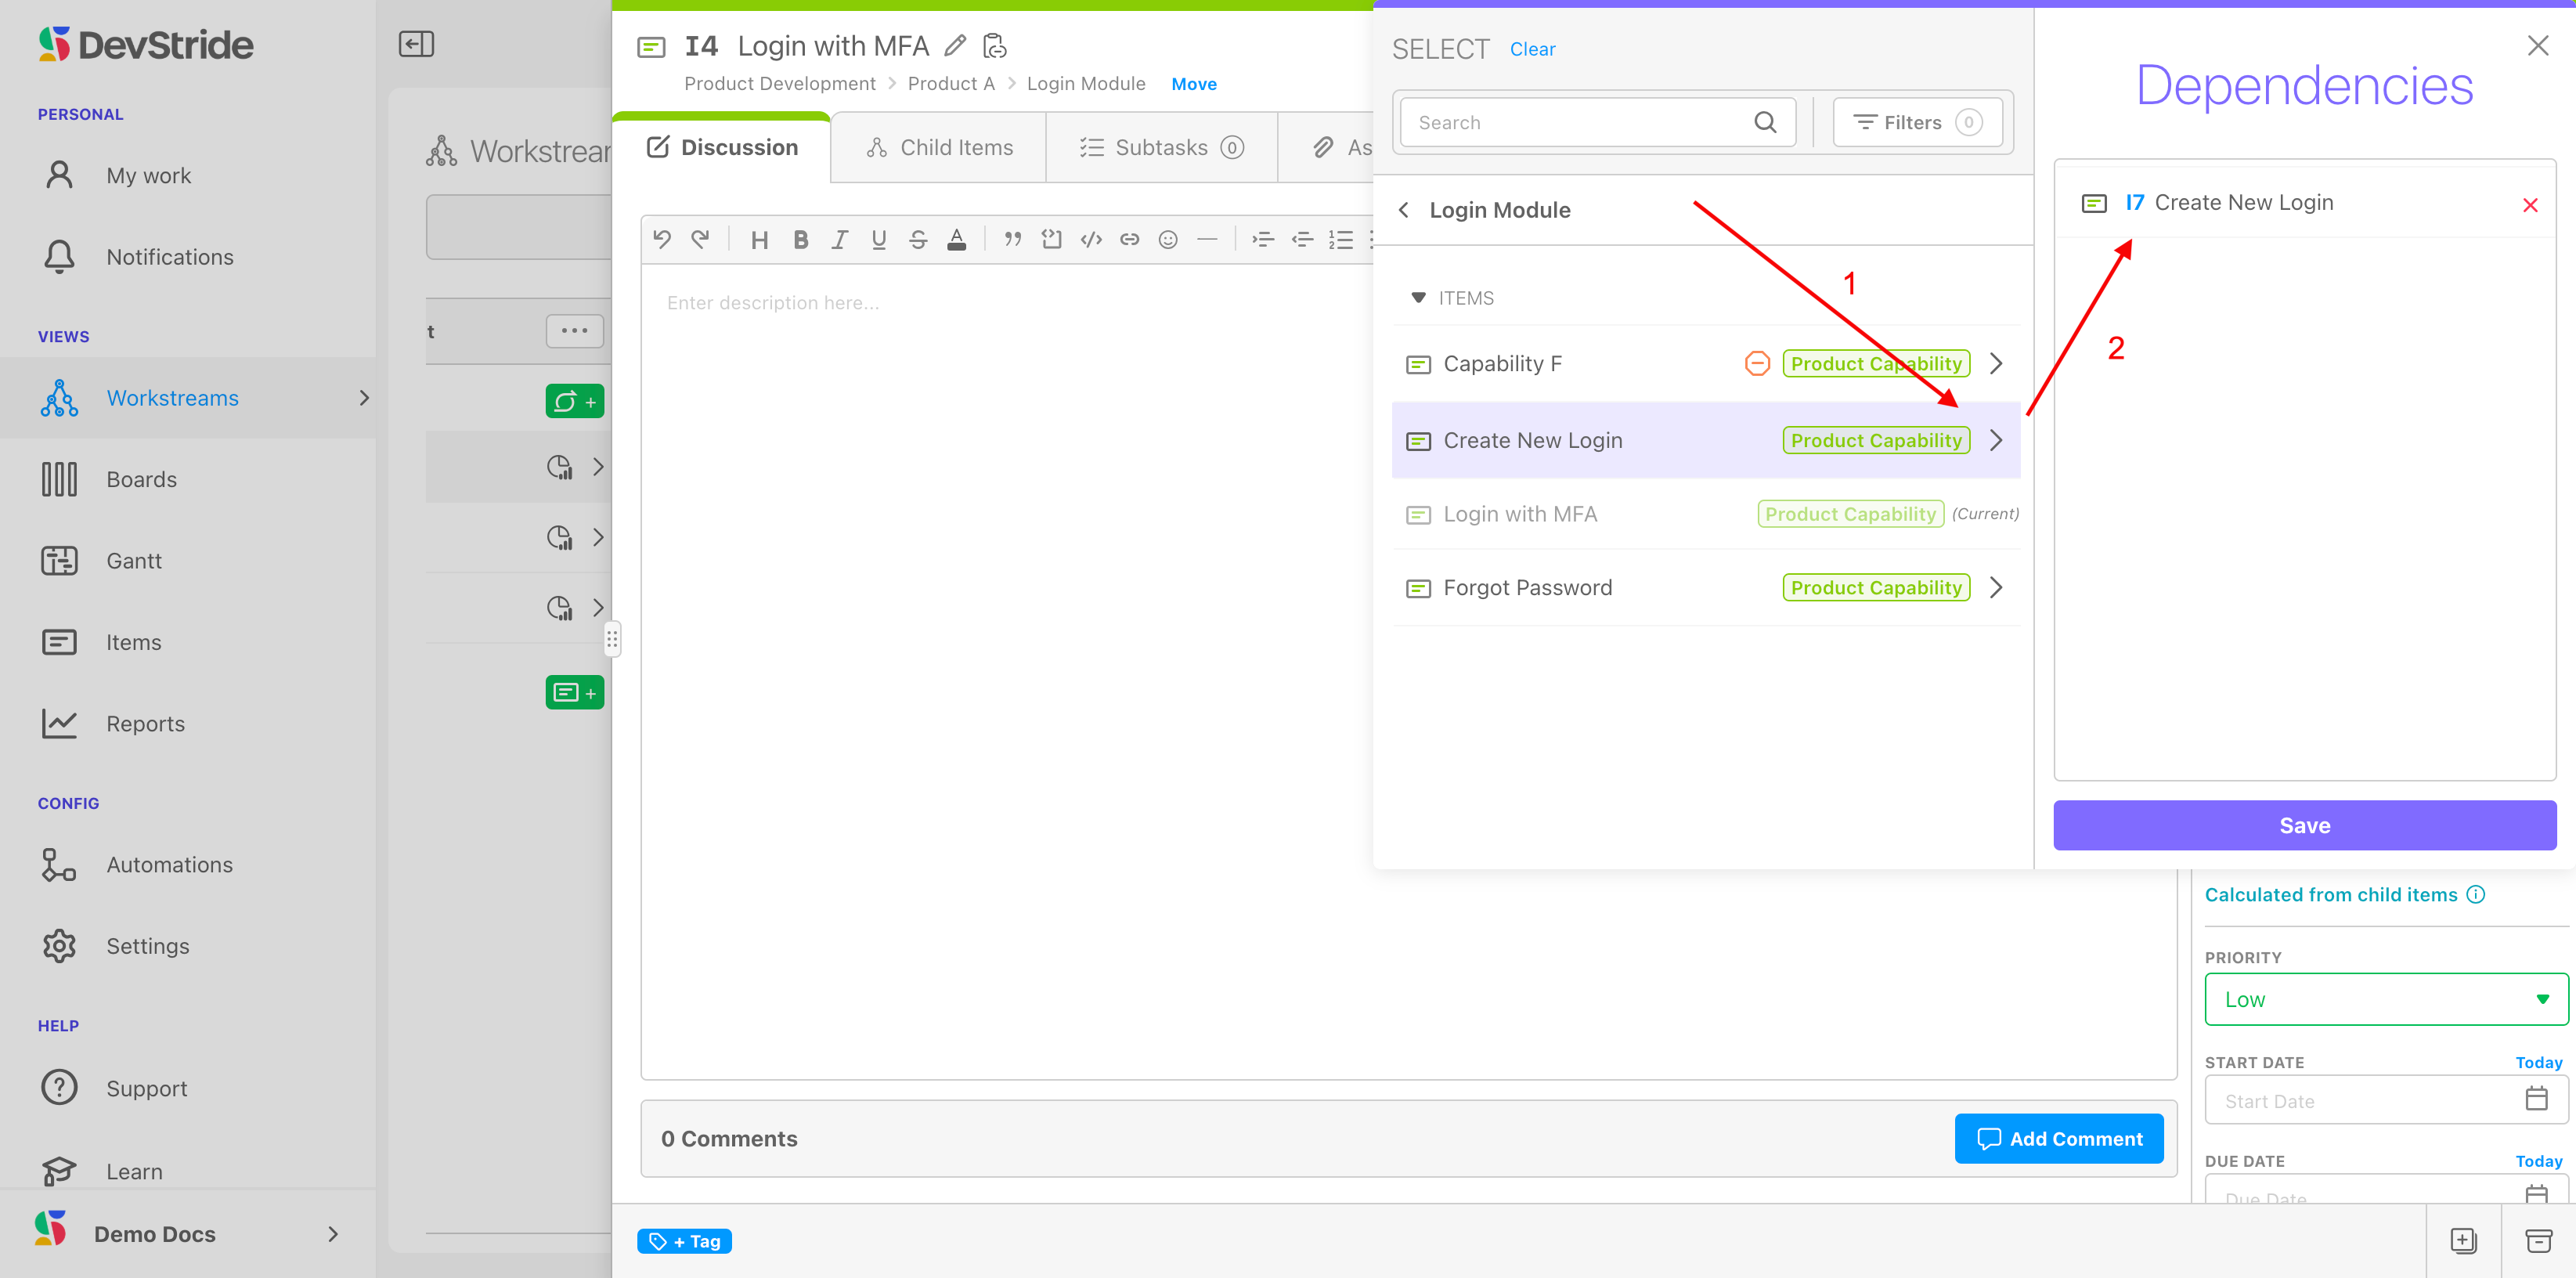
Navigate through the workstream map in the pop-up window (1) to the item you want to create a relationship for and add it to the pane on the right (2). Click Save.
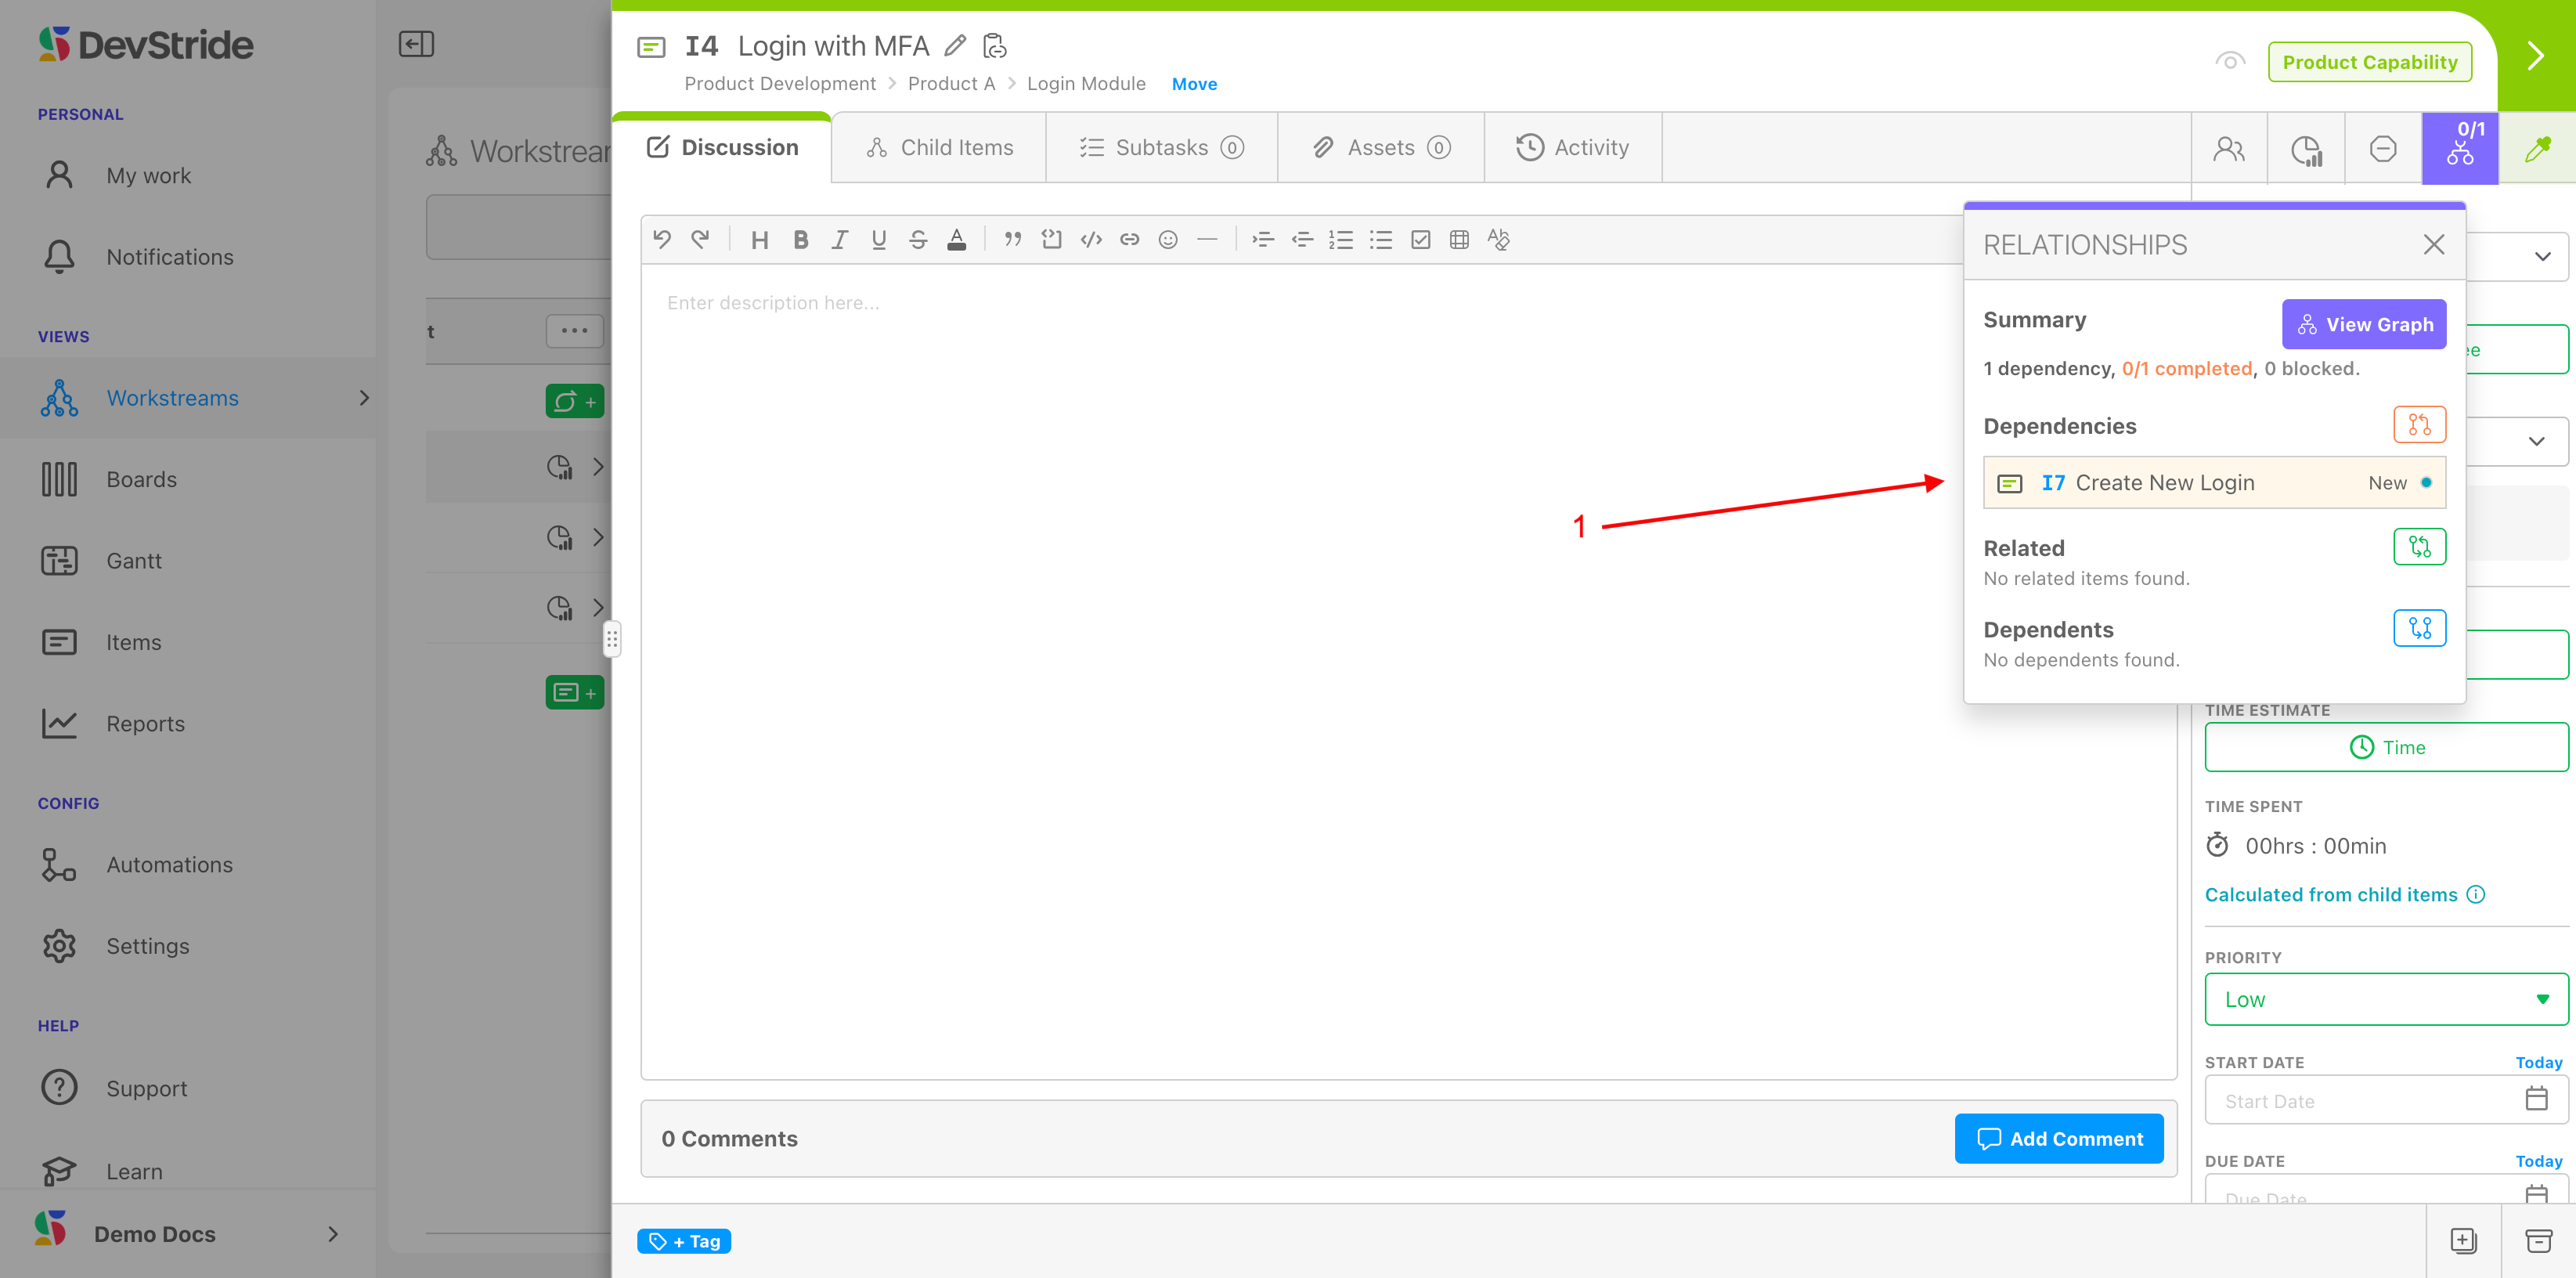
You can now view the relationship you created in the pop-up. The items that appear here are interactive, so that you can link to them as needed.
Color Picker Icon
By default, items inherit their item type color (found in Settings). You can change the color on a given item to adhere to your own business rules or for your own purposes.
Note: The color you make an item is not a personal view - it will show up that way to all users.
Now, for the features on the right bar of the item workspace:
Team through Status
Point Estimates
Time Estimates
Best Practices for Time Estimates
Time Spent
Priority
Start Dates and Due Dates
Progress Tracking
Custom Fields
Was this article helpful?