- Print
- DarkLight
Overview
Item Request Forms allow you to create either an Internal or an External form for submitting work requests like defects, new feature requests, setting up a new employee, etc., and creates a new Work Item from the request.
Usage
The Item Request Forms configuration is found under Settings.
This feature also depends on your settings for Item Types and Custom Fields.
Creating a New Item Request Form
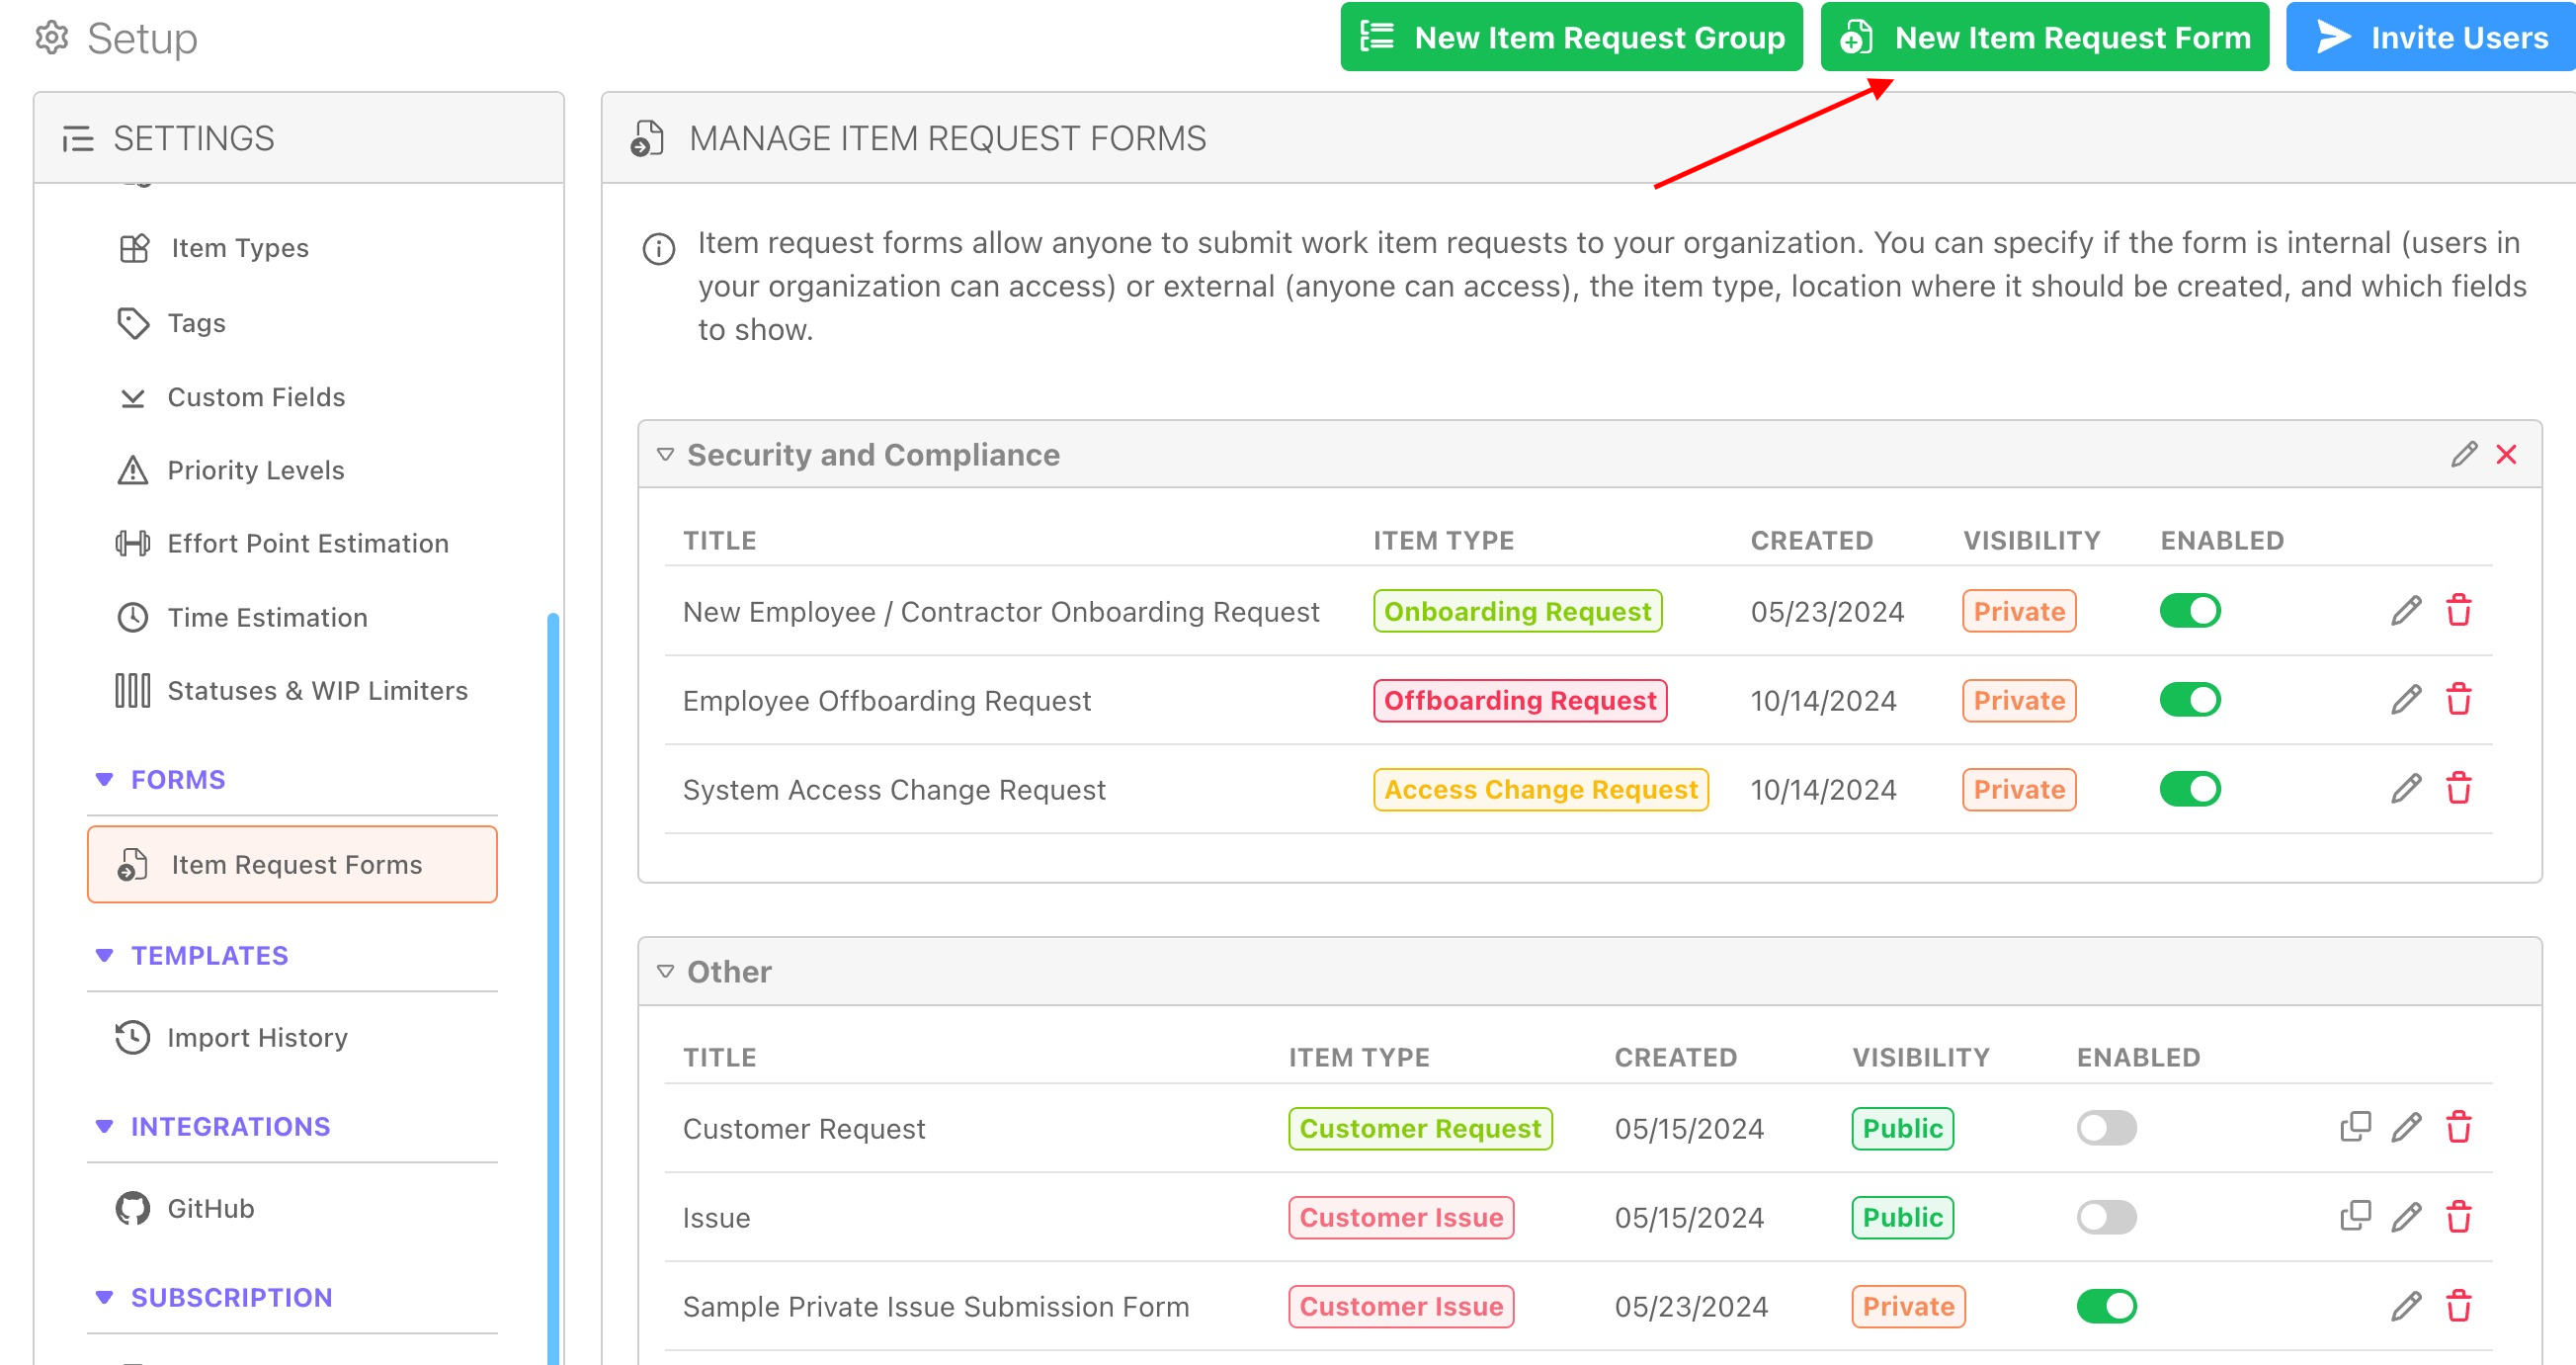
1. Create a New Item Request Form
Under Settings -> Forms -> Item Request Forms, you can create a New Item Request Form. Optionally: You can also create a New Item Request Group to place Item Request Forms in, as pictured below - the default group is "Other", and in this example, the added Item Request Group is named Security and Compliance.
2. Configure Basic Settings
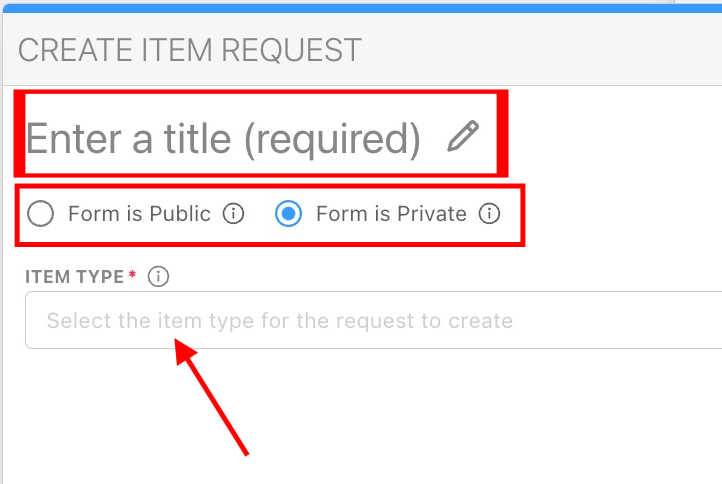
- You will need to add a Title, which will be displayed at the top of the form to the user.
- Then, specify if this form is meant to be used only by users within your DevStride account (Form is Private), or if you will allow people without DevStride accounts to use the form (Form is Public).
- Finally, specify an Item Type. Note: The form will rely on any Custom Fields that you have configured within an Item Type to use as fields in the form, so you will want to choose an Item Type that represents the type of information you are collecting, and the form will create a new Work Item using the Item Type you choose here.
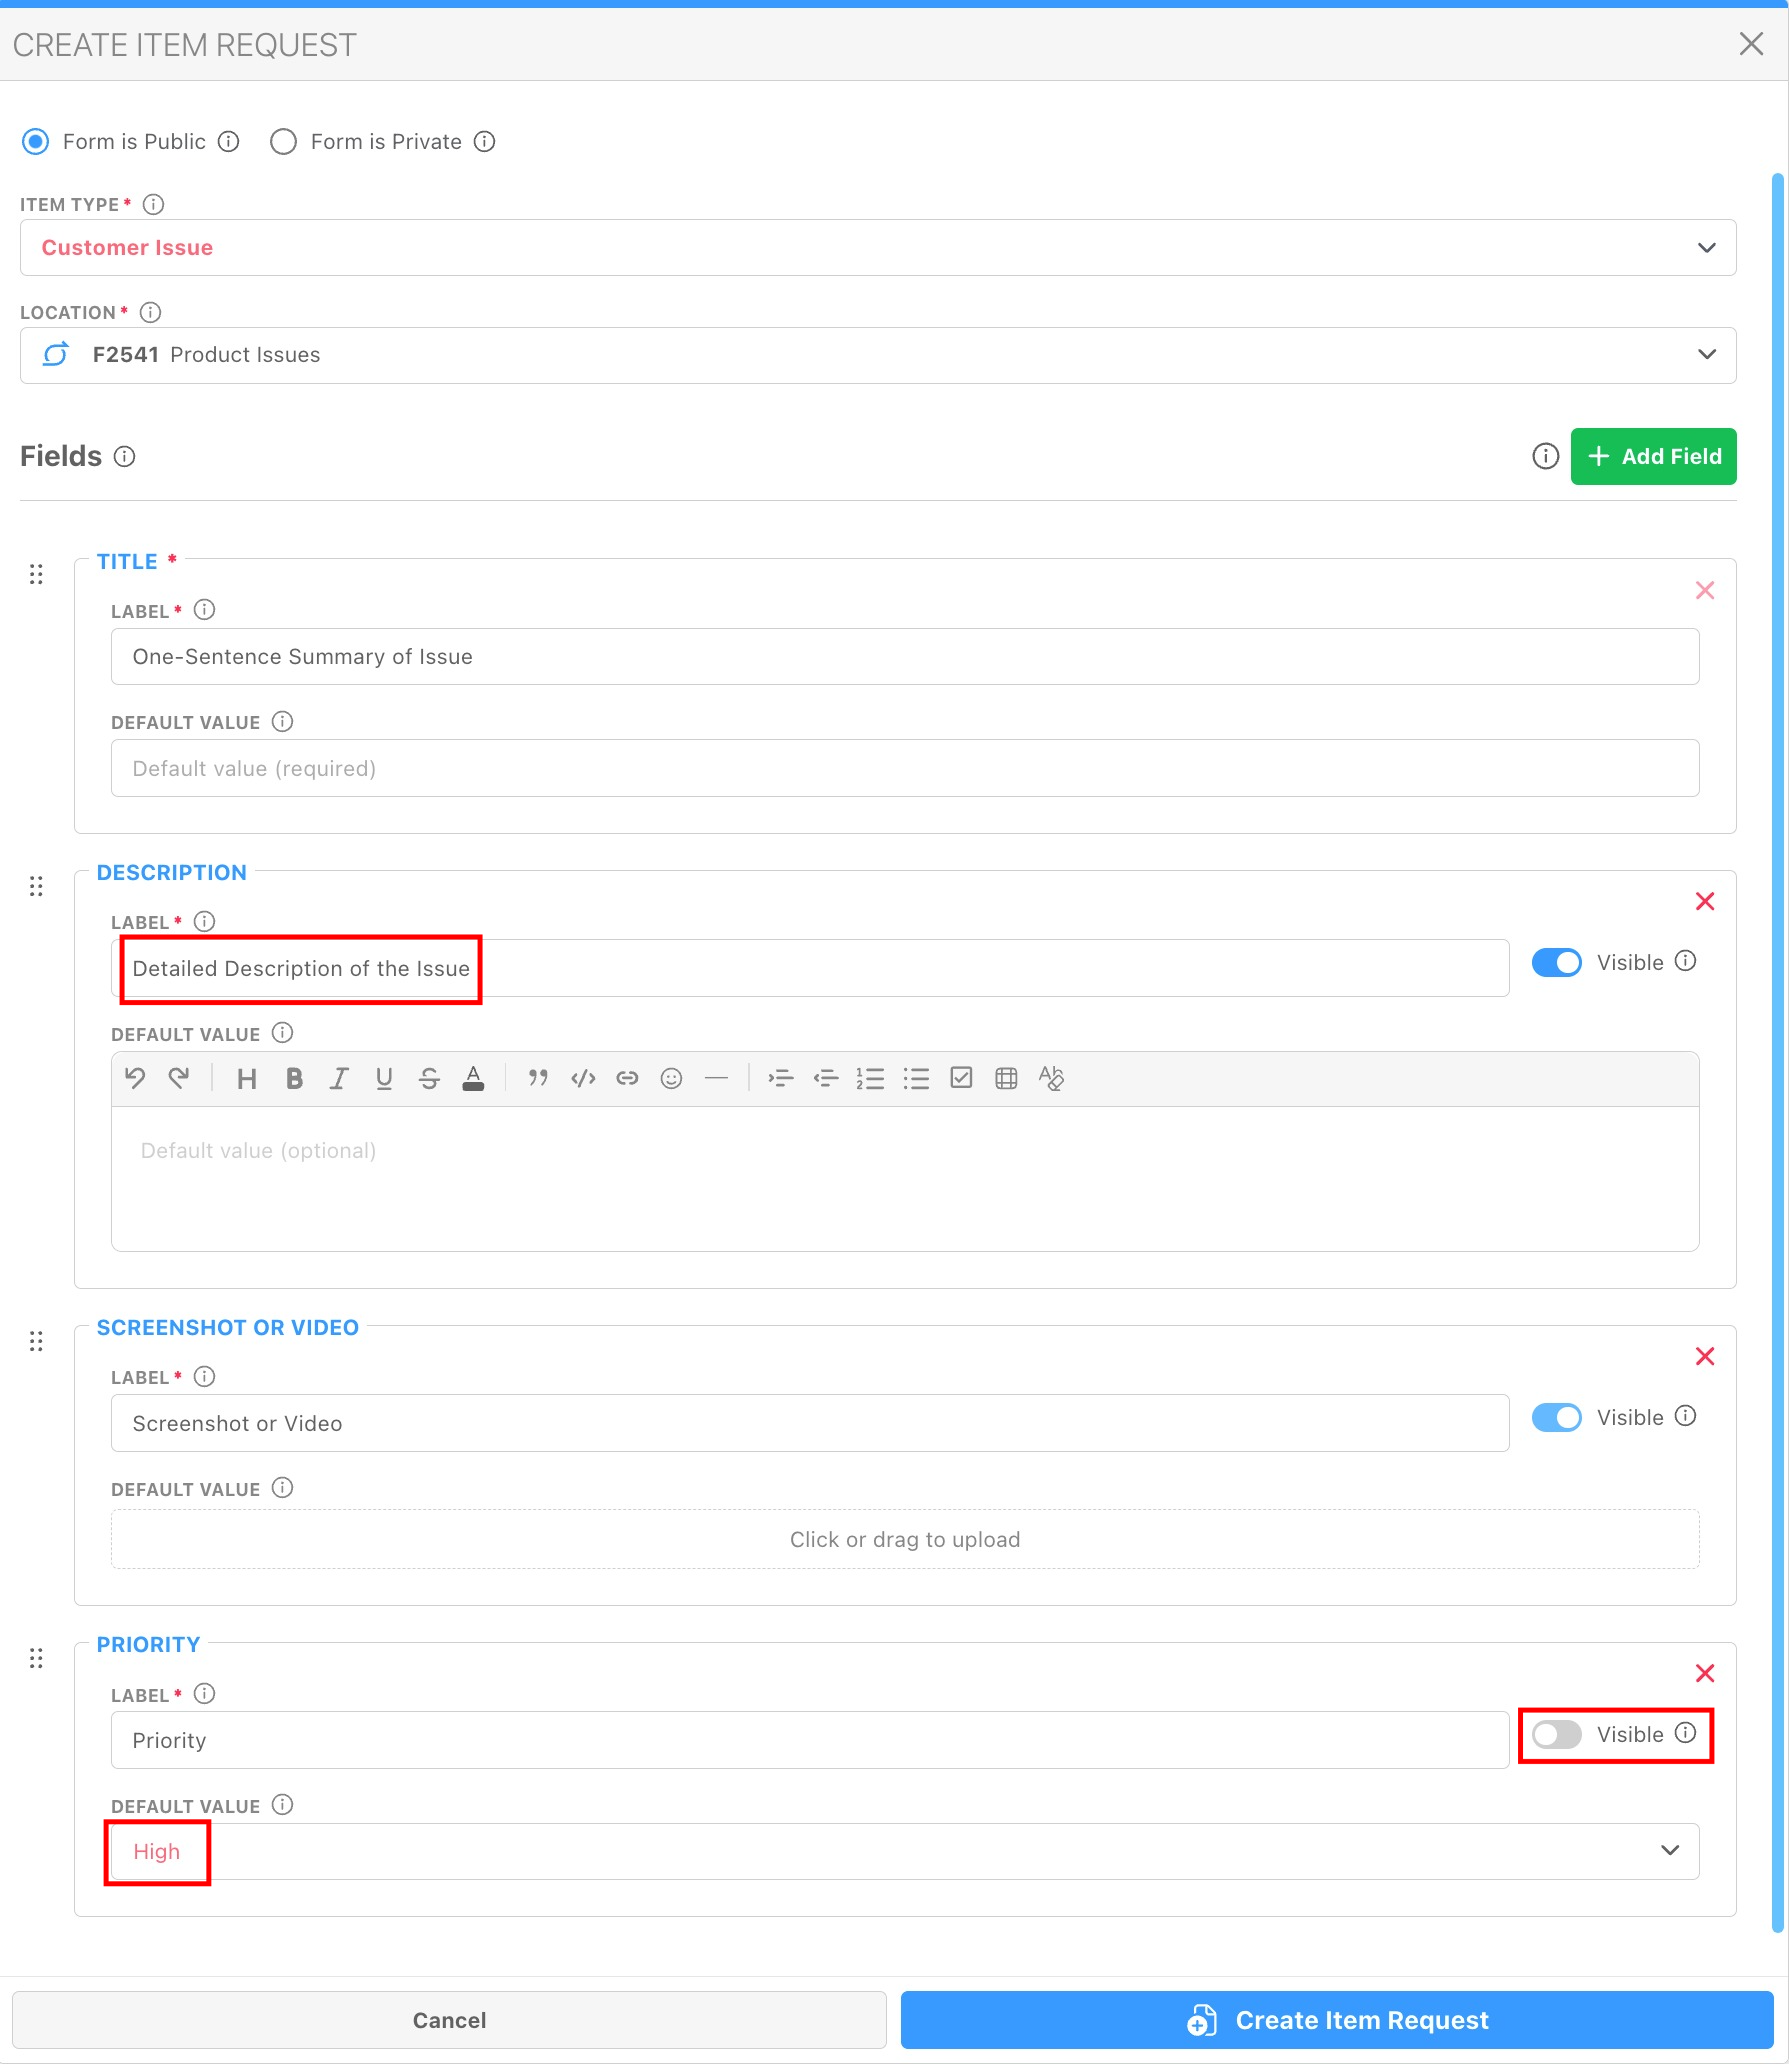
3. Add Fields
Now you are able to add fields, which are available based on a combination of standard fields such as Heading, Description, and Priority, as well as your Custom Fields that have been associated with the selected Item Type.
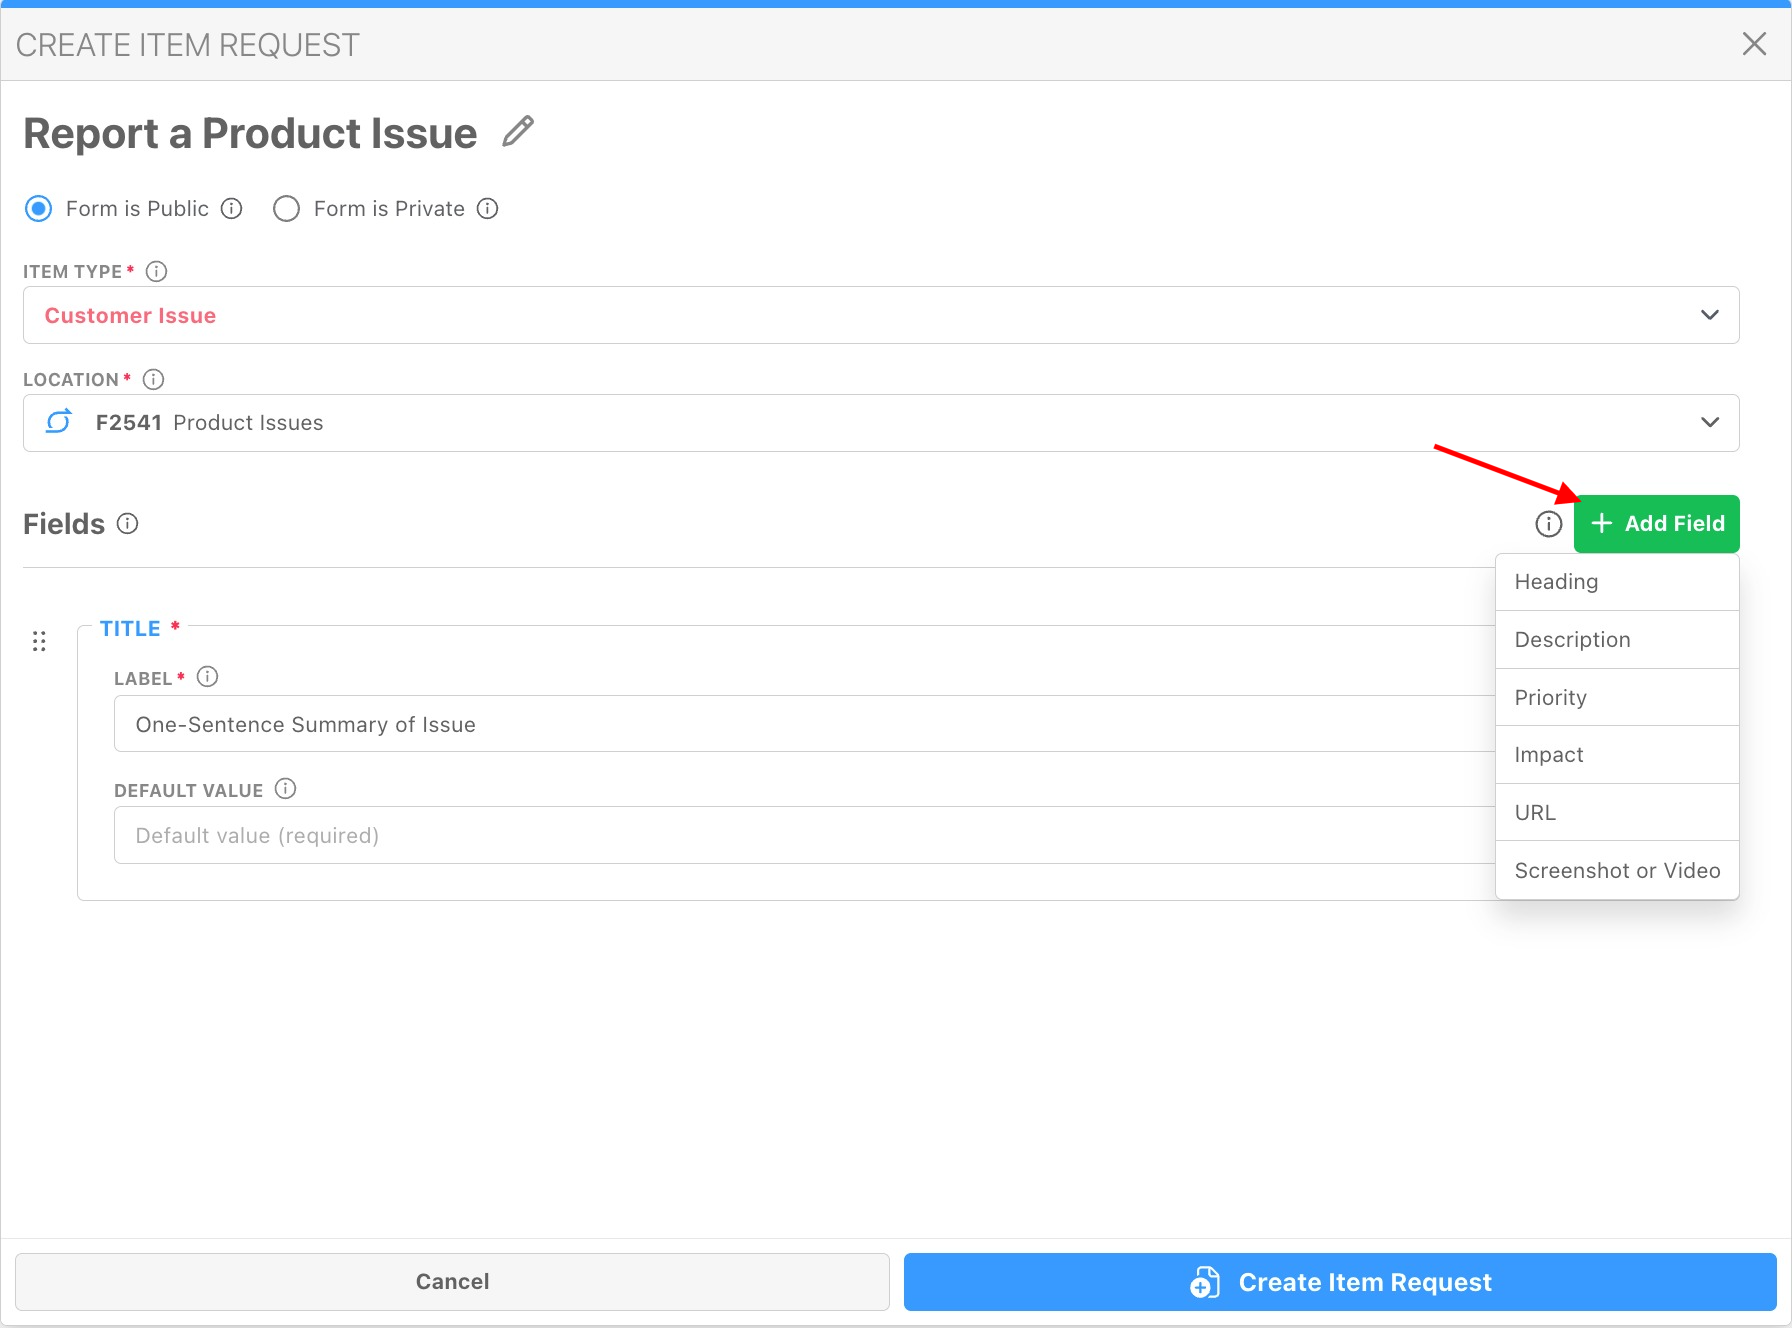
4. Customize Field Labels and Settings
You can change the displayed text for the field's Label if you prefer not to use the default Label, and you can also specify whether a field is Visible or not. For example, if you always want to pass through a Priority of High any time a user submits an Issue, you can specify the Default Value of High and configure Visible to off.
Using a Private Item Request Form
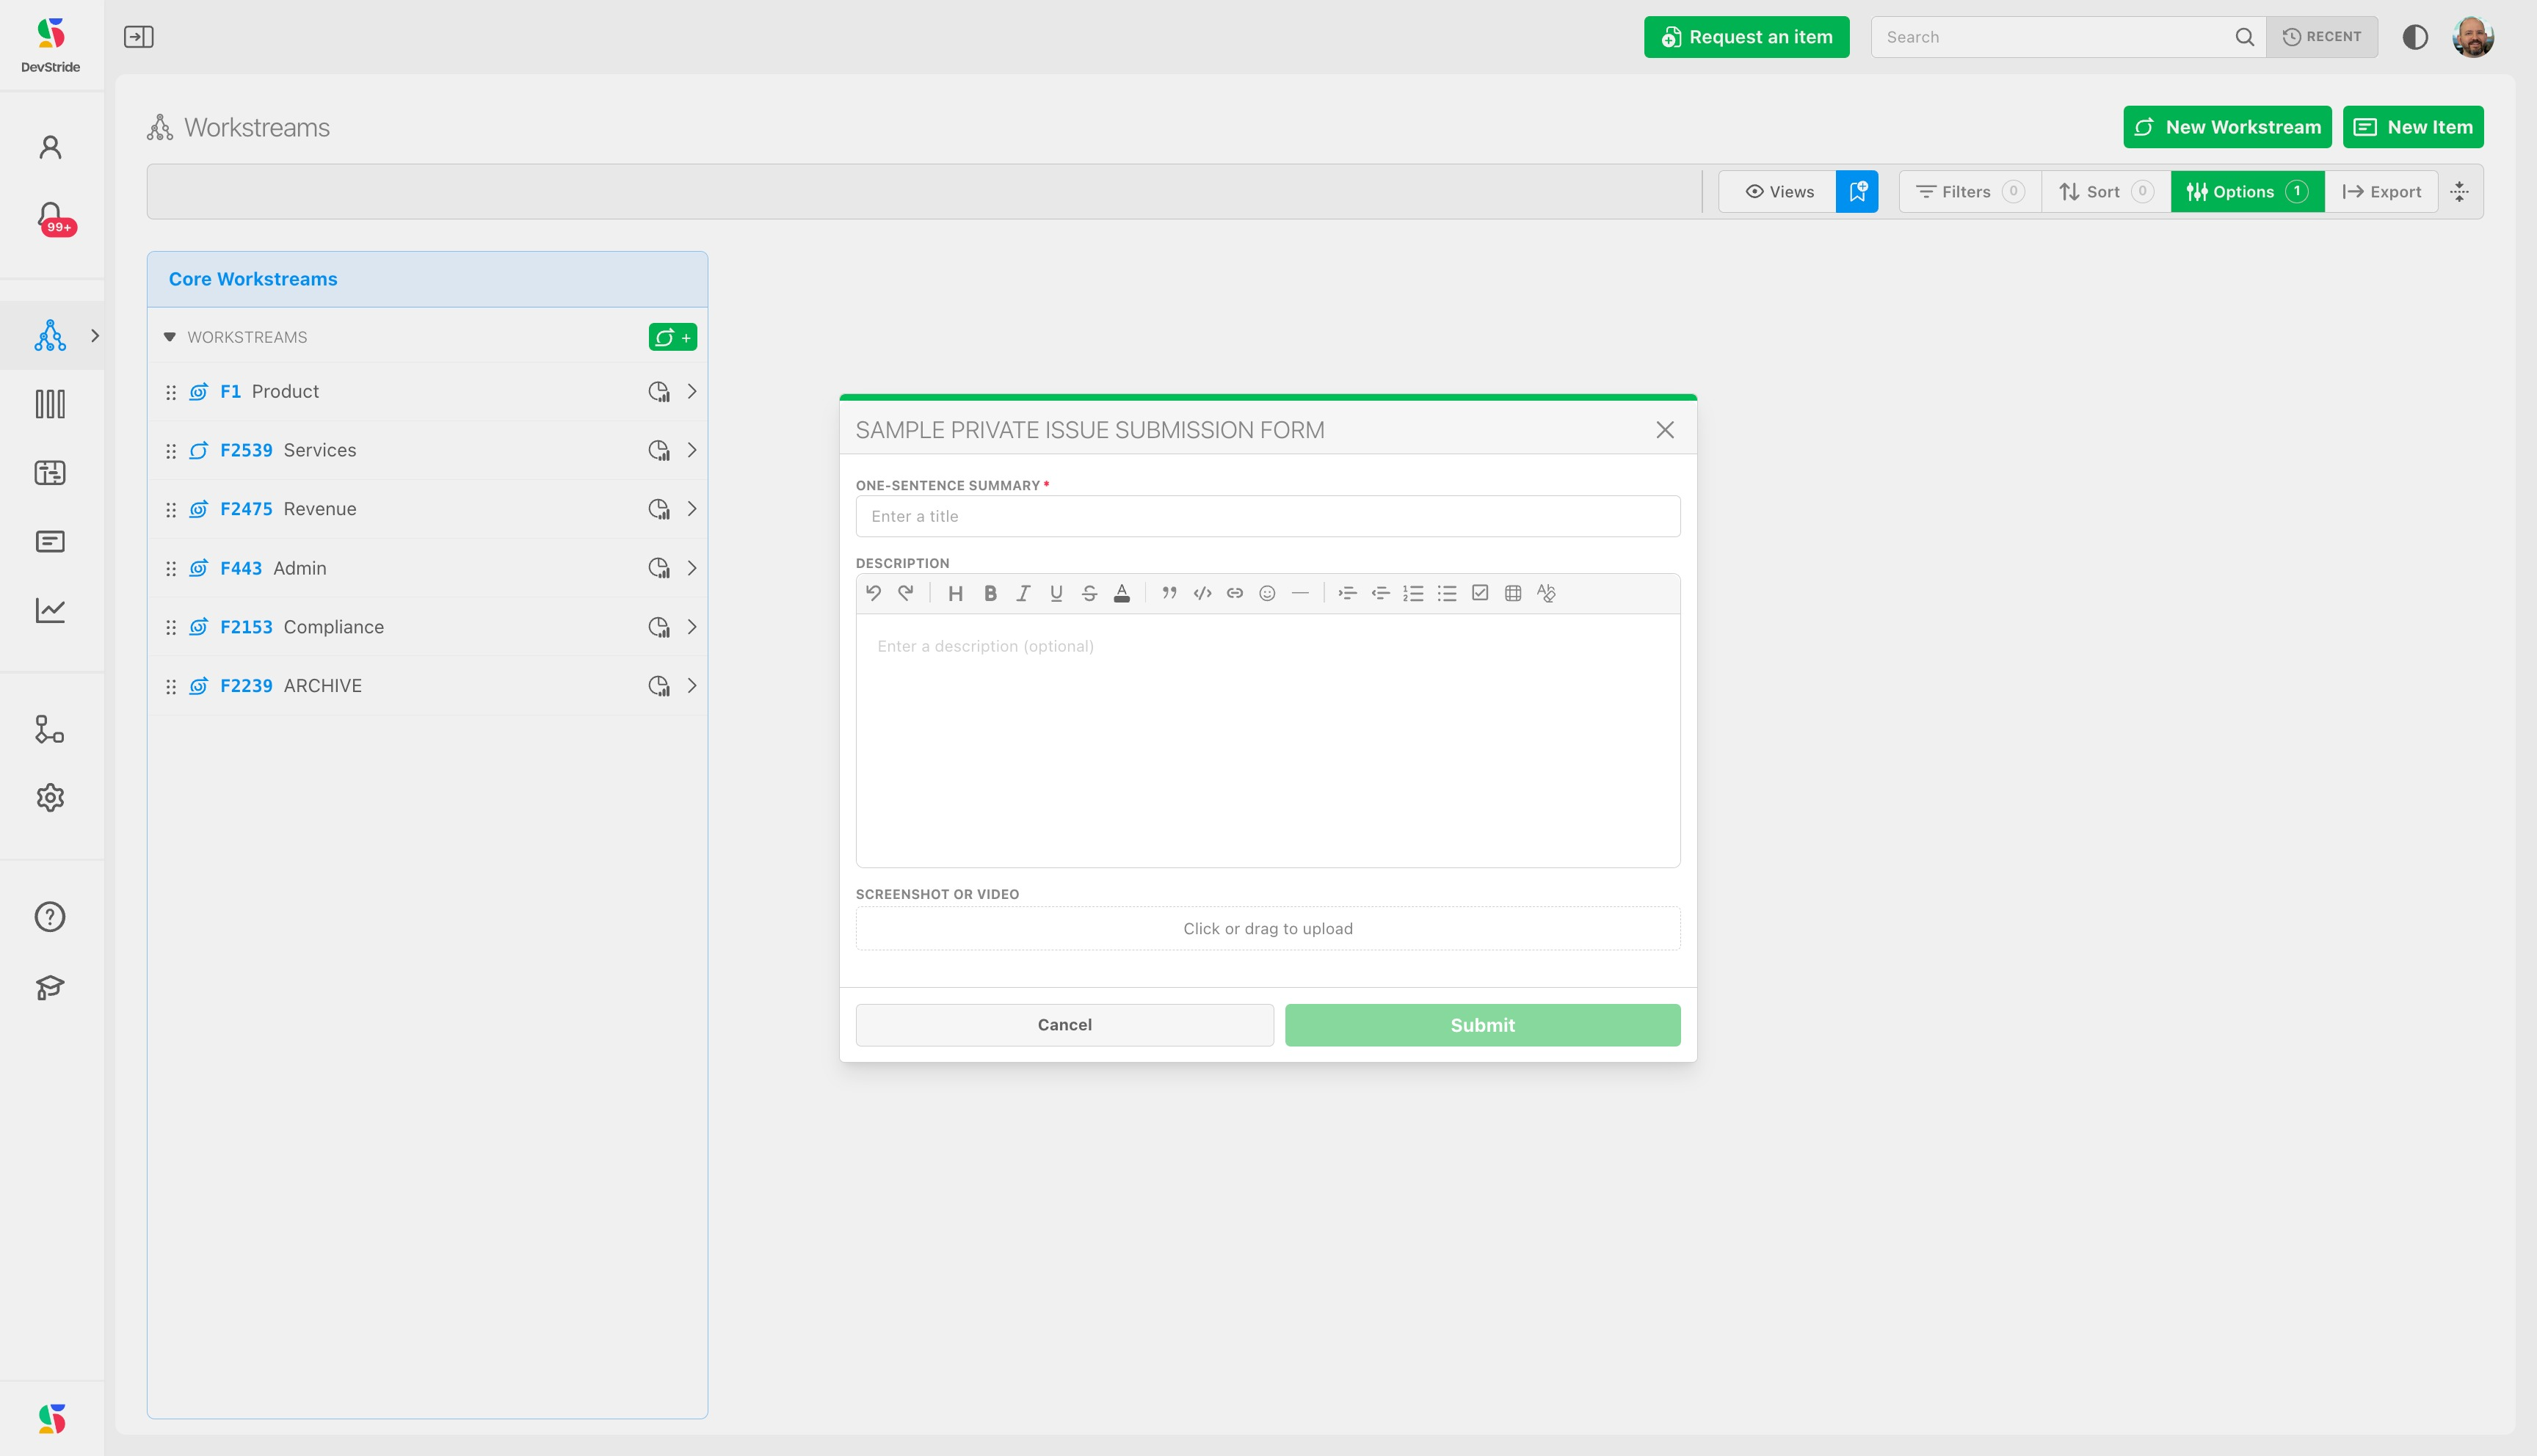
Once you have saved your first Private form, you should now see a new button at the top of the DevStride screen, which will then show you all available Private forms when clicked.

Upon clicking one of the available Private forms, you will be presented with it as a modal popup within DevStride.
Using a Public Item Request Form
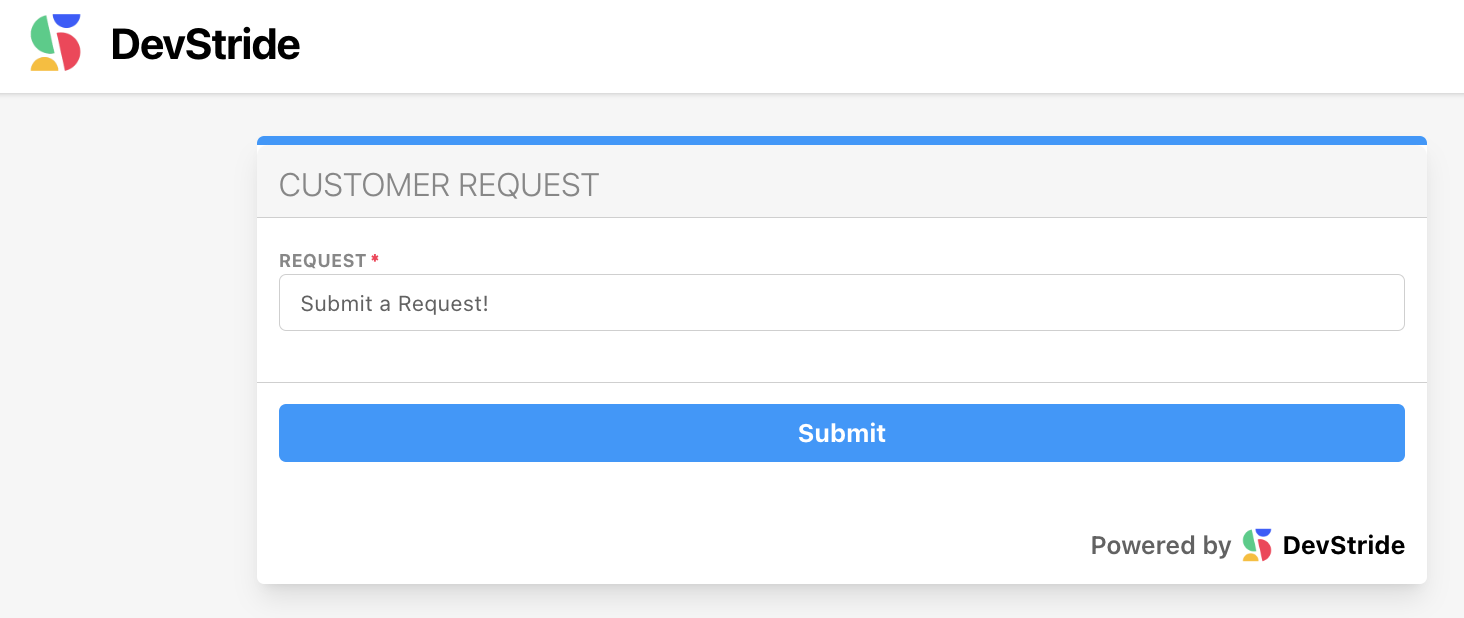
Public forms work a little differently from Private forms - click the Copy Public Link icon and use or share that link.

When you paste that link into a browser, the user will be met by a DevStride-branded form experience similar to this:
Examples
The following are just a few examples of how you might use Item Request Forms:
- Feature requests
- Reporting defects
- Tracking requests for elevated access to systems (for workflow and compliance purposes)
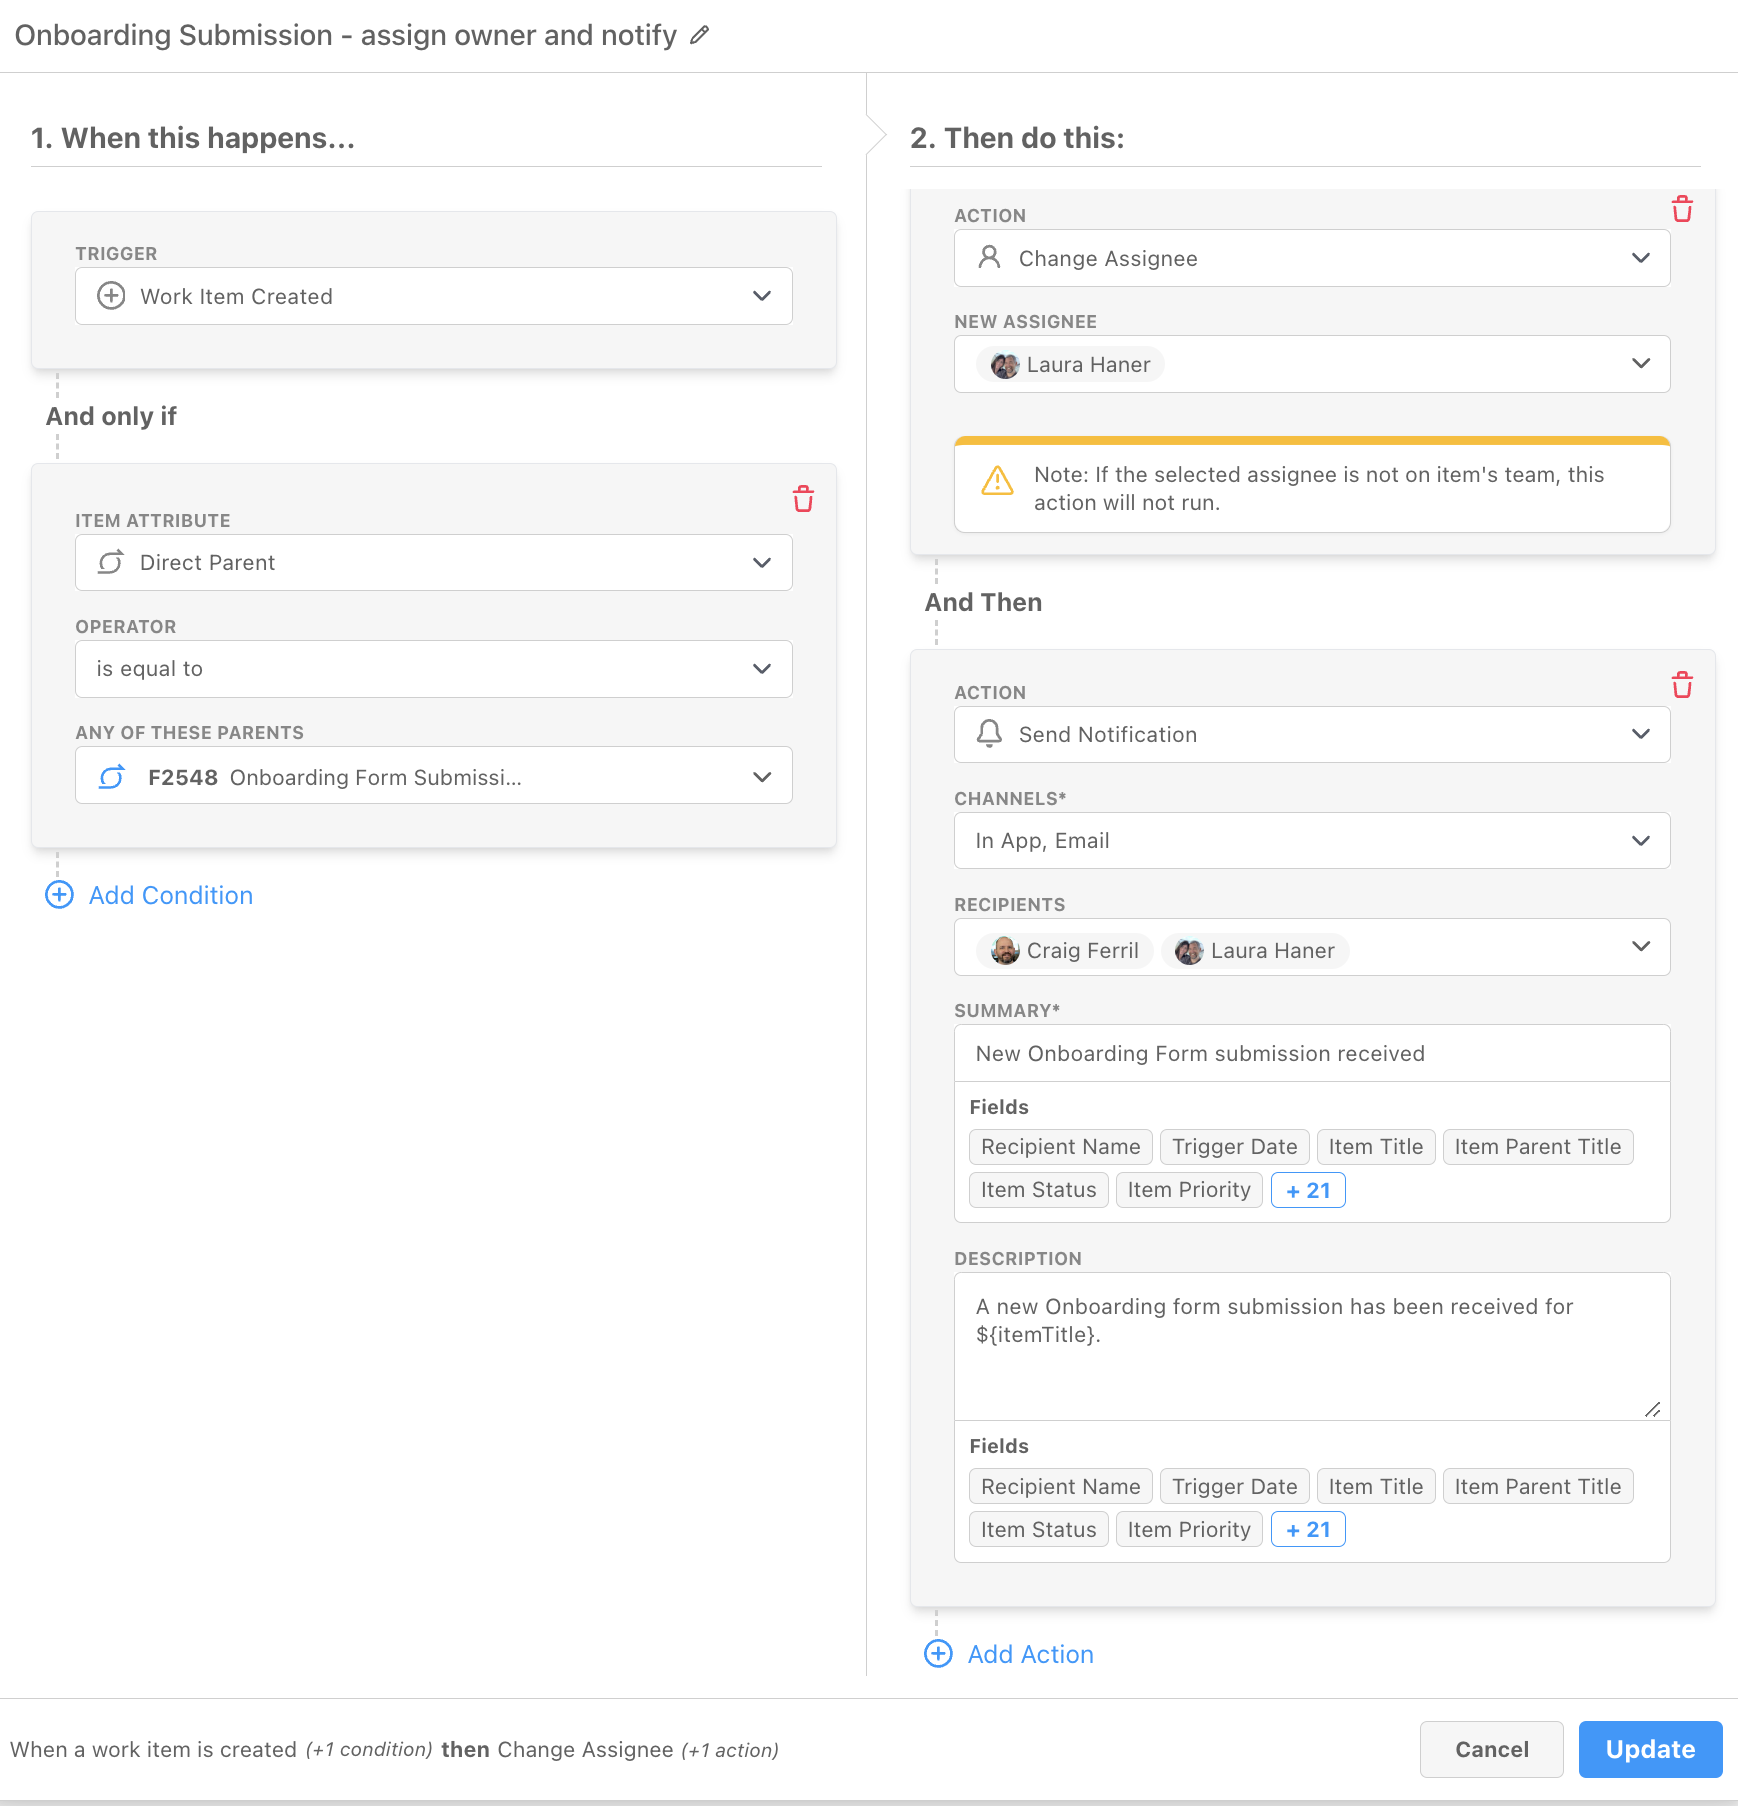
By pairing form submissions with an Automation, you can create notifications of new submissions, automatically assign an owner, and more. For example, automating the intake of an internal new hire request might include setting an Assignee and notifying the HR team of the new request via email and DevStride in-app notification.
Configuration
In Use
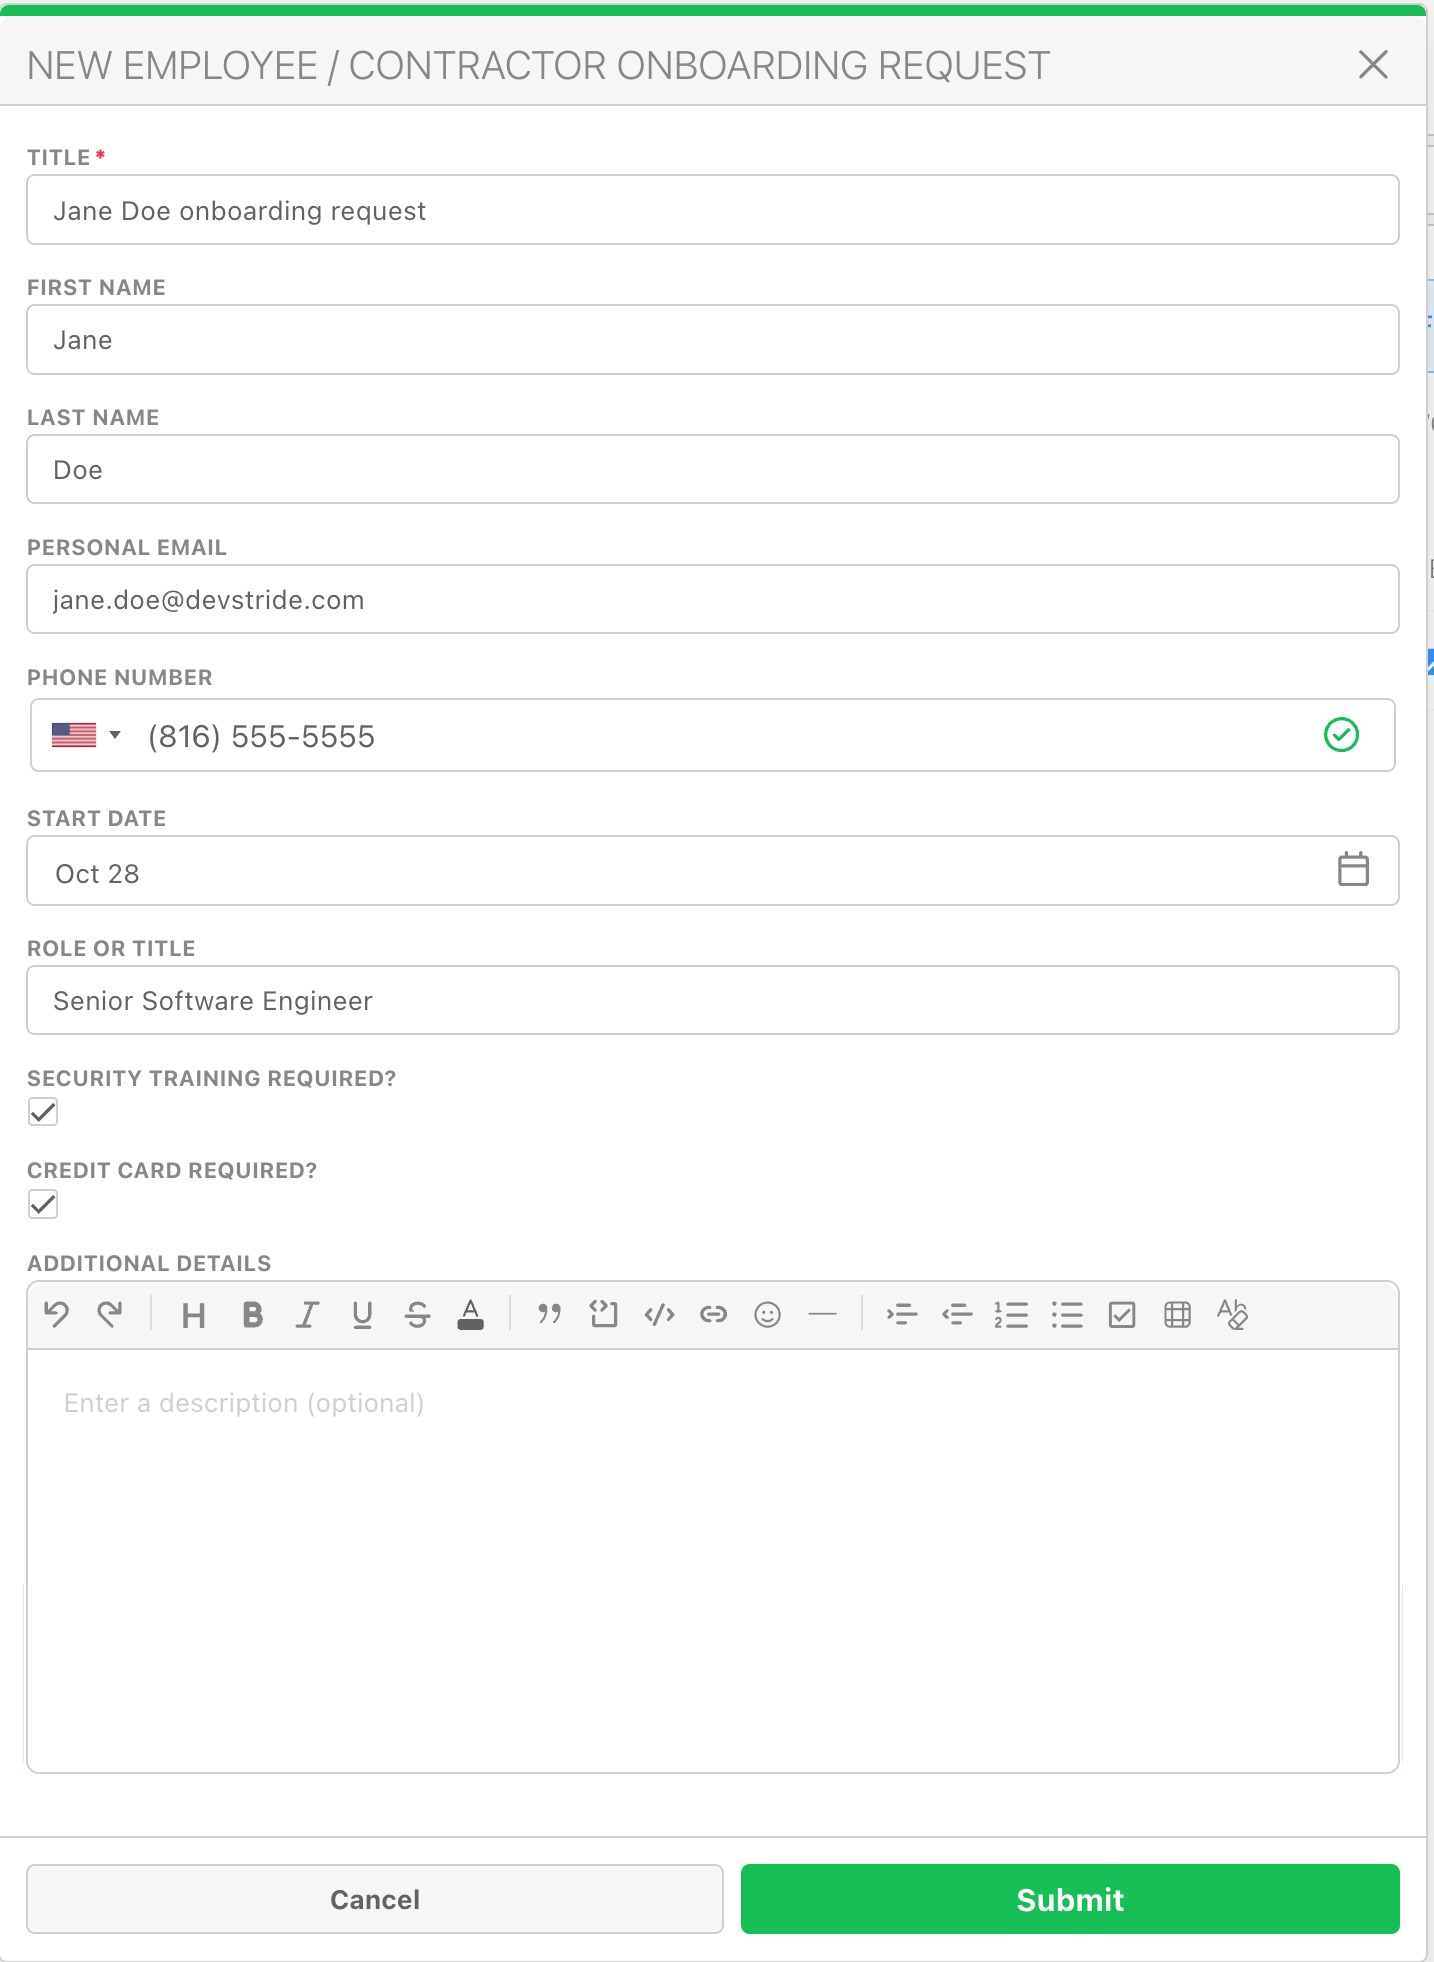
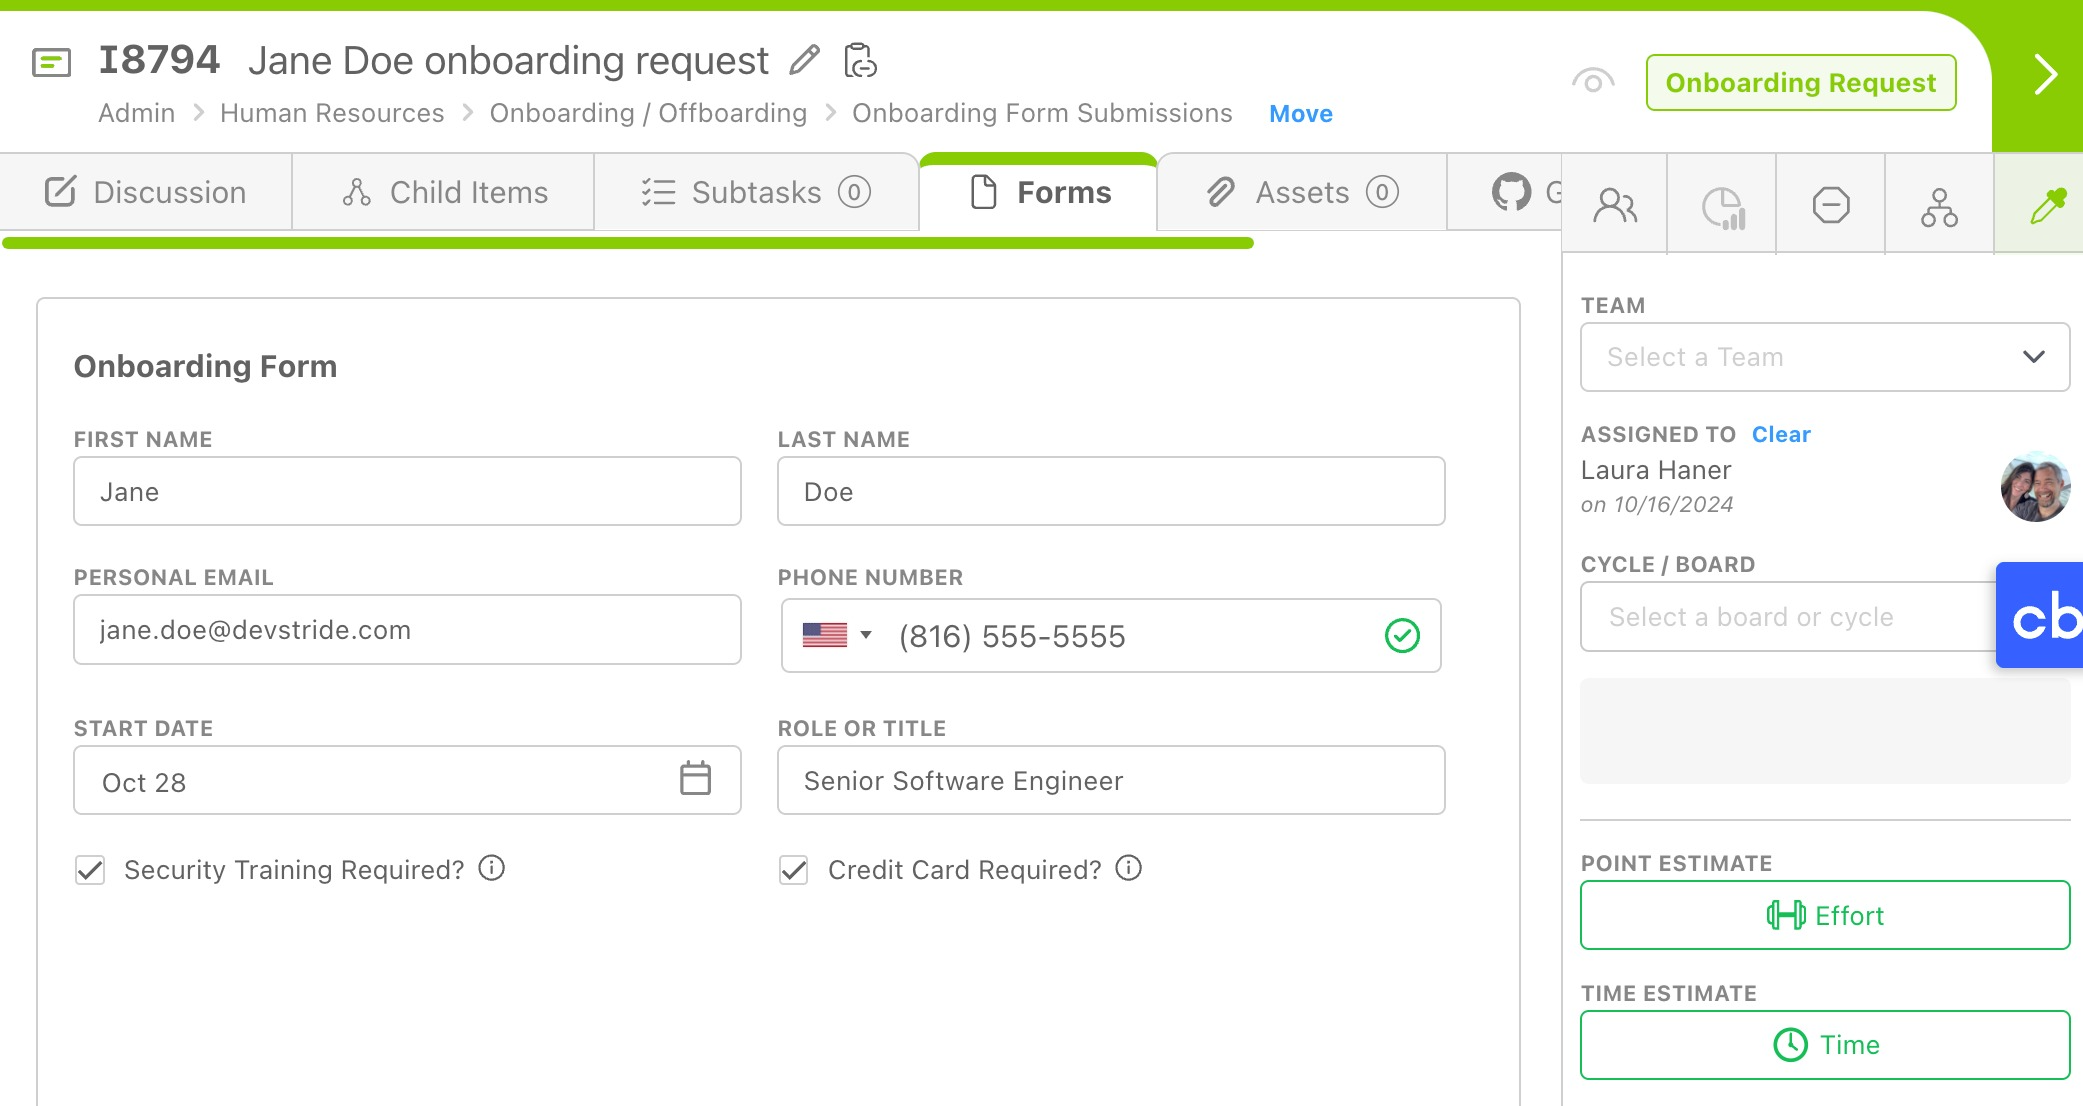
The Work Item Created
(Notice that, in this case, the Custom Fields were configured inside of a Forms Collection, therefore they appear under the Forms tab in the work item rather than in the sidebar.)
