Explore the Workspace
- 20 Feb 2025
- 2 Minutes to read
- Contributors

- Print
- DarkLight
Explore the Workspace
- Updated on 20 Feb 2025
- 2 Minutes to read
- Contributors
- Print
- DarkLight
Article summary
Did you find this summary helpful?
Thank you for your feedback!
In the nest few articles, we will tour each section of the item workspace. Follow the linked articles at the end of this page to move through each element of DevStride's Item Workspace.
Item Workspace Tour: Header
Let's open an item and take a look at what we can manage about items.
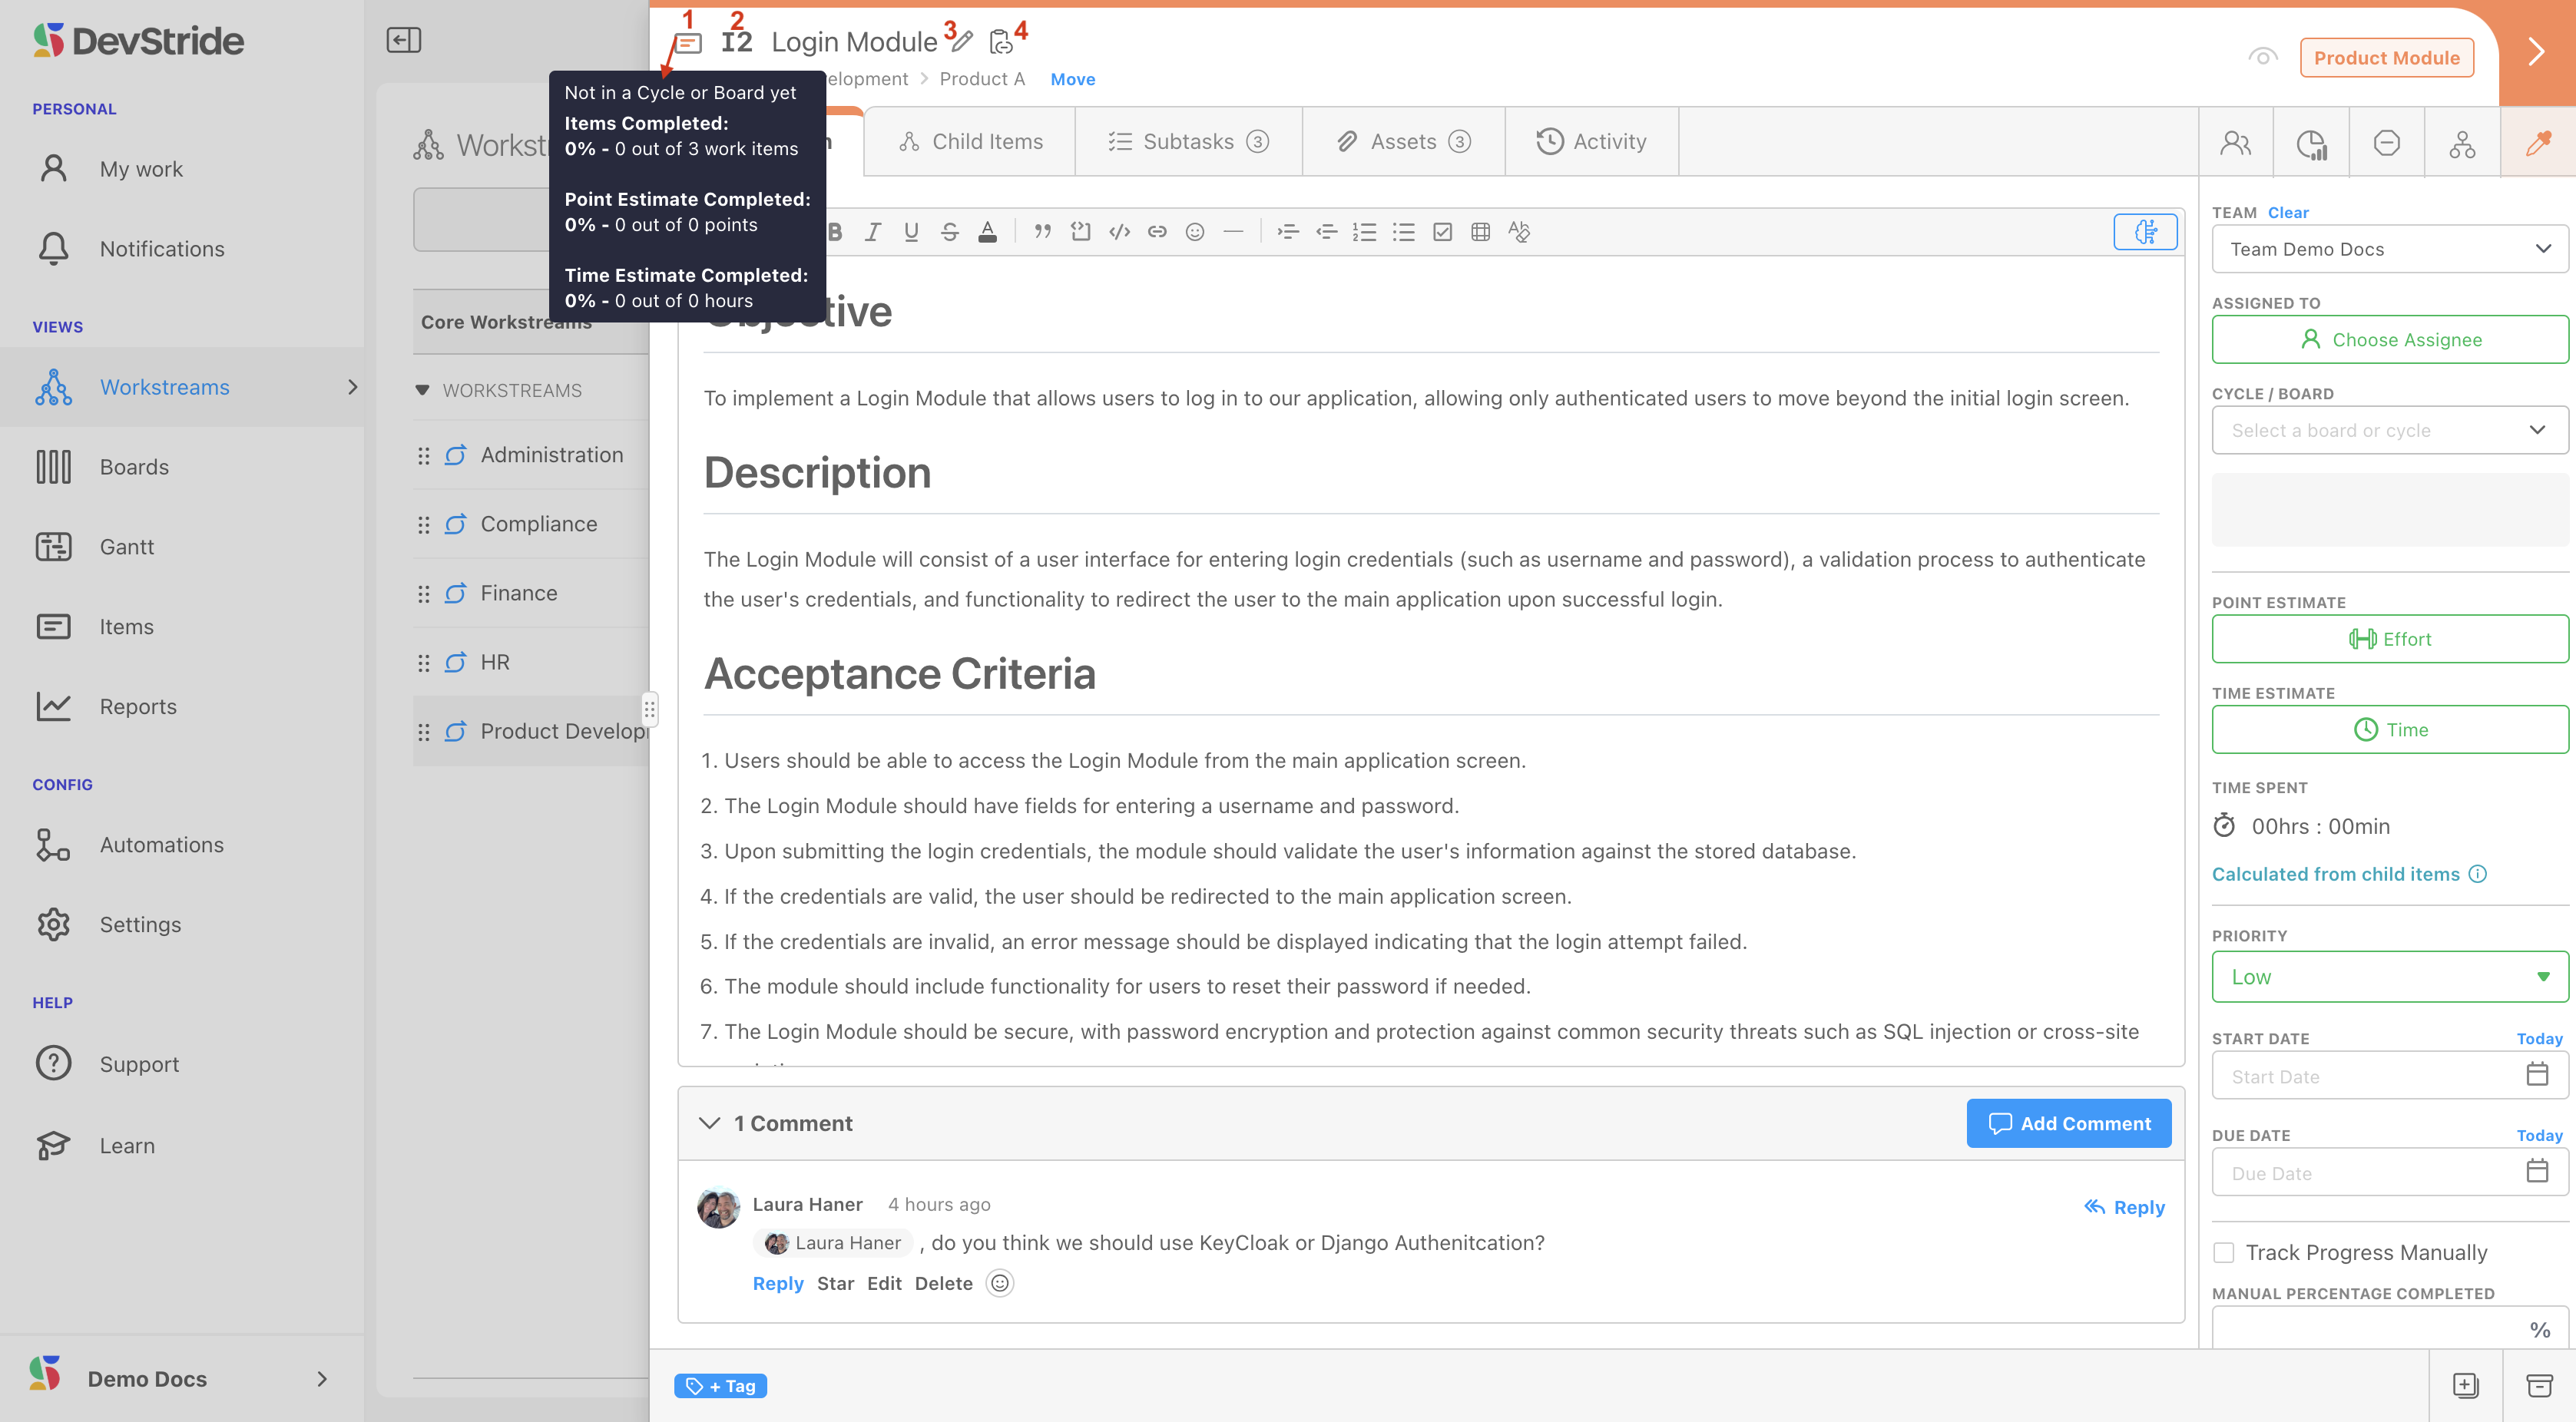
Item Header
There are several pieces of information about the item that we can get right from the header.
- Item card (1) - displays completion stats
- Item number (2) - this is a system-assigned number in the DevStride database. It starts with "I" for Item.
- Item name (3) - you can edit the name by clicking on the pencil icon. The new name will display system-wide.
- Copy item link (4) - this can be used to create a link that when clicked will drop the user right back to this item. This is great for referring to items in Slack, email, on lists, etc. It can clicked on from anywhere or pasted right in a new browser instance. It is a link that works internet-wide for any logged-in users.
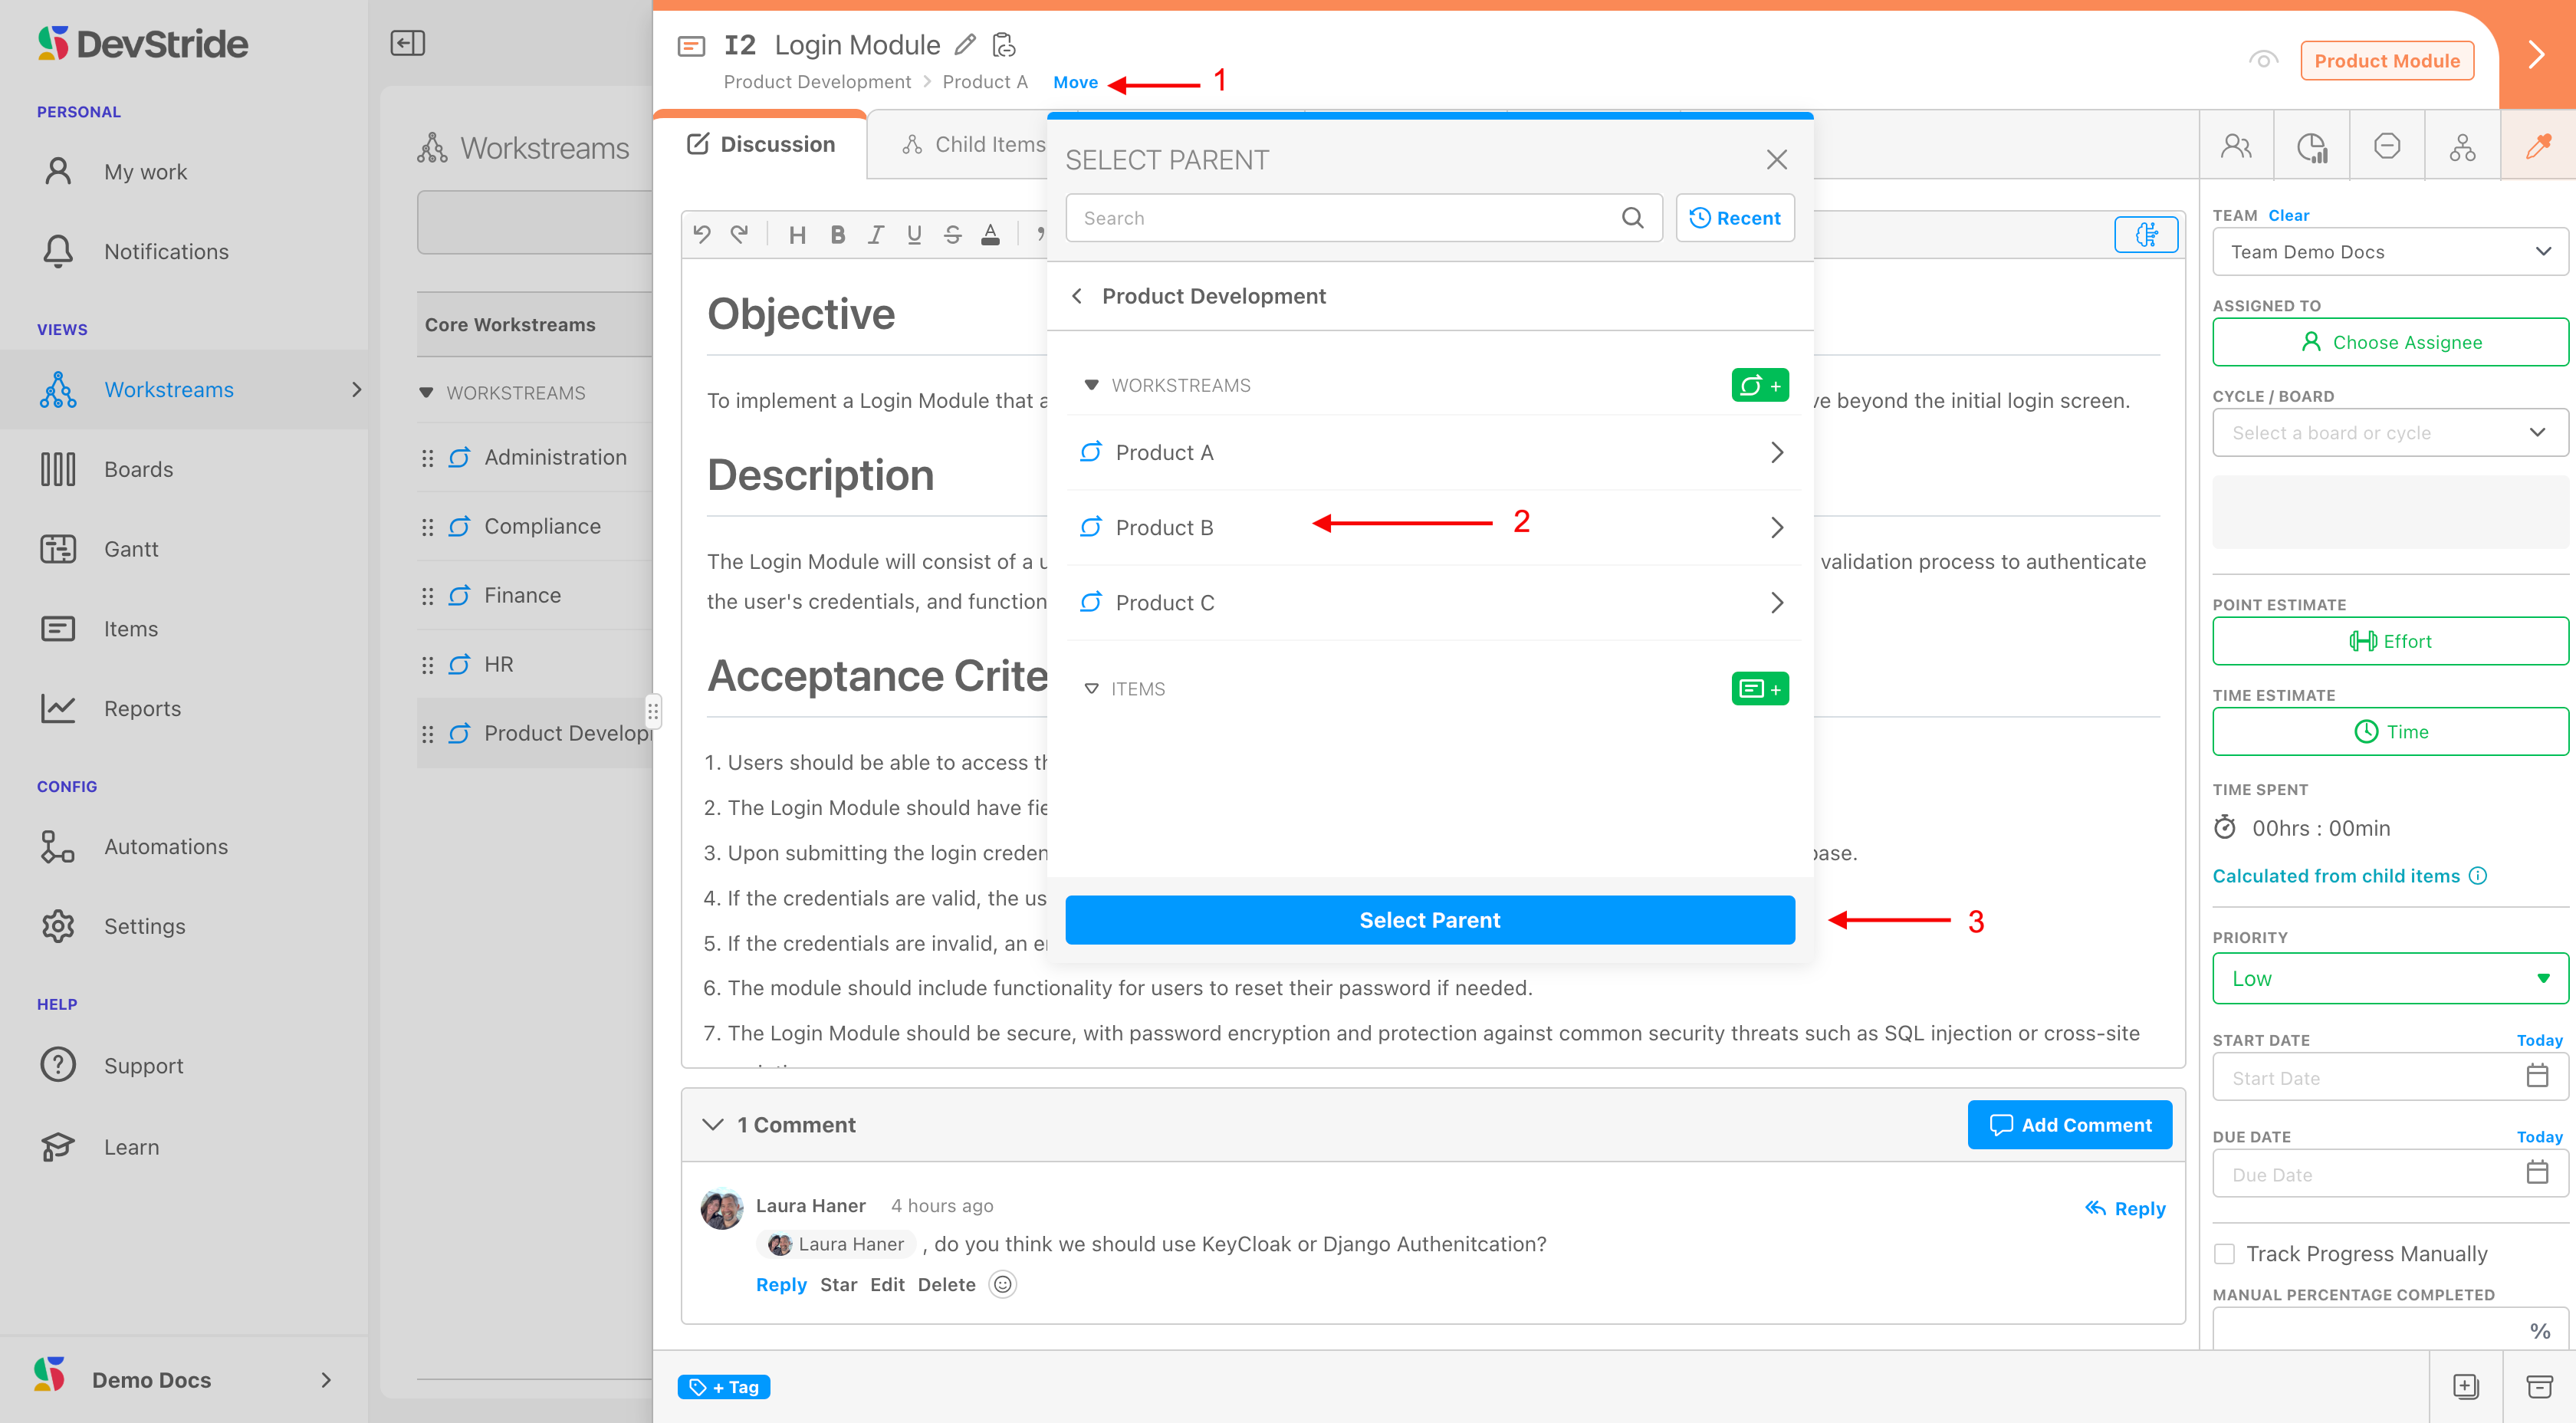
Breadcrumb Trail
The breadcrumb trail under the item name reflects where the item is in the Workstream map. In addition to using it to navigate to other places in the workstream, you can move the item to a different location from here.
To move an item, click on the Move link (1). In the pop-up box that displays, select where you want to move the item to by navigating to and clicking on the desired location in the workstream (2). Click Select Parent (3).
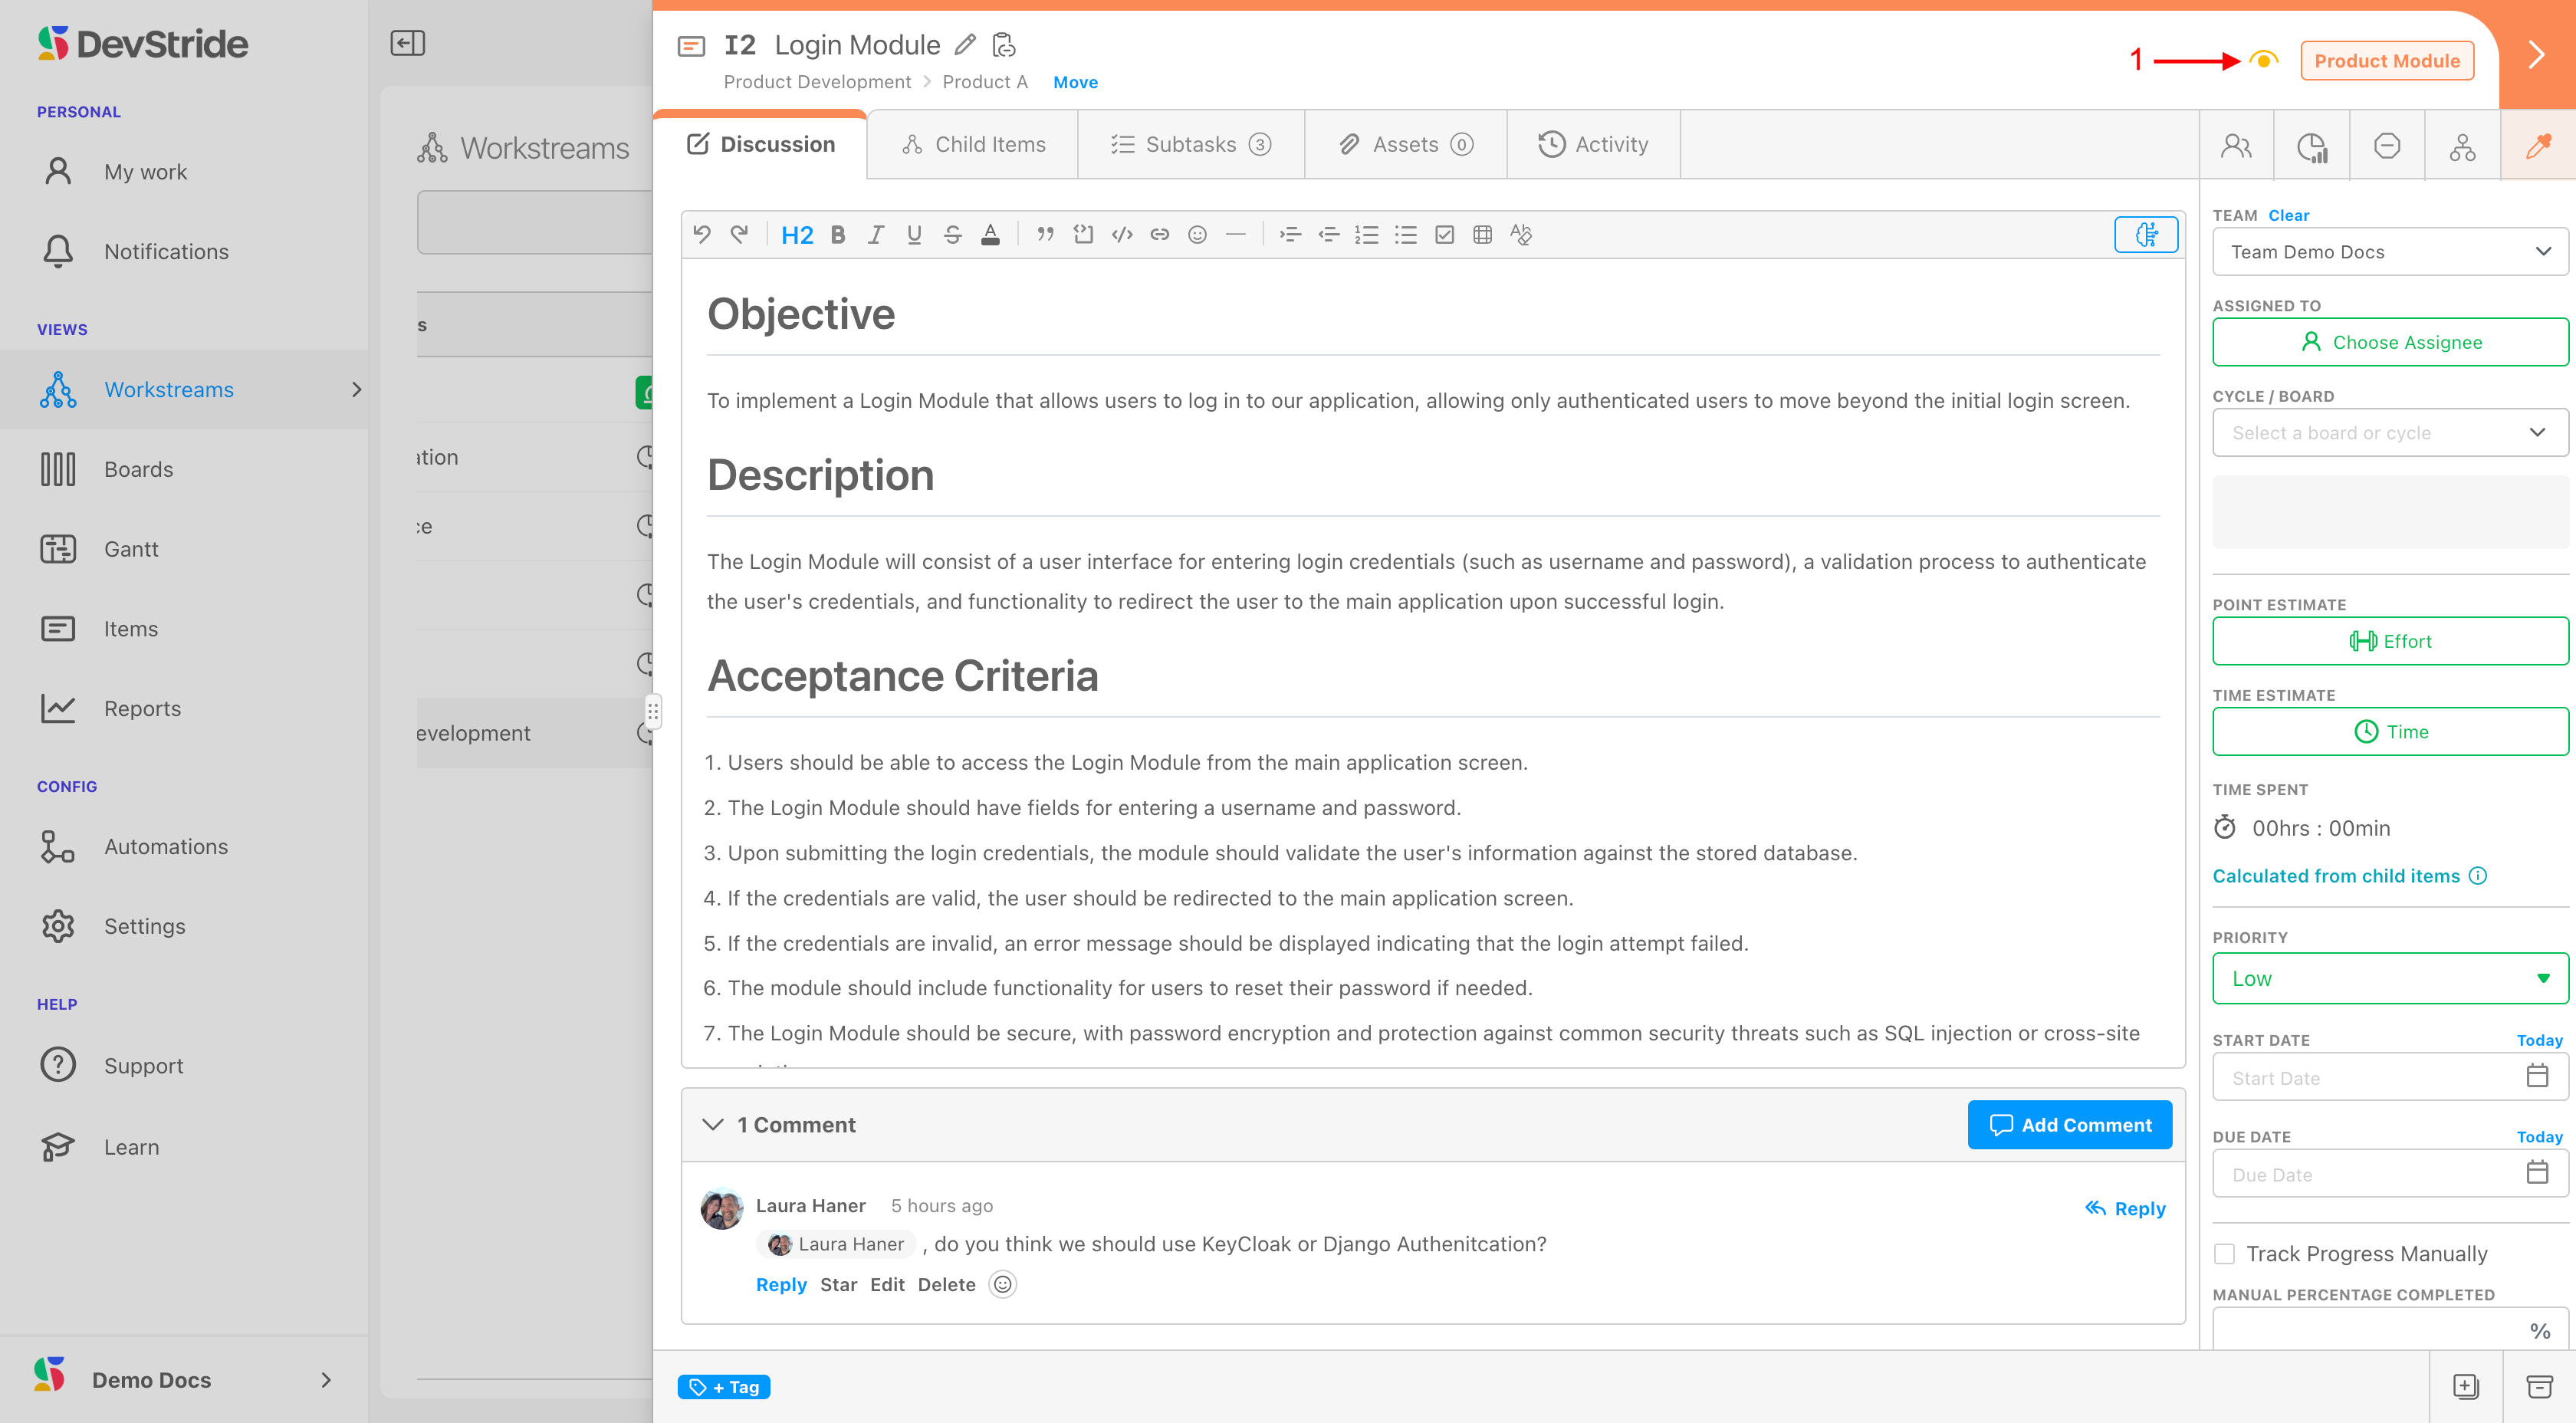
Watcher
If you would like to be included on notifications and changes about a particular item, you can click on this link (1).
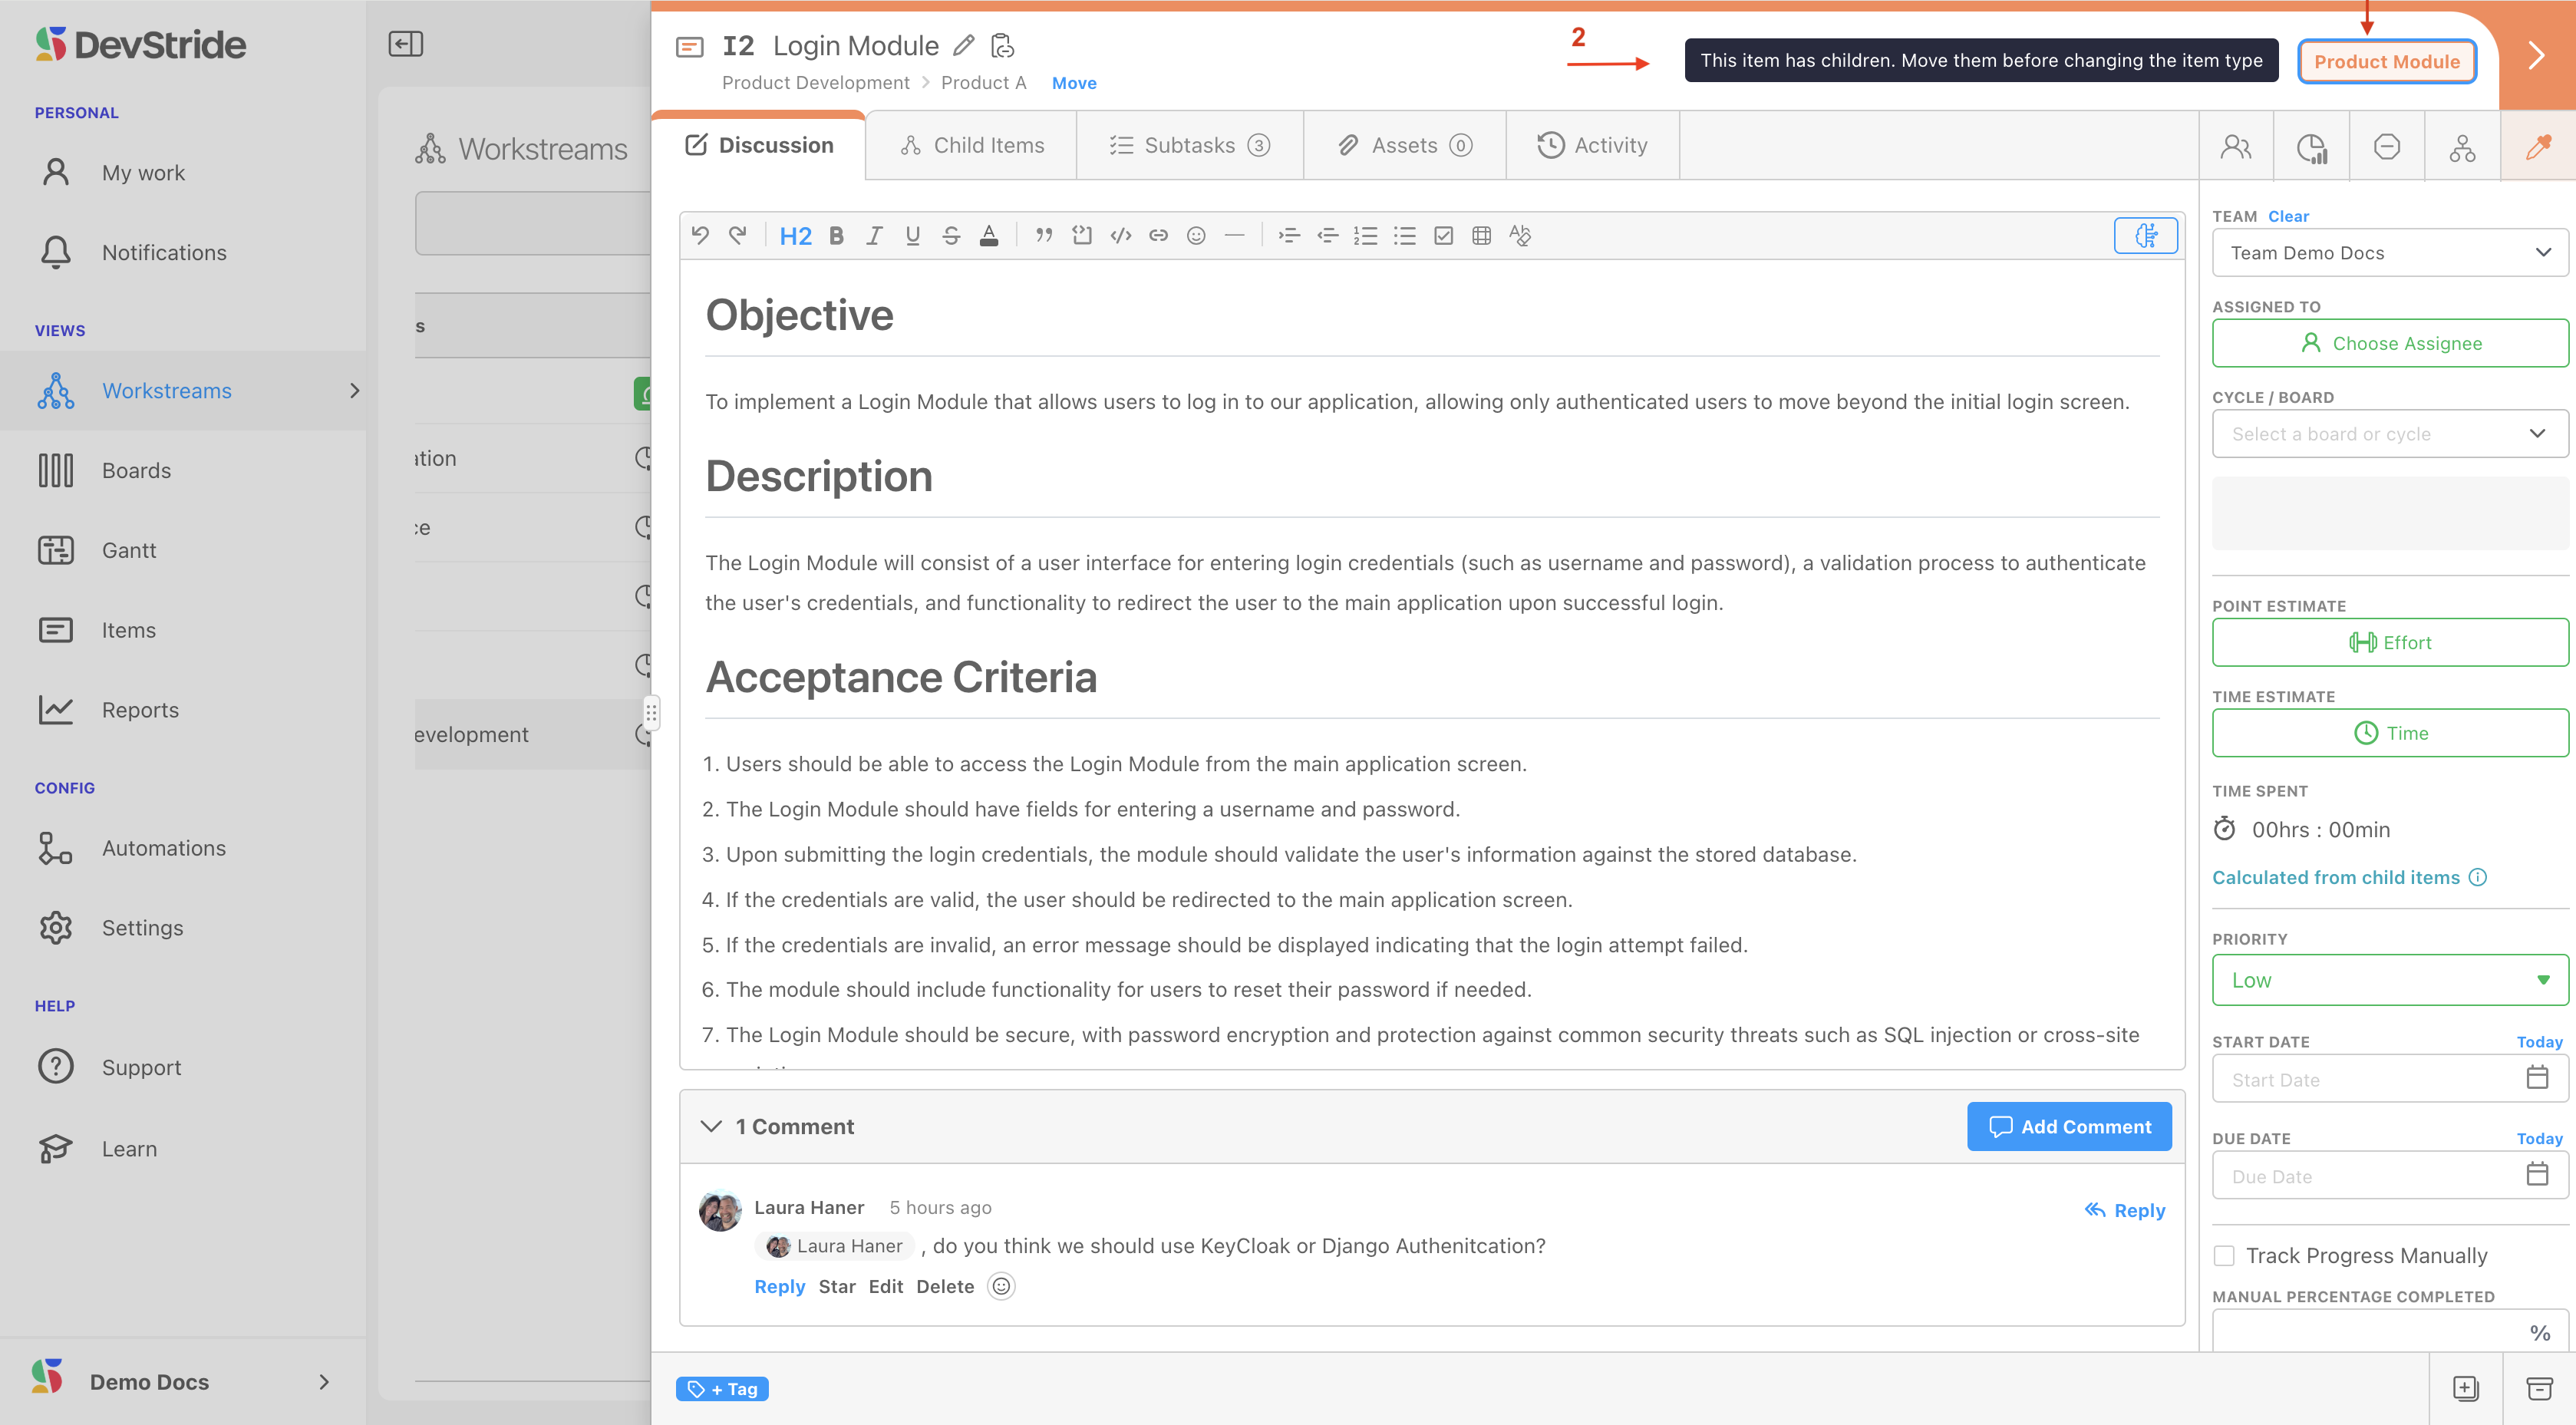
Item type label
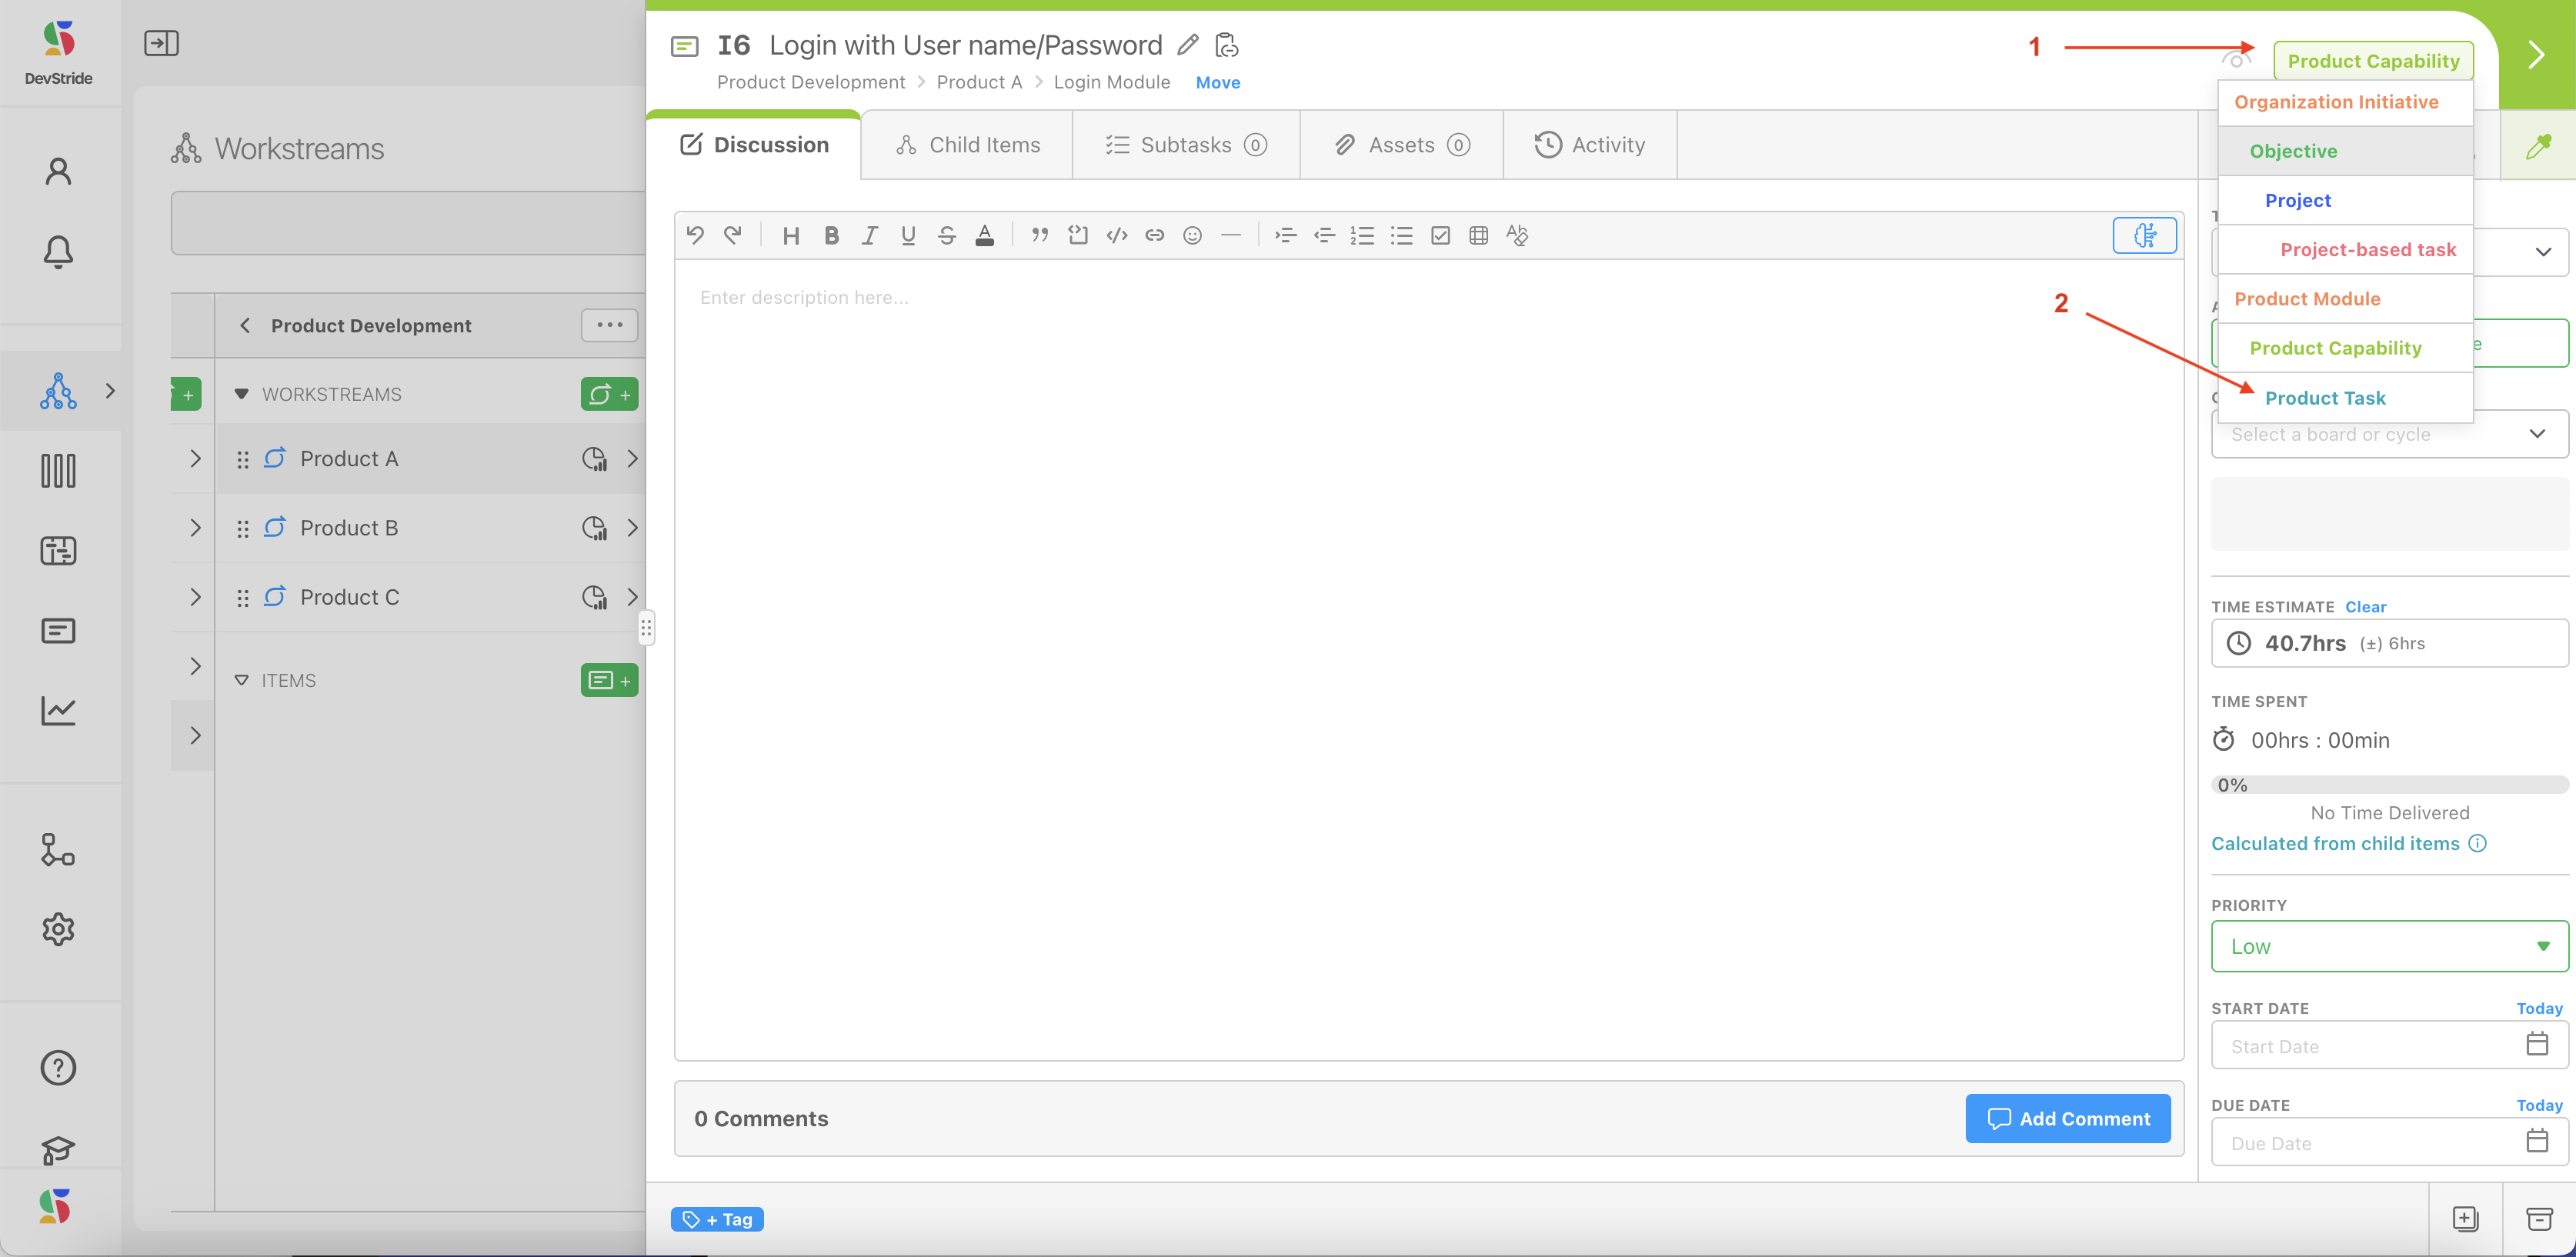
The label on the far right indicates the item type. You can click it (1) and edit it to be a different item type, but only if it doesn't have children. This is what is displayed if an item type already has children underneath it (2).
If the item type is eligible to be changed, there are just a few steps.
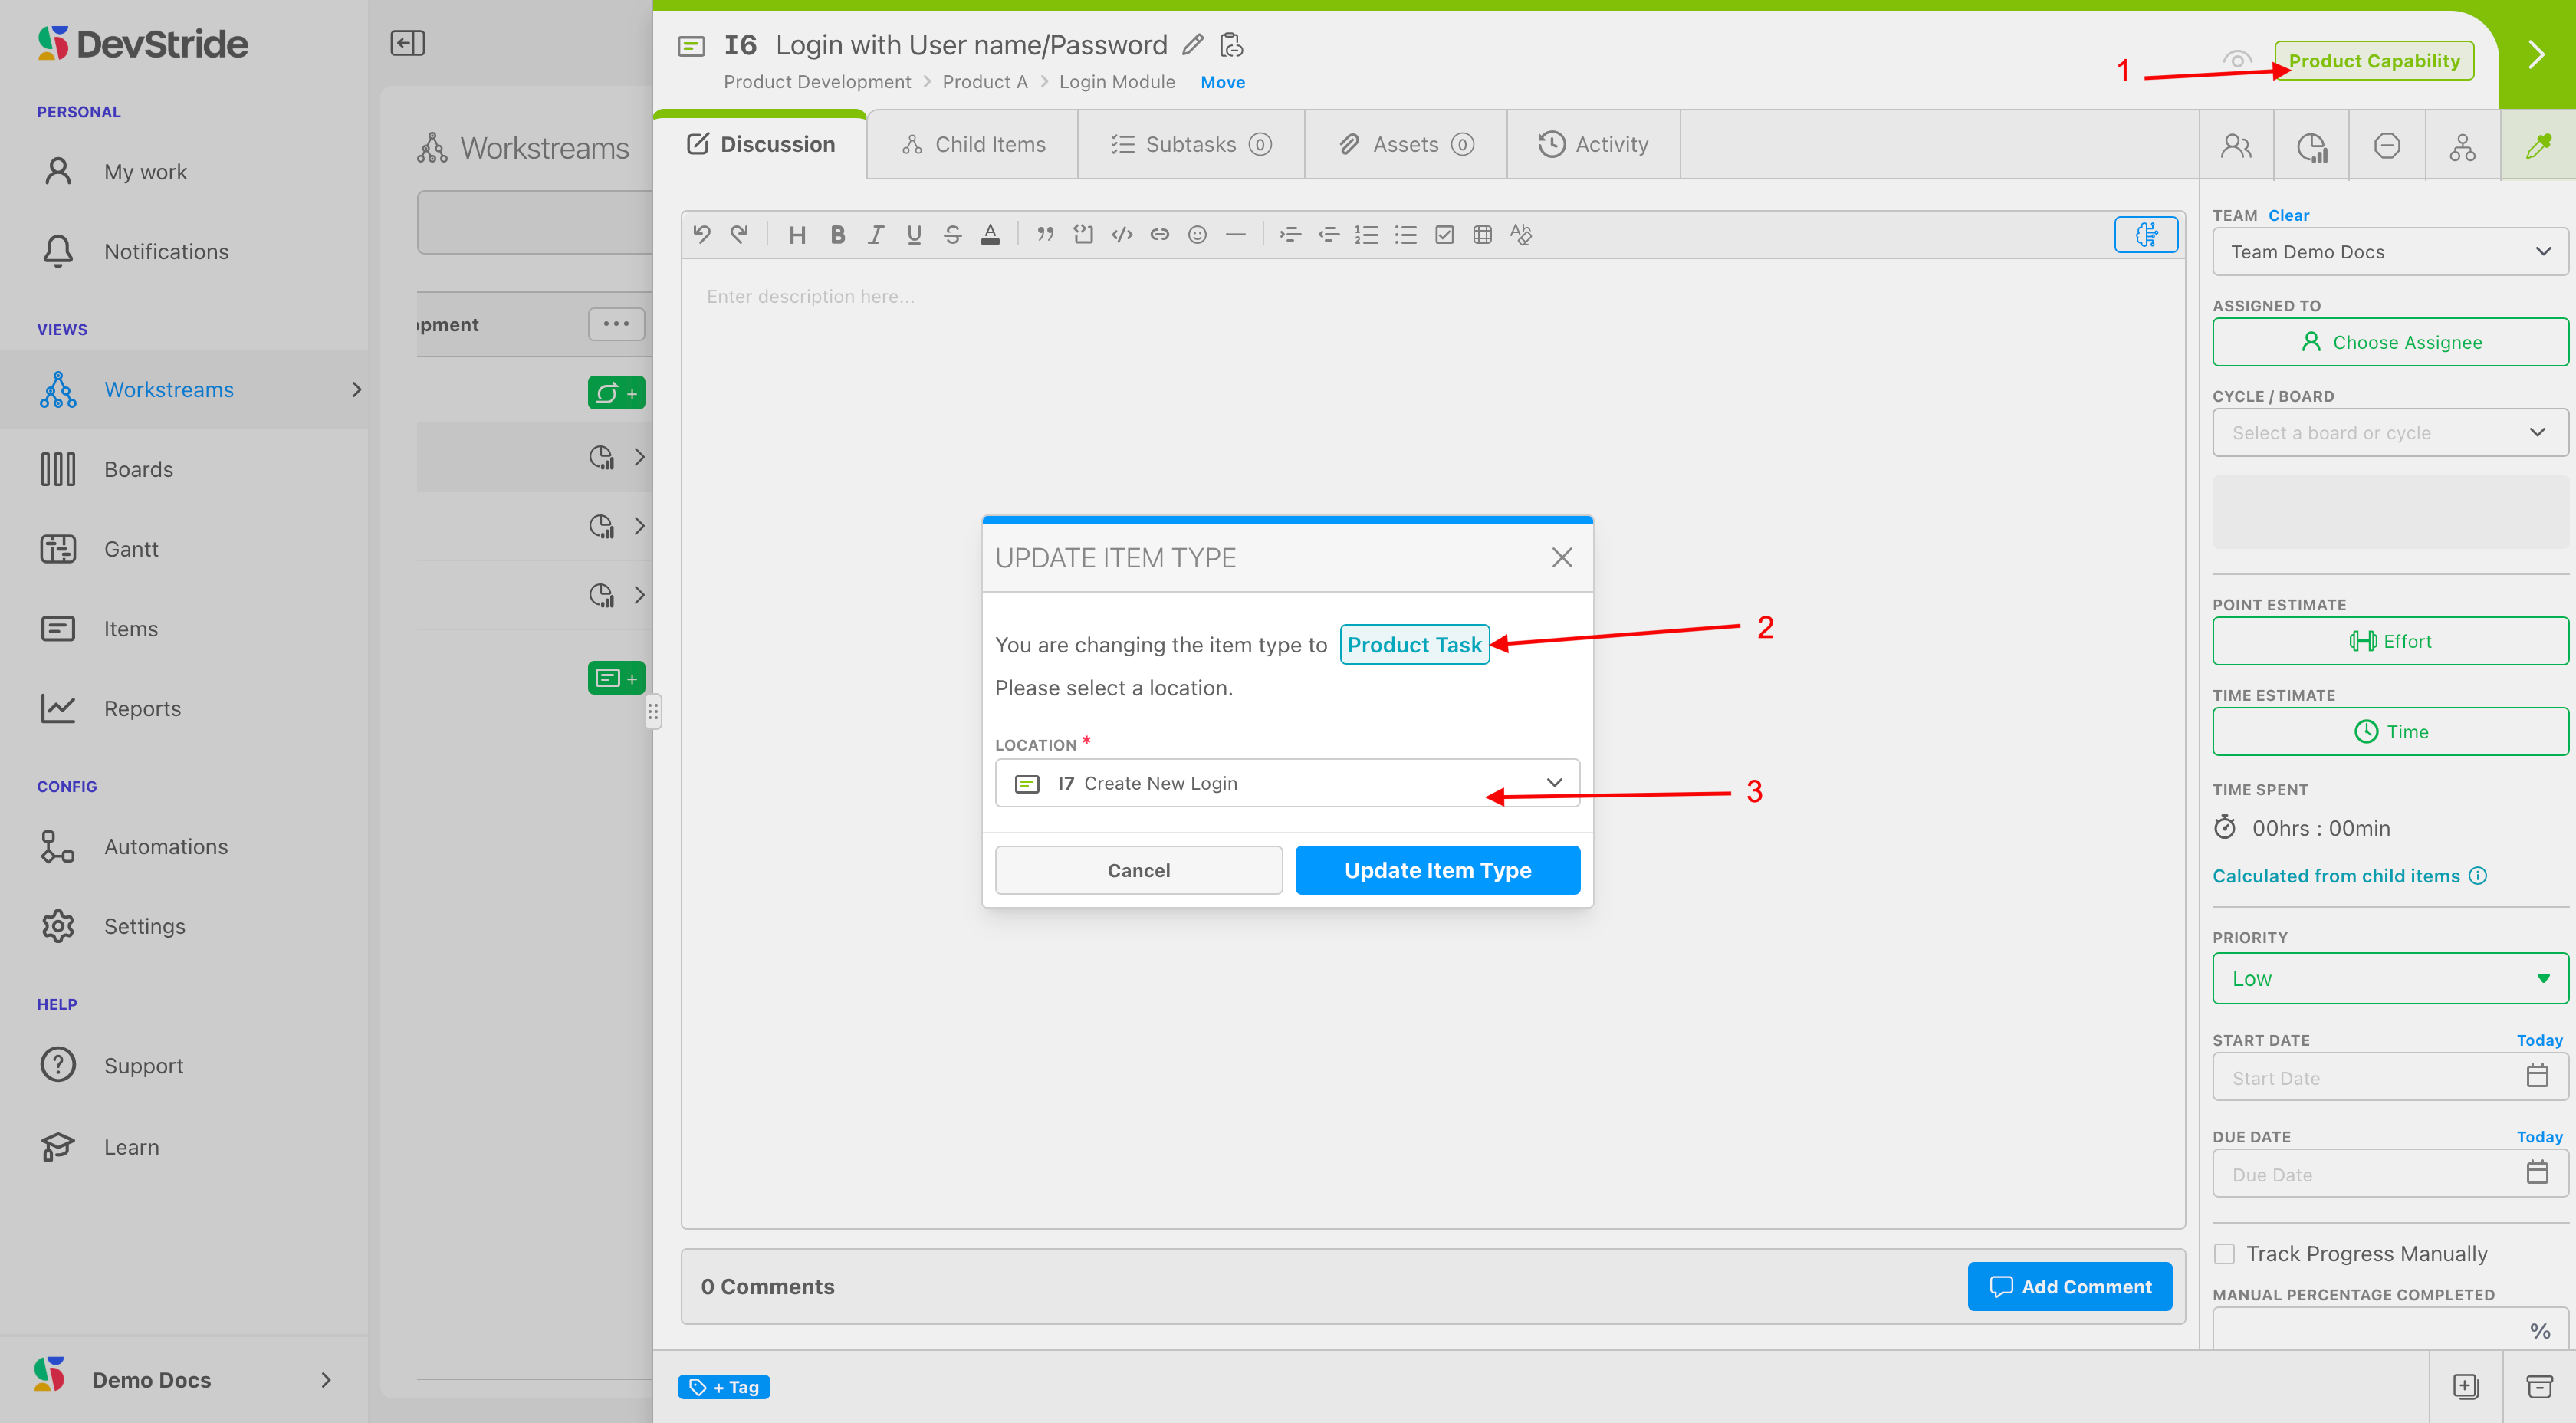
In the following example, we want to make the Login with User name/Password Capability (1) a Task instead. So we indicate the type of change (2) and the location (3) it should be in on the Workstream Map. Then we can click on Update Item Type.
Our Module was changed to a Product Task and we moved it. We can now see it on the Workstream Map under the Create New Login Capability as a Project Task called Login with User Name/Password (4).
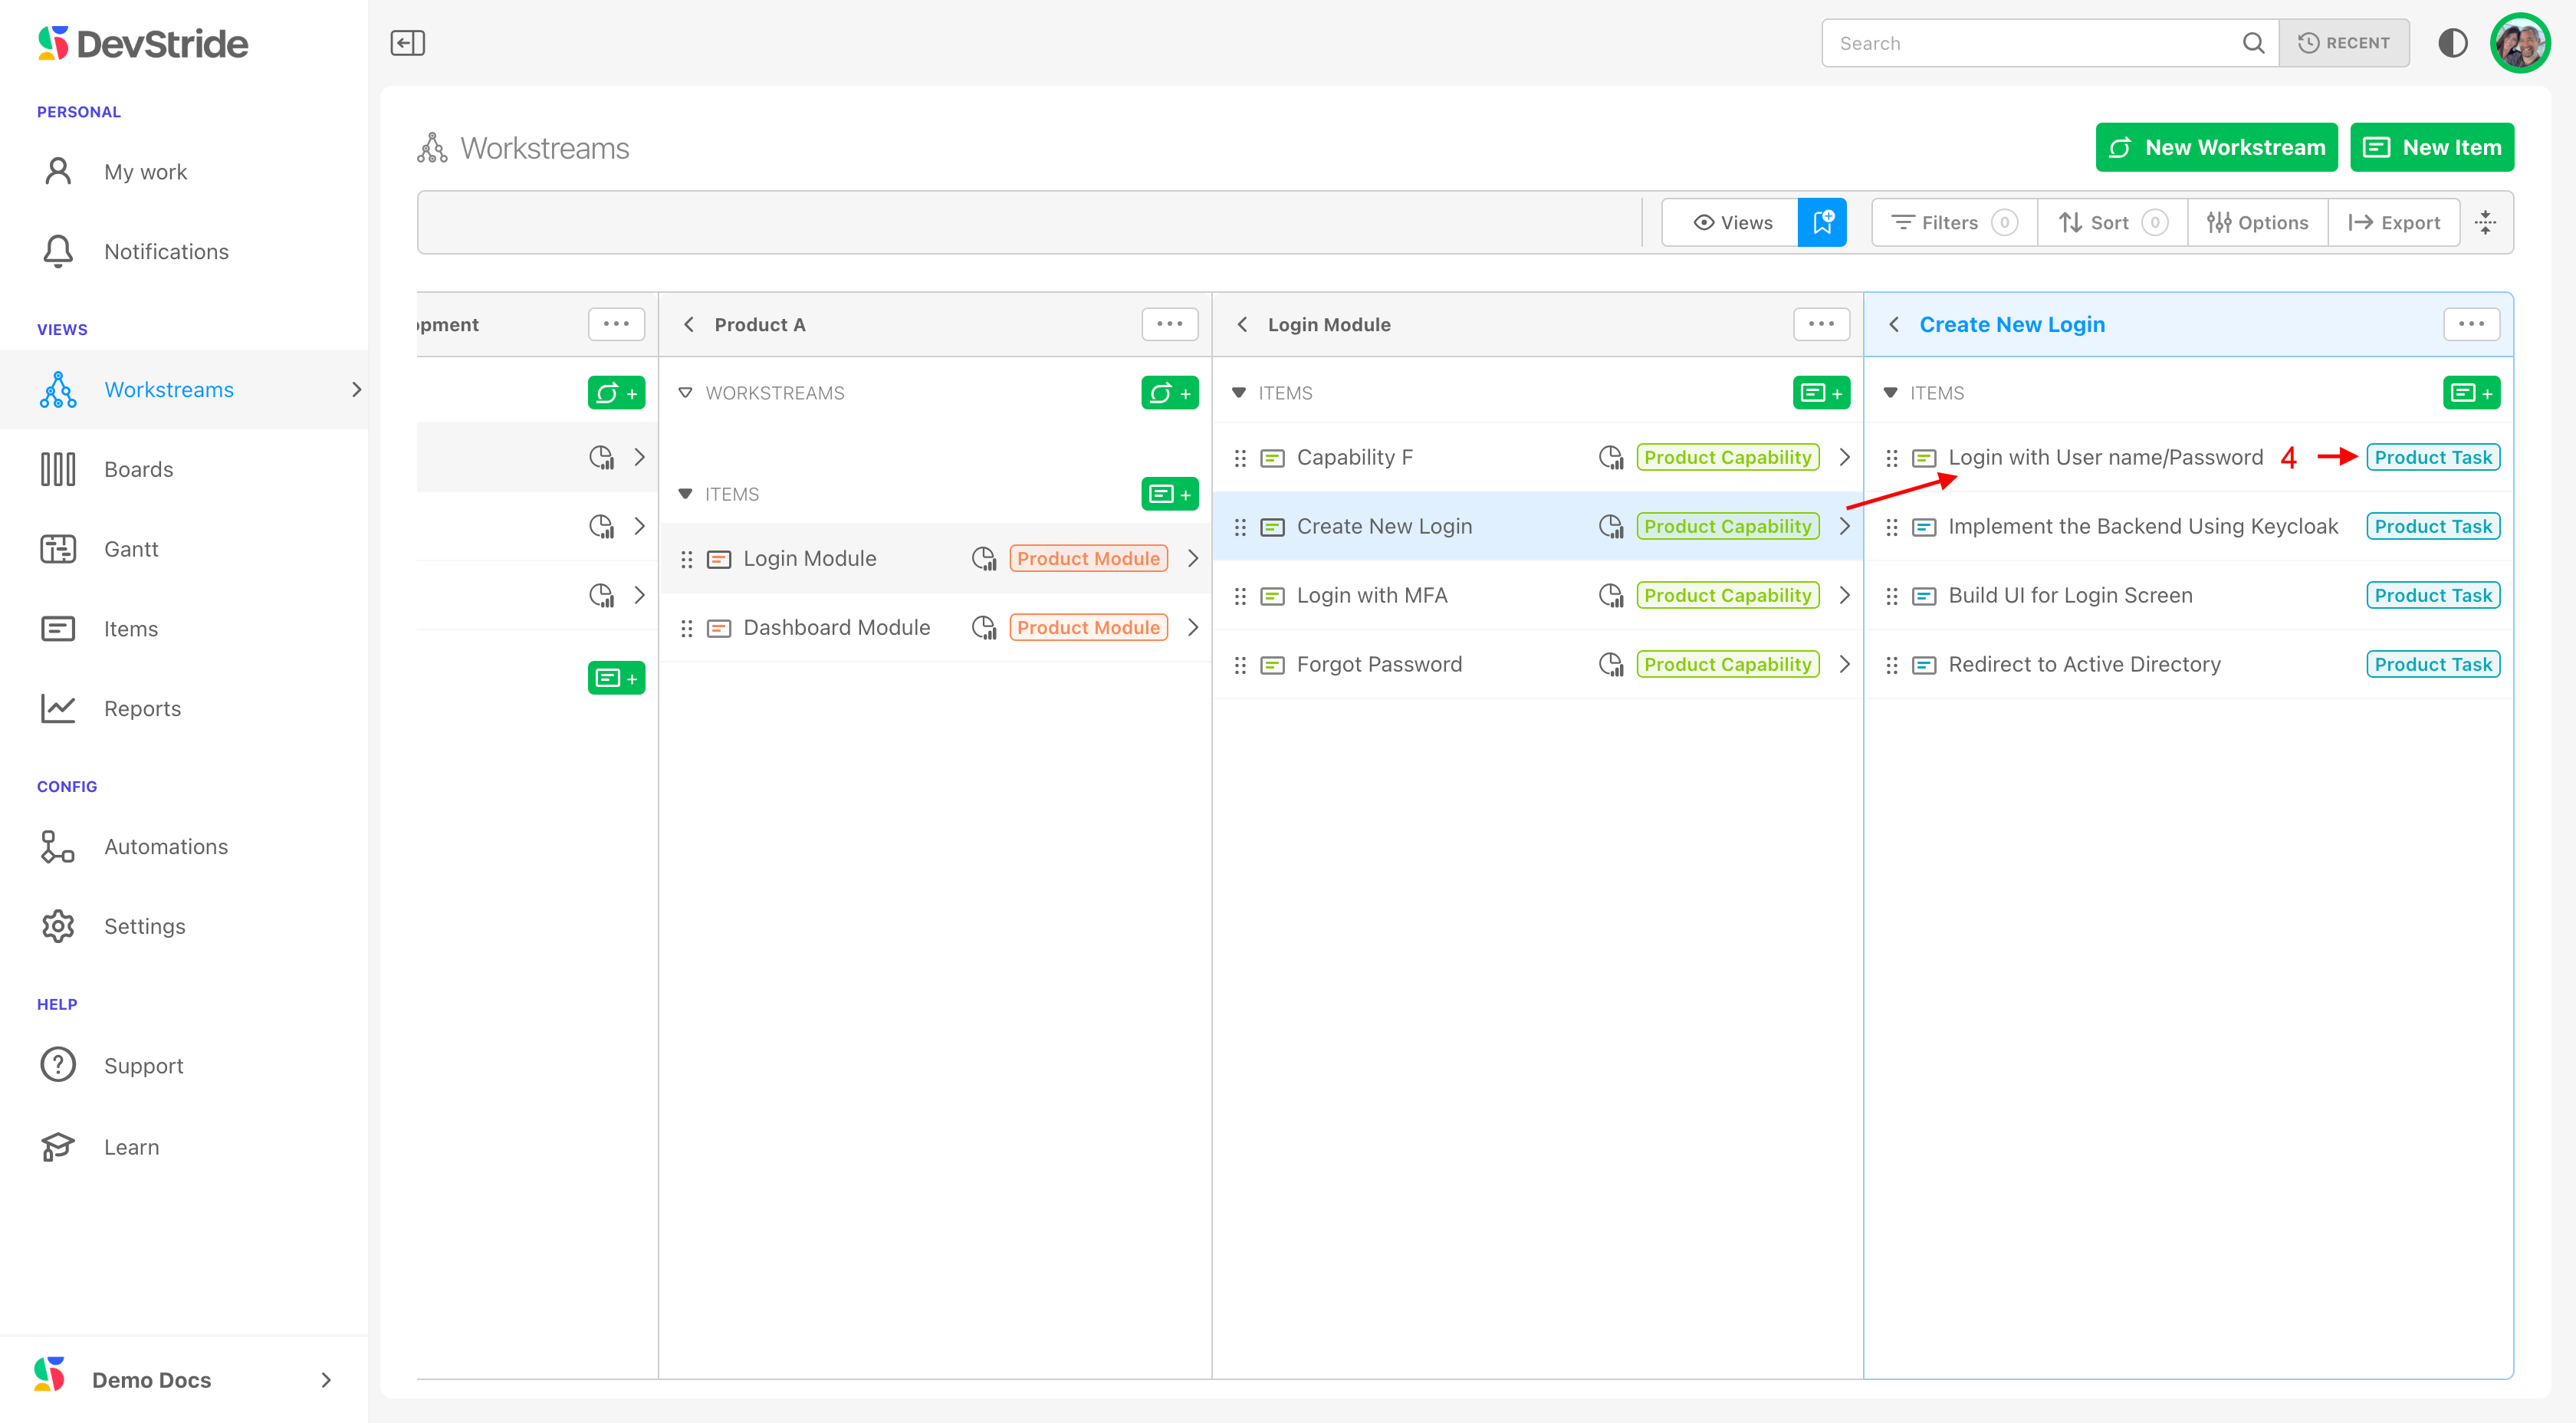
Next, we'll review the Item Workspace Tabs.
Was this article helpful?