- Print
- DarkLight
Custom Fields enable you to customize the information captured within Work Items. Custom Fields, when grouped into Collections and assigned to Item Types, form a powerful method for creating consistency in the data associated with all of your work items.
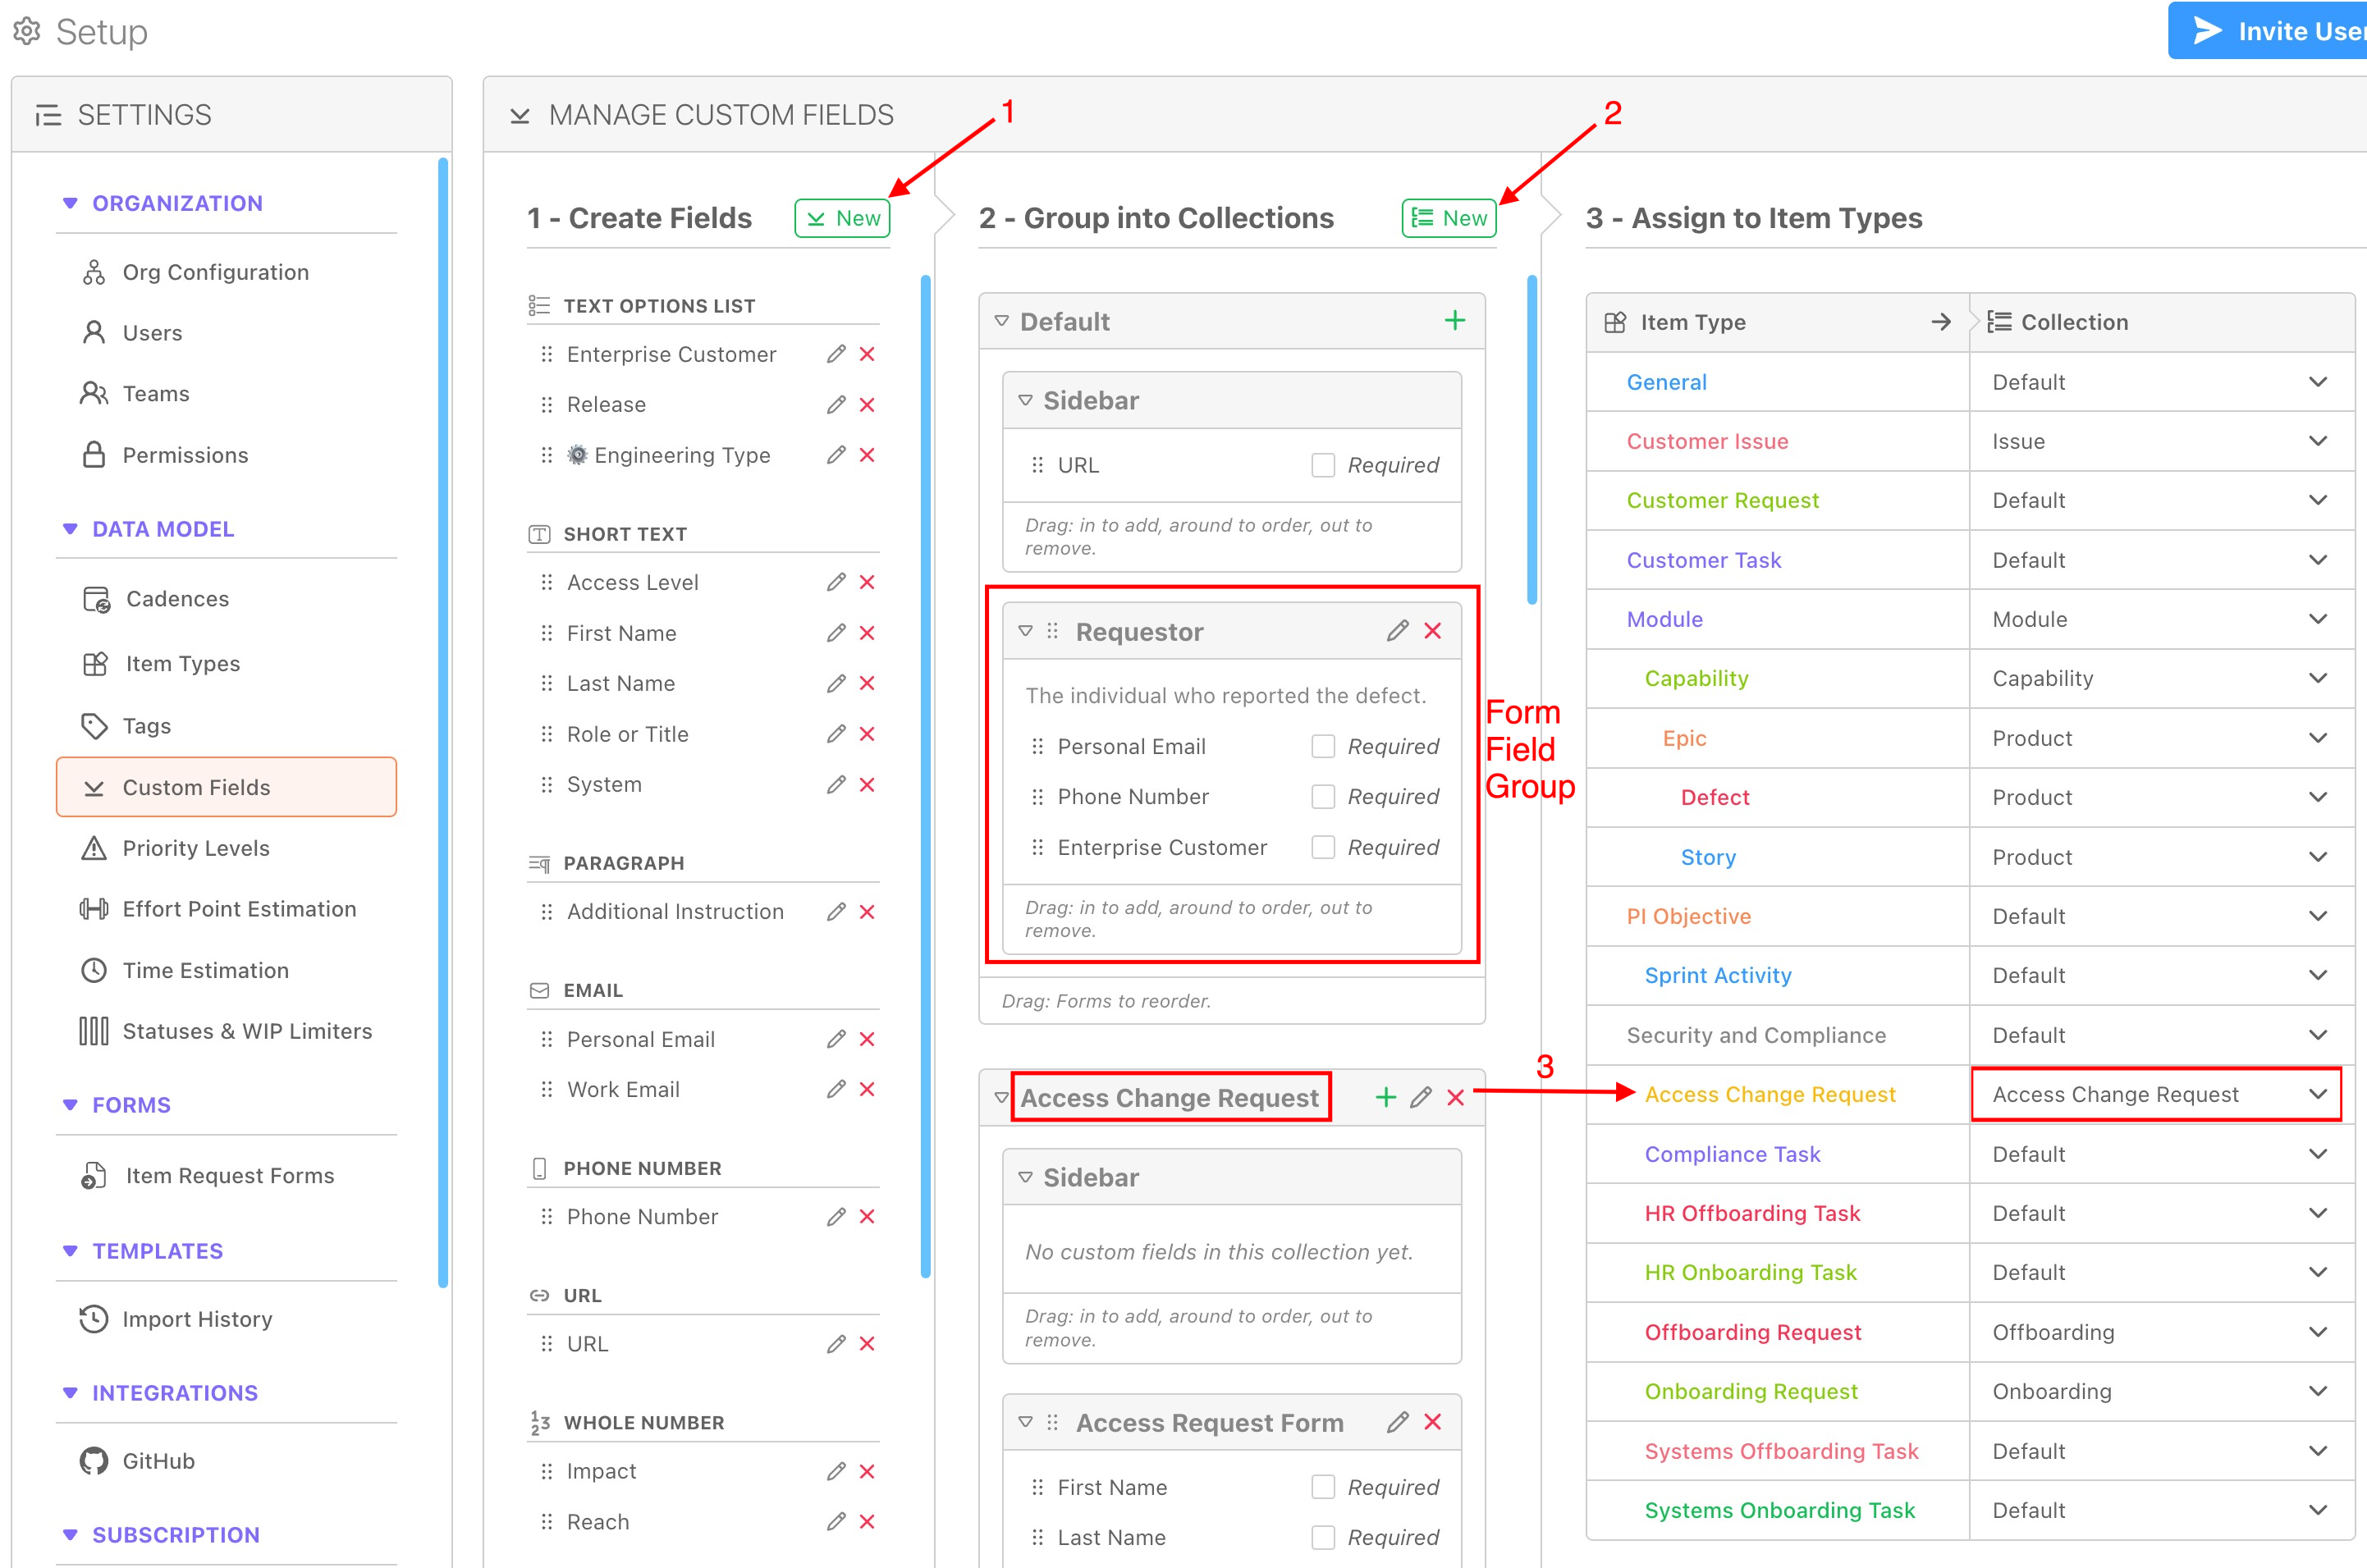
To create and arrange custom fields go to Settings, and under Data Model, click Custom Fields.

1 - Create Fields
Click the green "New" button to create a custom field and choose the predefined field type from the dropdown list. Each Custom Field that you create will be placed in the global Custom Fields list, organized by field type and available for others to use as well.
2 - Group Into Collections
Create collections by click the green "New" button next to 2 - Group Into Collections. Once you've created your list of collections, drag in custom fields to include them in the collection, drag around to change their order, or drag out to remove them from the collection
You can mark a custom field within a collection as Required. This will prompt the work item to ask you to select a custom field before being able to save a new item.
Sidebar vs Form Field Group
By default, you will be able to place Custom Fields into the Sidebar, found on the right side of the Item Types that you associate this Group with (see next step).
If you have Custom Fields that you are adding specifically to incorporate into an Item Request Form, click the green "+" button within the Group to create the Item Request Form group. See Item Request Forms for more details.
3 - Assign to Item Types
Finally, in order to see your Custom Fields (either in the Sidebar or in the Forms tab of a work item of your Item Type), you need to associate your Custom Field Collection with at least one Item Type. When you create or update a work item of that Item Type, you should now see your Custom Fields in the Sidebar of the work item or under the Forms tab, depending on how you have grouped them.

