- Print
- DarkLight
O3: Admin Onboarding - Configuring Your Work Model
Setting Up your Workstream Map
Now it's time to start identifying the work your organization is going to do. We call these Workstreams. This is a key concept in DevStride.
In any organization where there is a lot of activity, there is a need to organize that activity. Workstreams are a way to organize all your activities in one place.
DevStride has a dual approach to organizing activities. One is through its use of Workstreams. And the other is through Boards. We will talk about Boards later. First, we'll talk about Workstreams.
Workstreams are a hierarchical organization of effort. This is often referred to as a functional taxonomy. It's the idea of taking big concepts of work and breaking them down into smaller and smaller concepts until they eventually break down into individual tasks for the users.
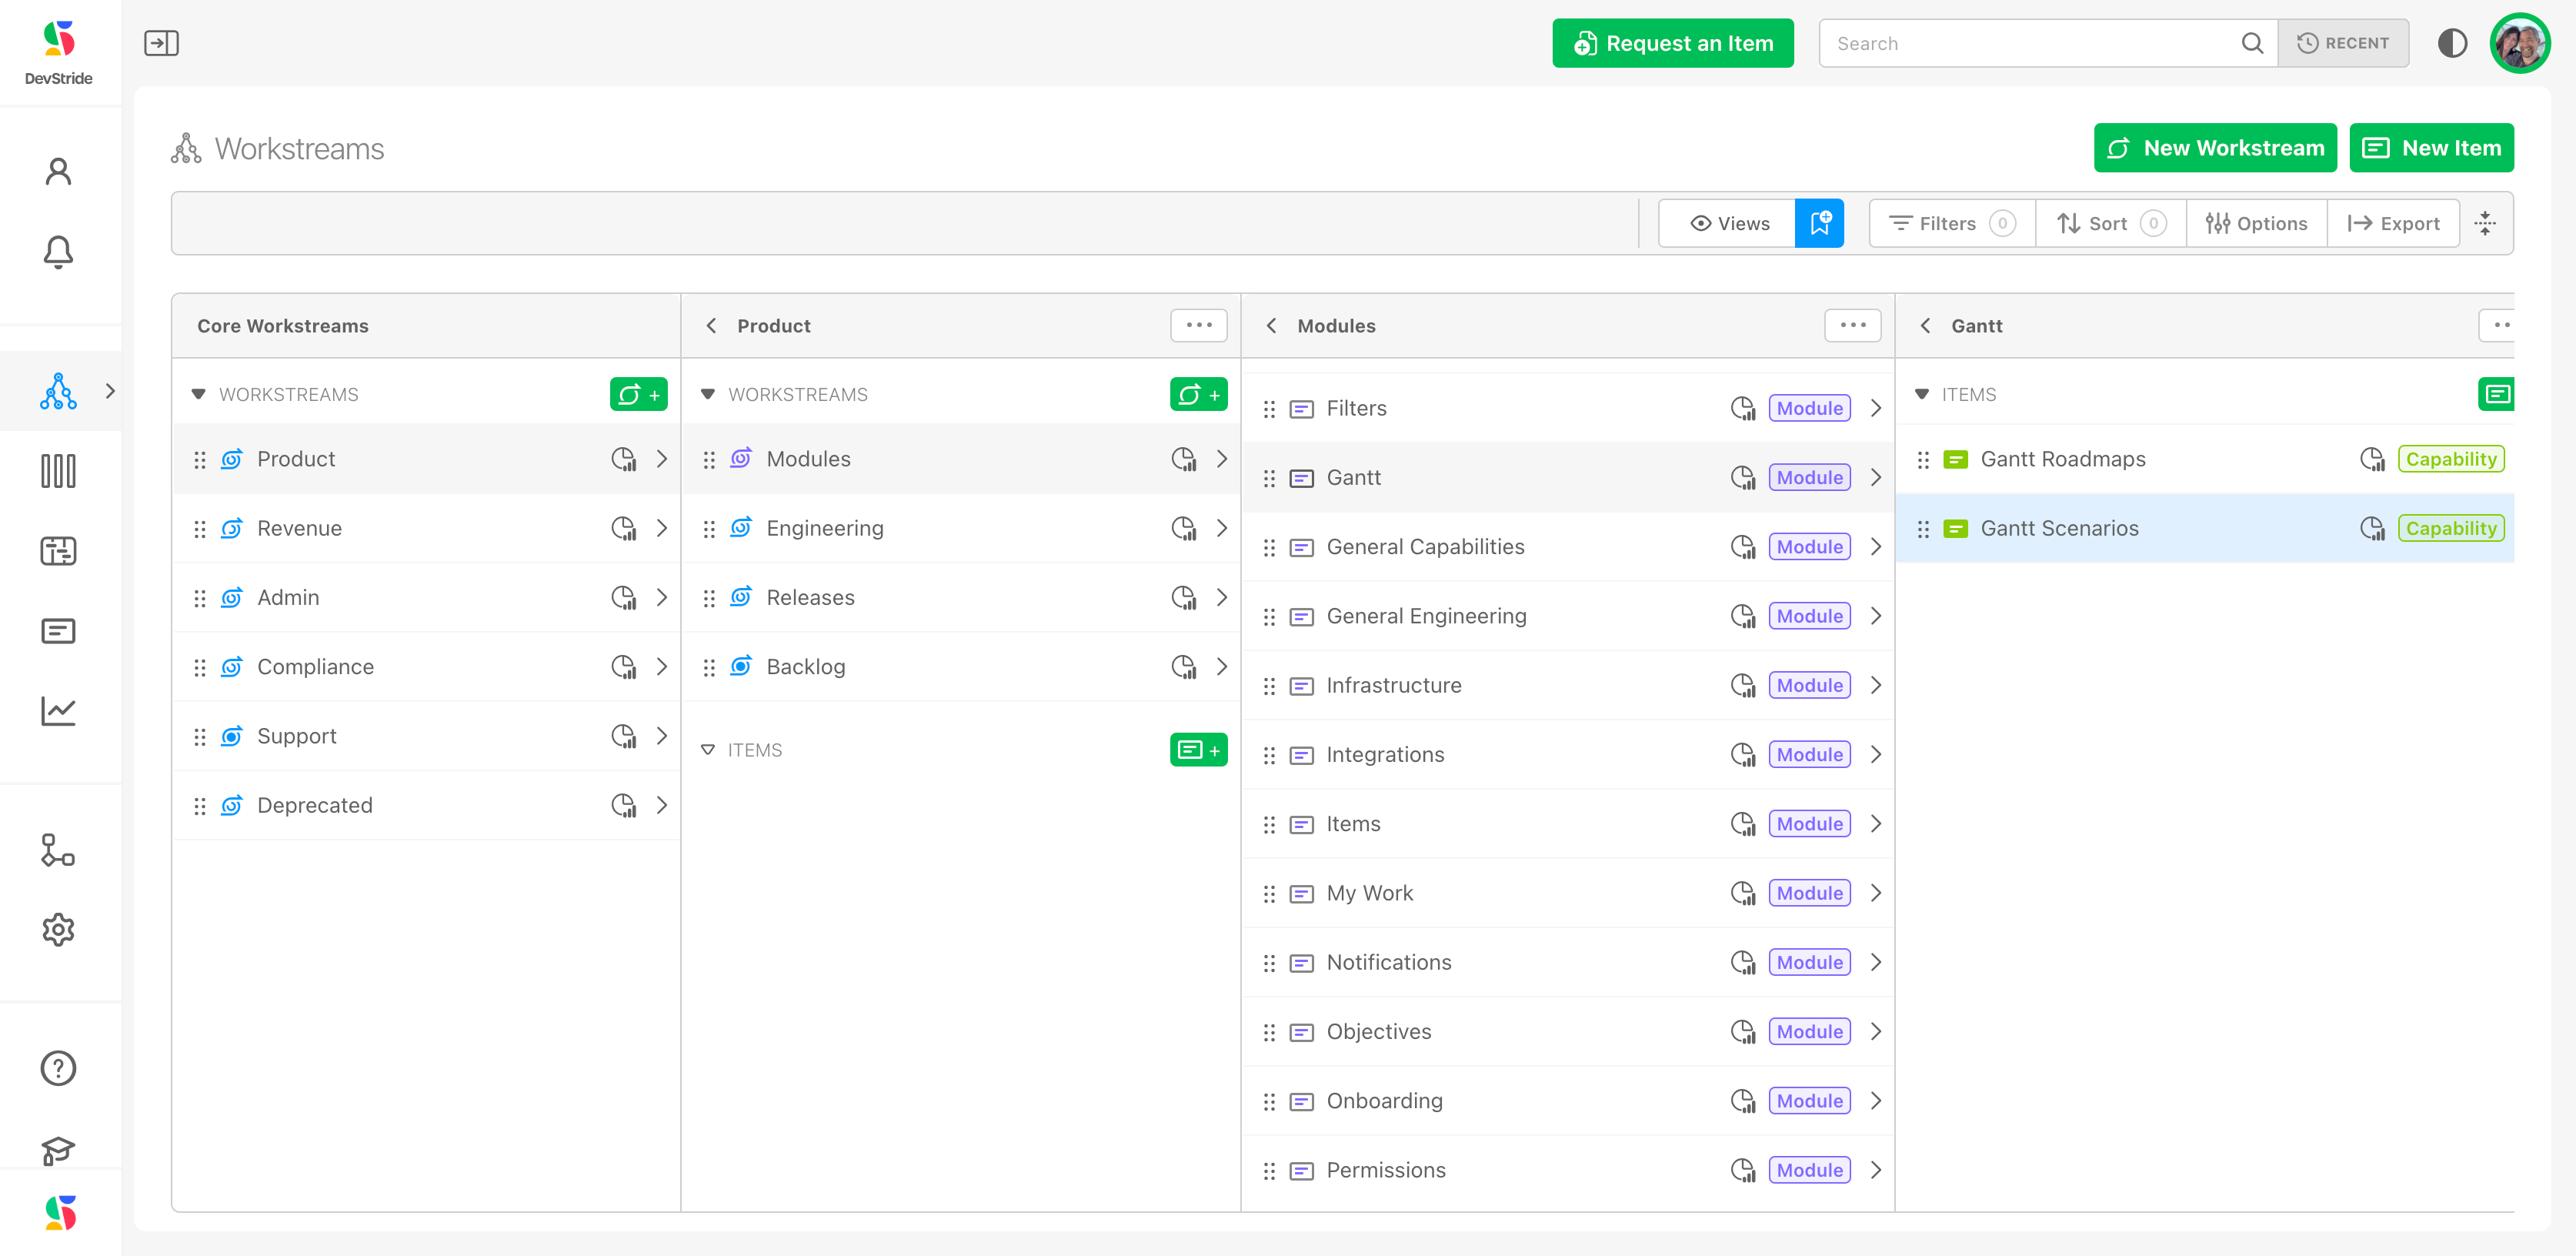
A Workstream Map is a visual layout of your organization’s workstreams (these could be initiatives, functional groups, programs, product lines, and/or projects). The Workstream Map shows how different streams of work relate to each other.
Here's an example using of what a workstream map can look like. Every workstream map uniquely reflects the organization using it:
Why It’s Important
The Workstream Map provides a bird’s-eye view of all major initiatives.
It helps leadership and team members understand the scope and relationships of projects.
What It Gives You
The Workstream Map:
- Provides a quick reference to all the work in the organization
- Creates the structure for enterprise-wide reporting
You do not have to create a complete workstream map at this time. You can add to your Workstream Map and adjust it as you use DevStride.
Click here for more information on the Workstream Map and the visual cues it can provide.
Step 1: Understanding Workstreams
What This Is:
Workstreams are simply a way to group the work in an organization.
Core workstreams are very much like the highest folder in a folder structure. From these core workstreams, you can nest additional workstreams to reflect a hierarchy of work or related projects.
There is no limit to how deep you can nest workstreams or the work items underneath them.
There is no limit to how many core workstreams, nested workstreams, or items you can create.
In creating workstreams and their items, we don't care about who is doing the work, or when they are going to do the work. We are just defining the what. We'll define the "how" later.
In this section, we will walk through how to create worksteams and configure item types.
This step is essentially about configuring your data model.
Why It's Important
The data model of workstreams and all the work items underneath them means that you can report on any level of any workstream or across workstreams within the organization.
What This Gives You
The workstream data model is extremely powerful for progress tracking and multi-dimensional visibility across the entire organization, allowing you to identify what's working well and what might be a potential issue before there's a problem.
Organizing work in workstreams gives you the ability to report at the workstream level (up, down, and across all workstreams), as well as by teams and individuals.
Later, when we assign people to the work, we will be defining how work gets done.
You can view where your Workstreams will eventually be populated by clicking on Workstreams (1) in the left navigation bar. The workstreams panel will open. (2) Core Workstreams will show in the far left pane. (3) ****
Item type Hierarchy
To create a workstream map that can track all your work, we are going to define a few things about the items that will eventually be managed inside them.
To do this, we need to define your hierarchy of item types. An item type hierarchy employs a taxonomy as a way to manage the kind of work (items) that is being done. It is often referred to as an agile hierarchy. It's a very useful way to identify what you want to call your larger groups of work, and what you wish to name the smaller, and smaller units of work underneath them.
In DevStride, a unit of work or effort is called an item. An item defines something you want to go do.
In a very small organization, tasks might be managed just as a fairly flat list.
As organizations get bigger, they might have bigger initiatives that break into smaller projects and tasks. That's where the idea of item types comes in. Item types allow organizations to create a hierarchy so that big ideas and projects can be broken down into smaller and smaller units of work so that they work has context (an item type - is it a big item like a module, or a small unit of work in your hierarchy, like a task) and a home (in the workstream map).
Example:
At DevStride, we use the following item type hierarchy for tracking Product Development work:
Module → Capability → Epic → Story and Defect
You can create as many item hierarchies as you would like.
Touring an Example:
To see how this works we will look at an example. This functionality is under, Settings > Item Types (1). The Manage Item Types displays an organization's item types.
The image below is an example of DevStride's item type hierarchy (2). You can name your own.
Note that in our organization, we have a few different item type hierarchies that we can track (2 - 4).
DevStride allows you to create and name your item types, decide how many you need, and how deep they go.
How to Do it
Step 2: Create Your Item Type Hierarchy
To create a new item type or a new hierarchy of items, navigate to Item types under Settings and click on New Item Type (5).
You can name your item types anything you want. For some organizations, an item type hierarchy might be as simple as:
Objective → Task
How to Do it - Item Type Hierarchy
Click on Settings then Item Types (1). Then click on the green New Item Type button on the top right corner (2).
Name the highest level of your item hierarchy in the pop-up box under Label (3).
In our example, we are using Module as our top-level item category. We do not need to select a parent at this point (4), because Module is at the top. We can then choose its display color. (5)
We want the Modules that we will be working on to break down into smaller ideas or objectives and smaller pieces of work.
For our example, we will name this smaller type of work—and the next level down in our hierarchy—"Capability." (1) Then we can assign it as a child level of Module (2) and choose its display color (3).
If you forget to add the item to its parent, you can edit it as long as there is no work assigned to it.
And because there is no work of this item type in the system, we can still edit its place in the hierarchy by clicking on the edit pencil. Then, simply choose its parent from the dropdown (1).
Note: Time is tracked on the lowest child level(s) as indicated here (1), so that all time can be rolled up to each parent above it.
Be thoughtful about designing your hierarchy. You can change your hierarchy and its labels until you have content assigned with these item types.
Changing the hierarchy after content is added would fundamentally change your data model and all the reporting associated with it, etc.
If you need to change your hierarchy after you have started managing content in DevStride, please reach out to DevStride Support.
Once you start creating content in DevStride there are a few basic rules concerning your item type hierarchy:
You can delete things assigned as the top level of your hierarchy (in our example above, Modules). In this case, the system would simply archive that top level and anything associated with it.
You can delete the bottom level of your hierarchy (in our example above, Story or Defects) because there are no children.
You cannot delete items that are in the middle of a hierarchy. That is because they have inherent dependencies and data associated with them—as designed. The system would not know how to resolve the data tree (in other words, the dependent data) later.
Also note that you cannot inject levels into the middle after content is added. It's best to put a placeholder in now, rather than reordering things in the middle later. So, if you think you might use an item level at some point, add it now.
If you need to make changes to the middle of your hierarchy after getting started, please contact DevStride Support - we'll help you resolve the issue.
Different types of work? No problem!
A marketing team's work, for example, won't look like a product's team work. Instead, a marketing team might have a hierarchy that looks like this:
Client (or Initiative if internal) → Campaign → Objectives →Tasks
Some teams might use multiple types of item hierarchies. There is no limit.
Here's an example of multiple hierarchies - in this case, one for marketing, one for organization initiatives, and one for product engineering:
Next up: Populating and Managing Workstreams