Admin Onboarding - Item Workspace - Right Bar: Priority
- 28 Feb 2025
- 2 Minutes to read
- Contributors

- Print
- DarkLight
Admin Onboarding - Item Workspace - Right Bar: Priority
- Updated on 28 Feb 2025
- 2 Minutes to read
- Contributors
- Print
- DarkLight
Article summary
Did you find this summary helpful?
Thank you for your feedback!
Item Workspace Tour: Right Bar Features continued - Priority
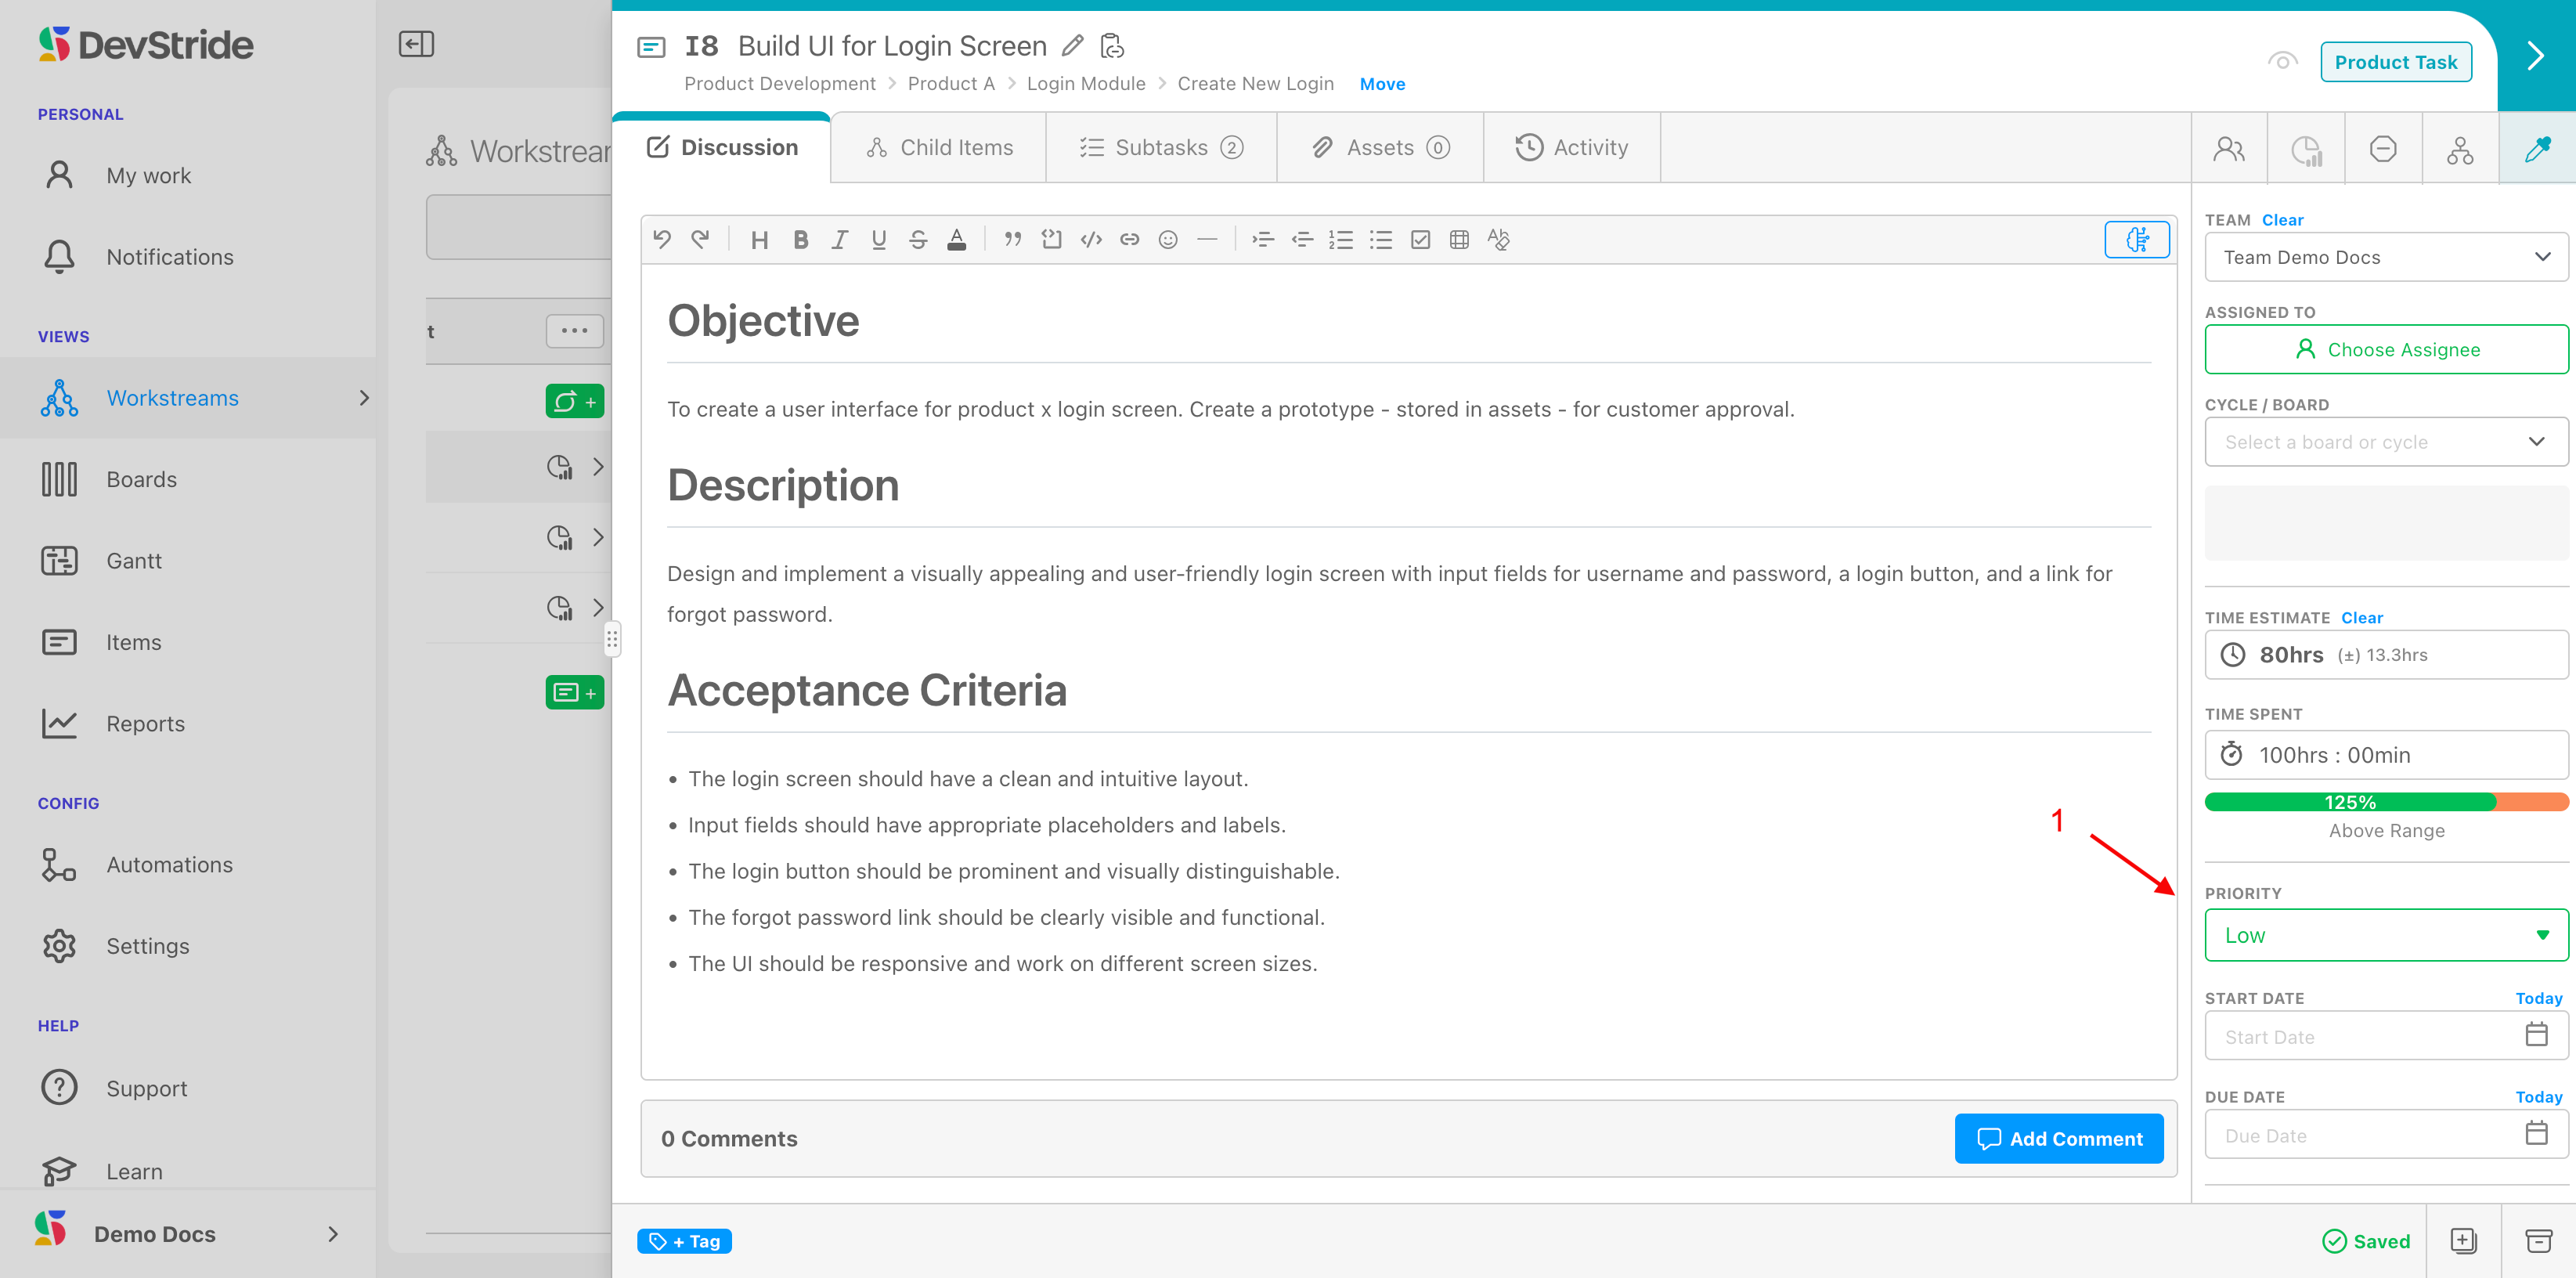
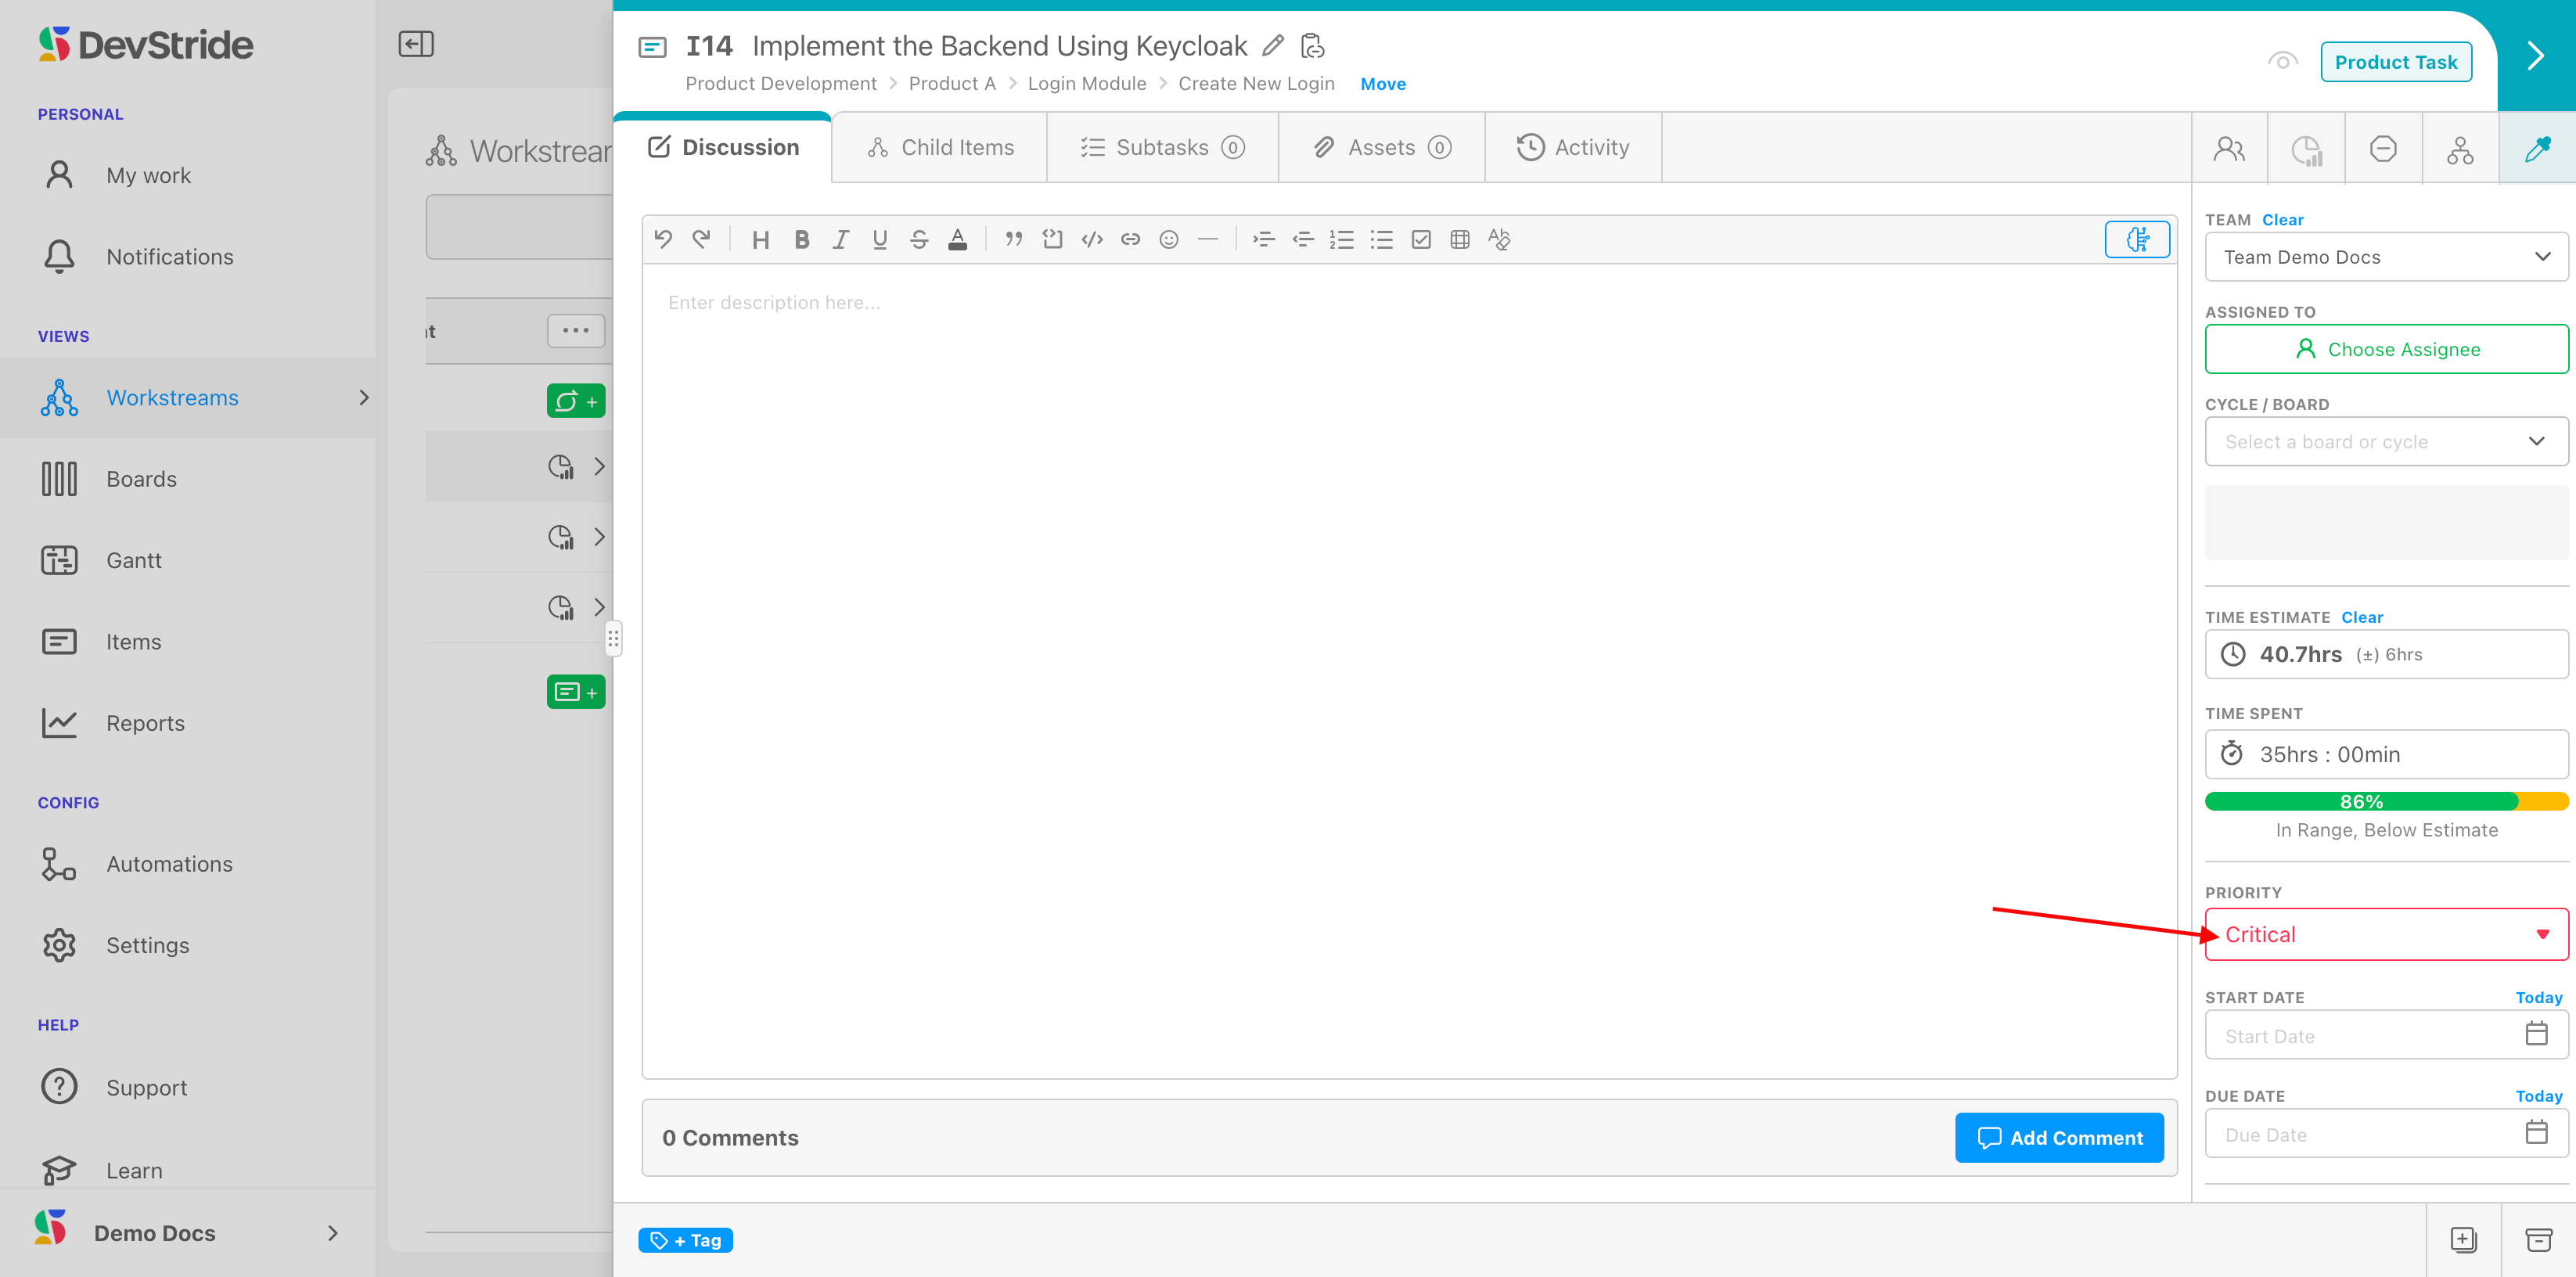
Next on the item workspace is the Priority setting (1).
Priority settings are customizable. You can set up the priority options for your organizations in Settings (1).
As with all Settings collections, you can use the default levels or click on the New icon to add to the list of available options(2). The levels in this list reflect the pool of all levels available to any collection in the entire organization.
You can then drag any options in this list to an existing collection, or create a new Collection (3).
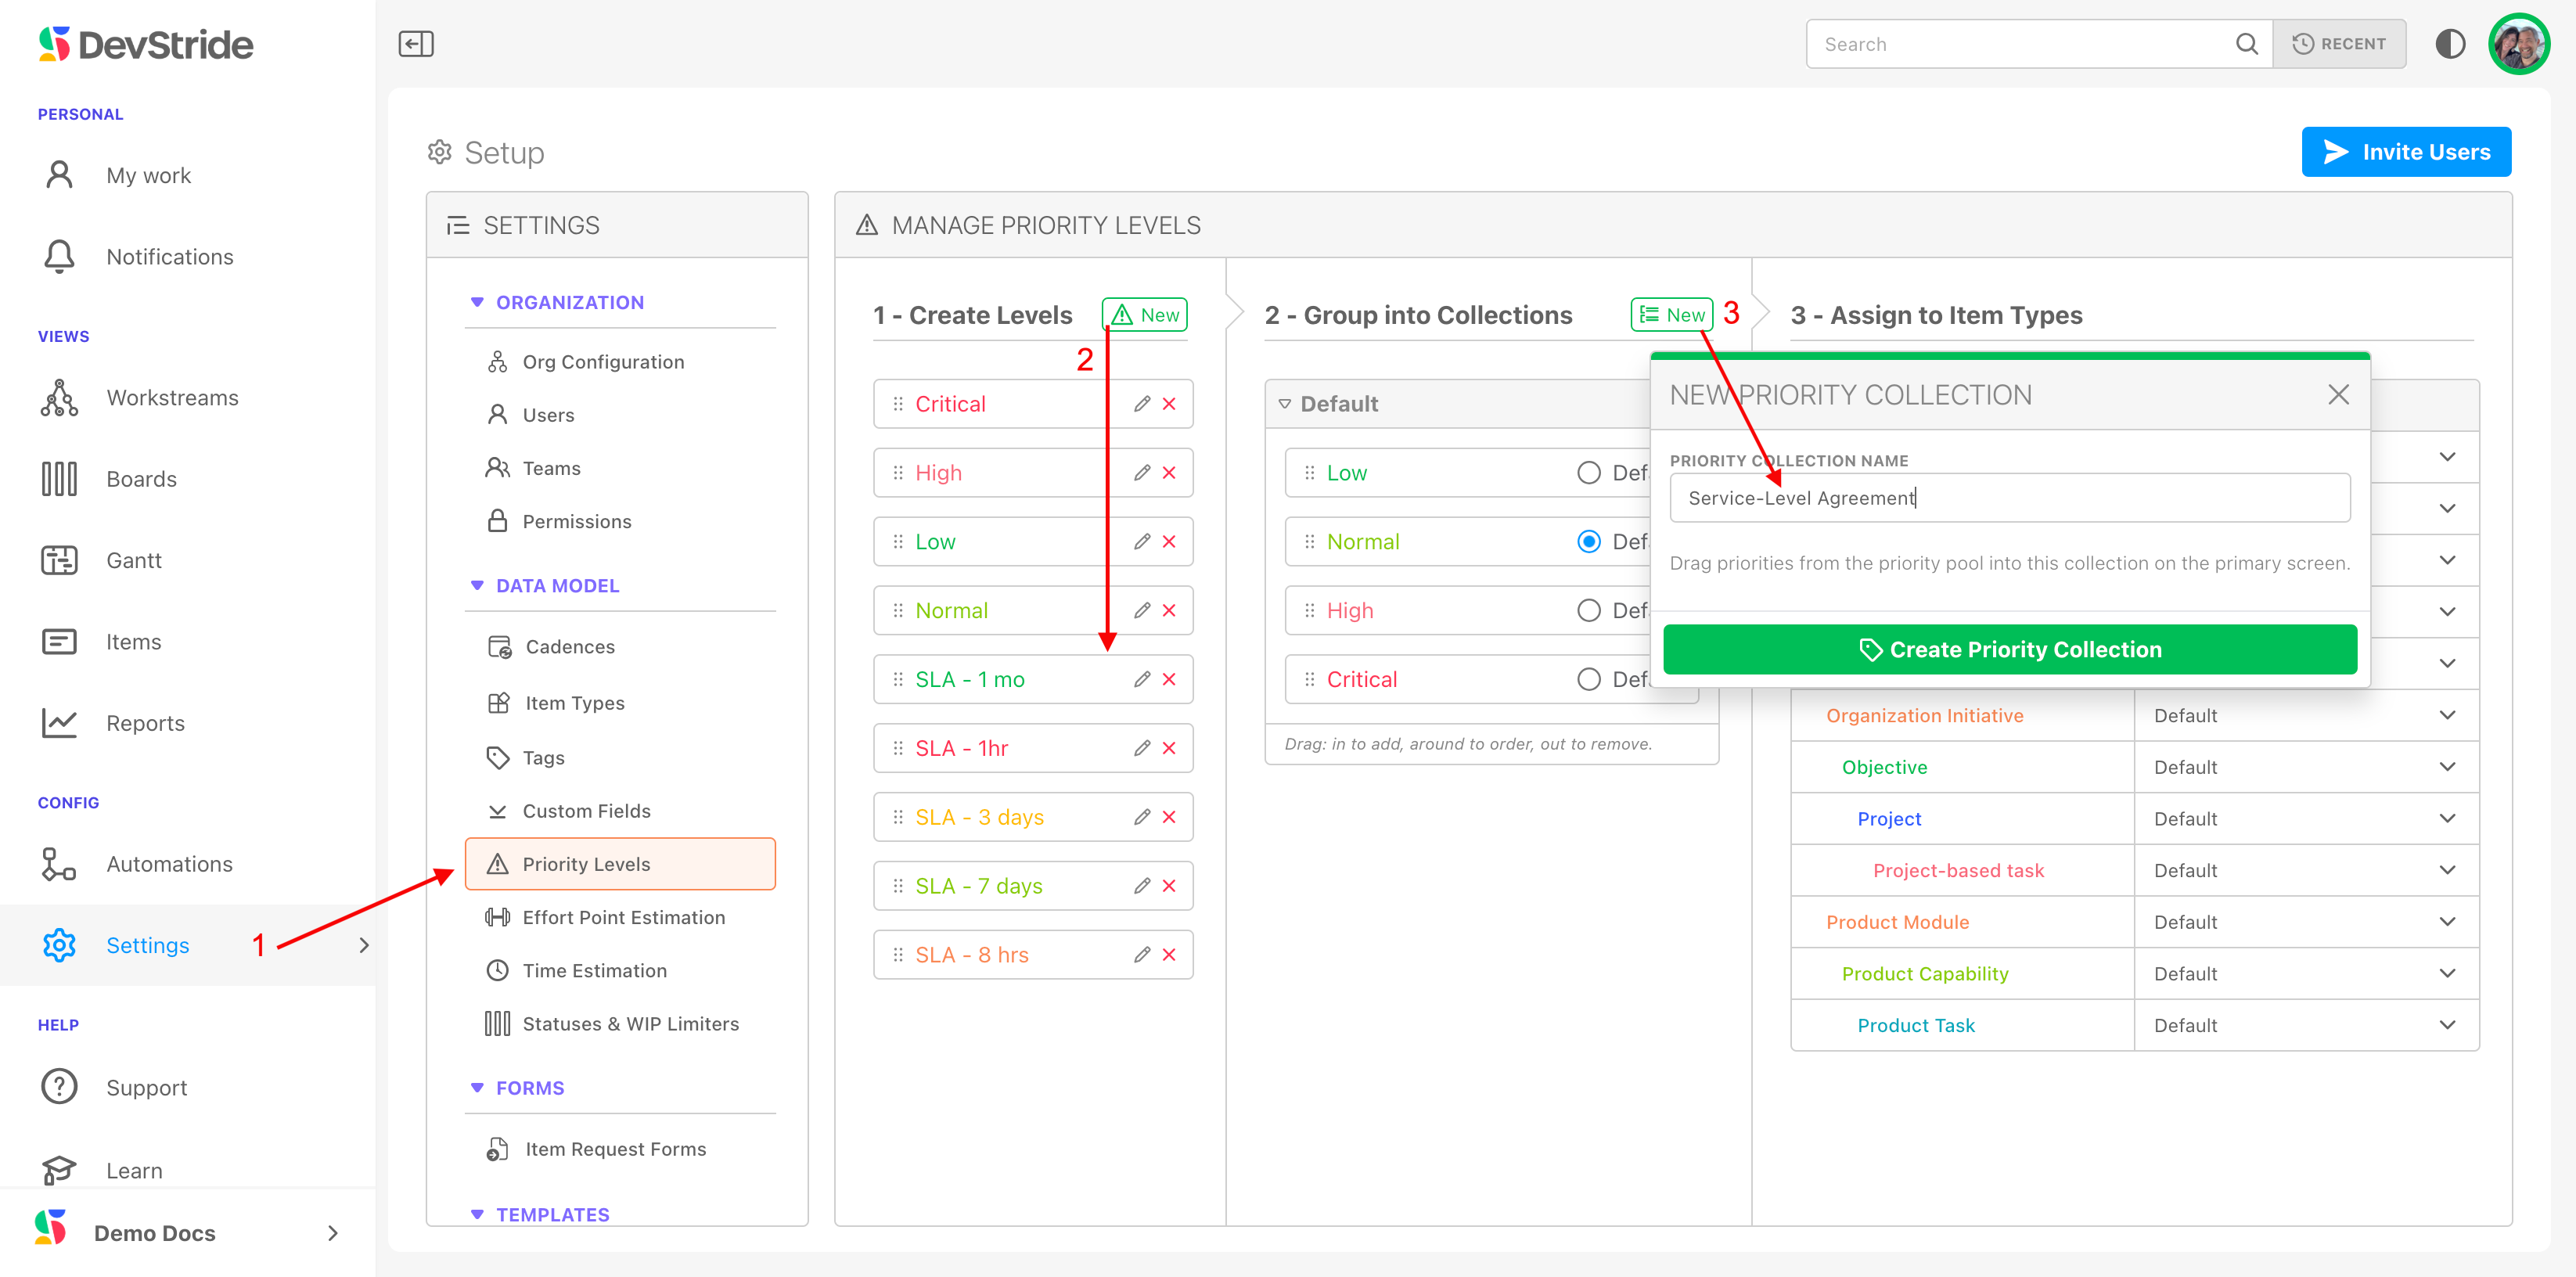
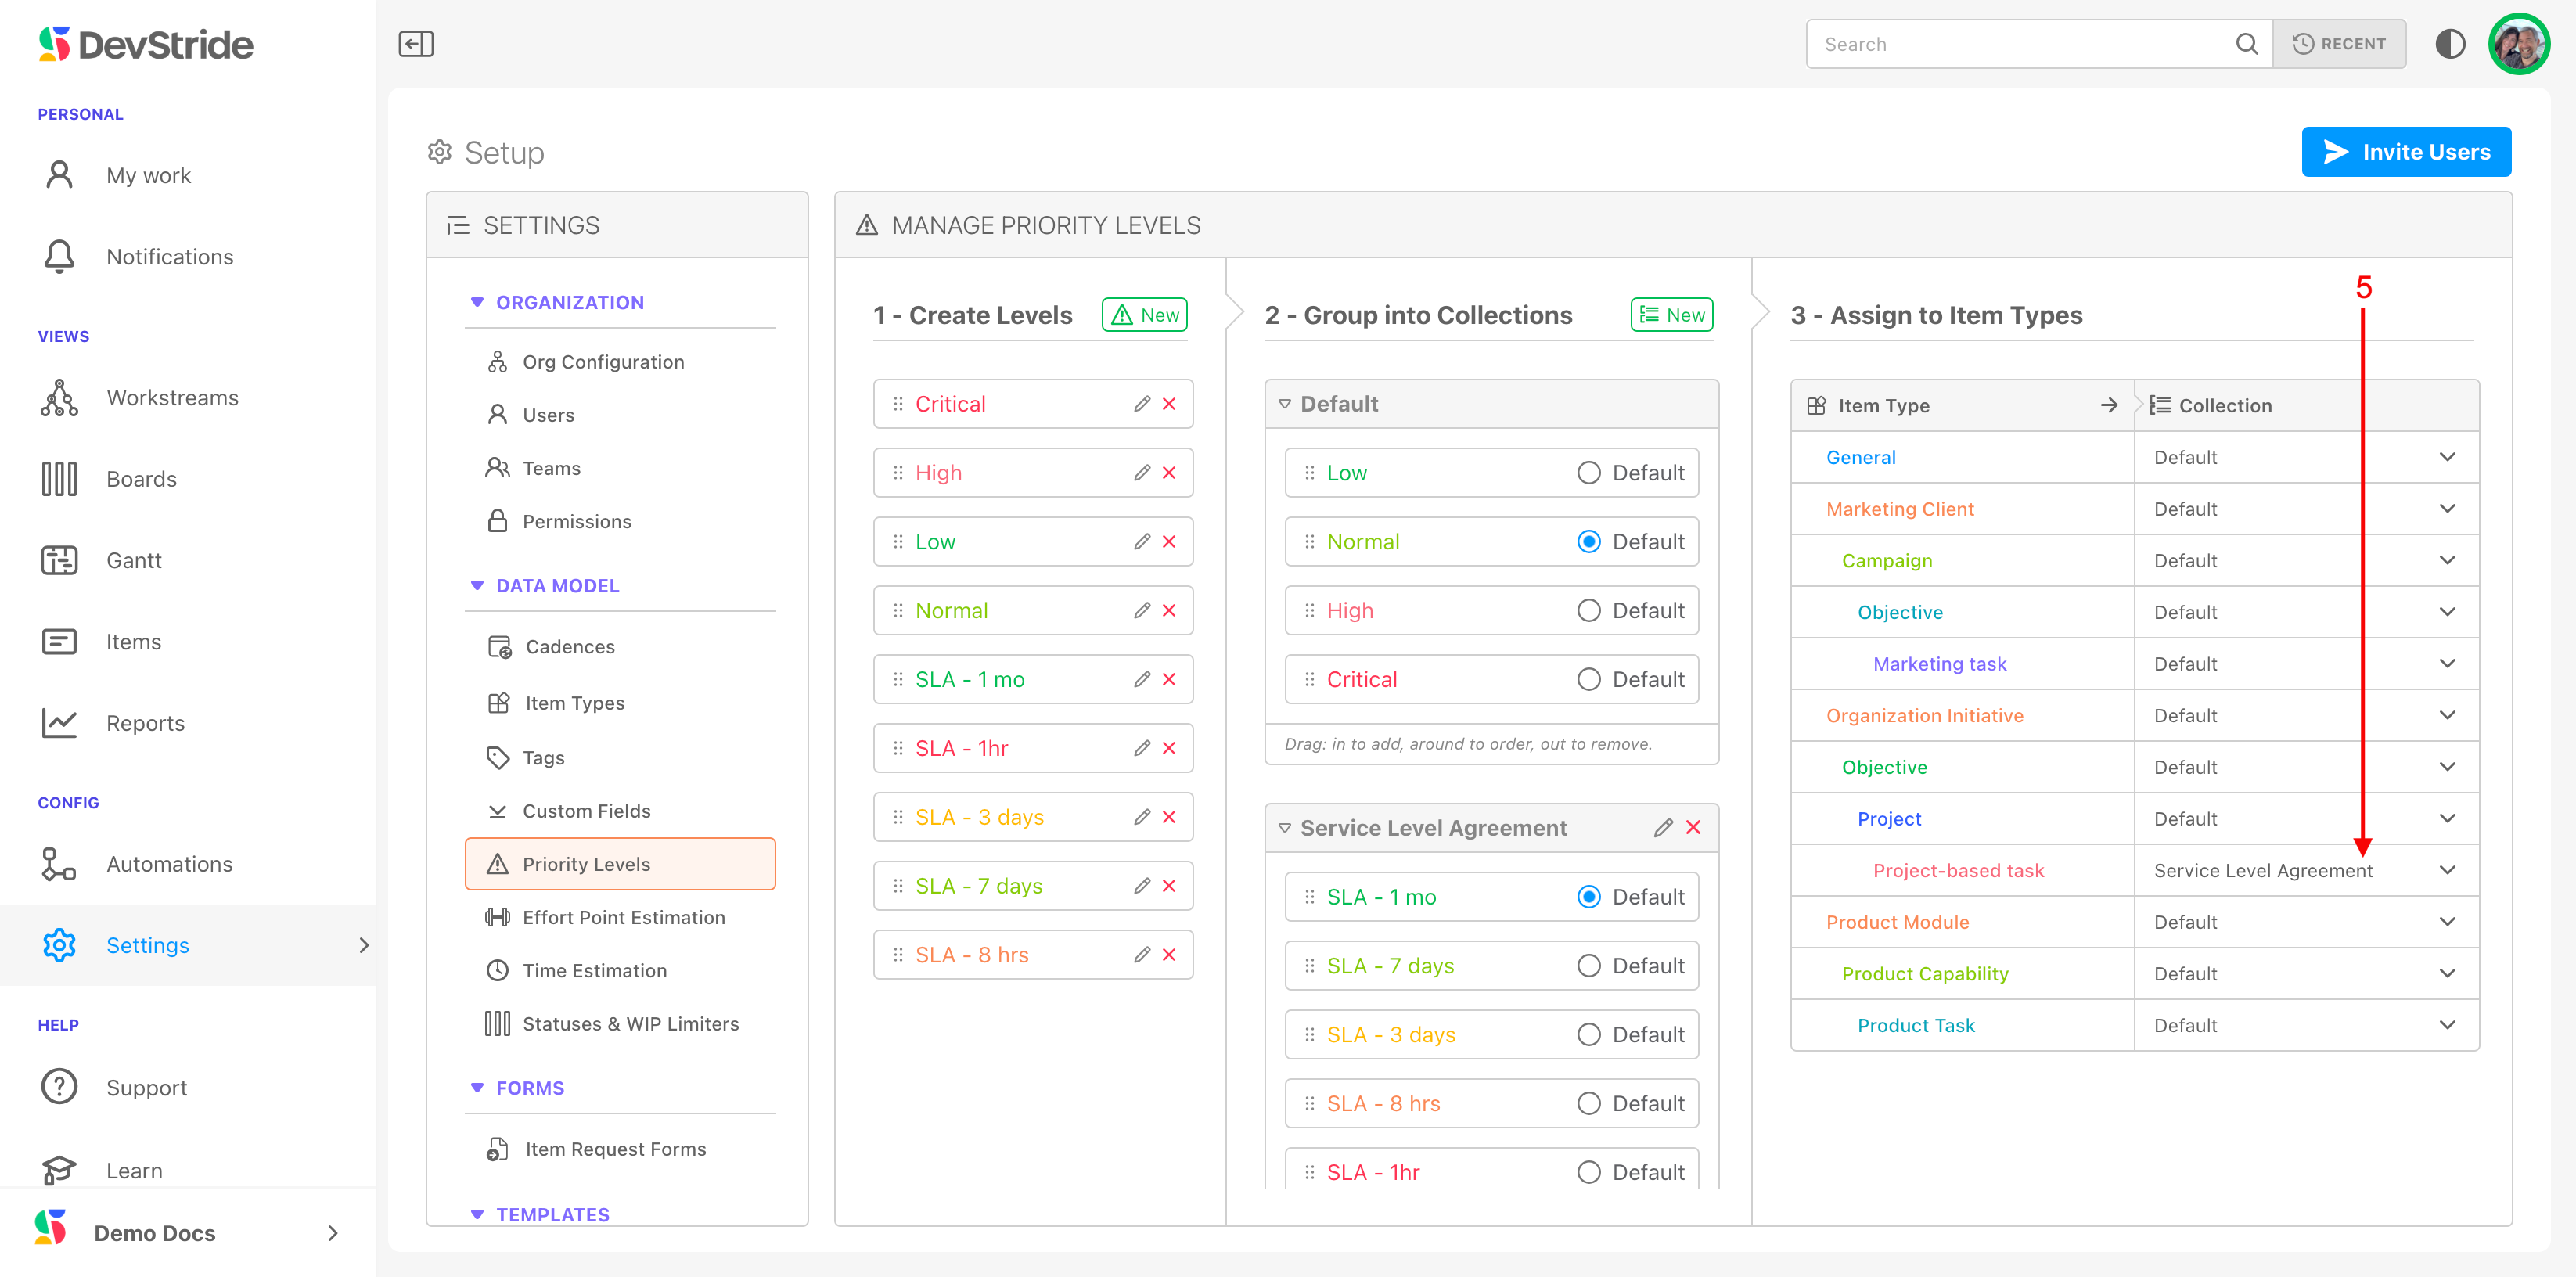
Then, simply drag the levels you would like included in the new collection from the Levels pane into the Collection (4).

After you have included all the levels you want to include in your new collection, you can add that collection to the desired Item type (5). Now the levels from the collection will be displayed for that item type throughout your DevStride organization.
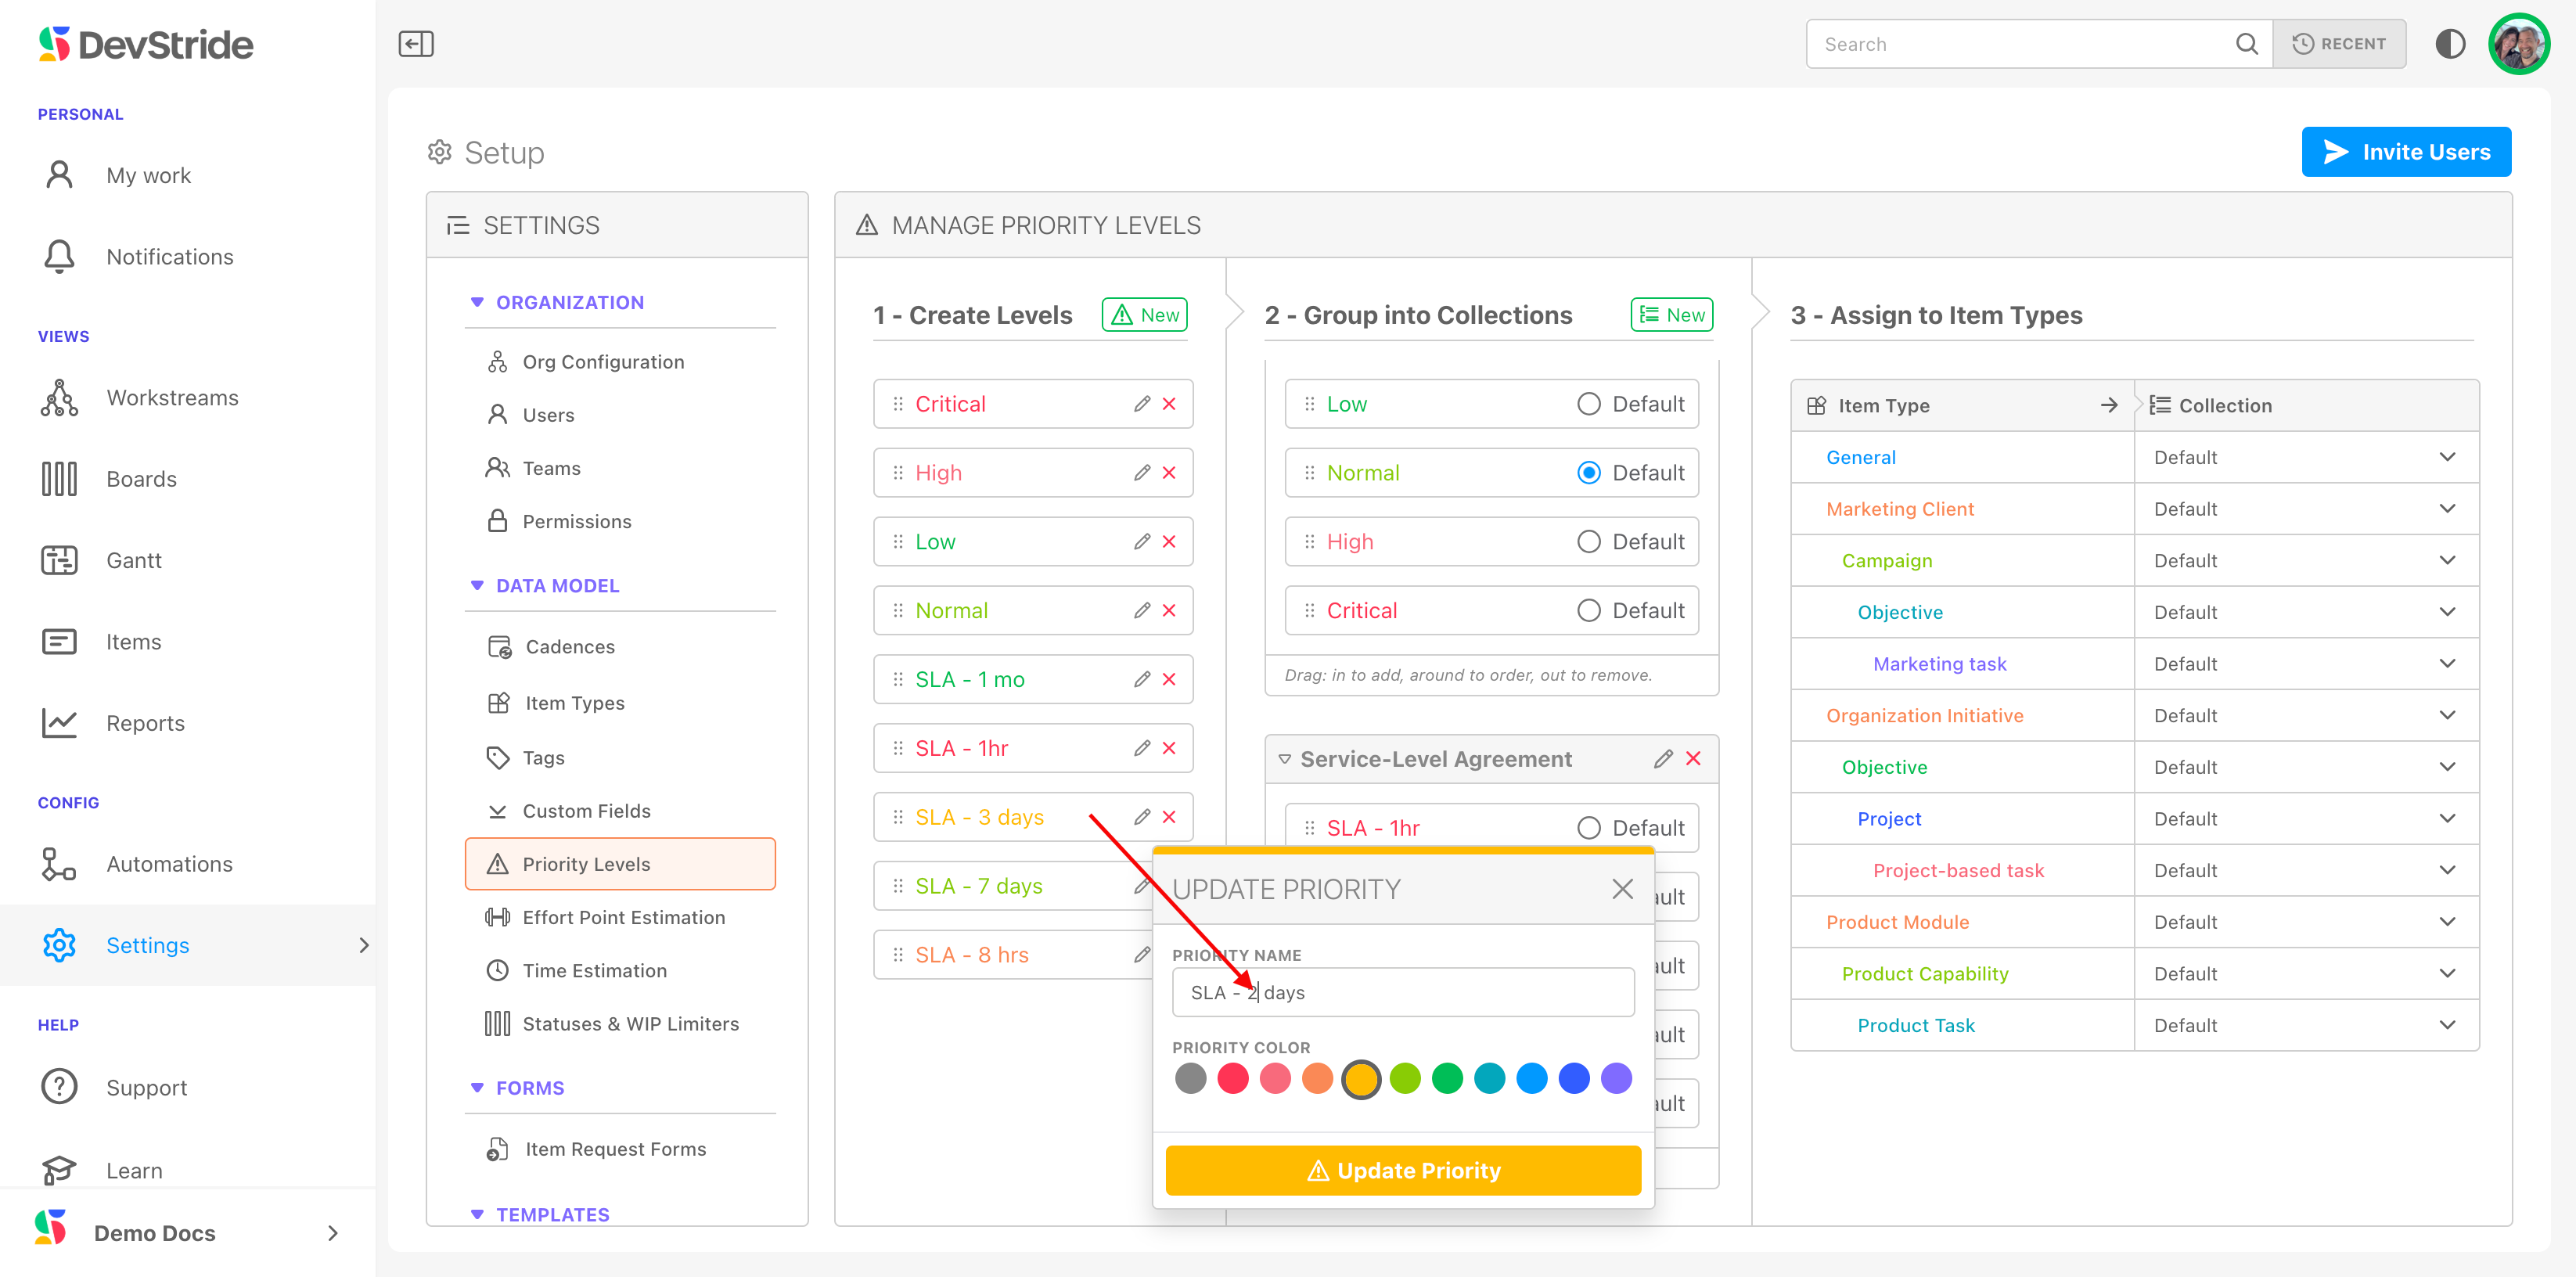
If you would like to make any edits to individual items on your priority lists, click on the pencil icon and make your changes. These updates will be applied to all items that use this level system-wide.
Priority levels are used throughout the system, on the item workspace of the item itself, and as a field in multiple views and analytics throughout DevStride.
What this gives you
Because different kinds of projects have different requirements for priority tracking, DevStride gives you the flexibility you need to use the kind of priorities that work for each item type in your item type hierarchy.
In our example, we have projects that are based on service-level agreements, so we created priority levels that help track priorities for established response times. We used a red "SLA - 1 hour" level to show that the priority for fixing this issue is 1 hour. The red color and the 1-hour priority shows a the critical nature of the issue.
Note: As with many other settings in DevStride, priority levels can be used as a trigger in Automations, which will be covered later. A change in a priority can trigger notifications and other actions in the system, which is another method to raise visibility and prevent potential setbacks.
Now, continue to tour the features on the right bar of the item workspace:
Teams through Status
Point Estimates
Time Estimates
Best Practices for Time Estimates
Time Spent
Was this article helpful?