Admin Onboarding - Setting up Tags
- 19 Feb 2025
- 5 Minutes to read
- Contributors

- Print
- DarkLight
Admin Onboarding - Setting up Tags
- Updated on 19 Feb 2025
- 5 Minutes to read
- Contributors
- Print
- DarkLight
Article summary
Did you find this summary helpful?
Thank you for your feedback!
Overview: Tags
Tags are a visual way of labeling an item. Like fields, they can be set manually or can be applied as part of an automation. They can also be used in reports and analytics.
Tags that already exist in DevStride
DevStride provides two standard tags:
- Blocked
- Bugs/defects
A common way to use them is for labeling "bugs" or "defects."
Other examples of useful tags include:
- Needs customer review or approval
- Ideation
- Specific teams, such as marketing, might use them to flag a particular campaign type or name
Effective ways to use tags - an Example
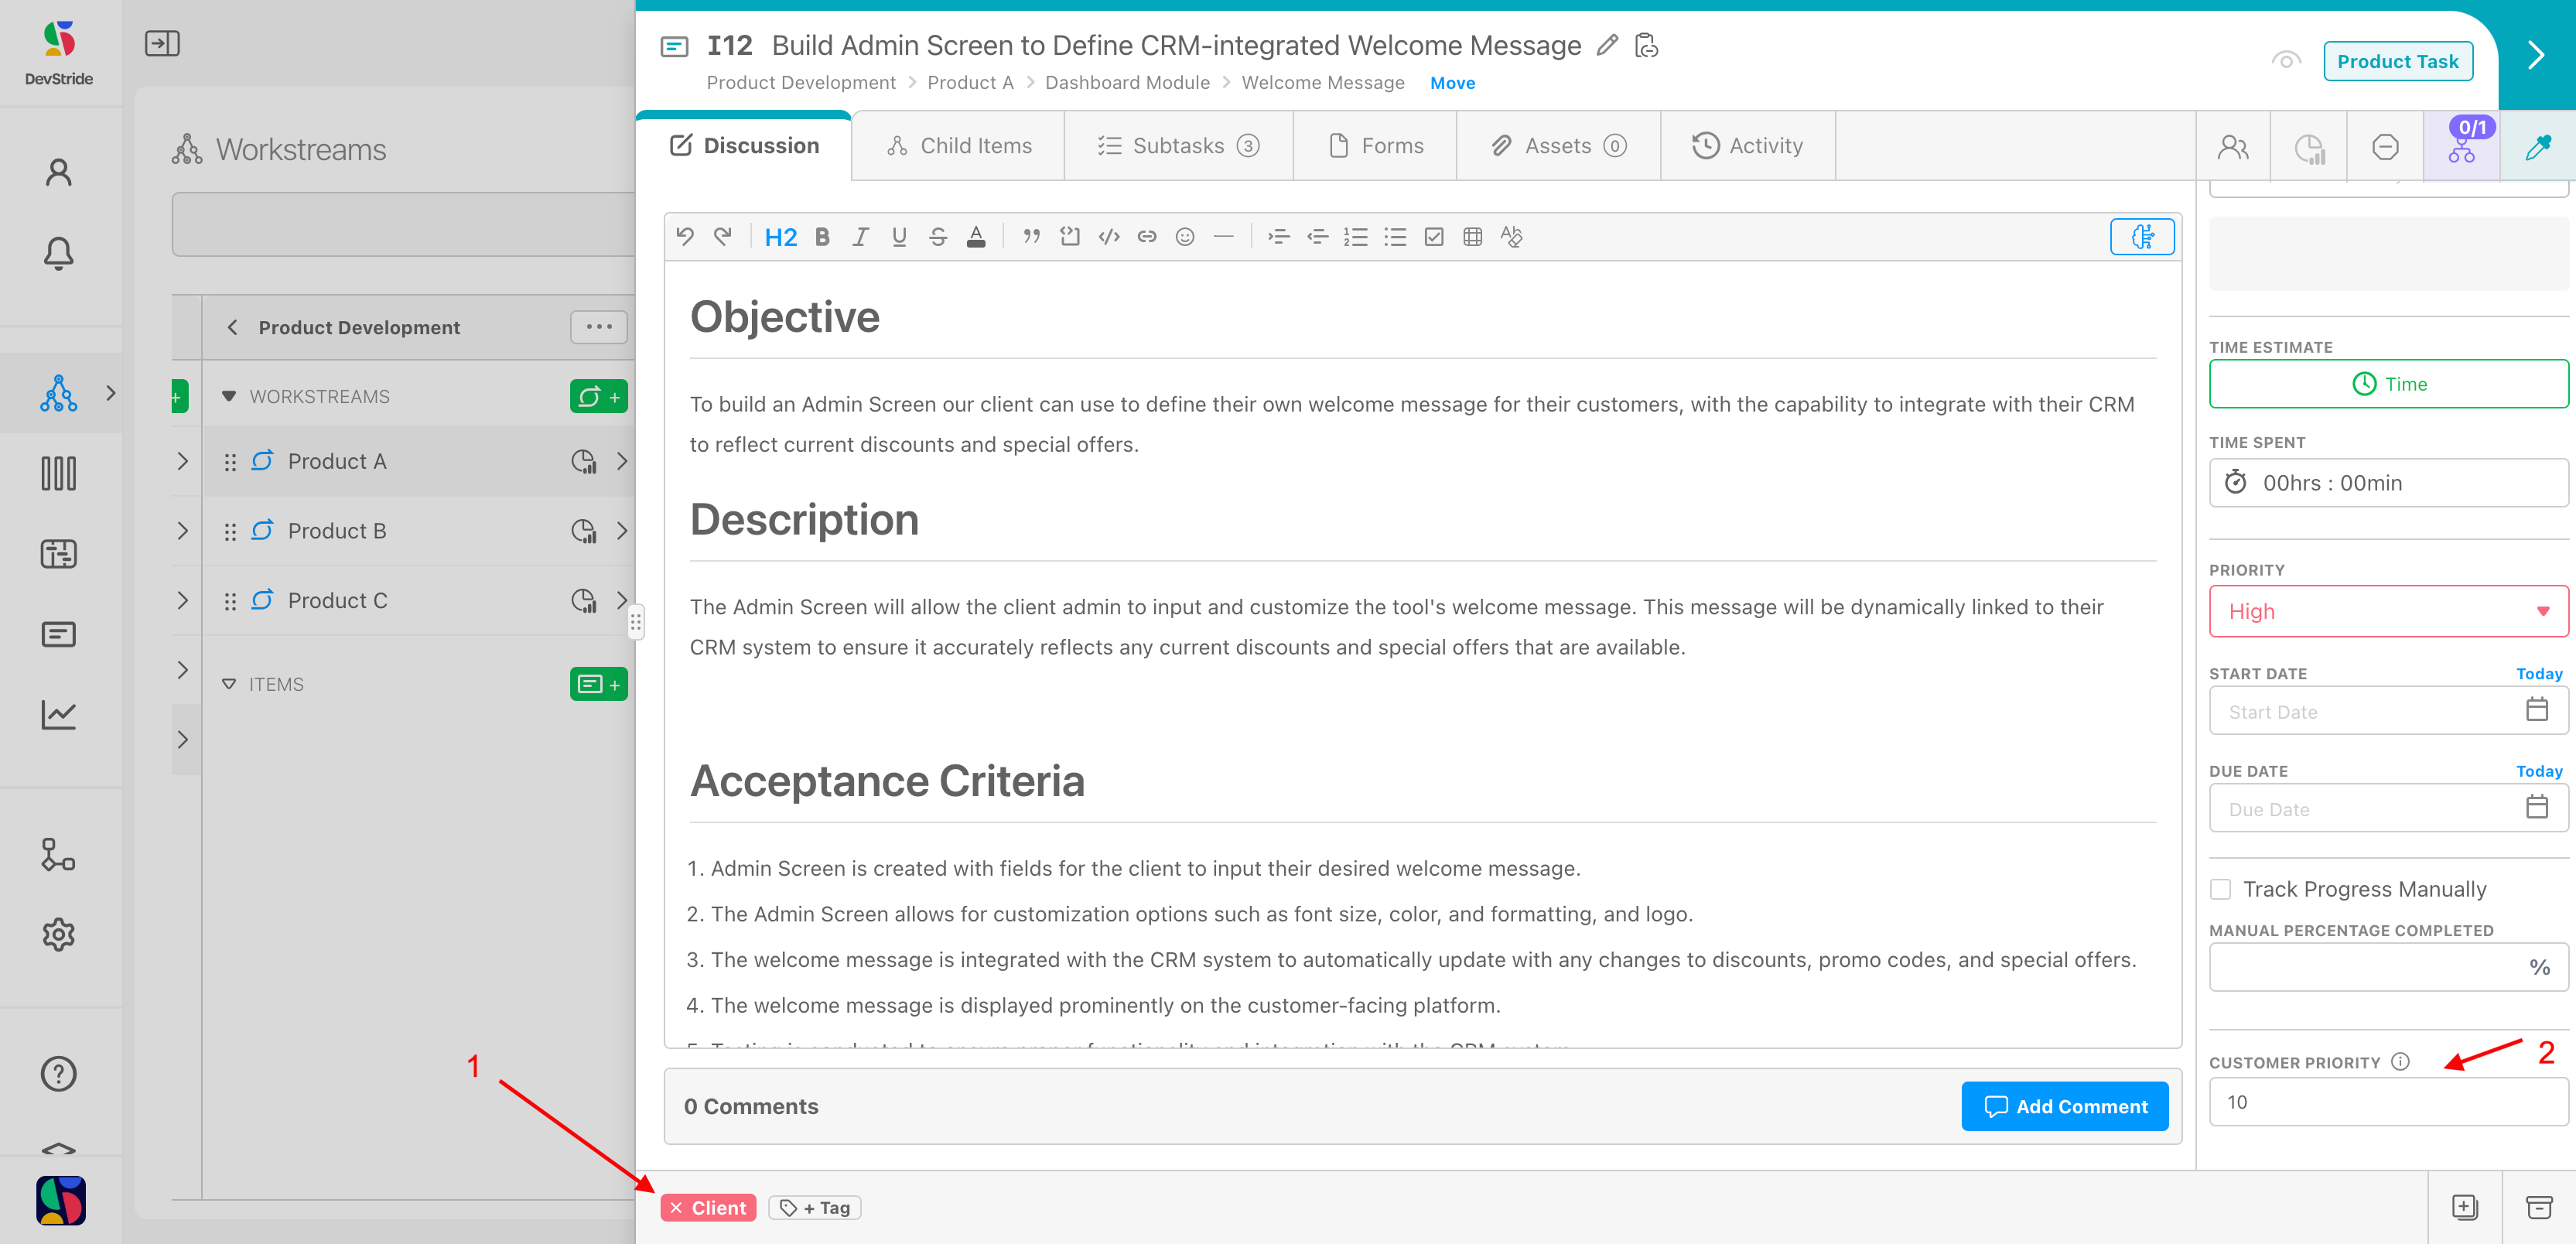
In the example below, a tag "Client" (1) is being used to mark an important client request.
Note that in this case, there is also a custom field in the sidebar called Customer Priority (2) - this item is a high priority.
This example used automation settings (which we will cover later) to automatically create the tag called Client any time there is an item whose customer priority is set to 5 or higher.
This is just one example of an effective way to use tags.
When to Use Tags
Tags are a great way to call attention to an item for a specific purpose.
In order to use them most effectively, they should be used sparingly. That way, too much visual "noise" isn't generated with multiple flags.
Tags are another way to do the following:
- Identify a type of item or activity
- Draw attention to something about the item
- Group items together that have something in common
- Report on items that contain a specific tag designation(s)
- Perform an action - tags can be used very effectively in combination with automations. You can create automations that cause a tag to be applied and also use tags to signal next steps in other automations.
When NOT to use a tag
- Used in place of a field or a custom field
- When you otherwise would want to create a list to pick from
Using Tags vs. Fields
We often get the question, "When should I use a tag vs. a field?"
Tags represents capturing a high-level concept that you want to bring label-like visibility to. It draws attention.
Tags exist in a many-to-many relationship with items. This means an item can have multiple tags. And many items might use the same tag.
As we stated above, do not want to tags when we really need a drop down list. In that case, you should use a field with a list.
Do not use too many tags.
As a general rule of thumb, most organizations will not need more than 10-20 tags.
Here's how to create additional tags that meet the needs of your organization:
Step 1: Set Up Custom Tags in Settings
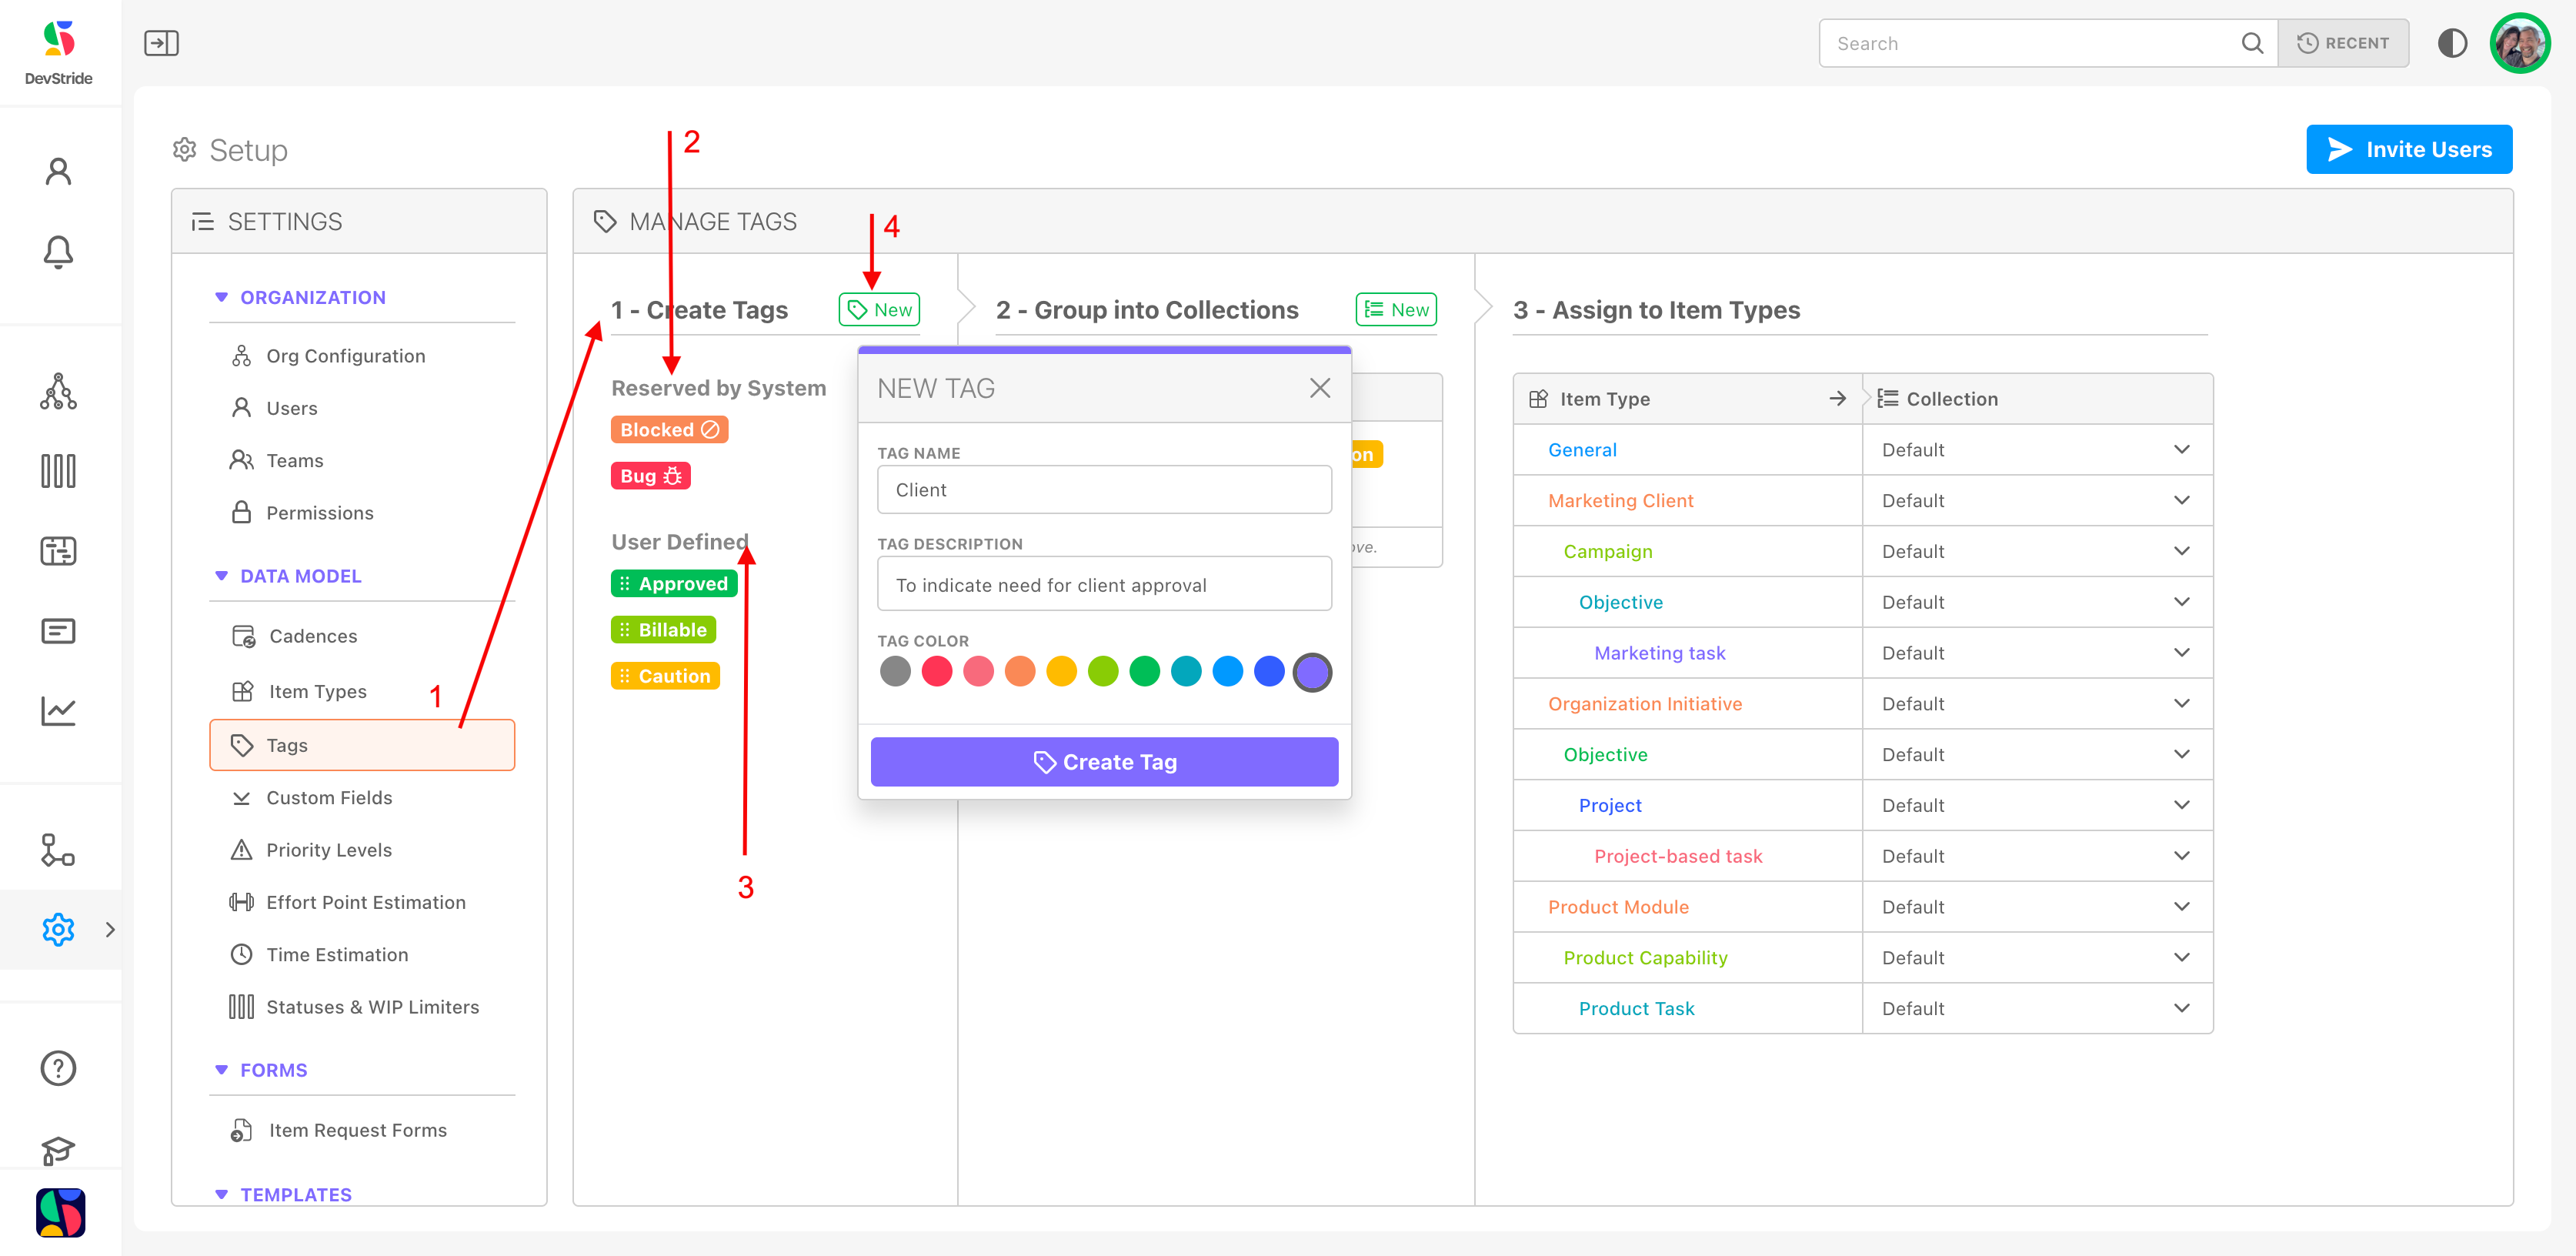
To add Custom Tags to your global data model, go to Settings.
As with all the other Settings, you can add to the the global list of item types on your left Create Tags pane (1). This pane displays the tags provided by the system (2) and has a separate category displaying user-defined—also called custom—tags (3).
To create a custom tag, click on New icon (4) next to Create Tags. Then, fill in:
- Tag name: Type in the name you want to use for your tag. In our example below, we want to create a tag called Client, to be used for client approval of an item.
- Tag description (optional): Provide a brief explanation of the tag’s purpose.
- Tag color: Select the display color of the tag.
Click on Create Tag.
Step 2: Group Into Collections
Organize Tags into a Collection:
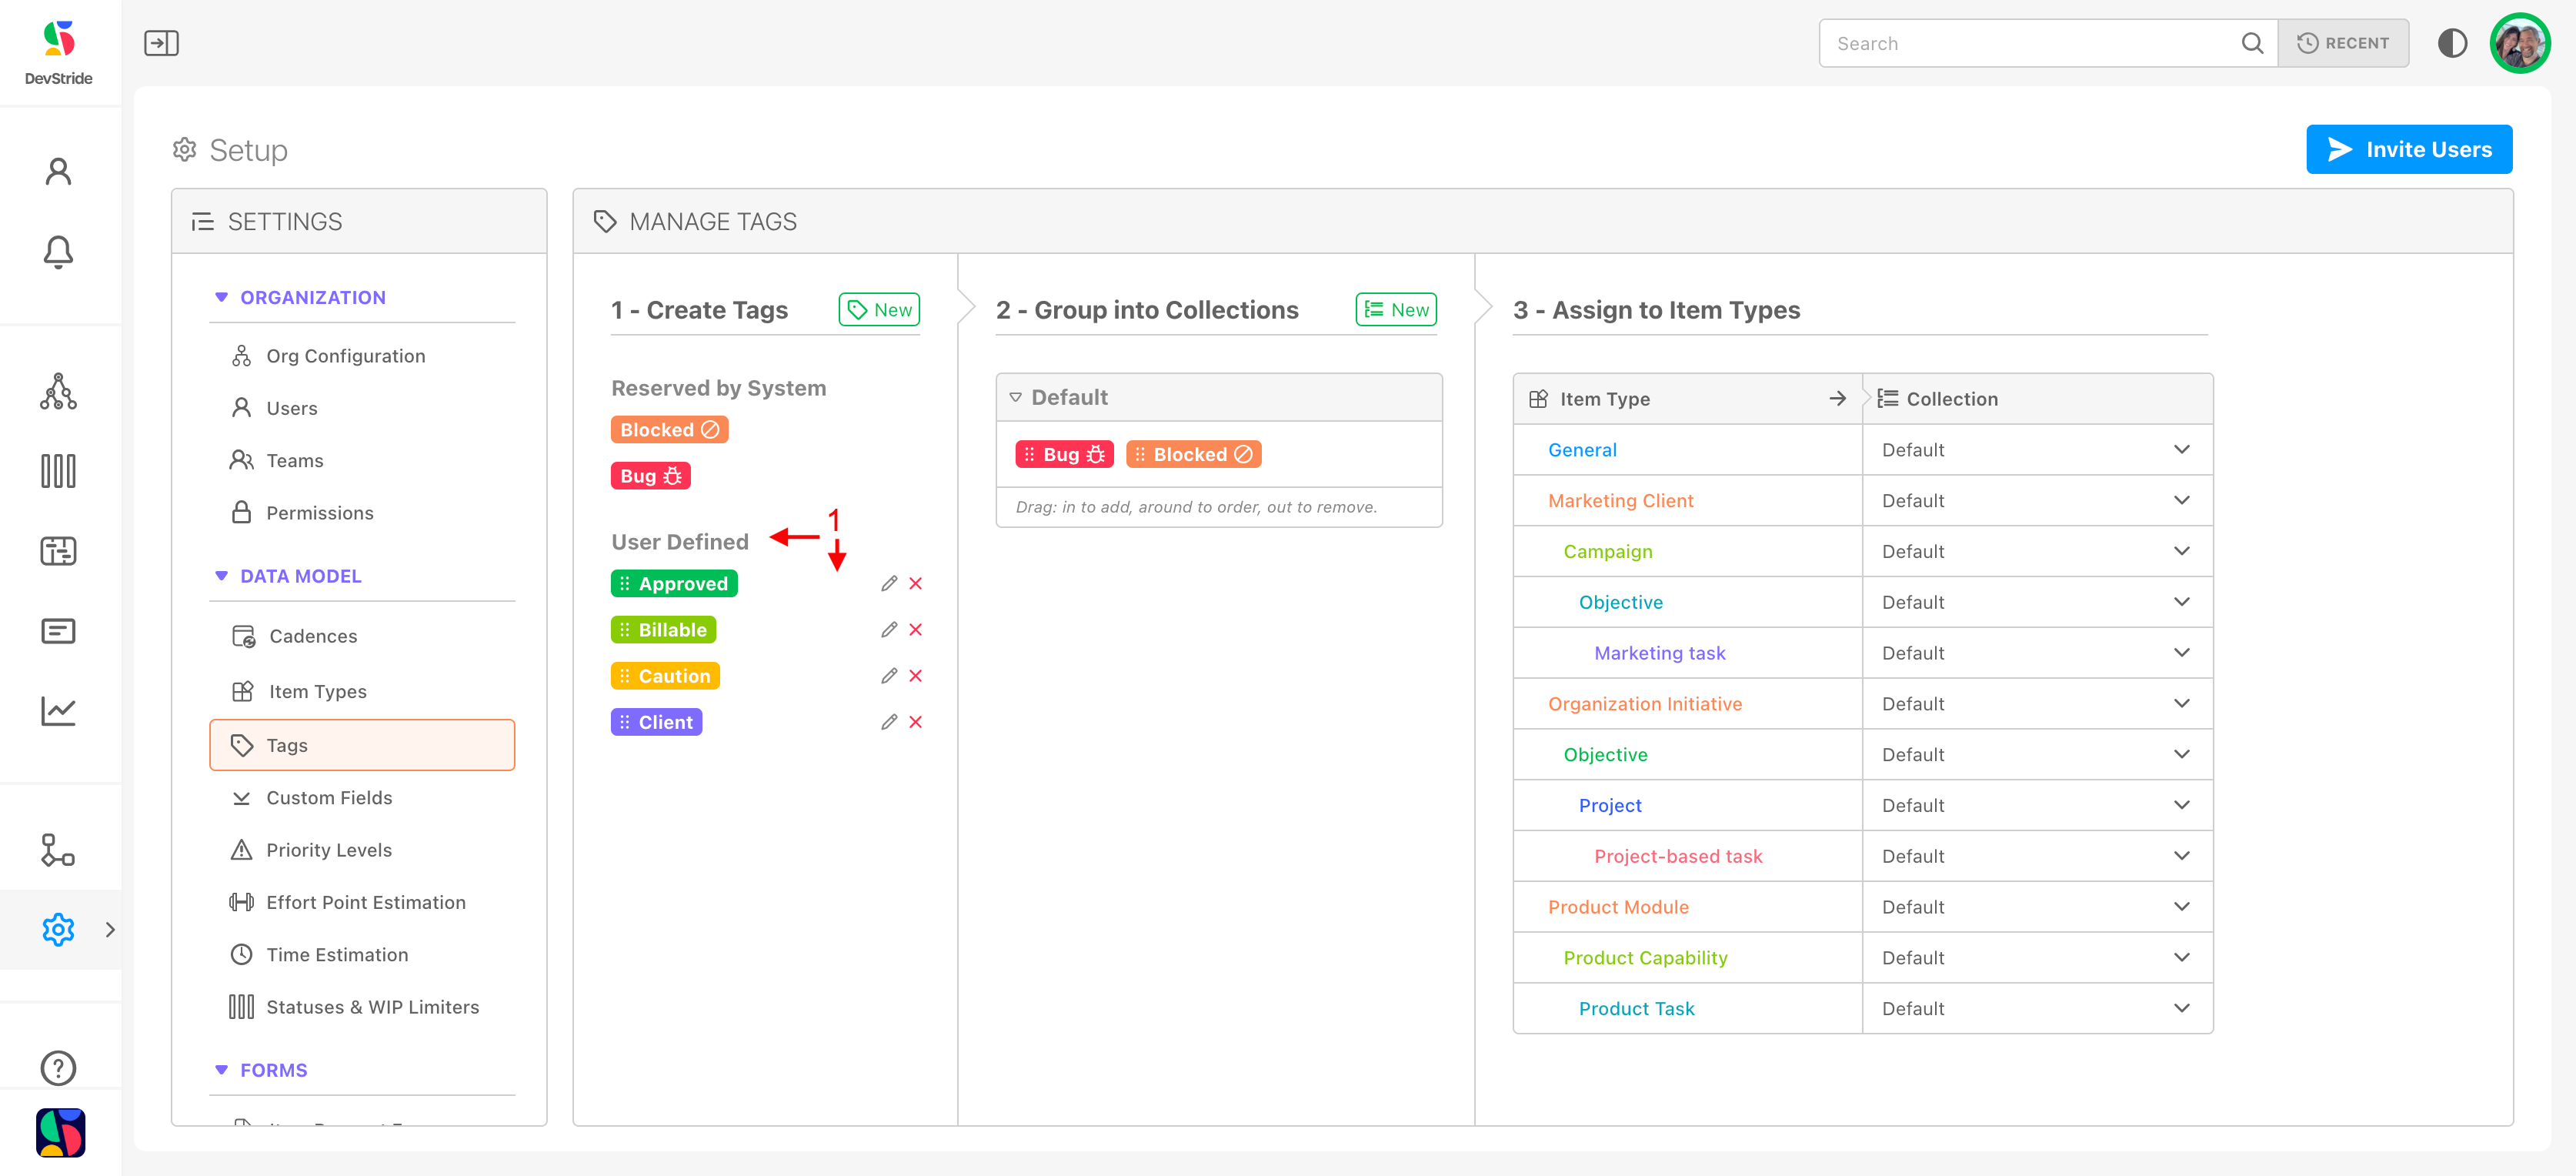
After you have created the tags you wish to use (1), you can group them into collections that are specific to your needs. (A collection groups tags by context or workflow.)
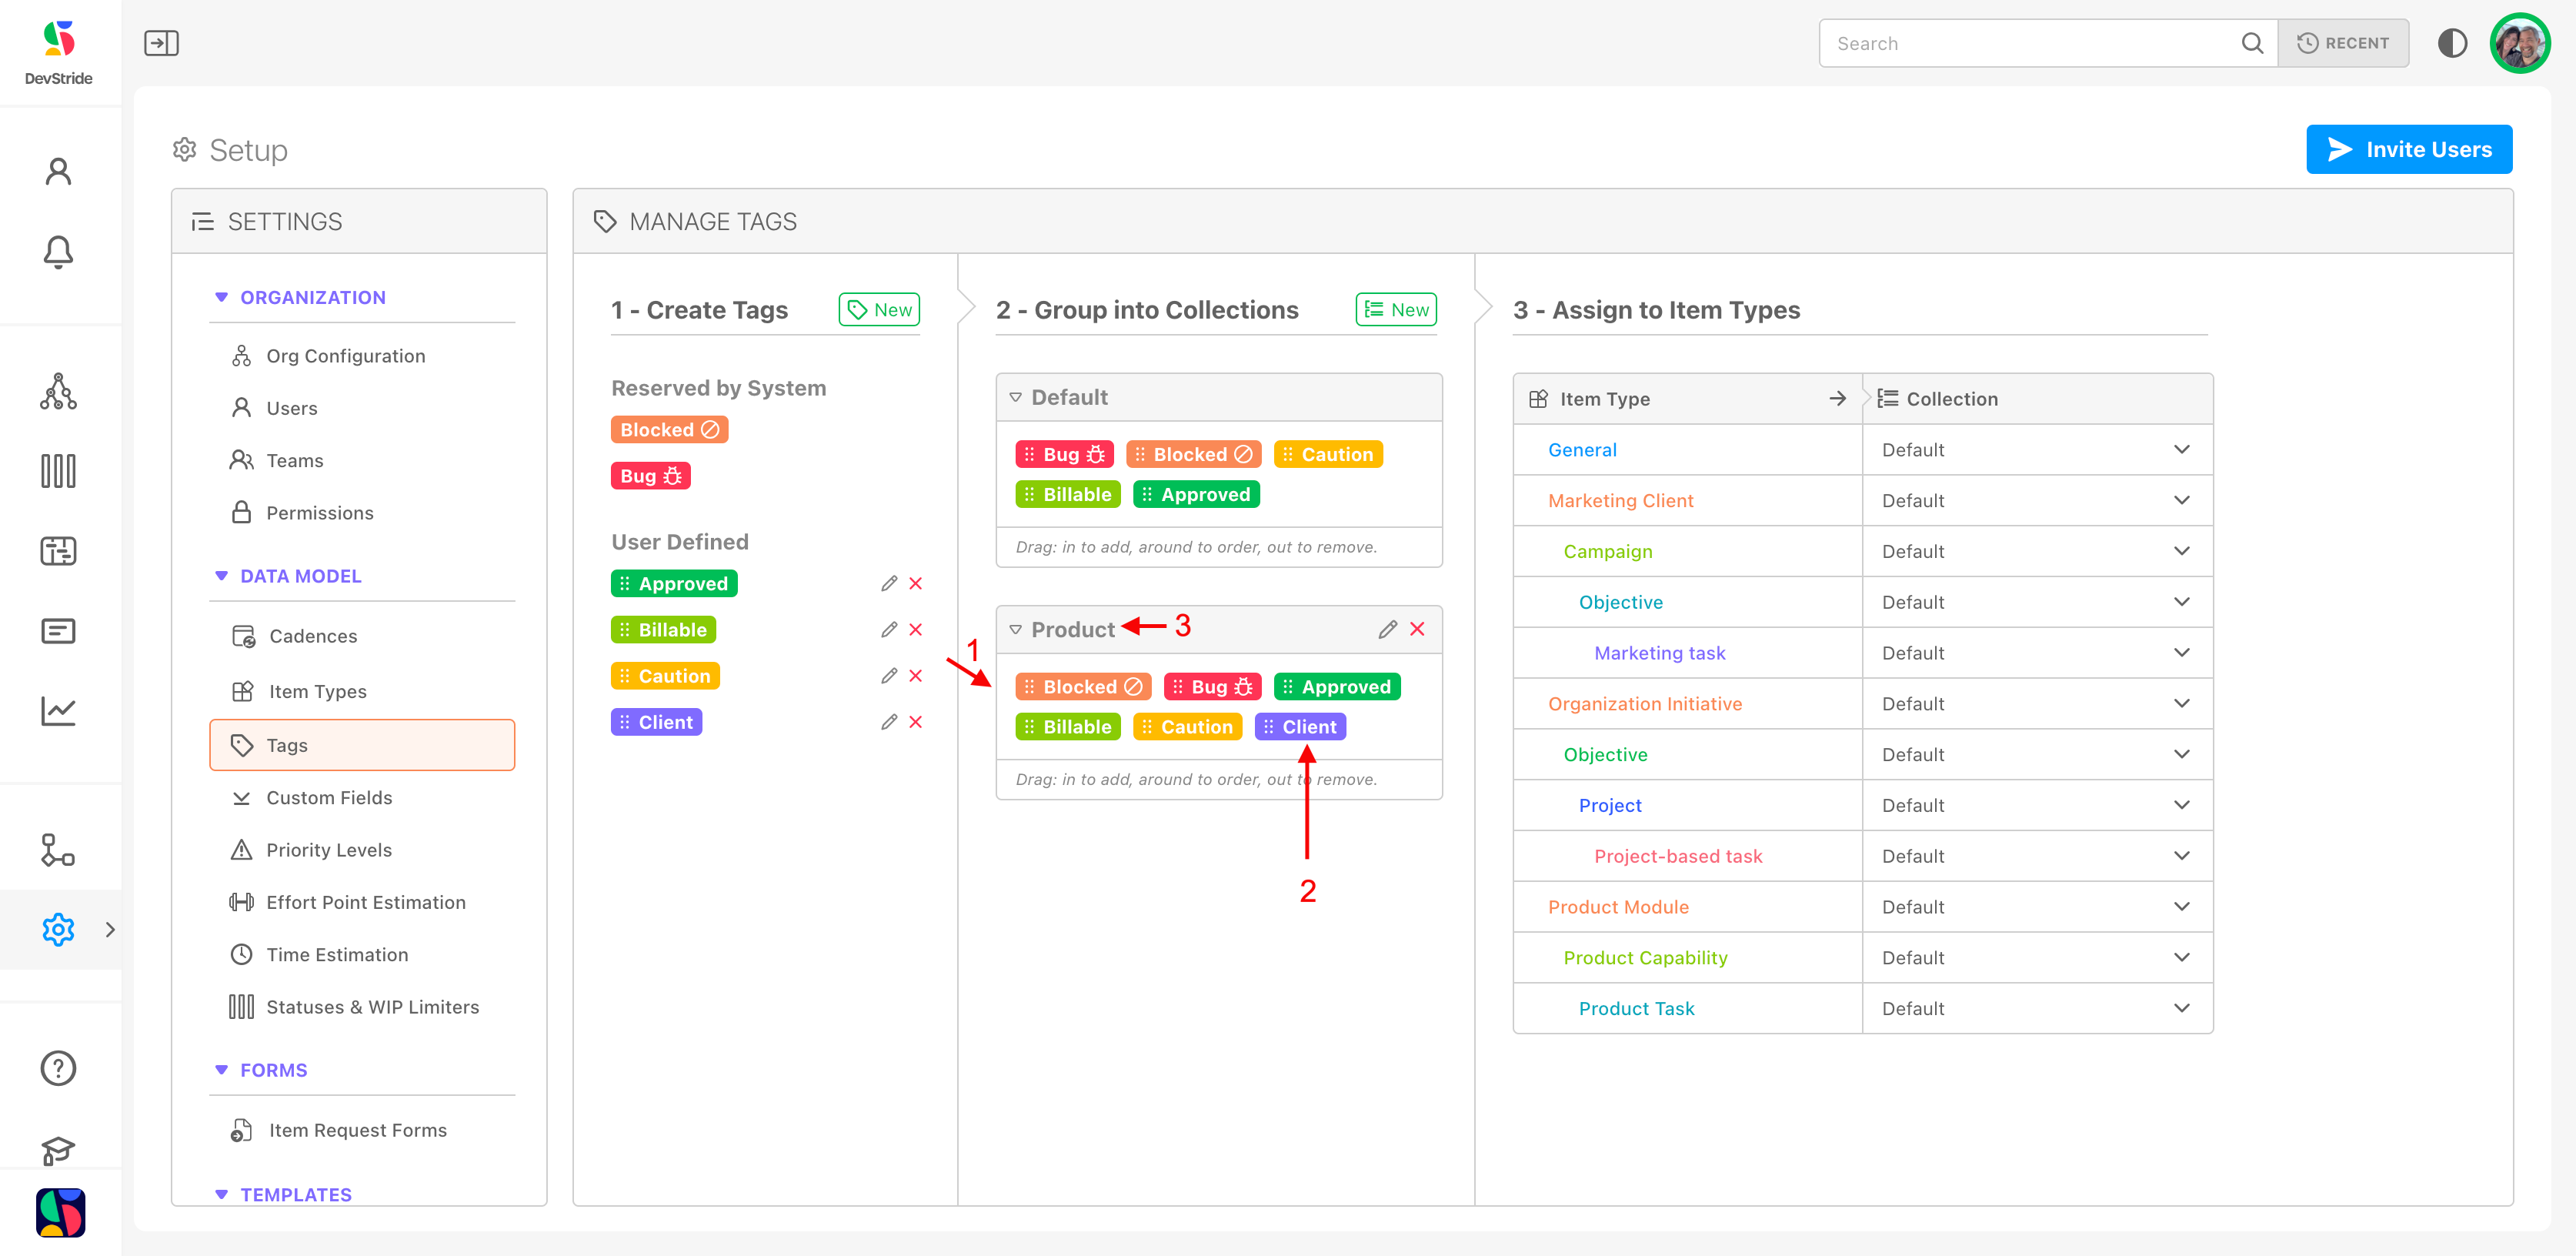
In our example, we have decided to use certain tags as default options for many of our item types. For our product work, we'd like to make sure we include the client approval tag, so we will create a collection and include this tag.
To do this, click on the New icon (1) and enter in the name of the collection you would like to create (2). Click Create Tag Collection.

This creates our now-available collection container (1). The system-supplied/default tags are automatically placed in this collection (2).

Now we can add the additional tags we want in this collection. Drag and drop all the desired fields from the Create Tags pane (1) to the new Product collection. Note that the client tag (2) that we set up was one of the options we dragged over. We also chose to drag over the other user-defined tags on the left pane as we also want them available to the Product Item Types.
We now have a collection named Product (3) that contains our custom tags. All the tags in the Product collection will now be available for use in any item type we assign the collection to. Our aim here is to assign this collection to the Product item types, but we could assign this collection to any item type in the right panel that we wish.
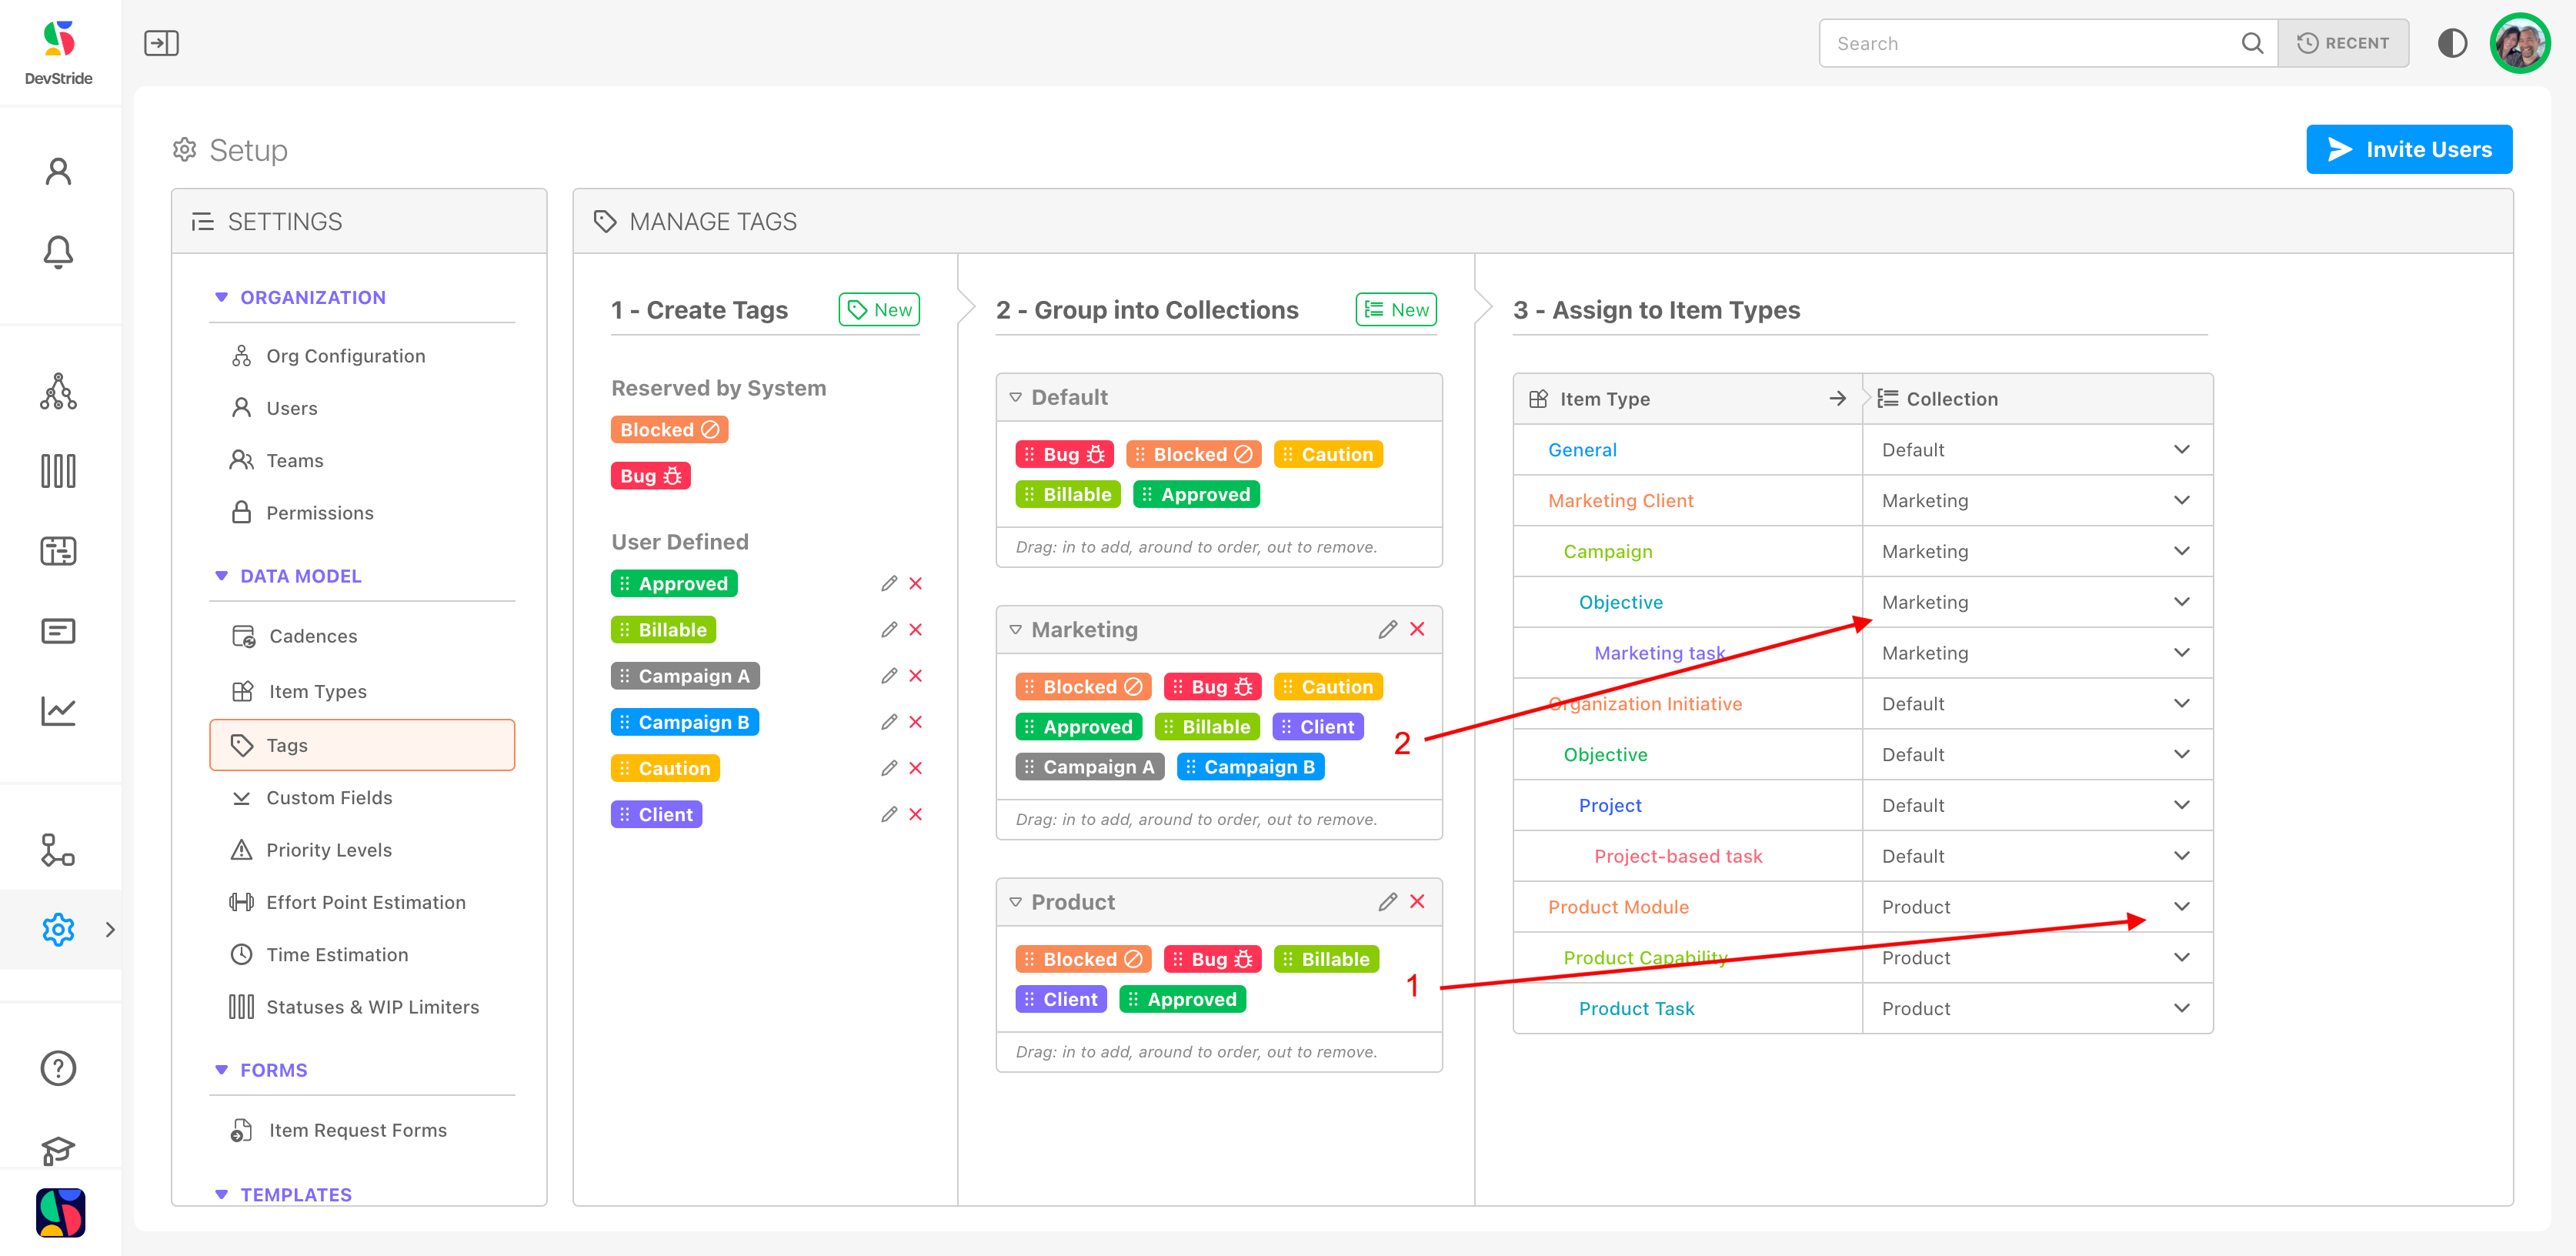
Step 3: Assign to Item Types
Next, assign the collection to your desired item type by selecting from the drop down list on the right.
This assigns the collection to that item type so that users can apply the tag when creating or updating items.
Here, we've assigned the Product collection to the Product item types (1) and the Marketing collection to the marketing related item types (2).
Note that you can get as specific as you wish with your collections because each item type can be assigned their own collection.
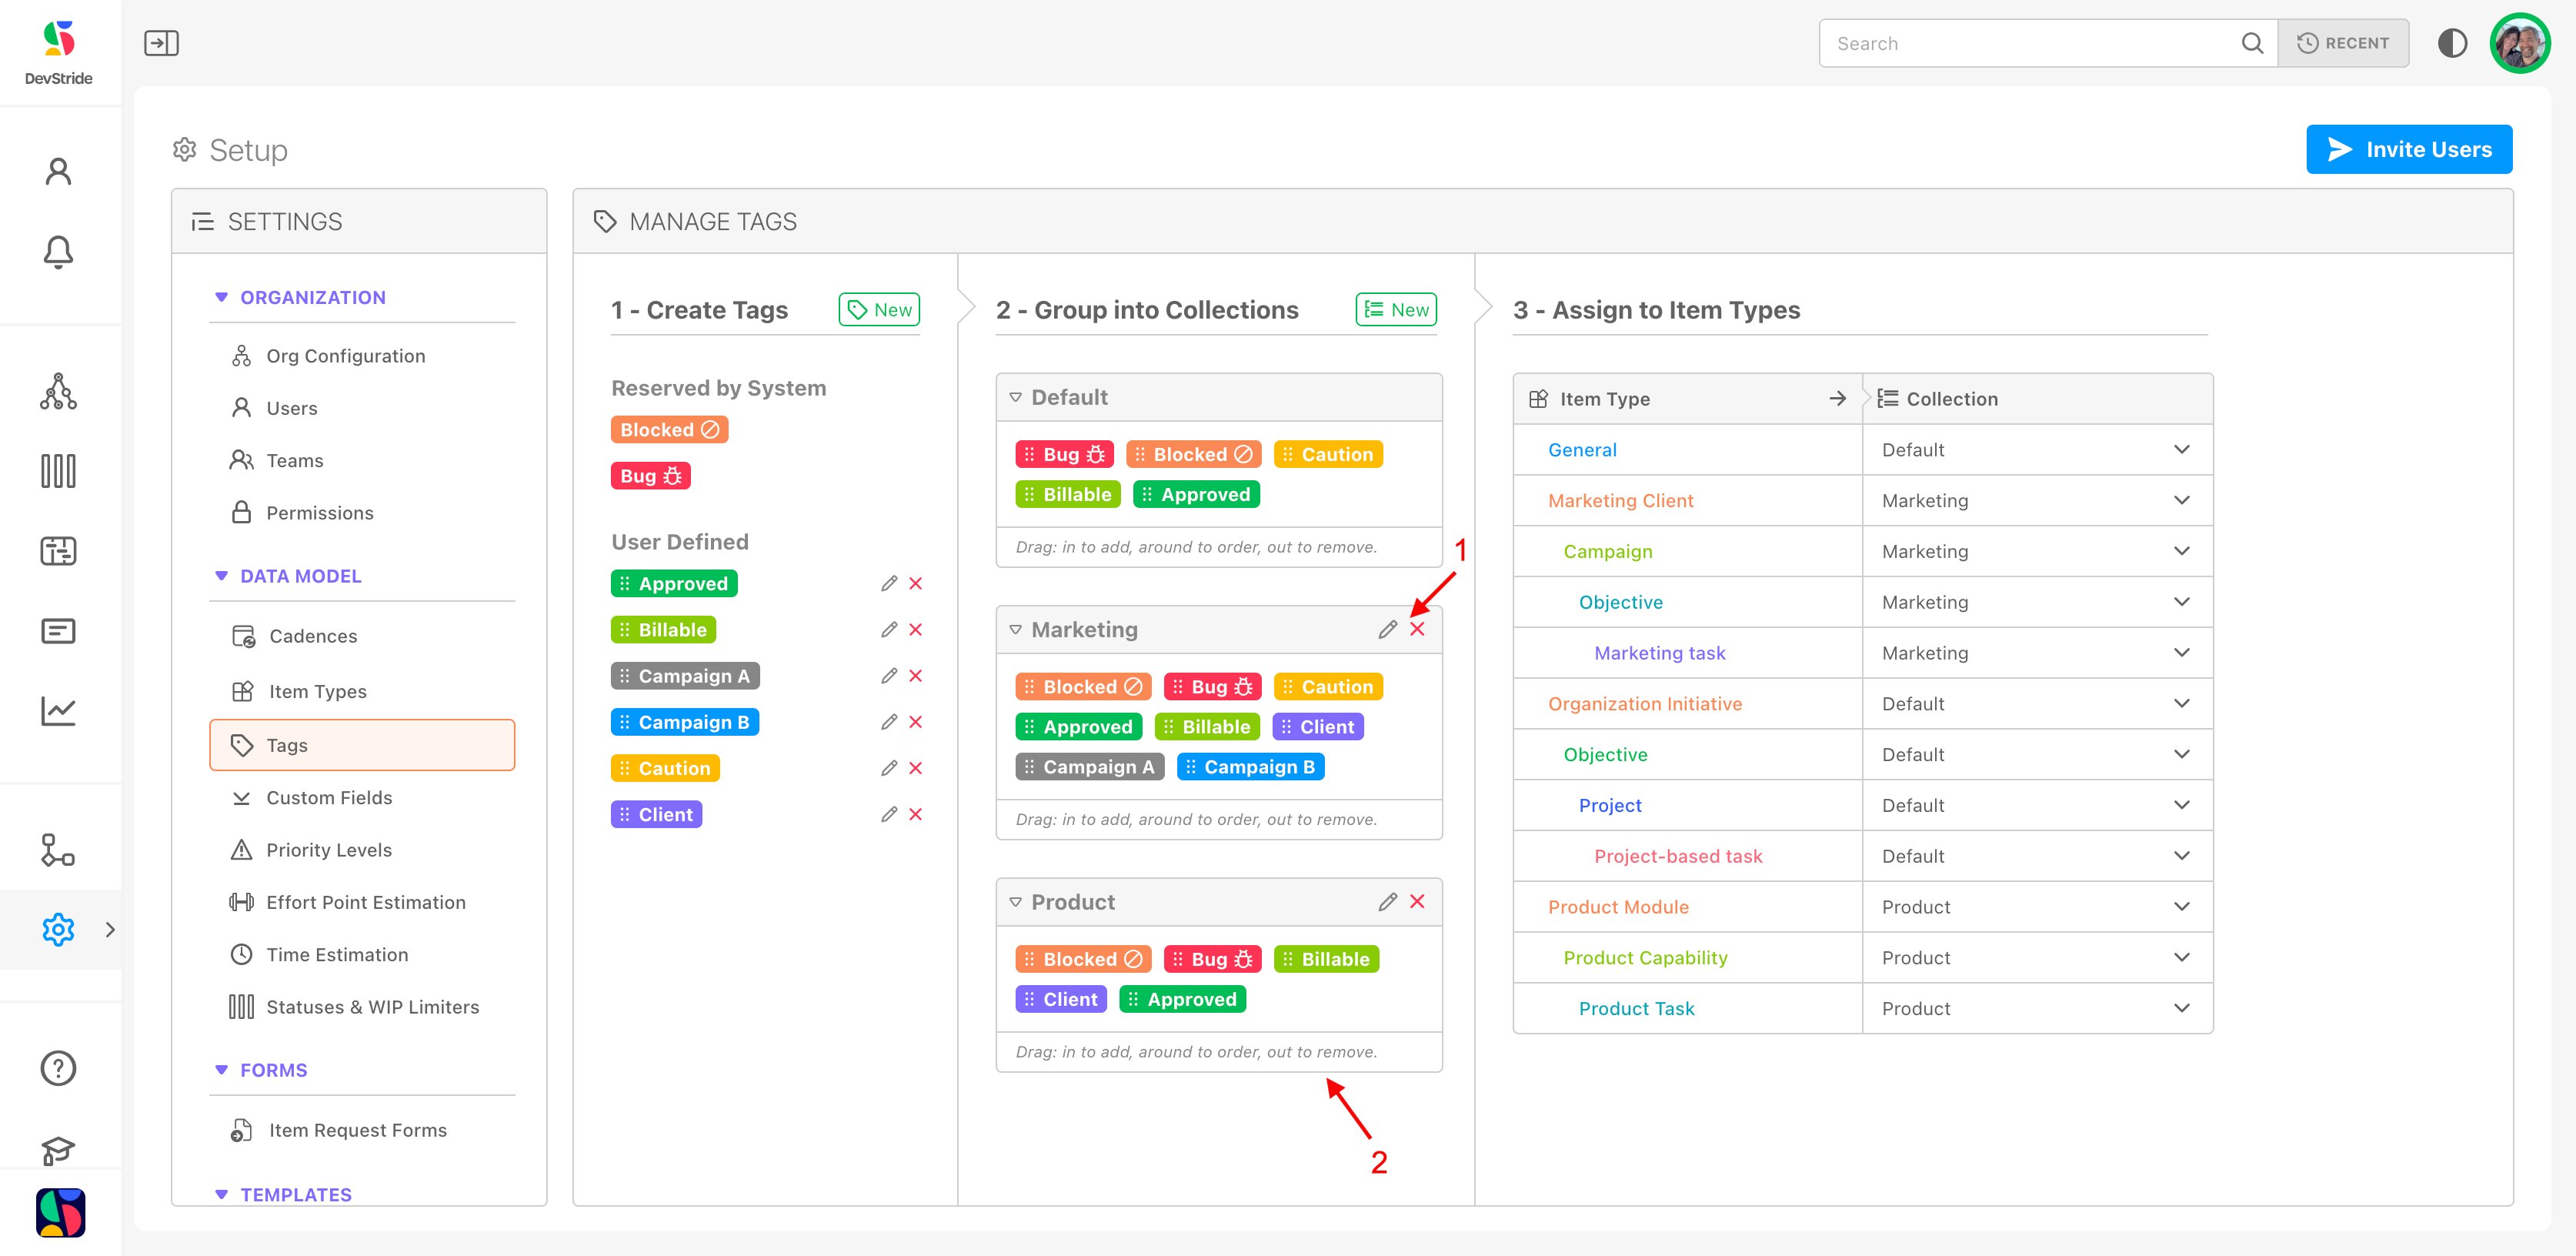
You can edit your collections and their names using the pencil icon in the Group into Collections pane or you can delete the collection by clicking the x (1).
Within each collection list, you can use the grab bars drag items in to add, around to order, and out to remove (2).
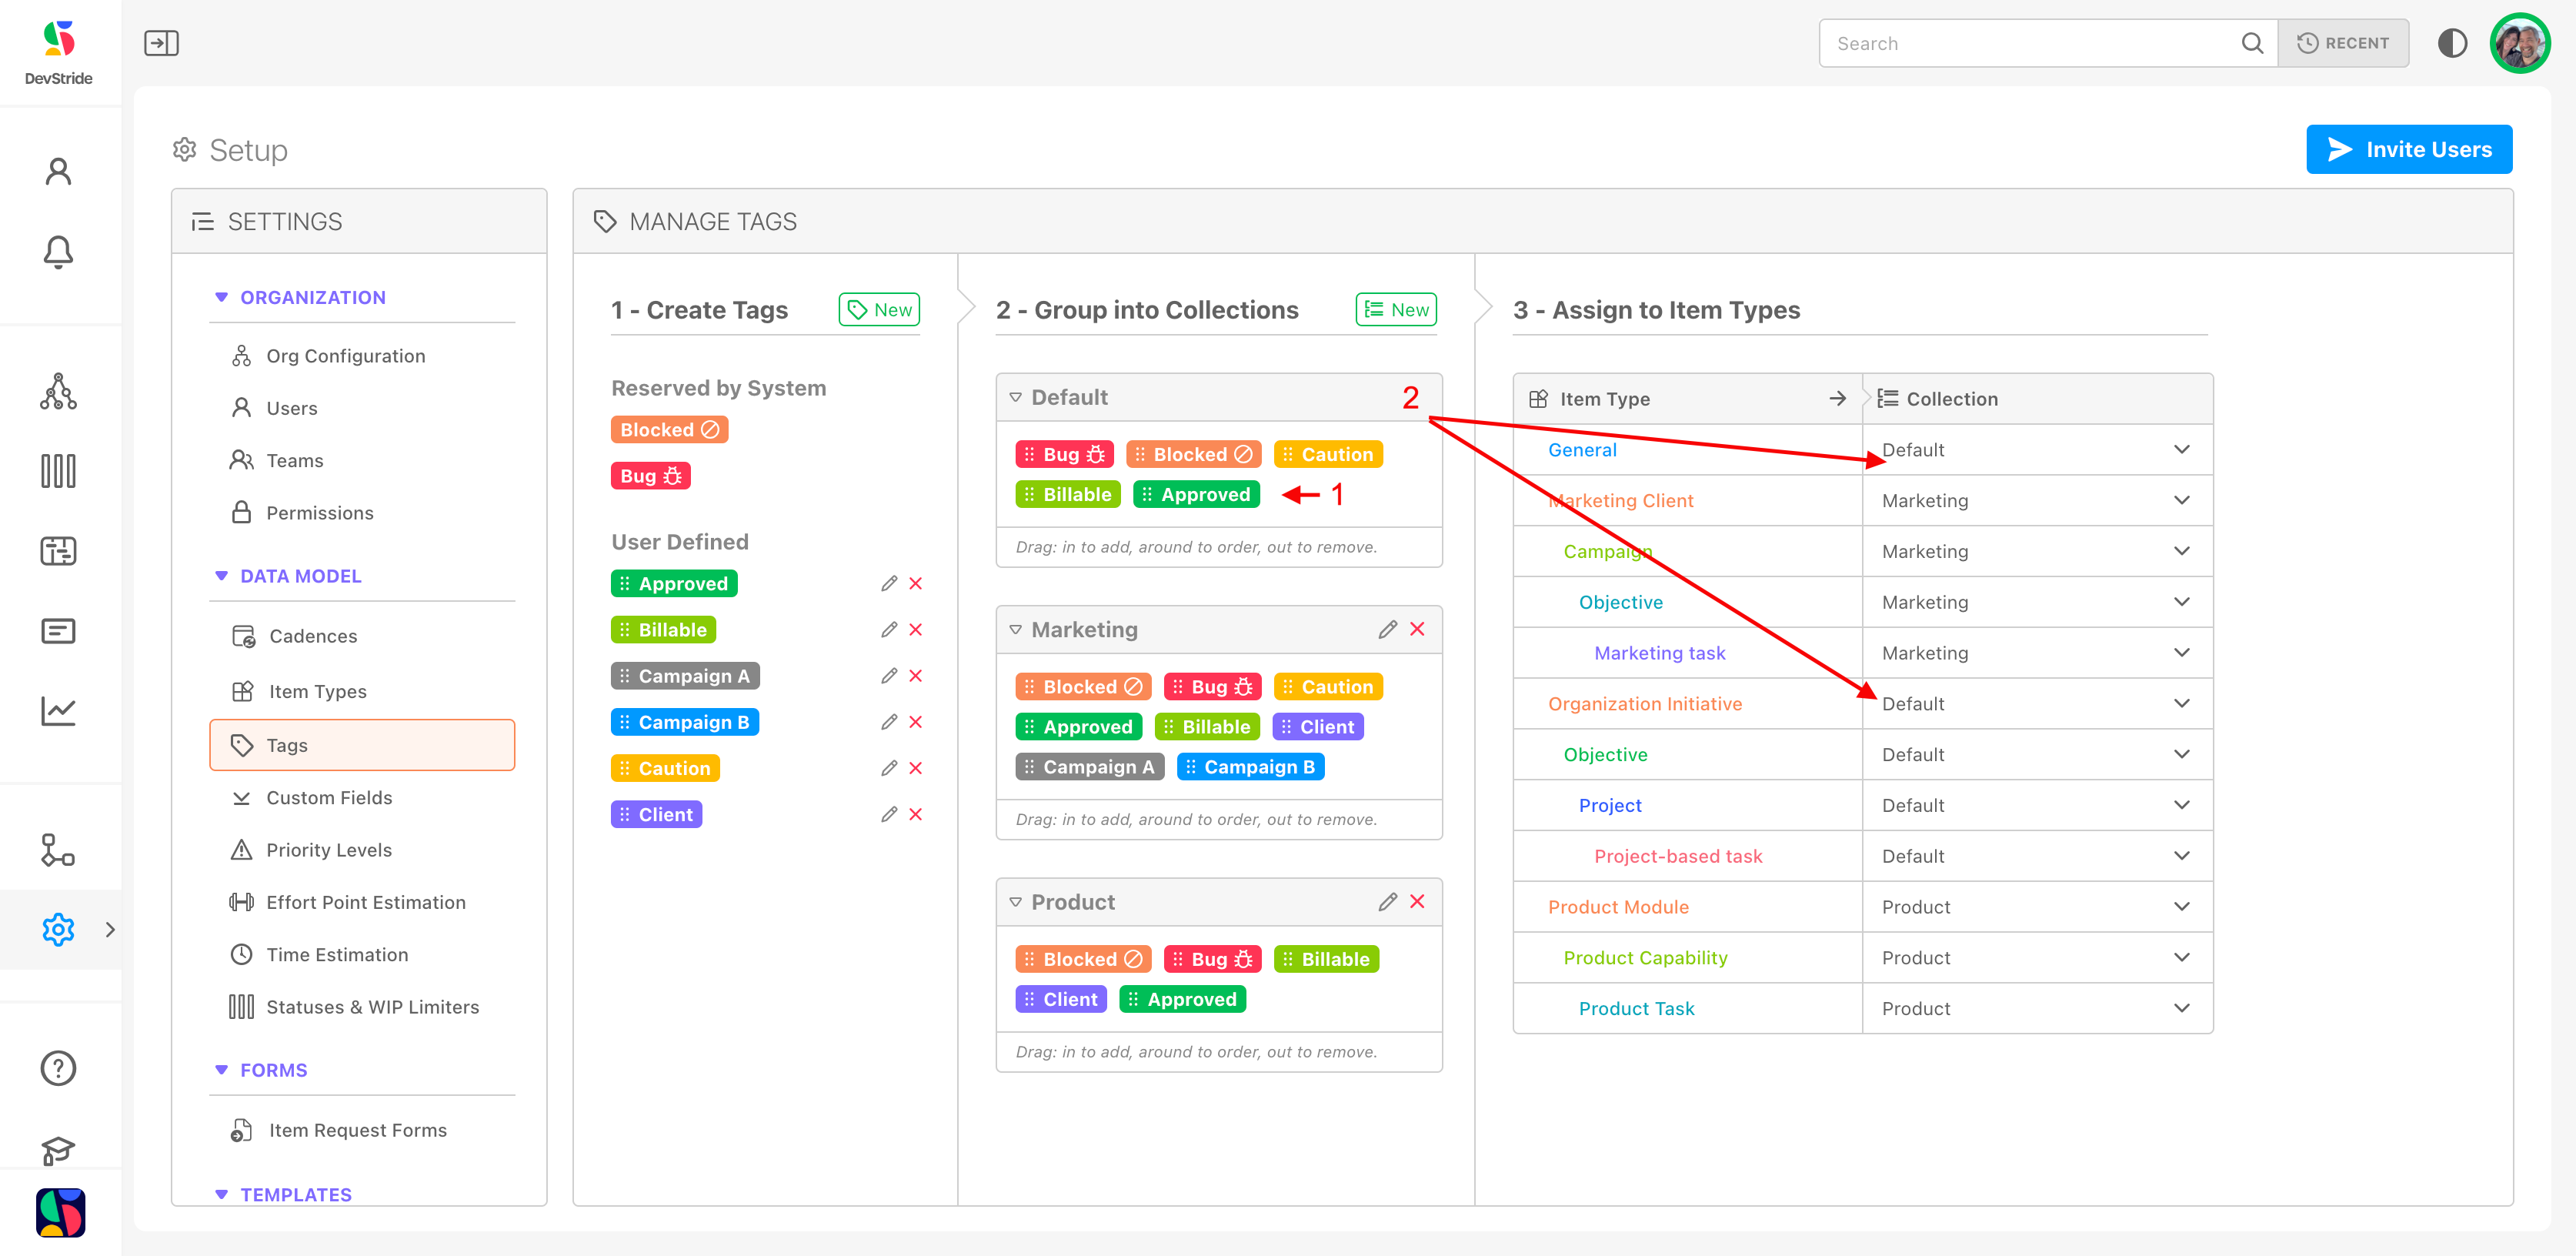
You can also easily add items to the default collection. You will need to follow the same path of creating your organization's desired default fields, adding them to your default collection (1). Any new fields you add to the default collection will automatically become available to all the item types with the default collection assigned to them (2).
Next Up: Statuses and WIP Limiters
Was this article helpful?