Admin Onboarding - Creating and Managing Forms
- 31 Mar 2025
- 4 Minutes to read
- Contributors

- Print
- DarkLight
Admin Onboarding - Creating and Managing Forms
- Updated on 31 Mar 2025
- 4 Minutes to read
- Contributors
- Print
- DarkLight
Article summary
Did you find this summary helpful?
Thank you for your feedback!
Overview
Item Request Forms provide an easy way for users to fill out a form as part of a workflow to submit new items in workstreams and boards for standardized events or processes into DevStride.
Forms can be submitted by external users or internal users.
Forms are optional in DevStride. They are typically used for specific purposes.
The key to forms is that they:
- Capture required information in a standardized way
- Can be part of a simple or complex workflow
Forms function as the front end for capturing user input which is then integrated into your established work streams and boards.
Public vs. Private Forms
Private Forms: Accessible only to authenticated users.
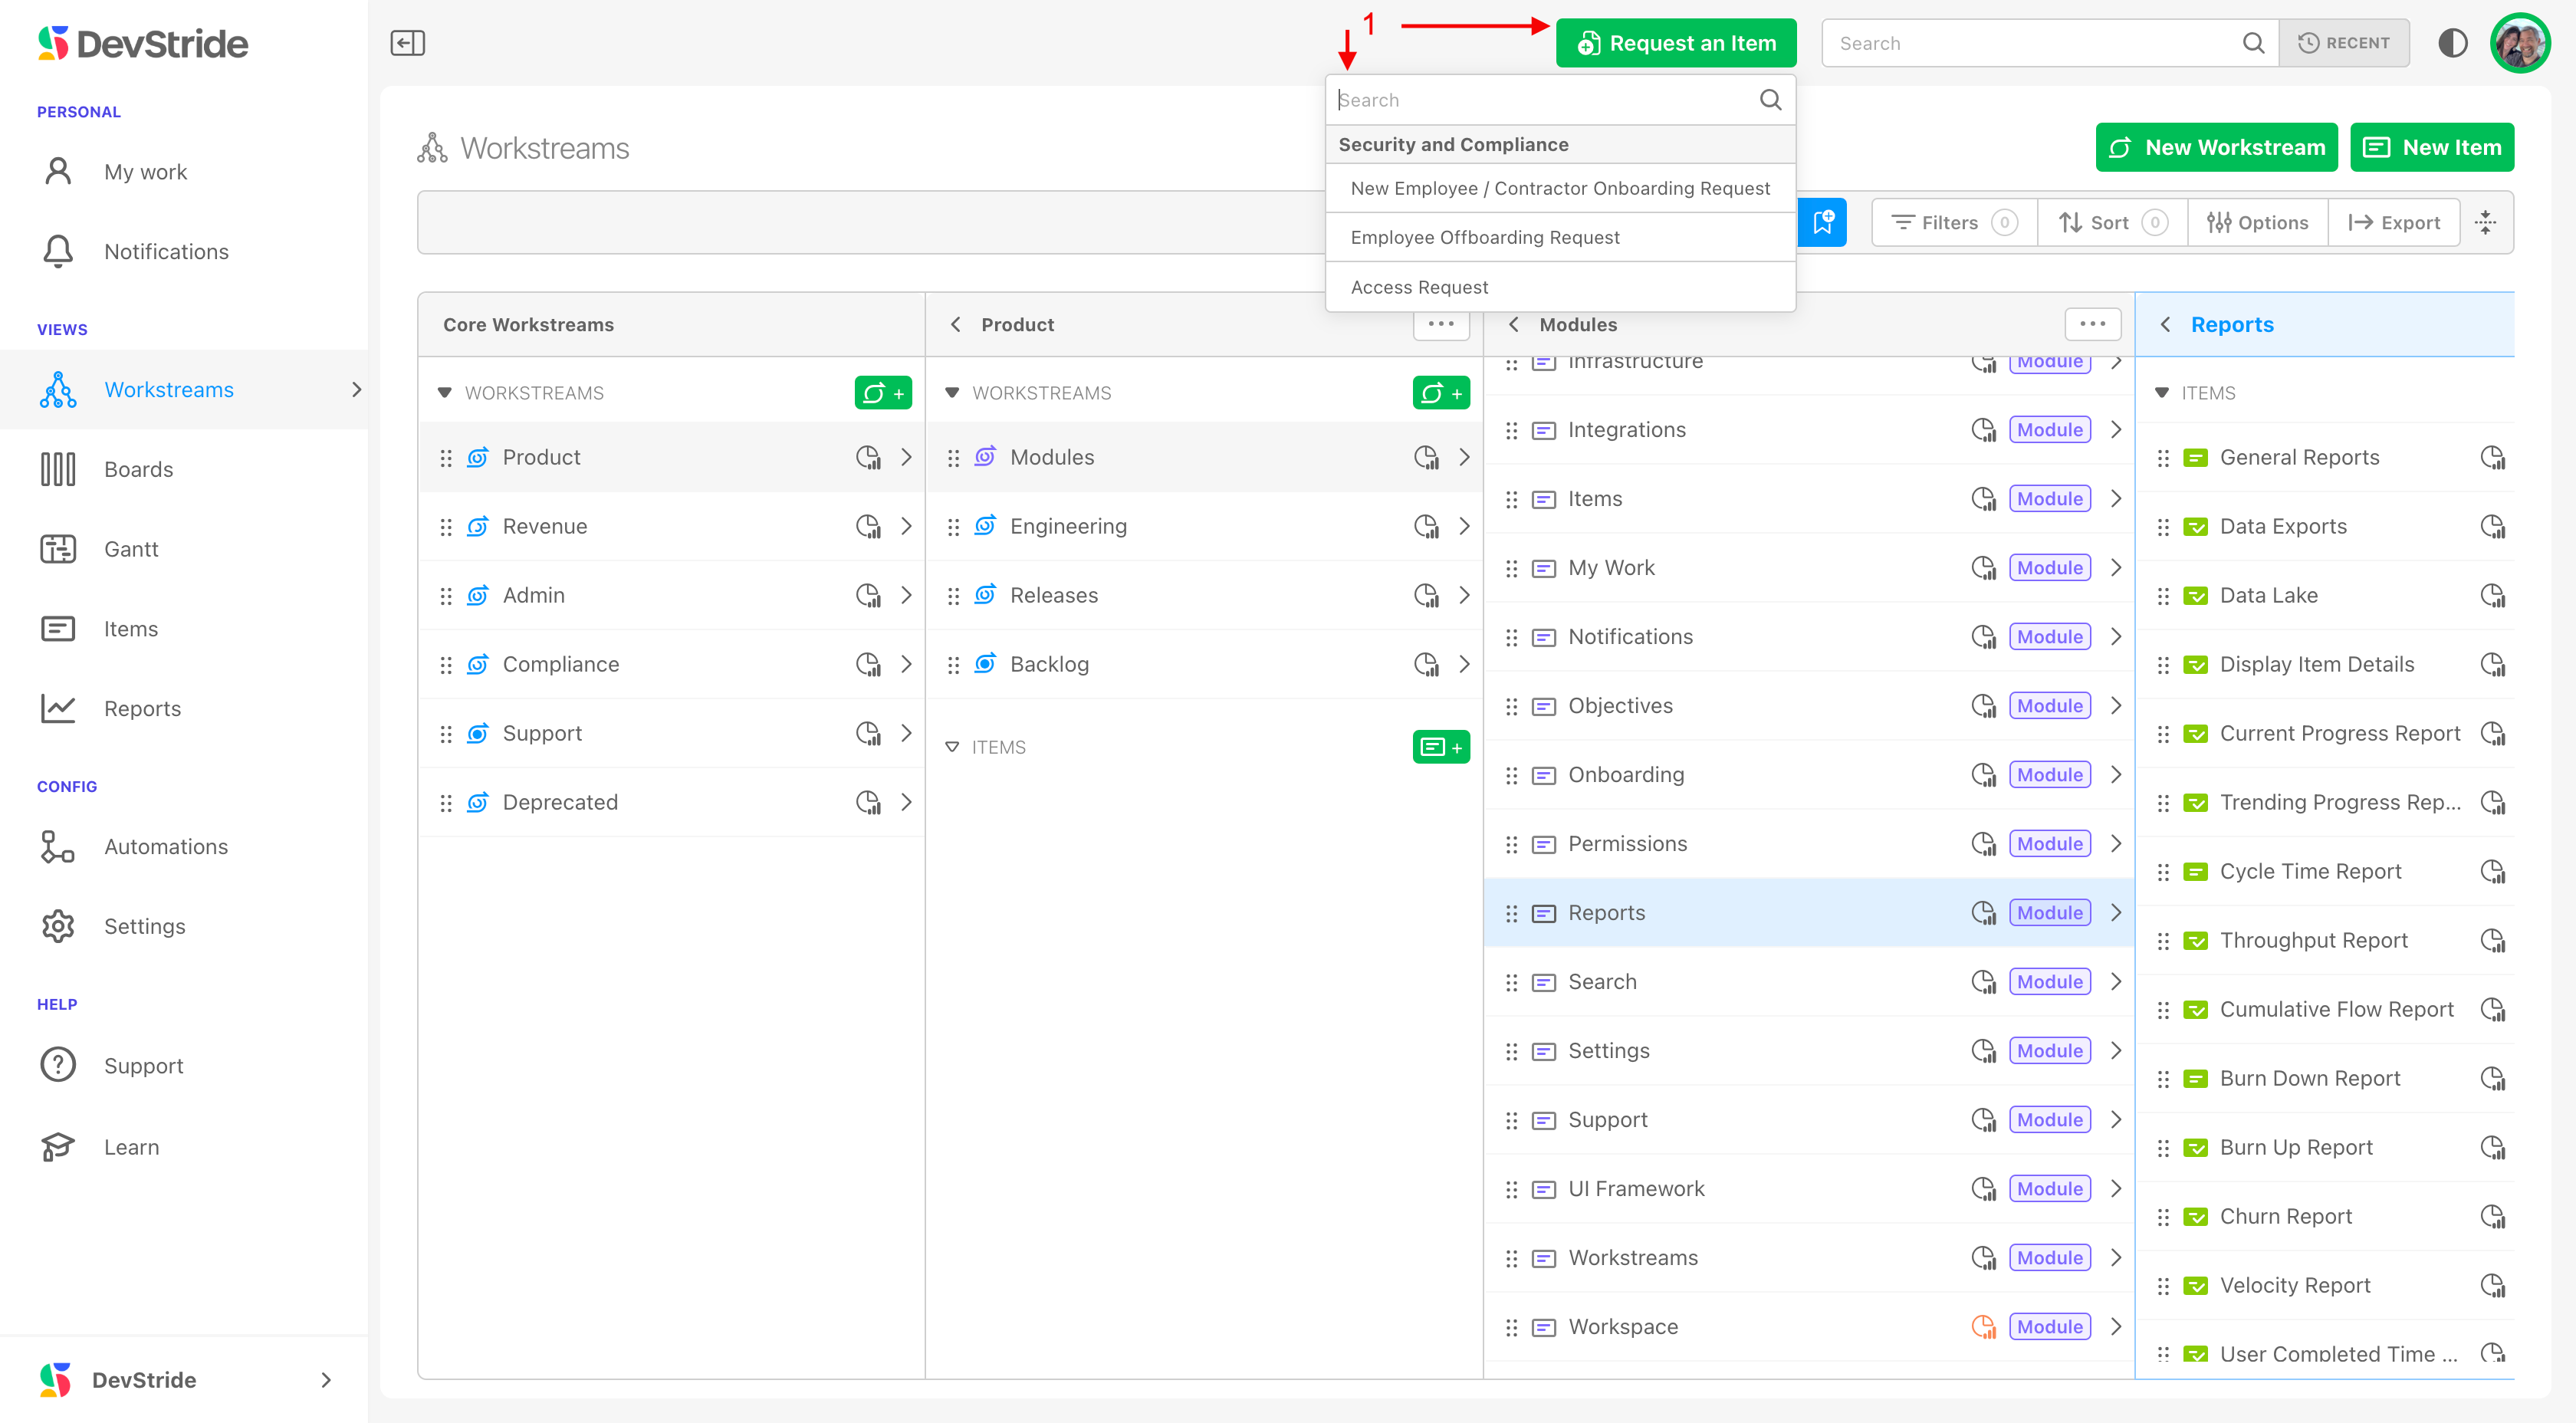
When logged into DevStride, users can click on a “Request an Item” link in the header to access these forms (1).
Public Forms: These forms are accessible without a login. Public forms have a public link that an external user can use.
Public forms are ideal for scenarios where you need to accept requests from external users (for example, support requests from customers without a DevStride account).
Examples of forms that an external user might submit, is an enhancement idea or support request. External marketing clients might create campaign-related work requests or feedback.
An employee onboarding form is an example of an internal form that might be used.
Grouping and Organization
Form Groups: You can organize item request forms into groups. For example, forms related to “Security and Compliance” might be grouped together.
Creating and Managing Custom Forms
Step 1: If needed, create a form group
If you already have created the group for this form, you can go to step 2.
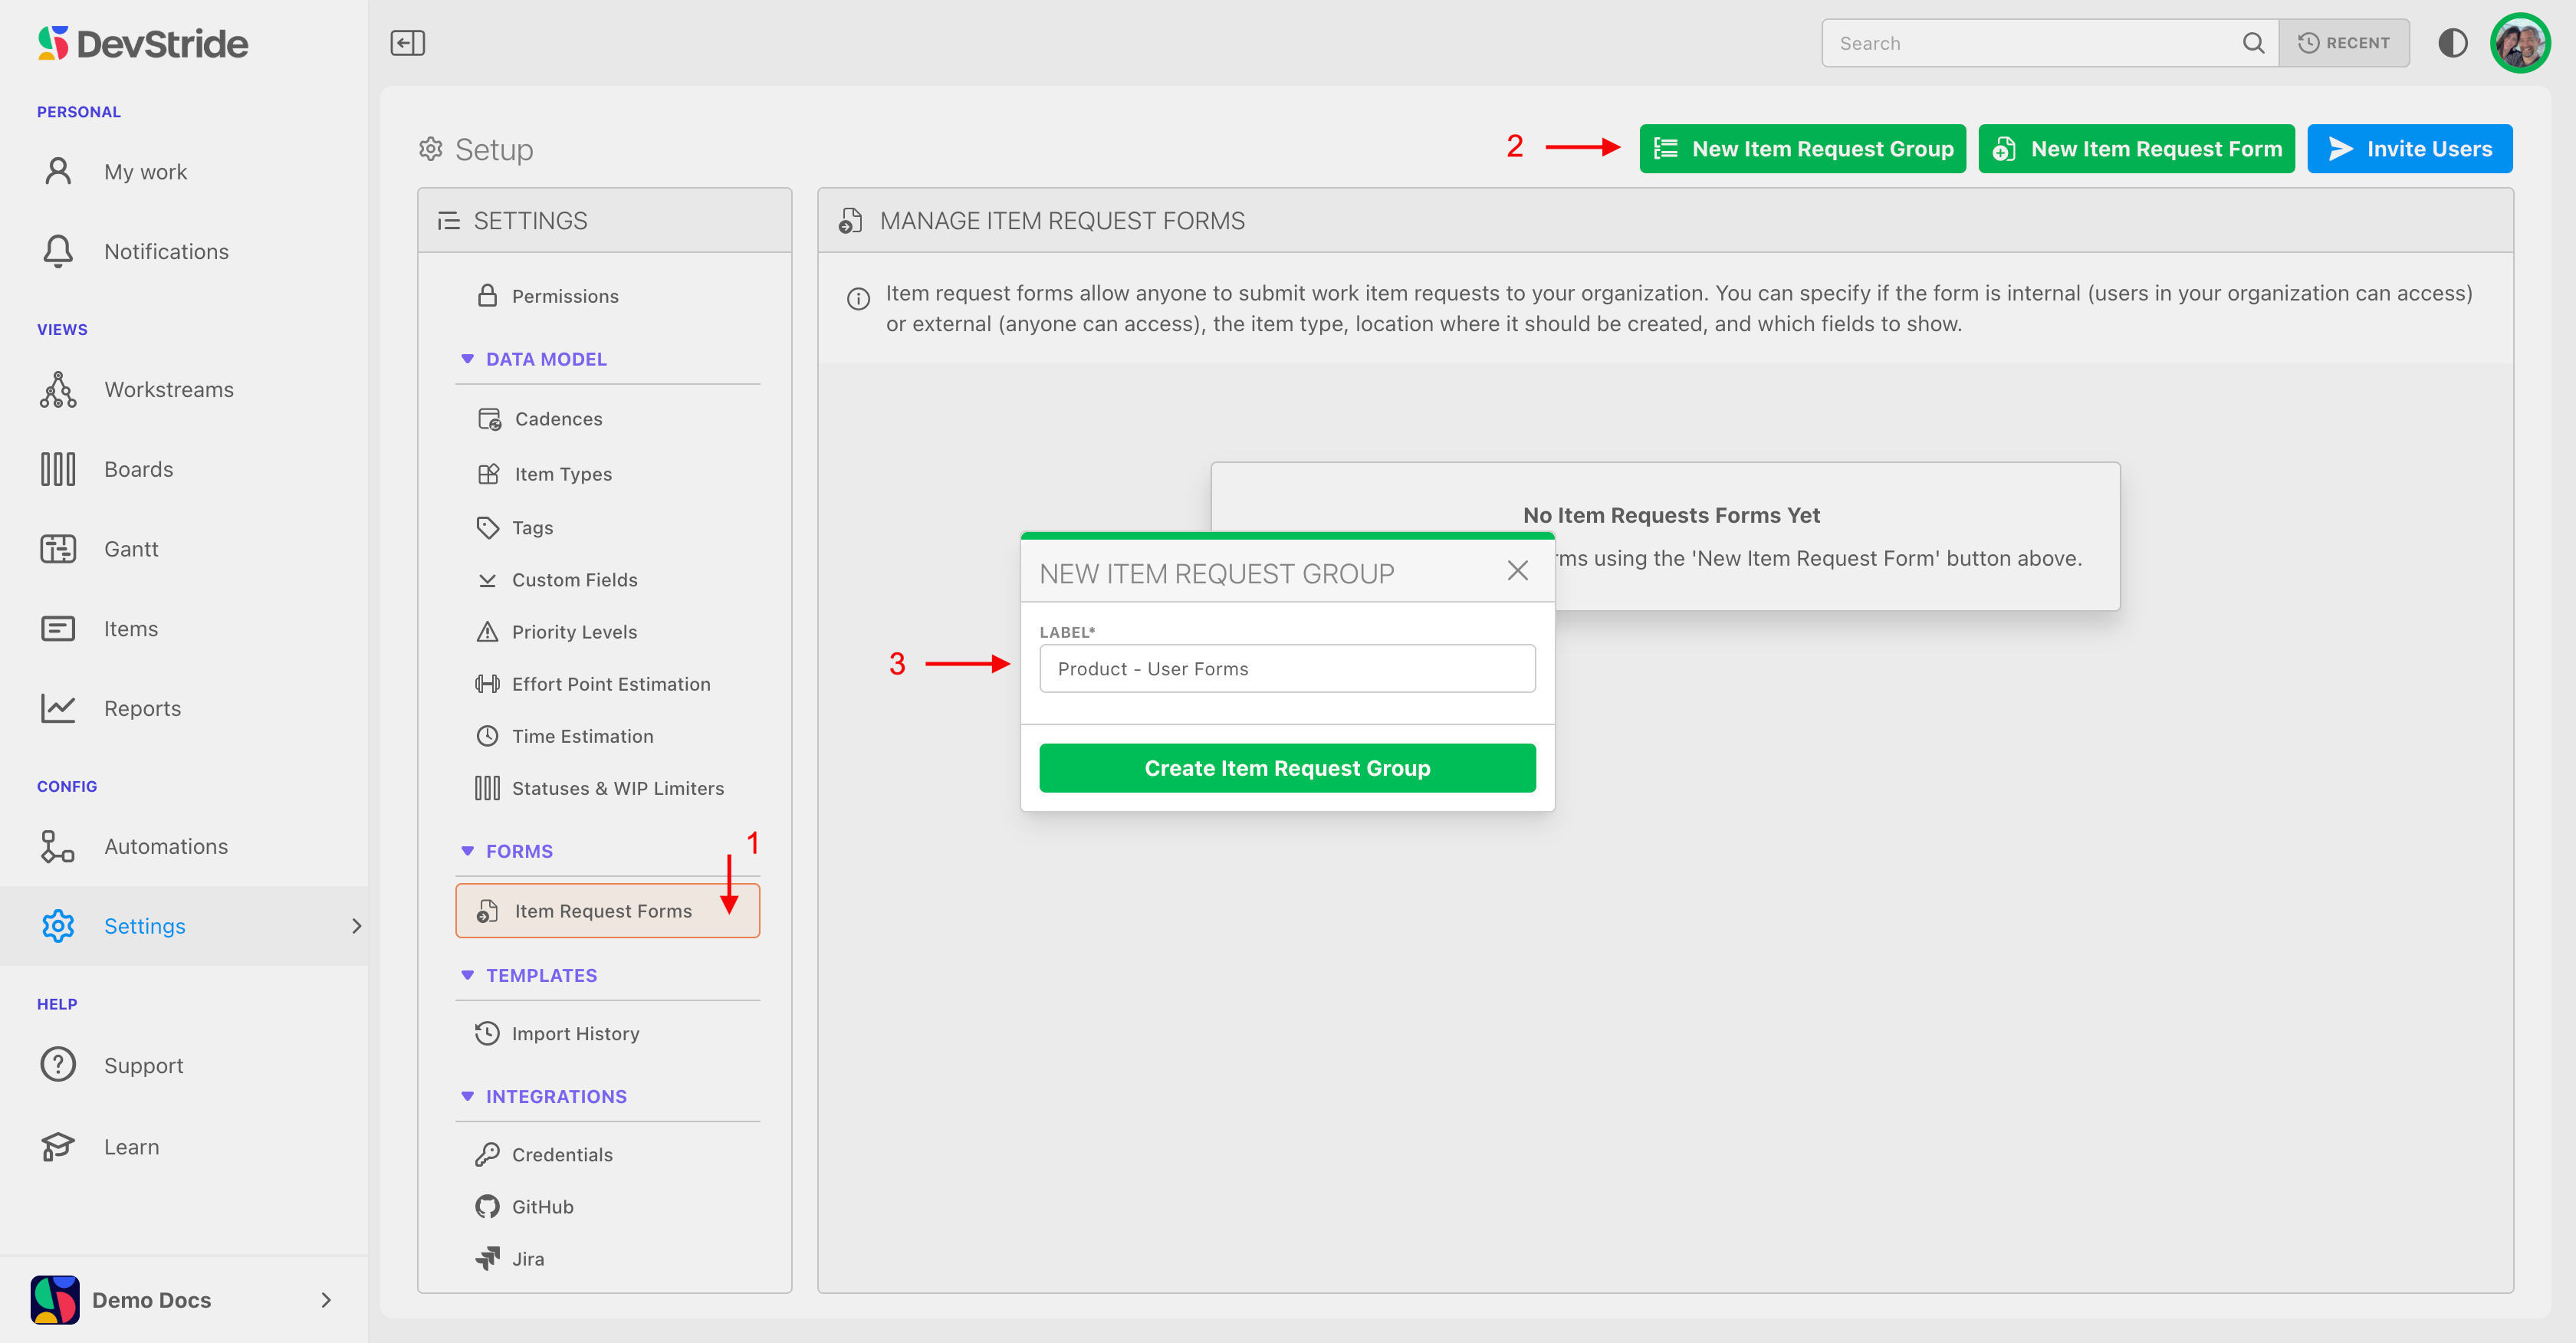
In Settings, go to Forms > Item Request Forms (1). Click on New Item Request Group (2).
Label your Forms Group (3).
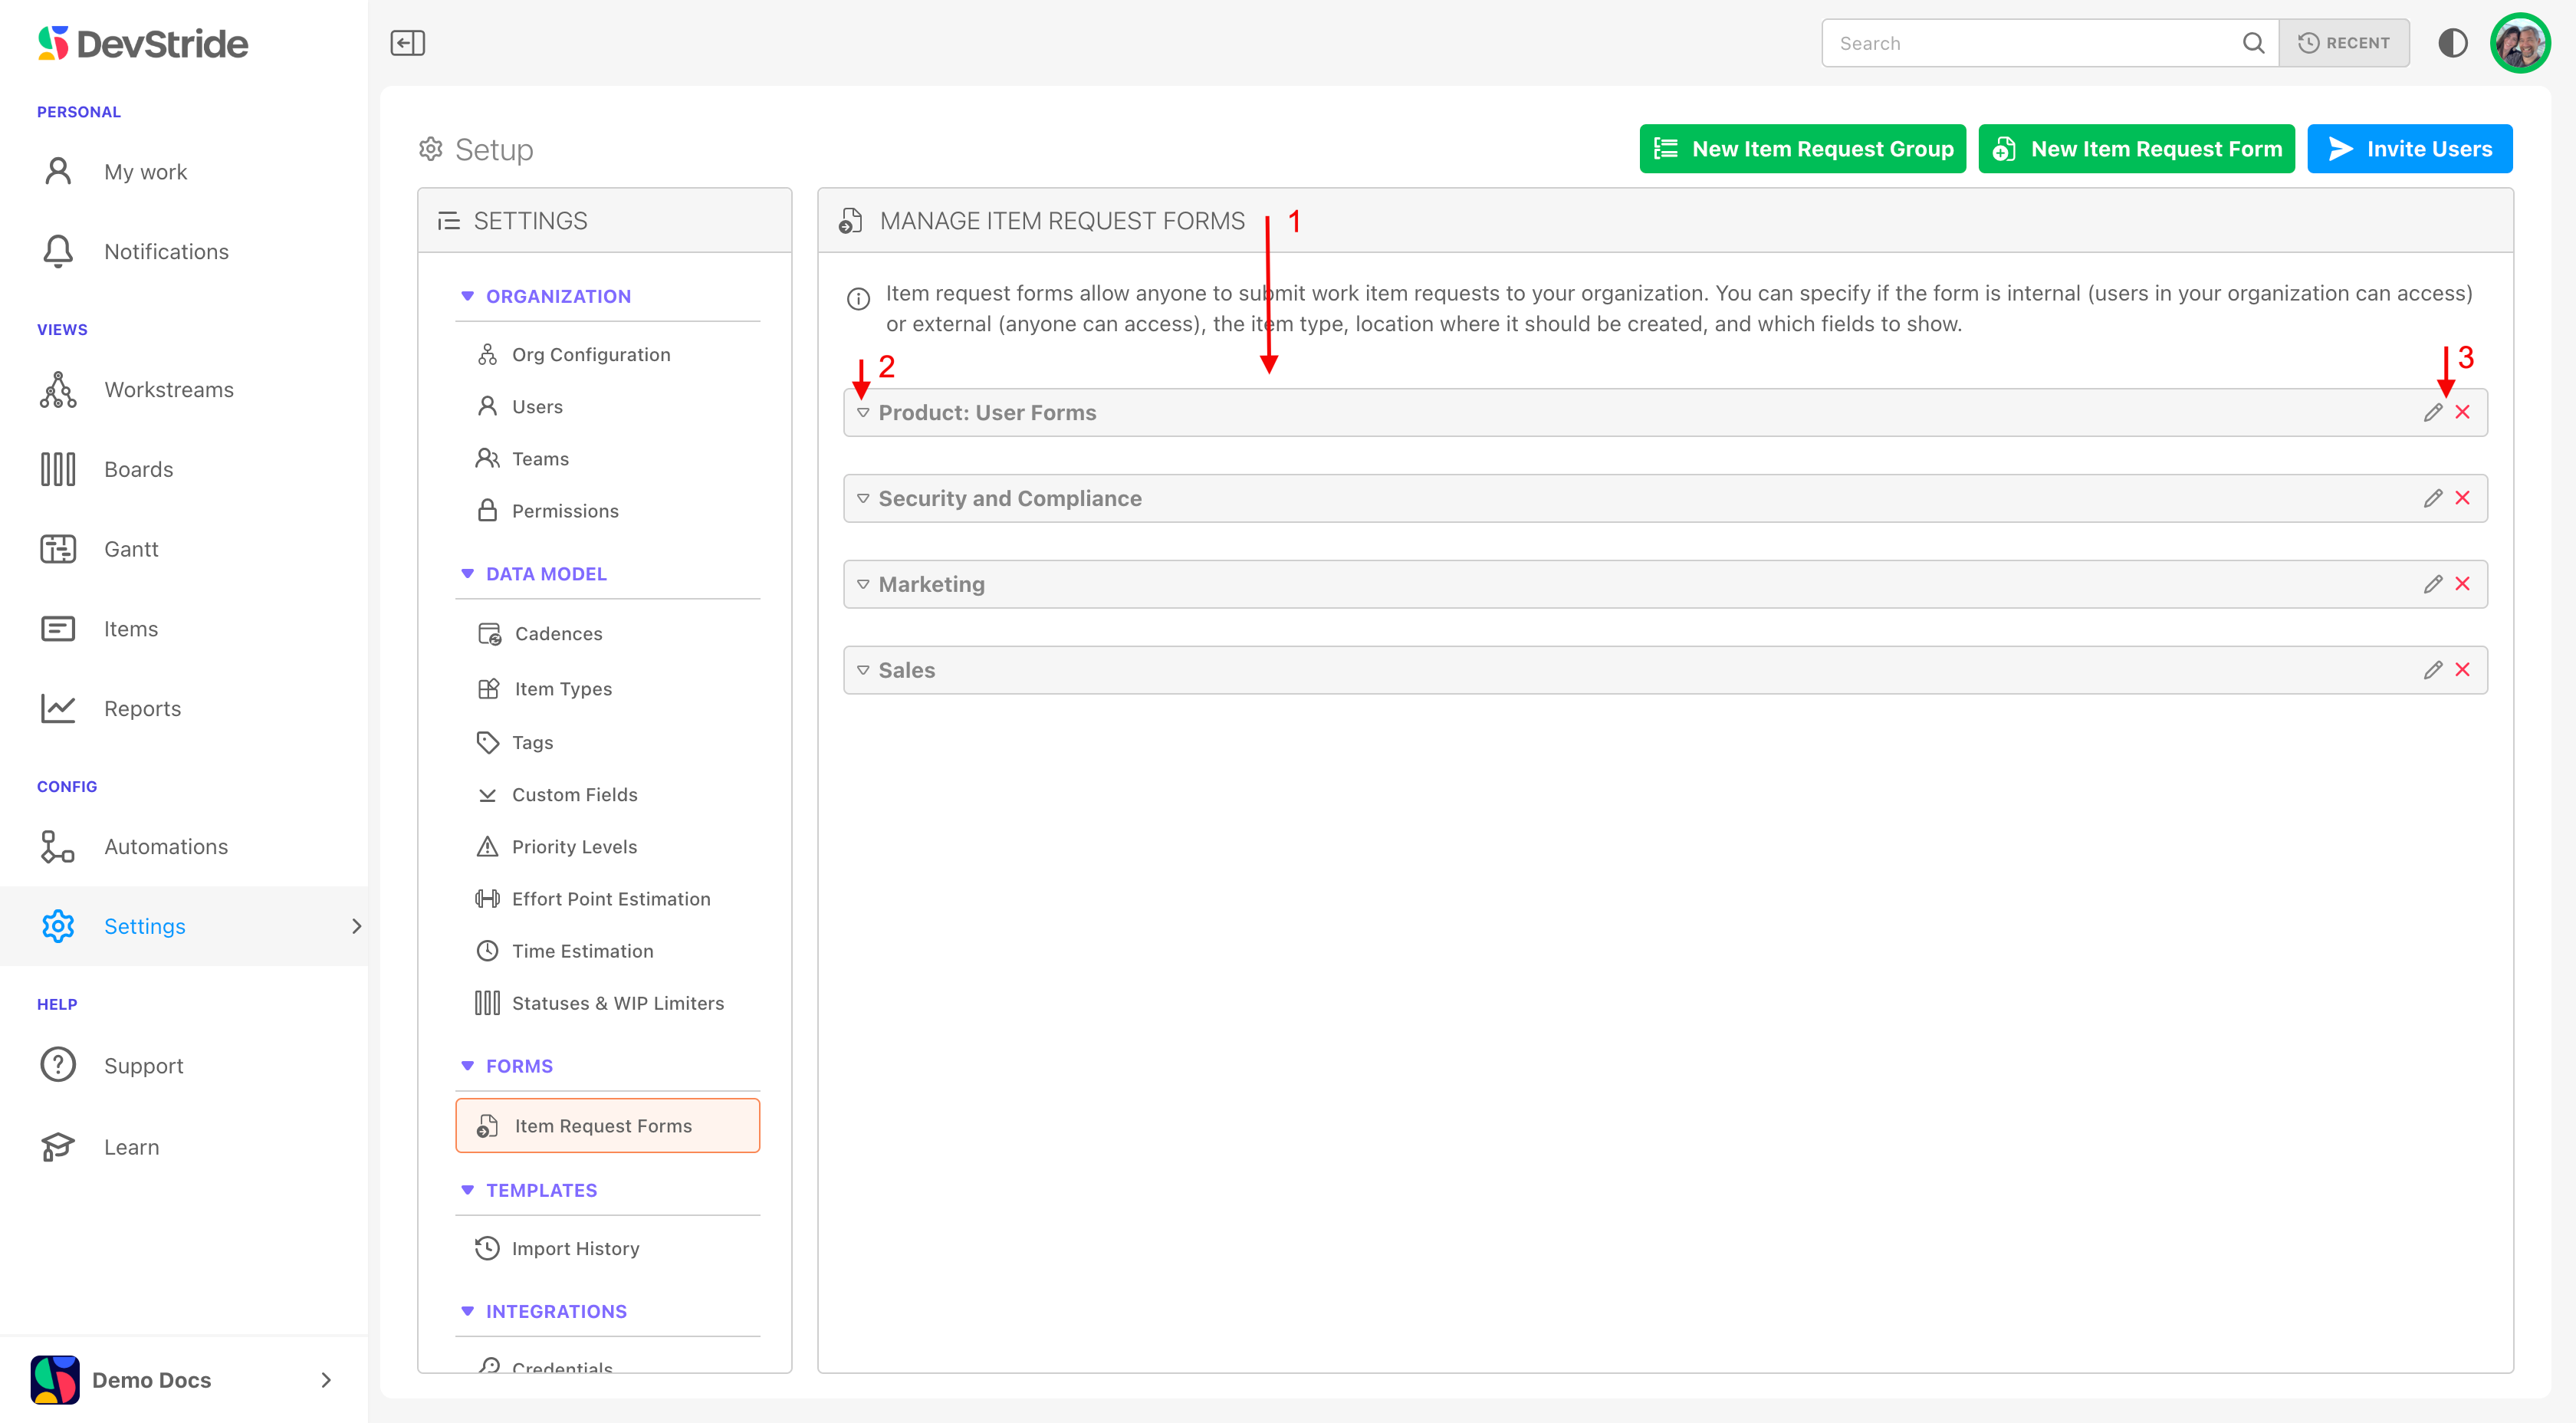
Forms Group(s) display in the Manage Item Request Forms pane - refresh your screen if you do not see them (1). You can collapse and expand the groups (2) and edit or delete the forms groups (3).
Step 2: Create an item request form
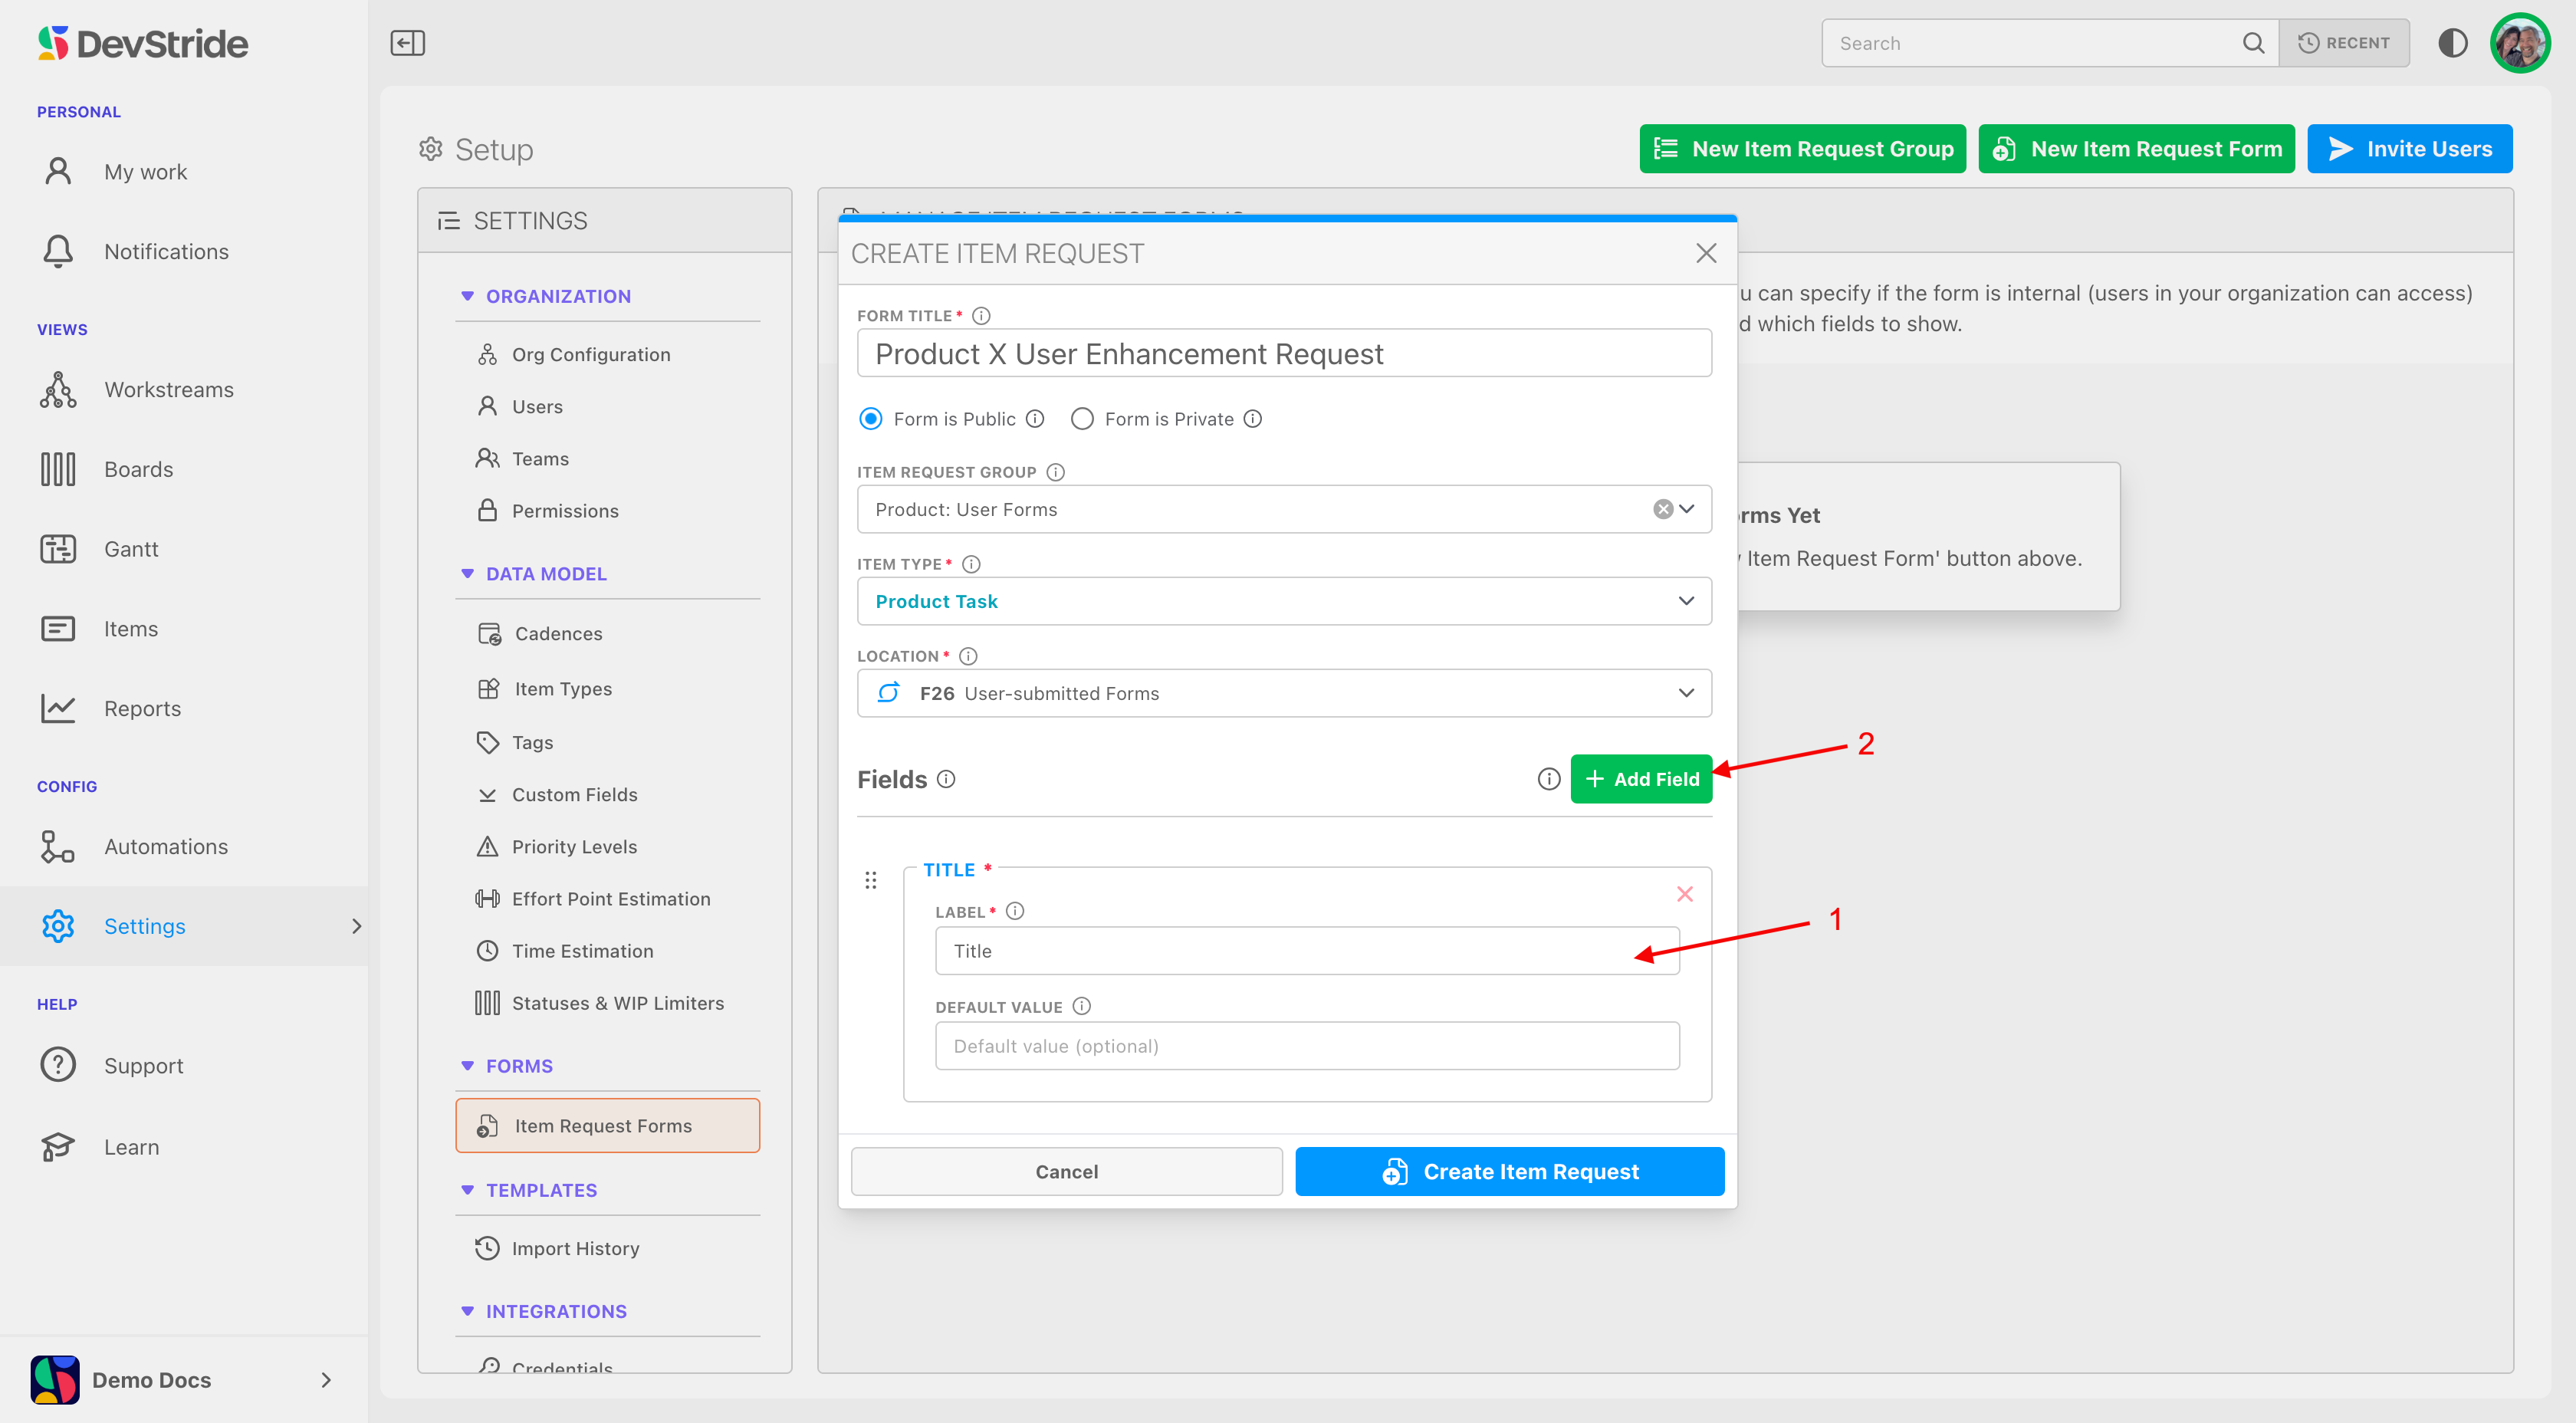
To create an item request form, click on New Item Request Form (1). Name the form as you would like to see it listed when users access the form (2).
Indicate whether the form should be Public or Private (3).
Select from Item request Group. This is optional - leave this blank if you do not want this form organized in a group (4). Click Create Item Request.

Select the item type for the form you want to create (1). Indicate where you would like to house these request forms in the location dropdown (2).
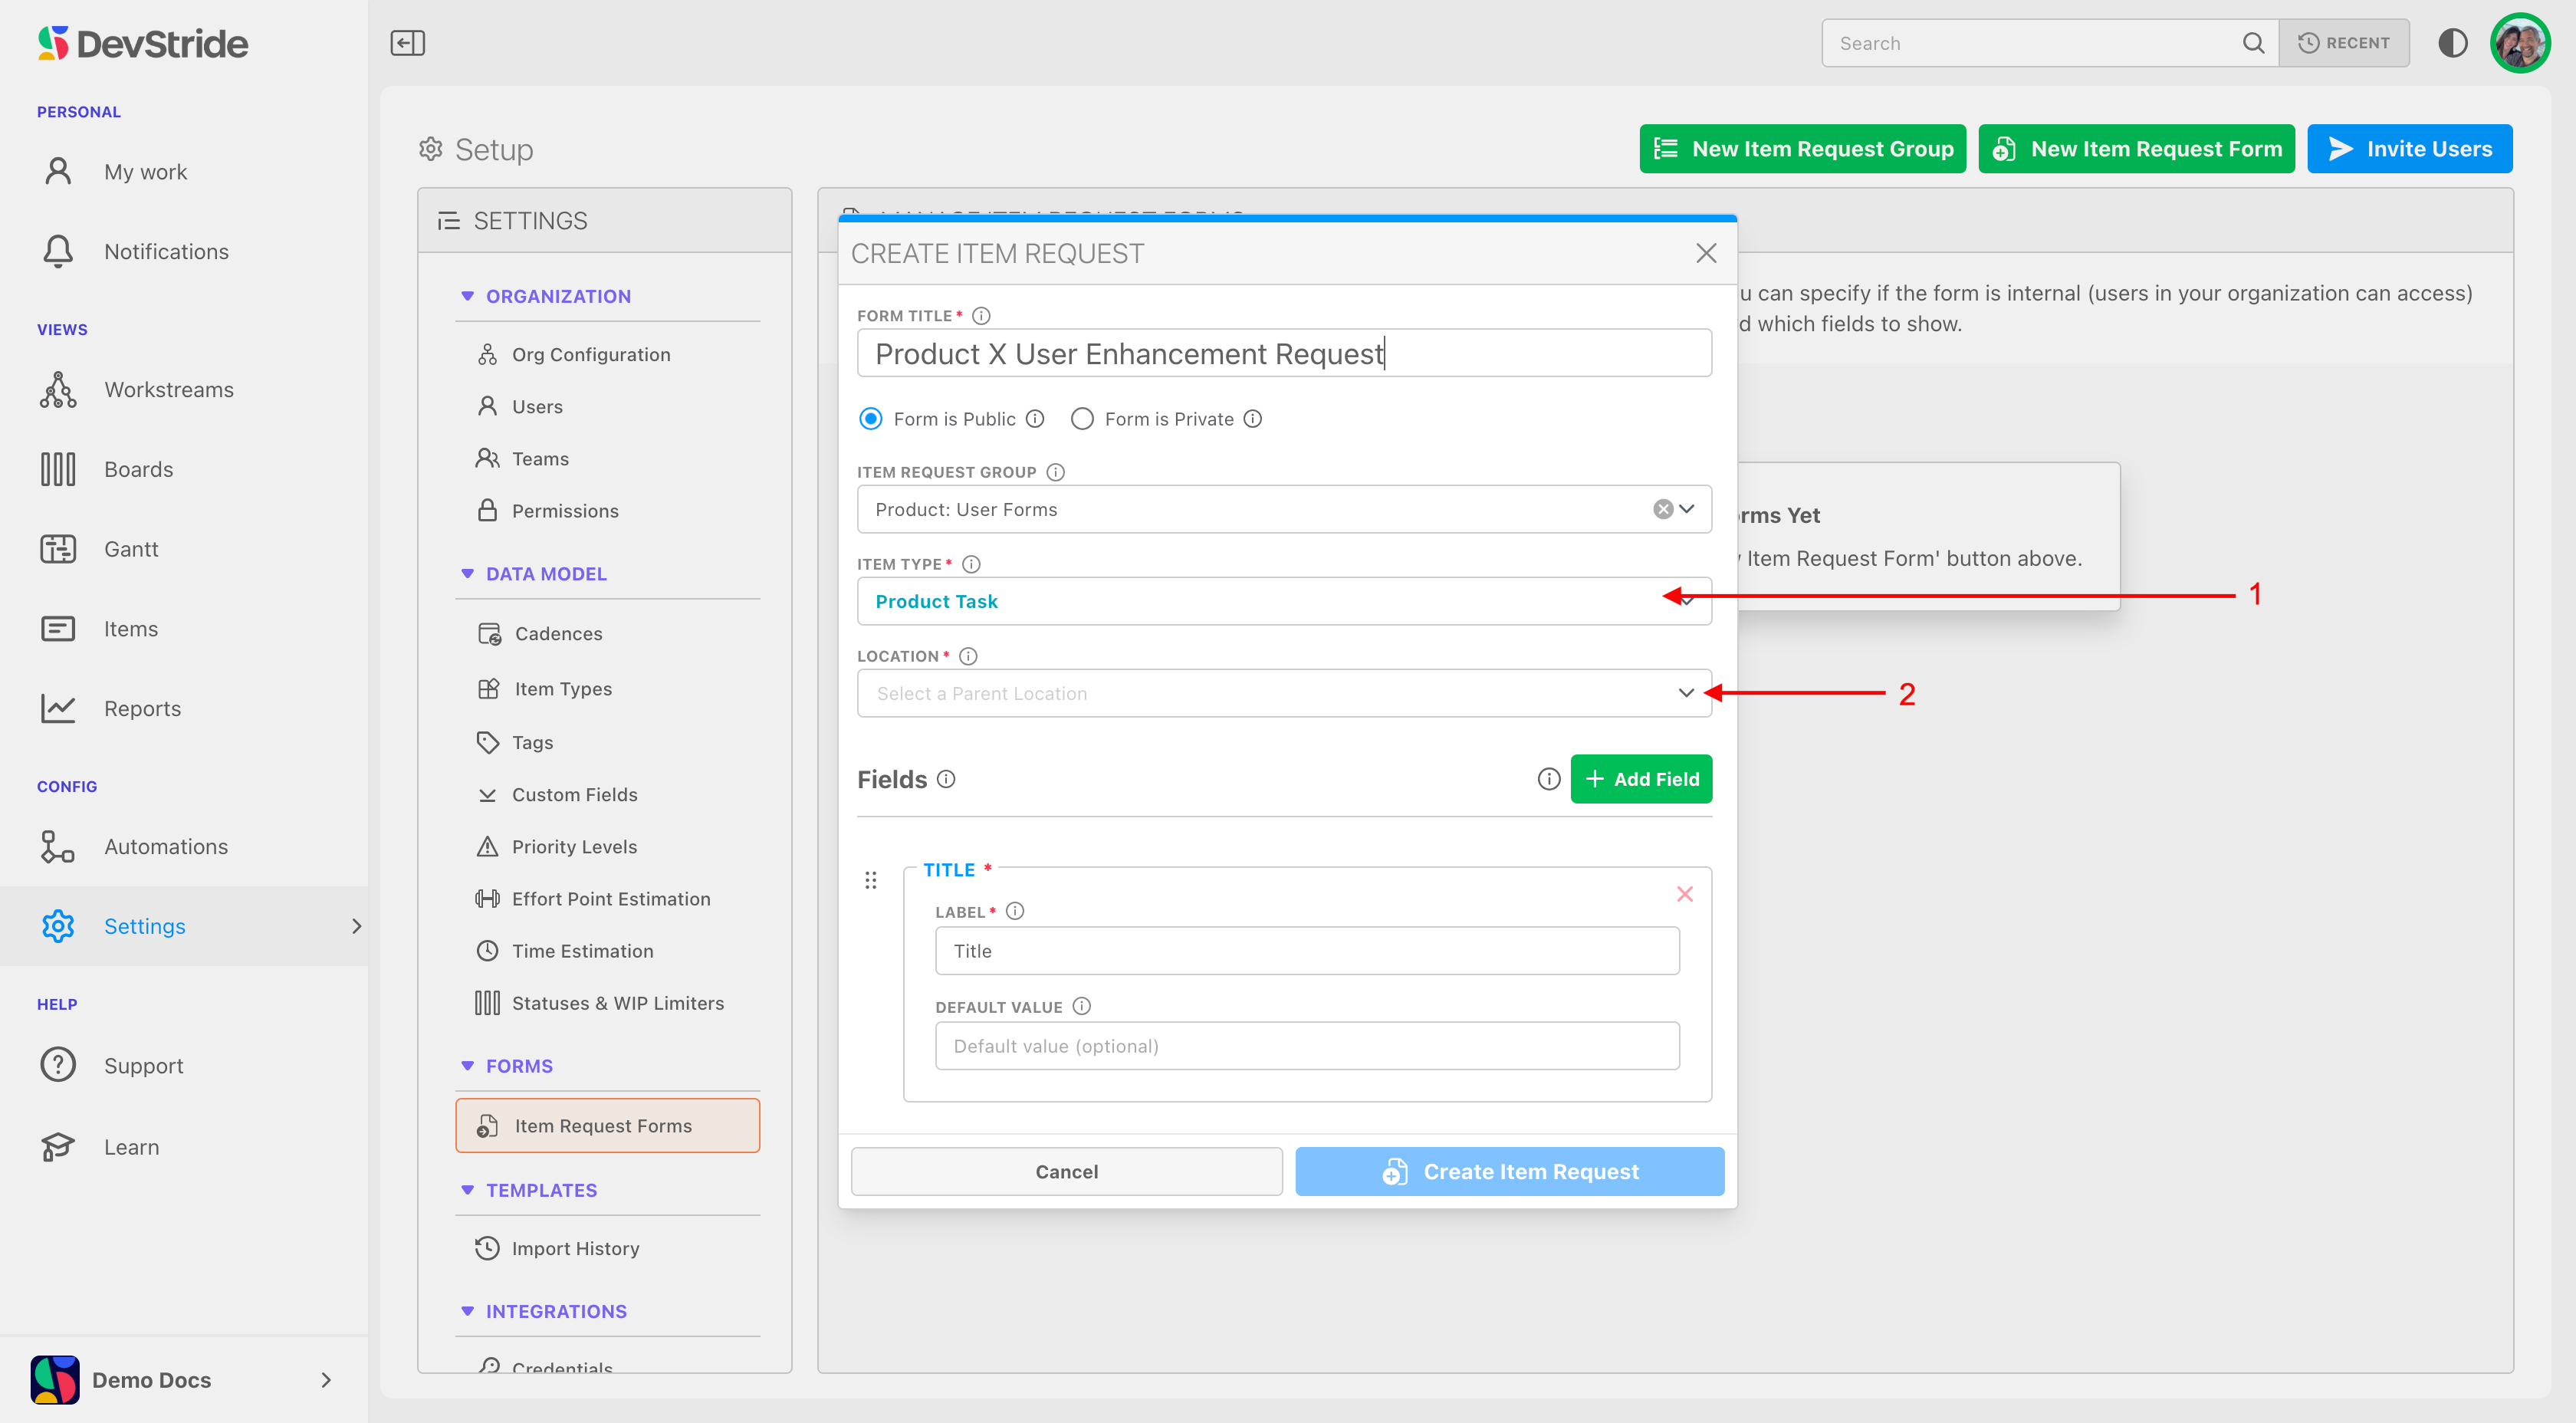
Navigate to the workstream you want them in (3) and click Select Parent.

Forms can be placed in any workstream you choose. For our example, we are creating enhancement requests, so we have created a User-Submitted Forms workstream under our Product Backlog workstream.
Now it's time to define your item request form.
Name your form as you would like your users (internal or external) to see it (1).
Select from the list of custom fields that have already been defined for the the item type you selected for your form (2). This ensures that all submitted data maps correctly to the underlying data model.
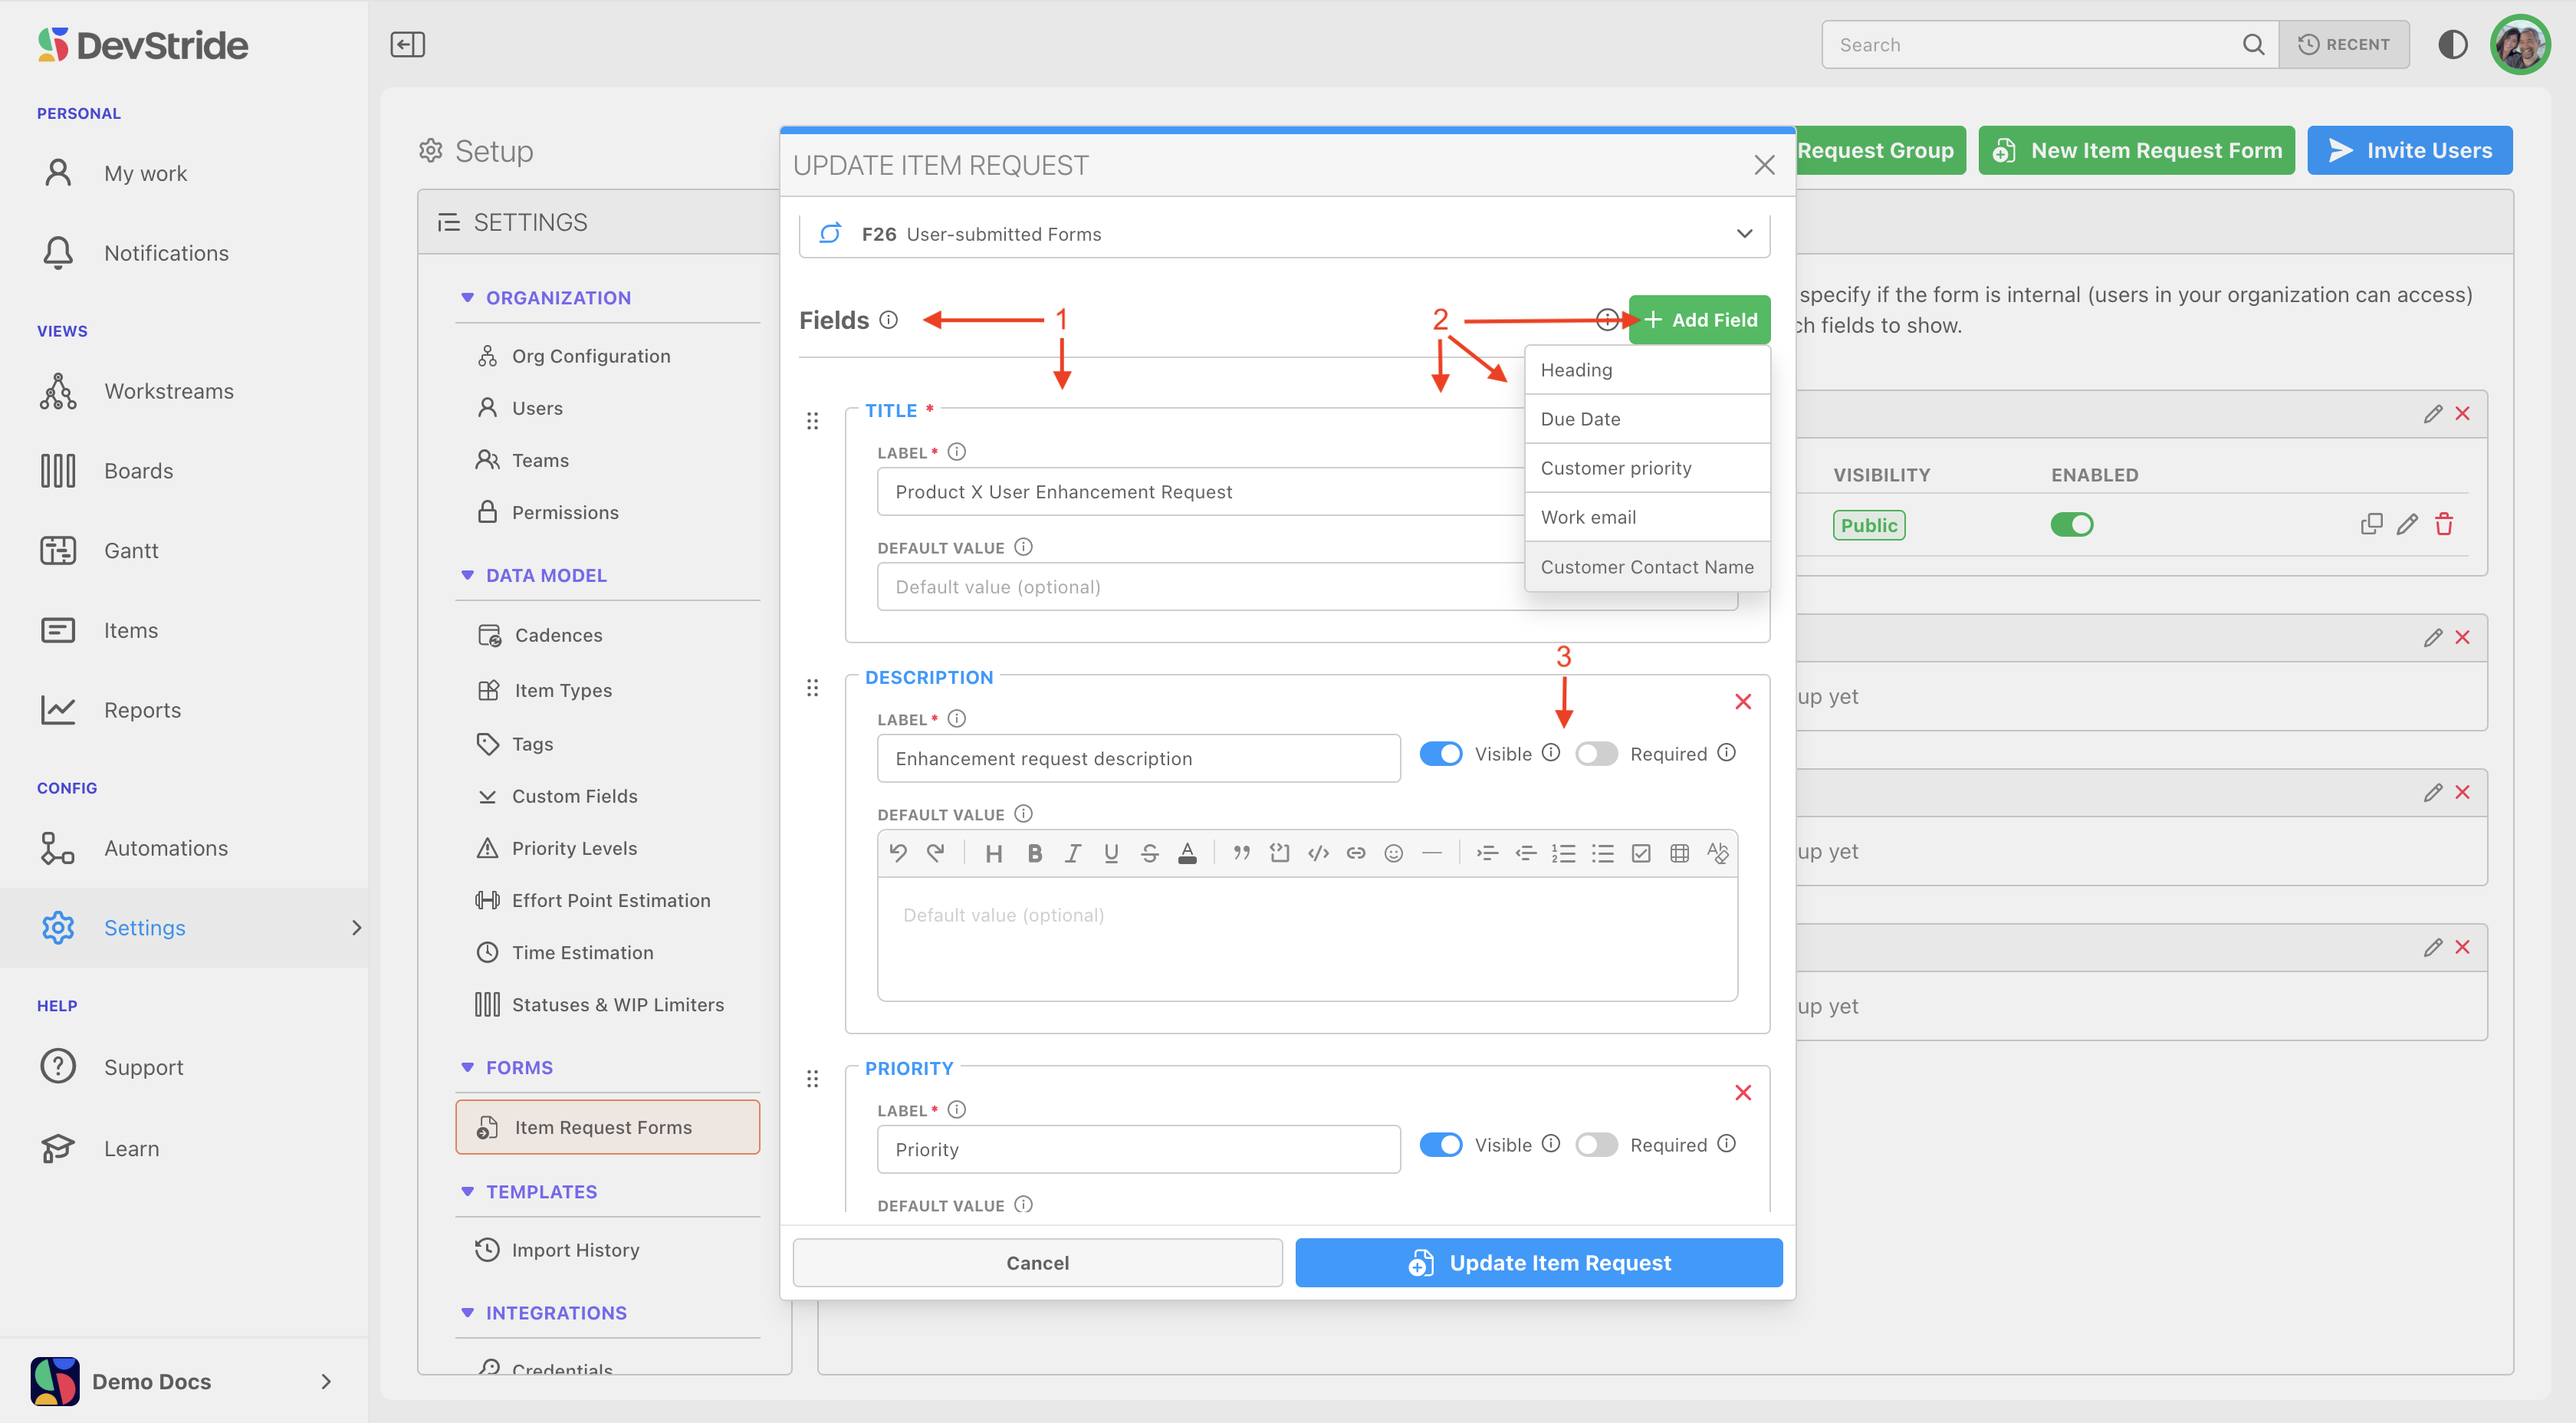
Add the fields you would like to include on the form (1). The available fields are based on the base work item fields in addition to the selected item type's custom field collection (2).
All custom fields and custom field types for the item type used for the form are available to be used in forms. Custom field collections for each item type can be managed by visiting Settings > Custom Fields.
Indicated whether the you would like each field to be visible or required (3).
Note that if you want to add a hidden field with a default value, you can add it here and then set it to hidden. Click update item request.
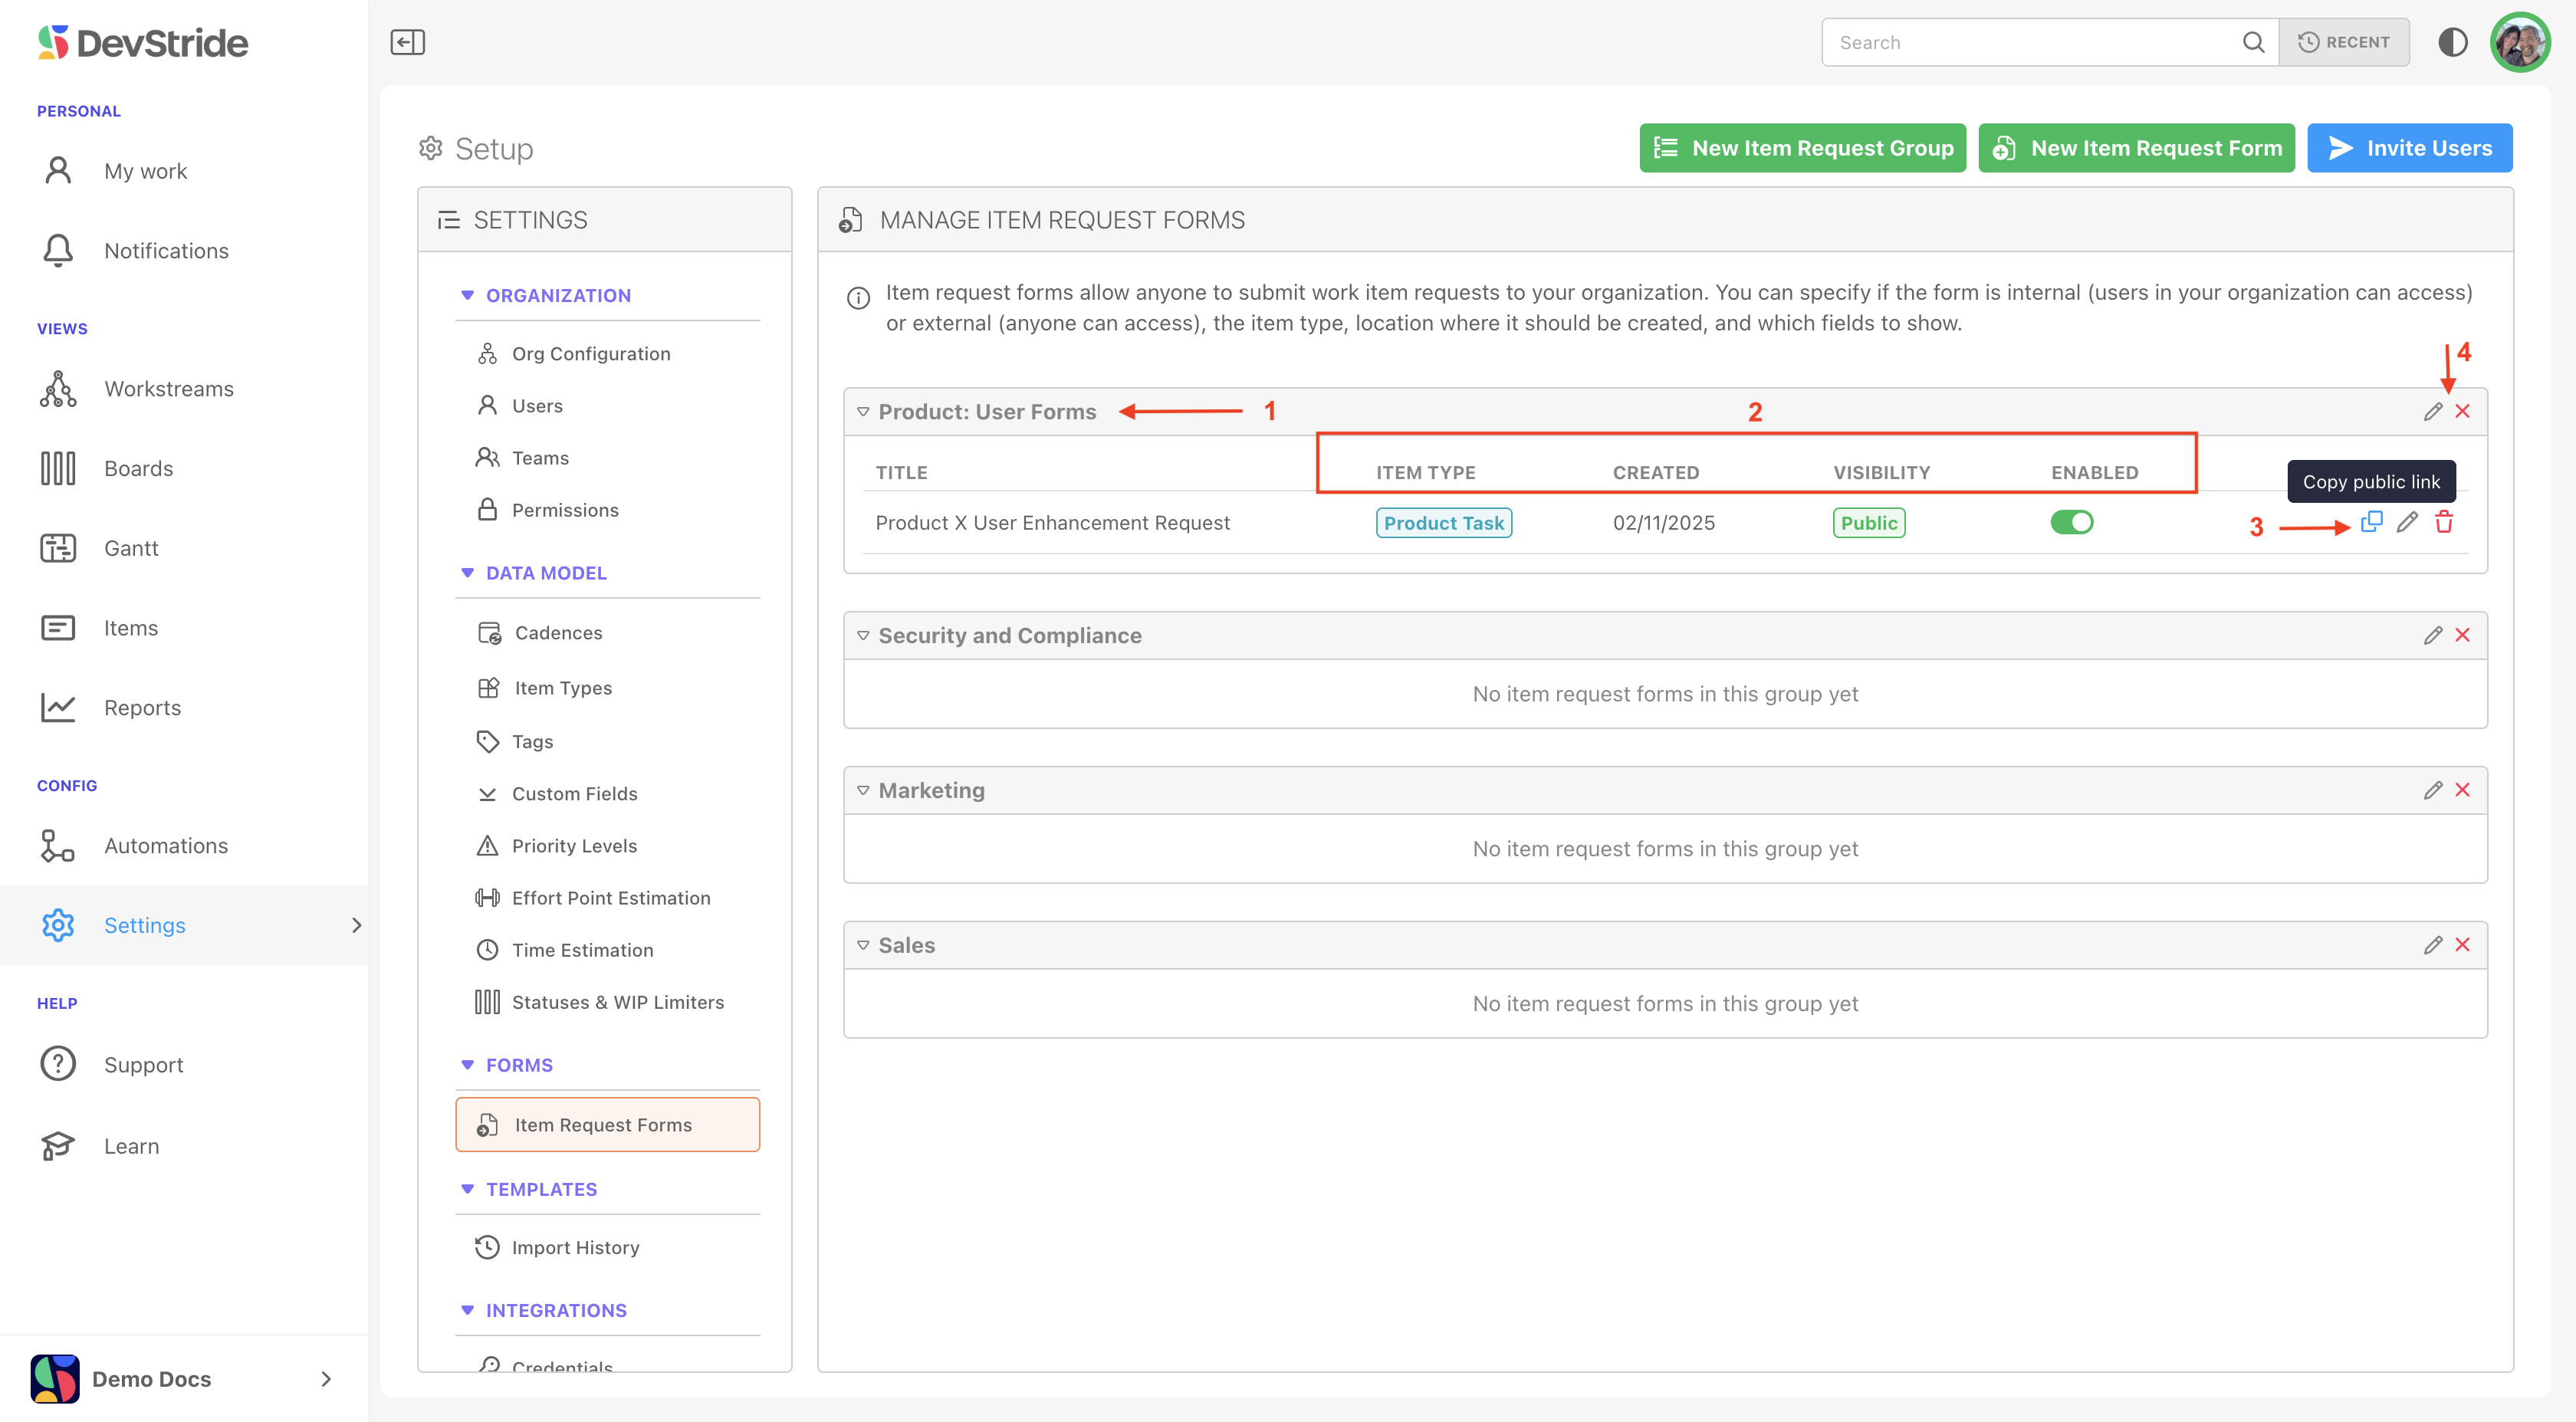
You can view the forms (1) in their groups along with their details (2) on the Manage Item Request Forms Pane. You can access the external link (3), edit, or delete the form (3). You can also edit or delete the Form group from here (4).
Integration with Automation
As yet another powerful feature, item request forms can be coupled with the automation engine in DevStride.
Triggering Workflows: For example, when a new form submission is received, it can trigger a workflow that automatically creates follow-up tasks such as:
- Assigning a customer service rep to contact the requester.
- Creating a triage work item for further review.
- Sending notifications to team members.
Flexible Automation: The automation triggers are configurable based on the type of item request so that you can tailor the workflow according to your business rules.
Go to Automations to read more about automations and forms.
Was this article helpful?