- Print
- DarkLight
Creating and Managing Automations
When you want an automatic action to be taken after some event is detected within DevStride, Automations are the answer.
With Automations, you can trigger an action to happen whenever one of the many supported actions is detected within one of the following categories:
- Time Based
- Work Item
- Workstream
- Github

In this guide, we will show you how to create an Automation from a Trigger that automates a task for you.
Add New Automation Group
By default, all Automations will be placed in the "Other" group, however you can also add new groups. Automation Groups are a great way to organize your Automations, which becomes especially helpful as you create larger numbers of Automations. Simply click the New Automation Group button to create a new group, and then you can organize existing and new Automations into their appropriate groups.

Add Automation
To add an automation in DevStride, click the Add Automation button in the top right corner of the screen.

Configure Automation
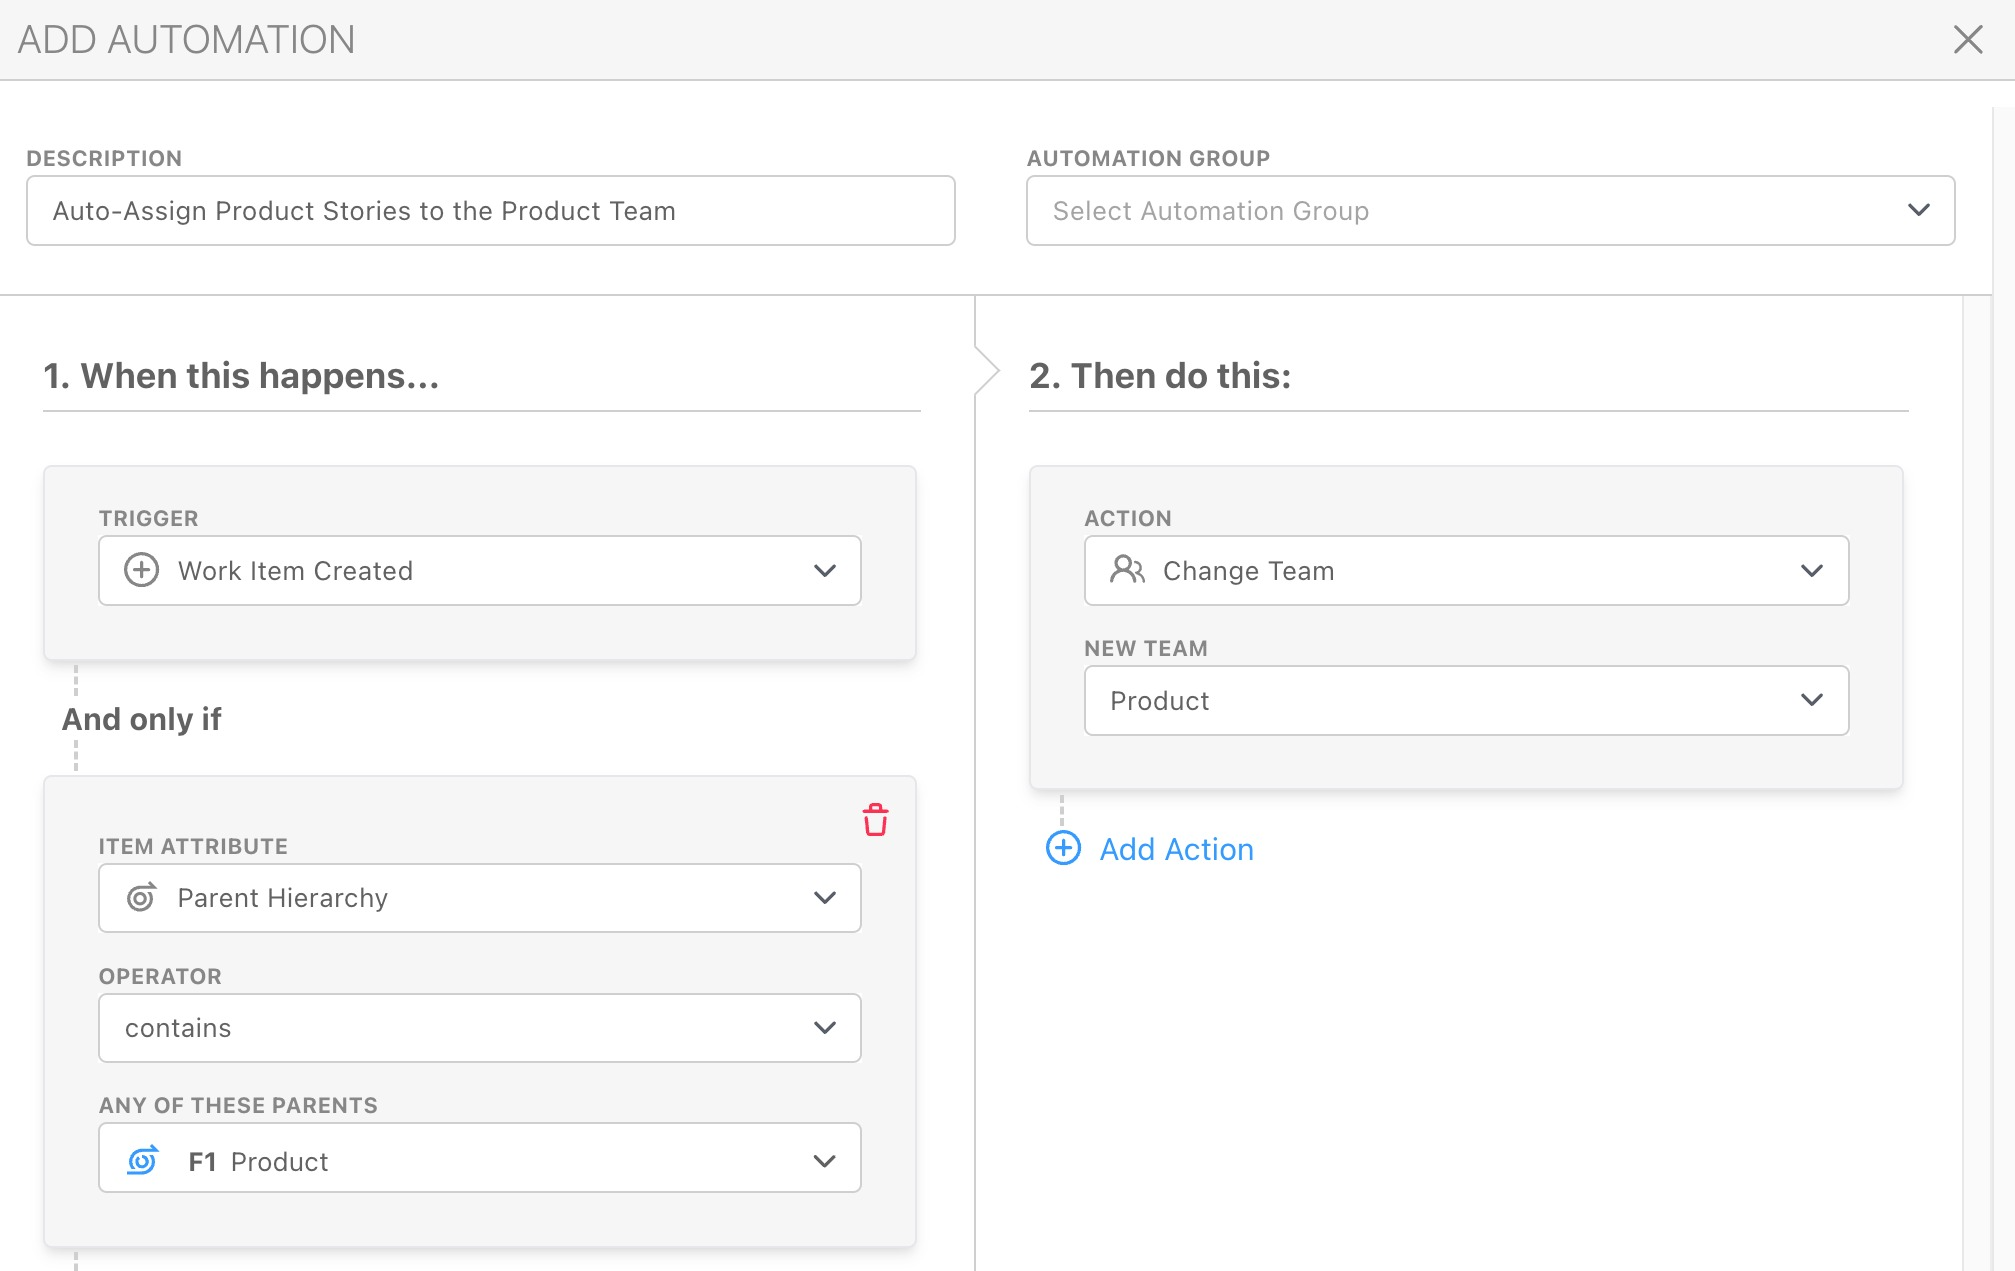
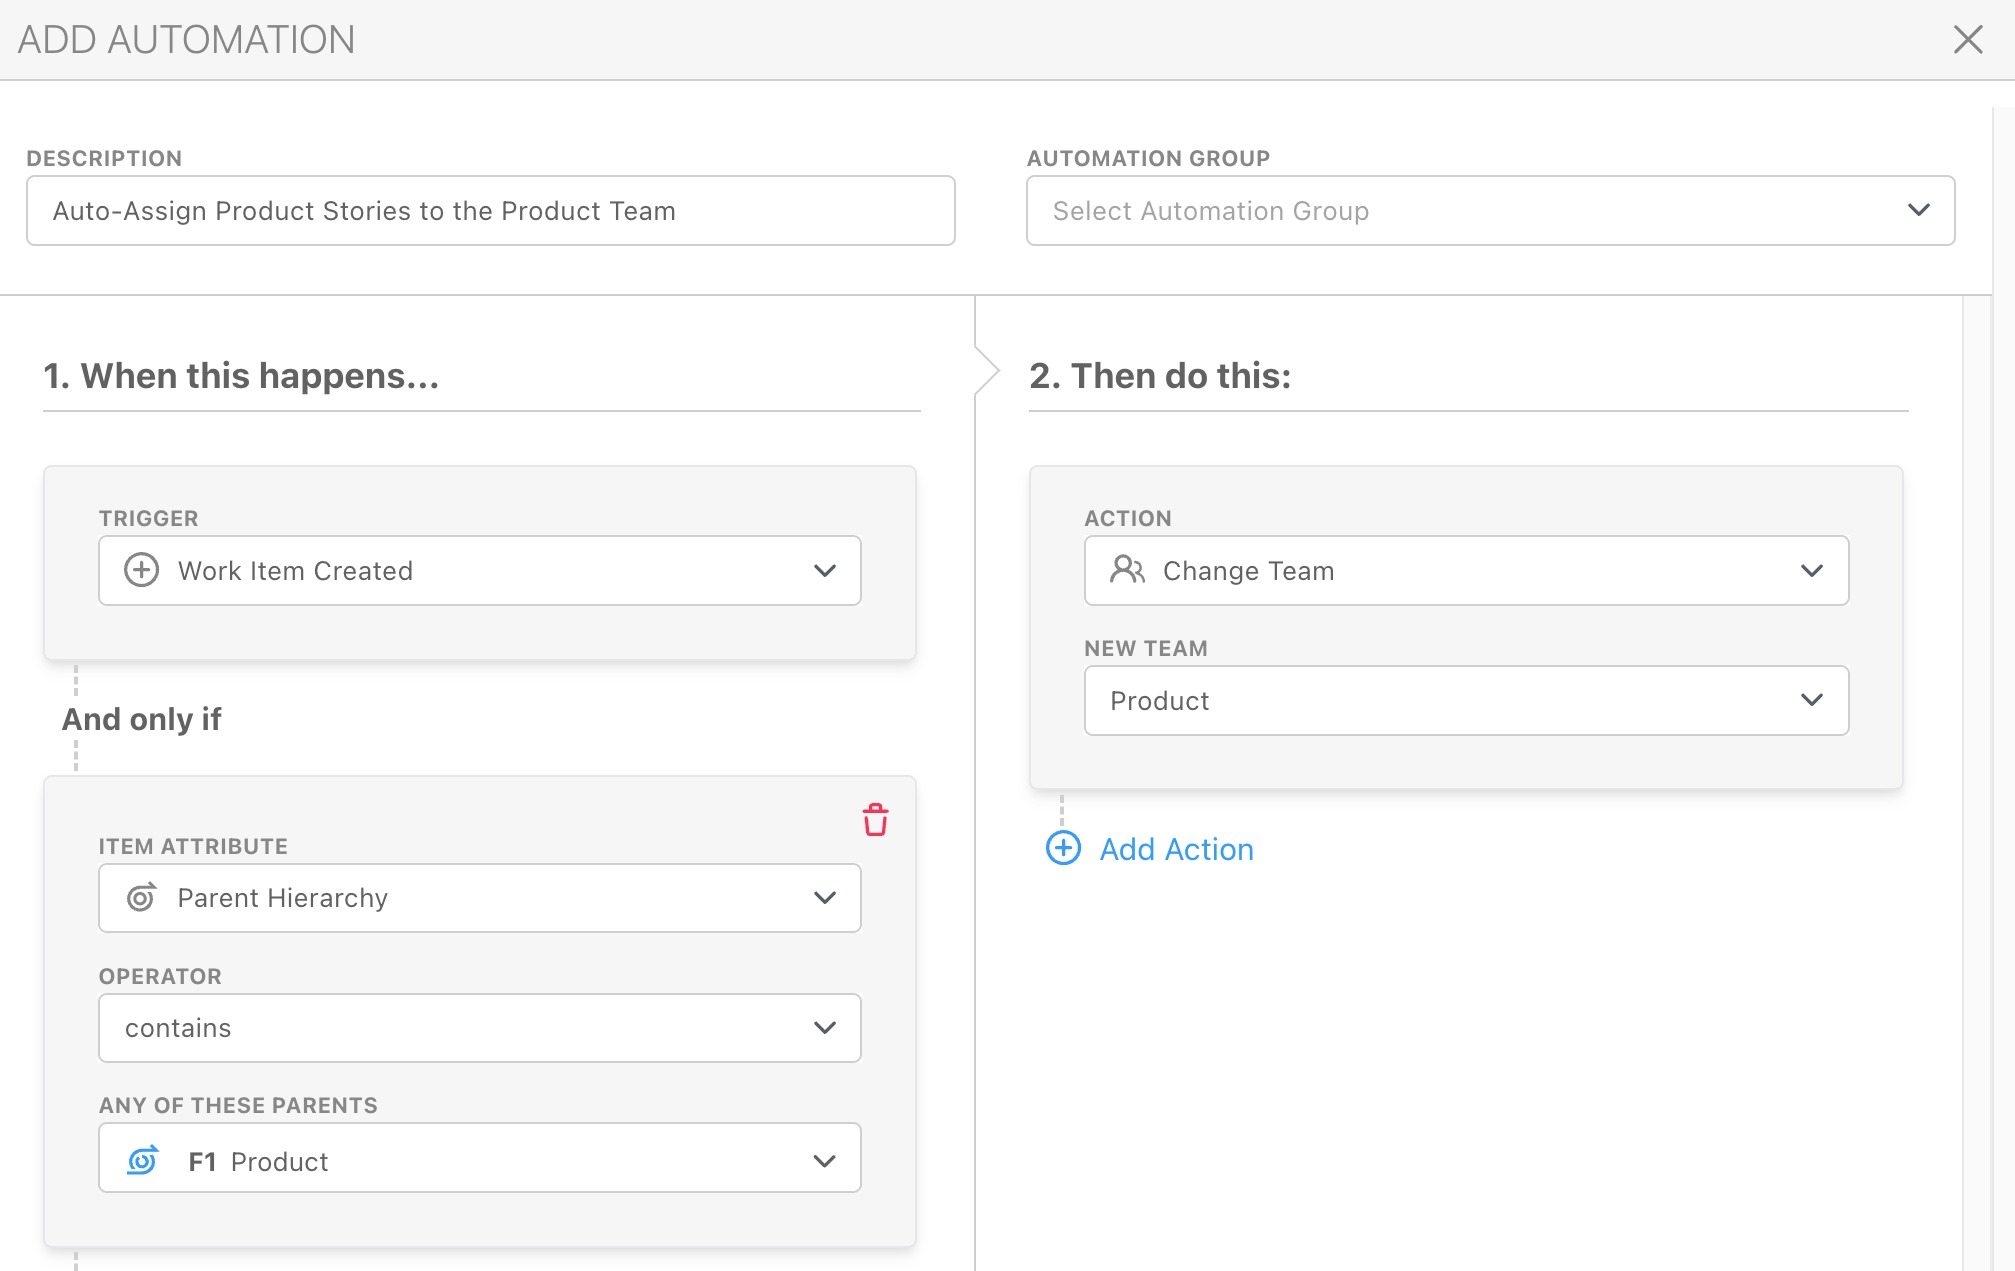
The Description you set will be displayed as the name of this in the list of Automations.
The Automation Group you specify will dictate which group it will be included in on the list of Automations.
Once you have specified the Description and Automation Group, configuring your Automation is as simple as selecting what will trigger the automation (1. When this happens), what conditions must be met before continuing (And only if), and what actions will be taken automatically (Then do this).
For example: Any time a New Work Item is Created anywhere under the Product workstream hierarchy, change the team to Product.

Monitor Automation Run History
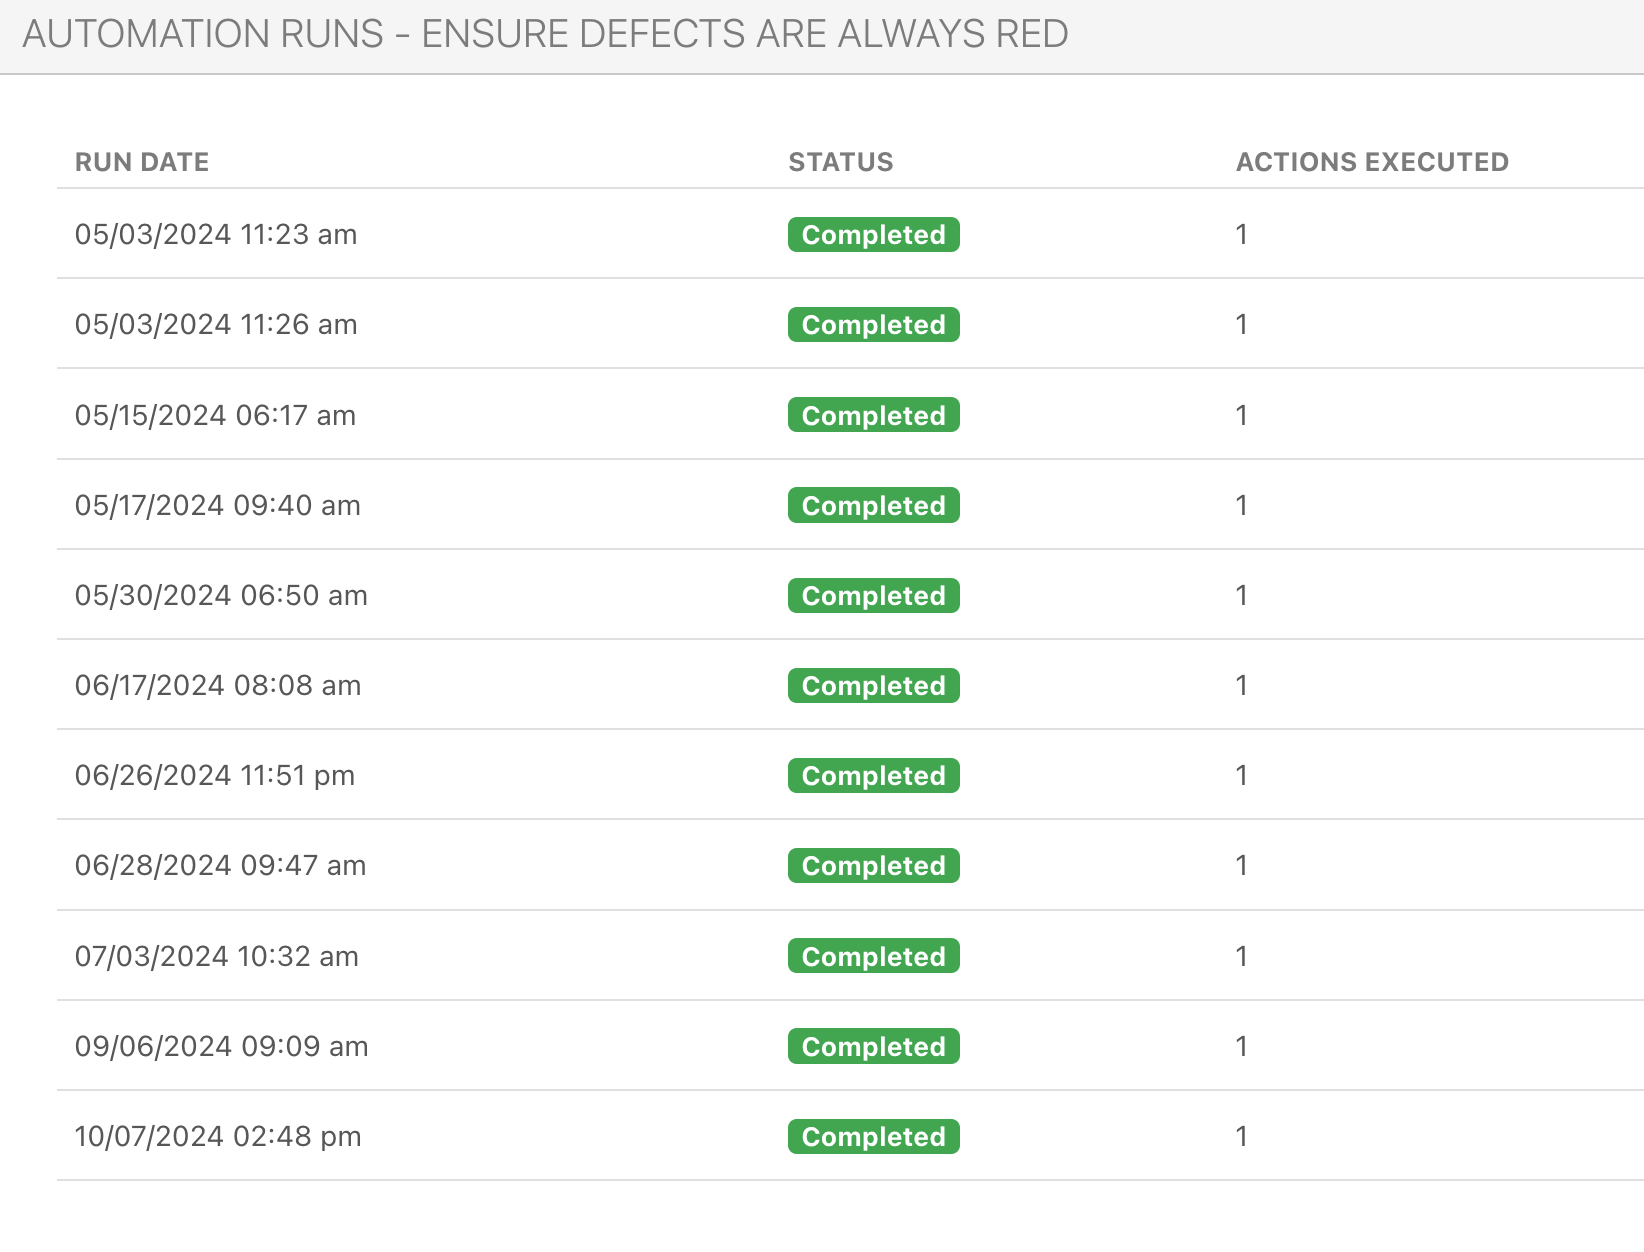
To monitor the activity of your Automations, you can view the Run History.

You will then be able to review the run history of the Automation to ensure it matches your expectations, or to help determine if there's something preventing it from running.


