How DevStride manages the When: Perpetual vs. Cycle-based Boards
- 16 Jul 2025
- 2 Minutes to read
- Contributors

- Print
- DarkLight
How DevStride manages the When: Perpetual vs. Cycle-based Boards
- Updated on 16 Jul 2025
- 2 Minutes to read
- Contributors
- Print
- DarkLight
Article summary
Did you find this summary helpful?
Thank you for your feedback!
Perpetual Boards vs. Time Cycle Board (or both!)
Boards help teams visualize work in motion.
DevStride boards function as Kanban-style, list-based, or 2D spider graph visualization tools, allowing teams to track work in real time.
What's more - DevStride offers more than one type of board.
You can choose to manage work as an evergreen list - something called a Perpetual Board in DevStride.
You can also choose to manage work in a timeboxed approach, called Cycle-based Boards.
DevStride allows you to choose both or either approach within your organization. Read on for more information on these options.
The Best of All Boards: Perpetual, Time-cycle Cadences, or Both
Perpetual boards are great for managing lists of to do's and backlogs of items. Due dates can be applied to these items. They just aren't managed to a particular cycle of time (sprints, monthly assiged work, etc.) for the team.
Time Cycle Boards, on the other hand, can be used when a team wants to manage their work in specific time-boxed periods. You can use any time-box series you wish — 2-week sprints, monthly, quarterly, annual planning, etc.
From perpetual to time-boxed: Many organizations choose to start by managing objectives and work items as a perpetual list. Then they move items they wish to commit to a particular cycle from the perpetual board to a particular cycle board.
There is an easy way to determine which type of board to use.
Ask this question:
Does your working group manage a set of ongoing work items (not date-based)?
If so, use perpetual boards.
If your working group uses cadences, such as sprints or monthly/quarterly planning, use cycle-based boards.
If you have teams that use both approaches, take advantage of both types of boards.
The main takeaway is this: It's important to understand how to set up cadences (time-periods), as this set up has downstream effects for other features of DevStride as work gets committed to cycles based on how you set them up.
Whatever way you choose to use boards, DevStride provides unmatched flexibility when it comes to your approach to managing committed work.
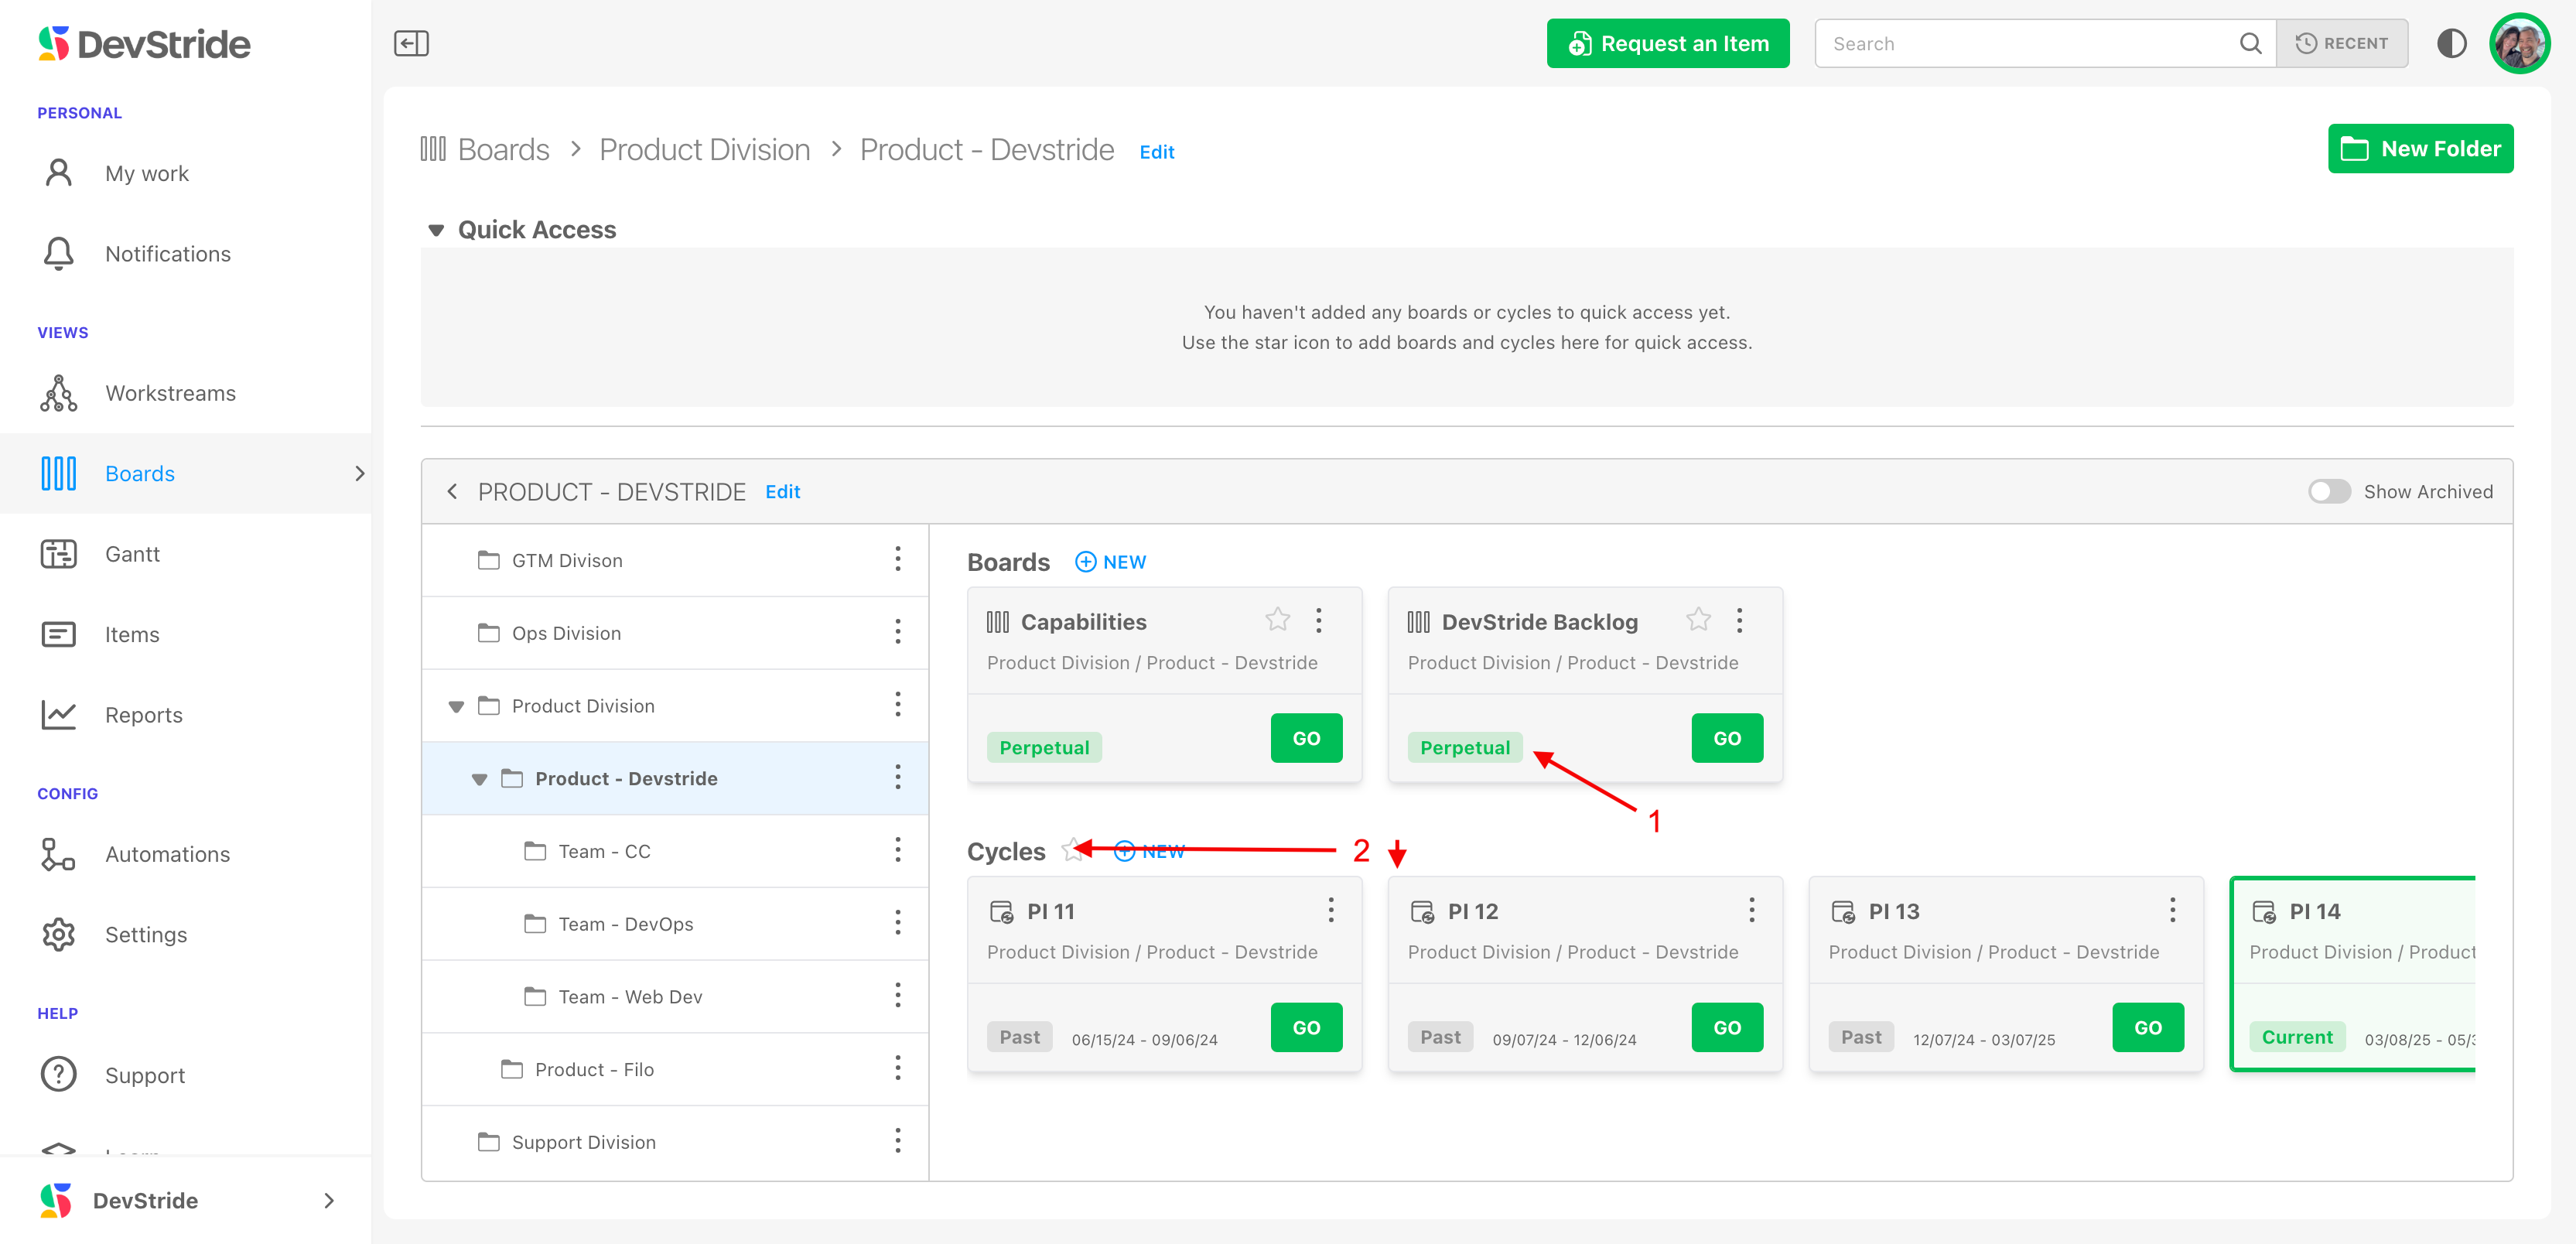
Board Types Comparison
Perpetual - Boards (1)
No set dates, used for ongoing work. Work items move through a series of statuses (such as new, in progress and done).
Ideal for backlog management, operations, and non-date-based projects.
Cycle-Driven Boards — Linked to cadences (2)
- Subsequent boards are automatically created per cadence time-frame (e.g., weekly, bi-weekly sprints, monthly, etc.)
- Ensures alignment with planning cycles.
- Supports structured, time-boxed execution.
For more step-by-step instructions on setting up boards, visit the upcoming articles.
Was this article helpful?