Admin Onboarding - Populating and Managing Workstreams
- 02 Oct 2025
- 5 Minutes to read
- Contributors

- Print
- DarkLight
Admin Onboarding - Populating and Managing Workstreams
- Updated on 02 Oct 2025
- 5 Minutes to read
- Contributors
- Print
- DarkLight
Article summary
Did you find this summary helpful?
Thank you for your feedback!
We are now going to head back over to your workstream map. This area helps organize the various streams of work going on in your organization. It's an ongoing stream, so has no start date and end date. It reflects where the work lives.
Workstreams can be nested as deeply as you wish, and you may have as many core workstreams (top-level workstreams) as you want.
As a best practice, we recommend only going 2 levels deep with any given workstreams.
Streamline those workstreams, as these are simply like organizational folders. Remember, item hierarchy is where the real data lives, and it is the item types that drive reporting, not the workstreams.
Example:
Let's take product engineering as an example. All the various projects being worked on by the product engineering team might reside in a workstream called "Product Development."
Step 1: Create a workstream
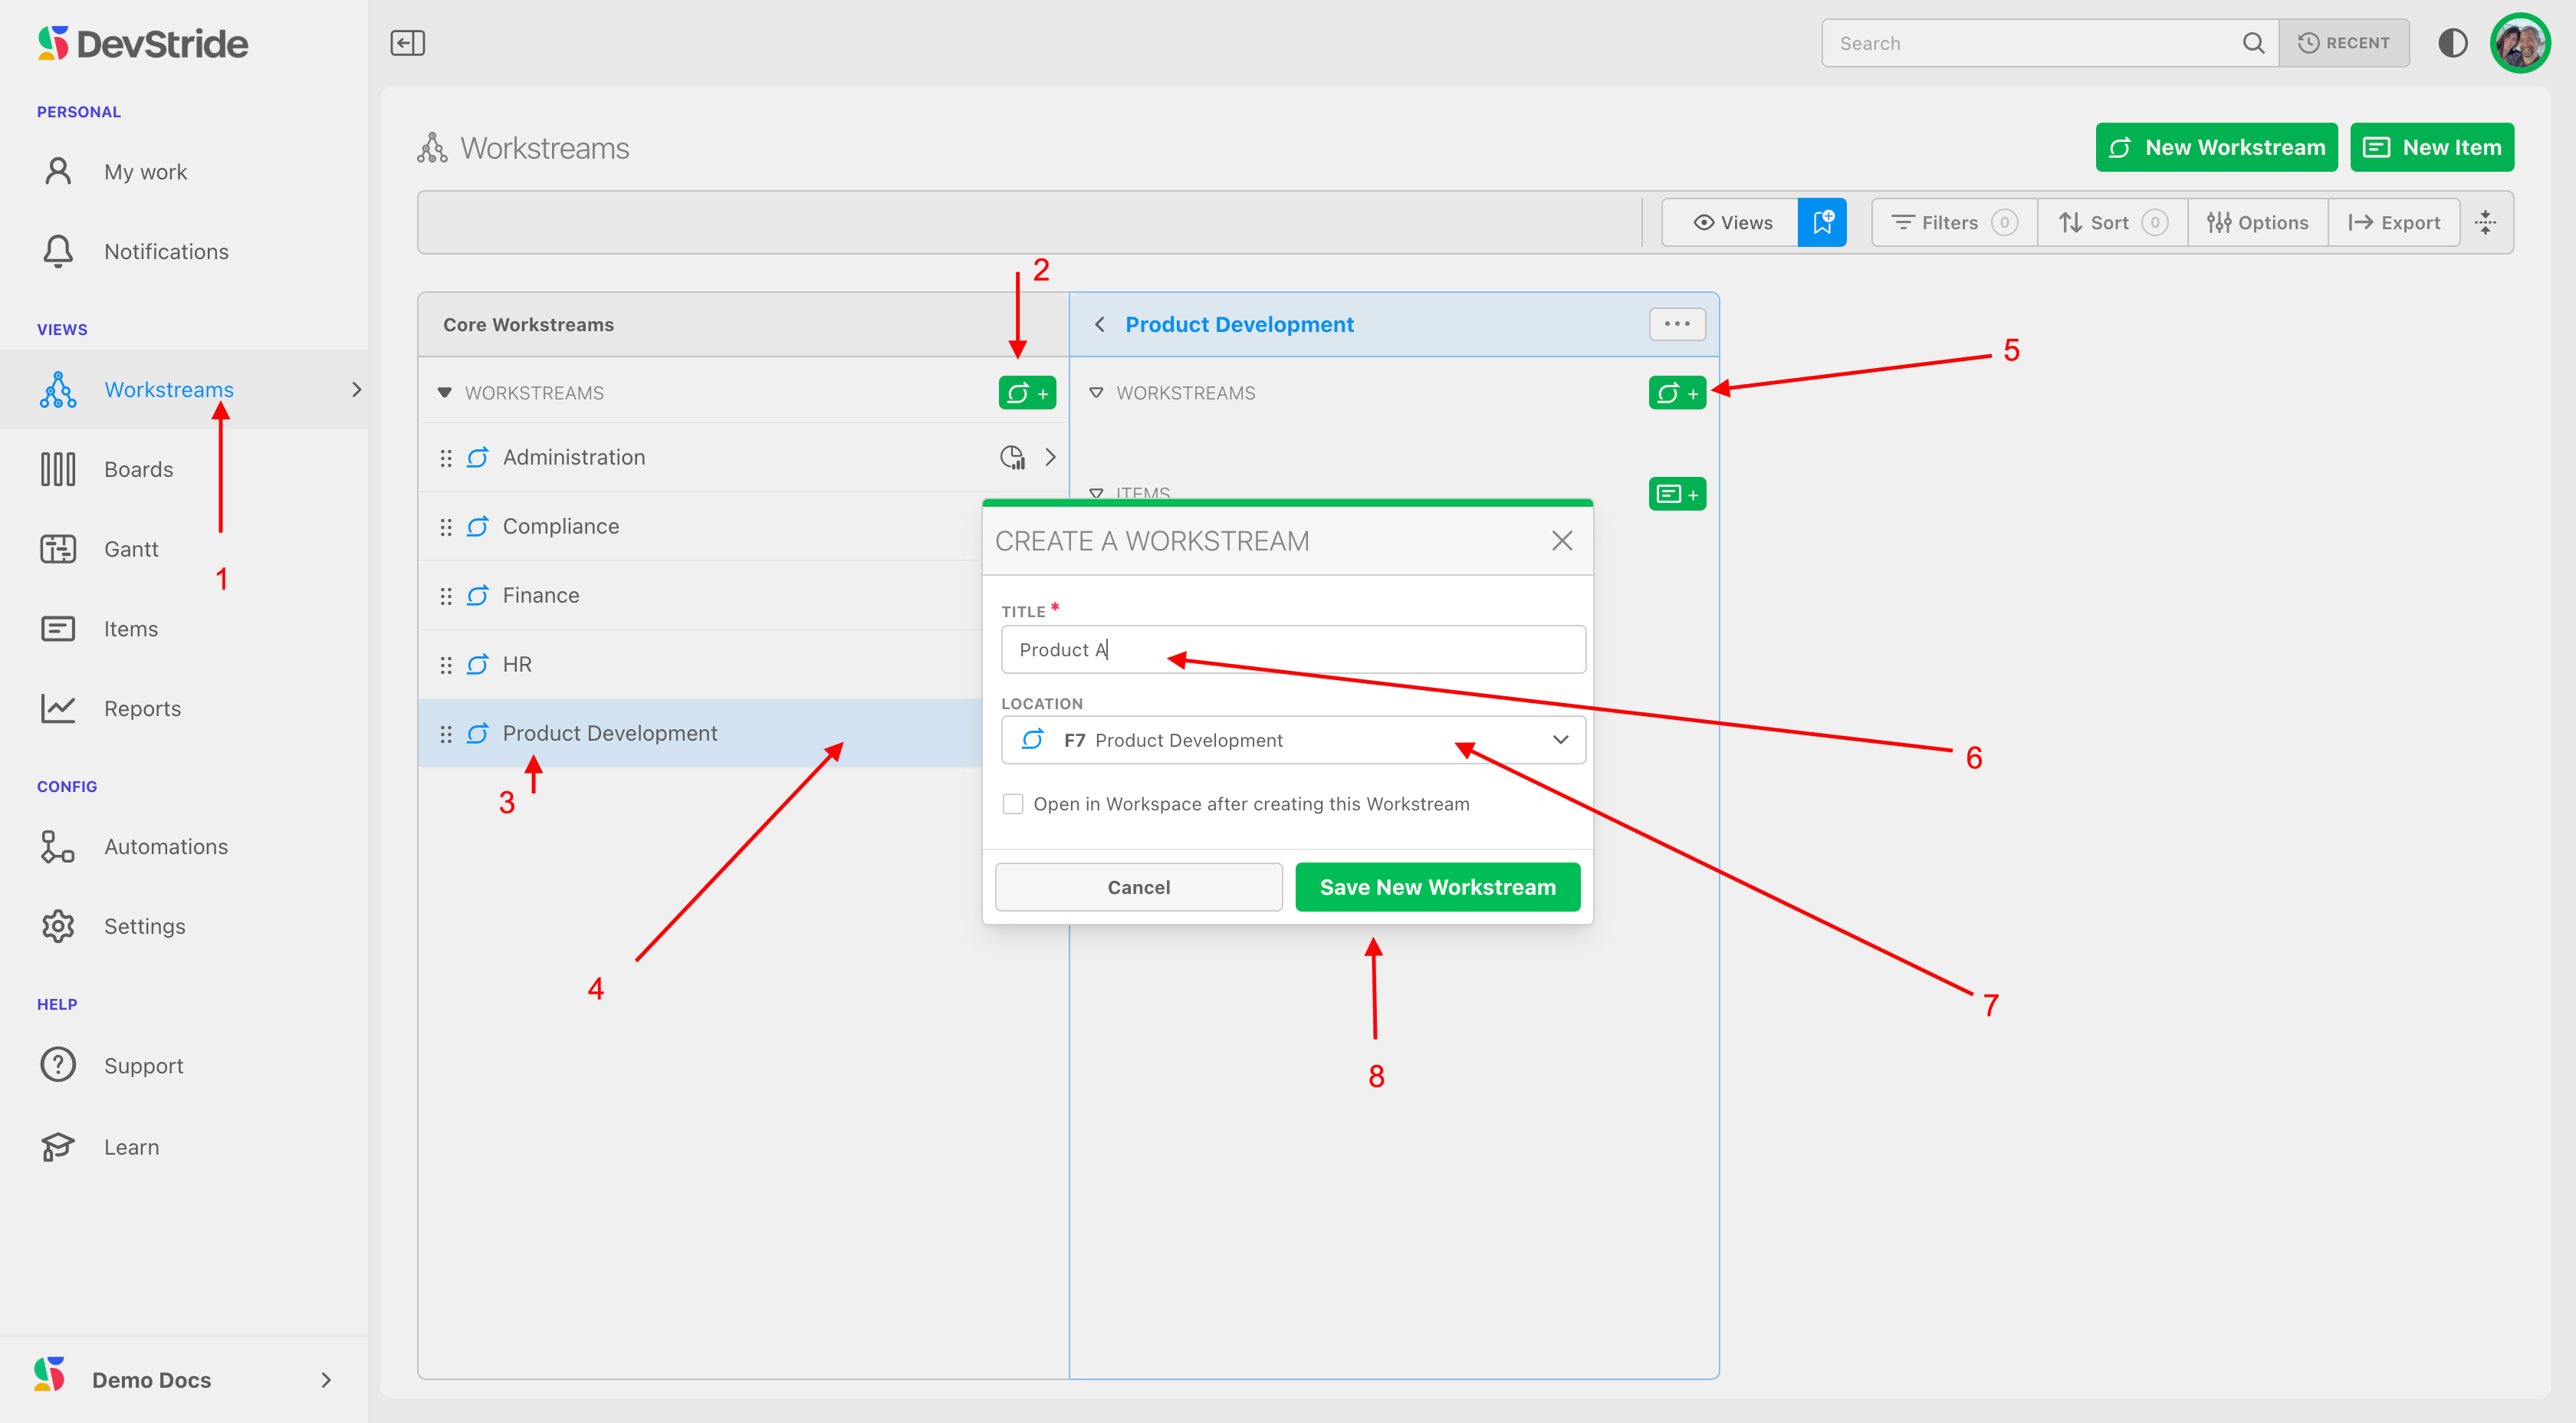
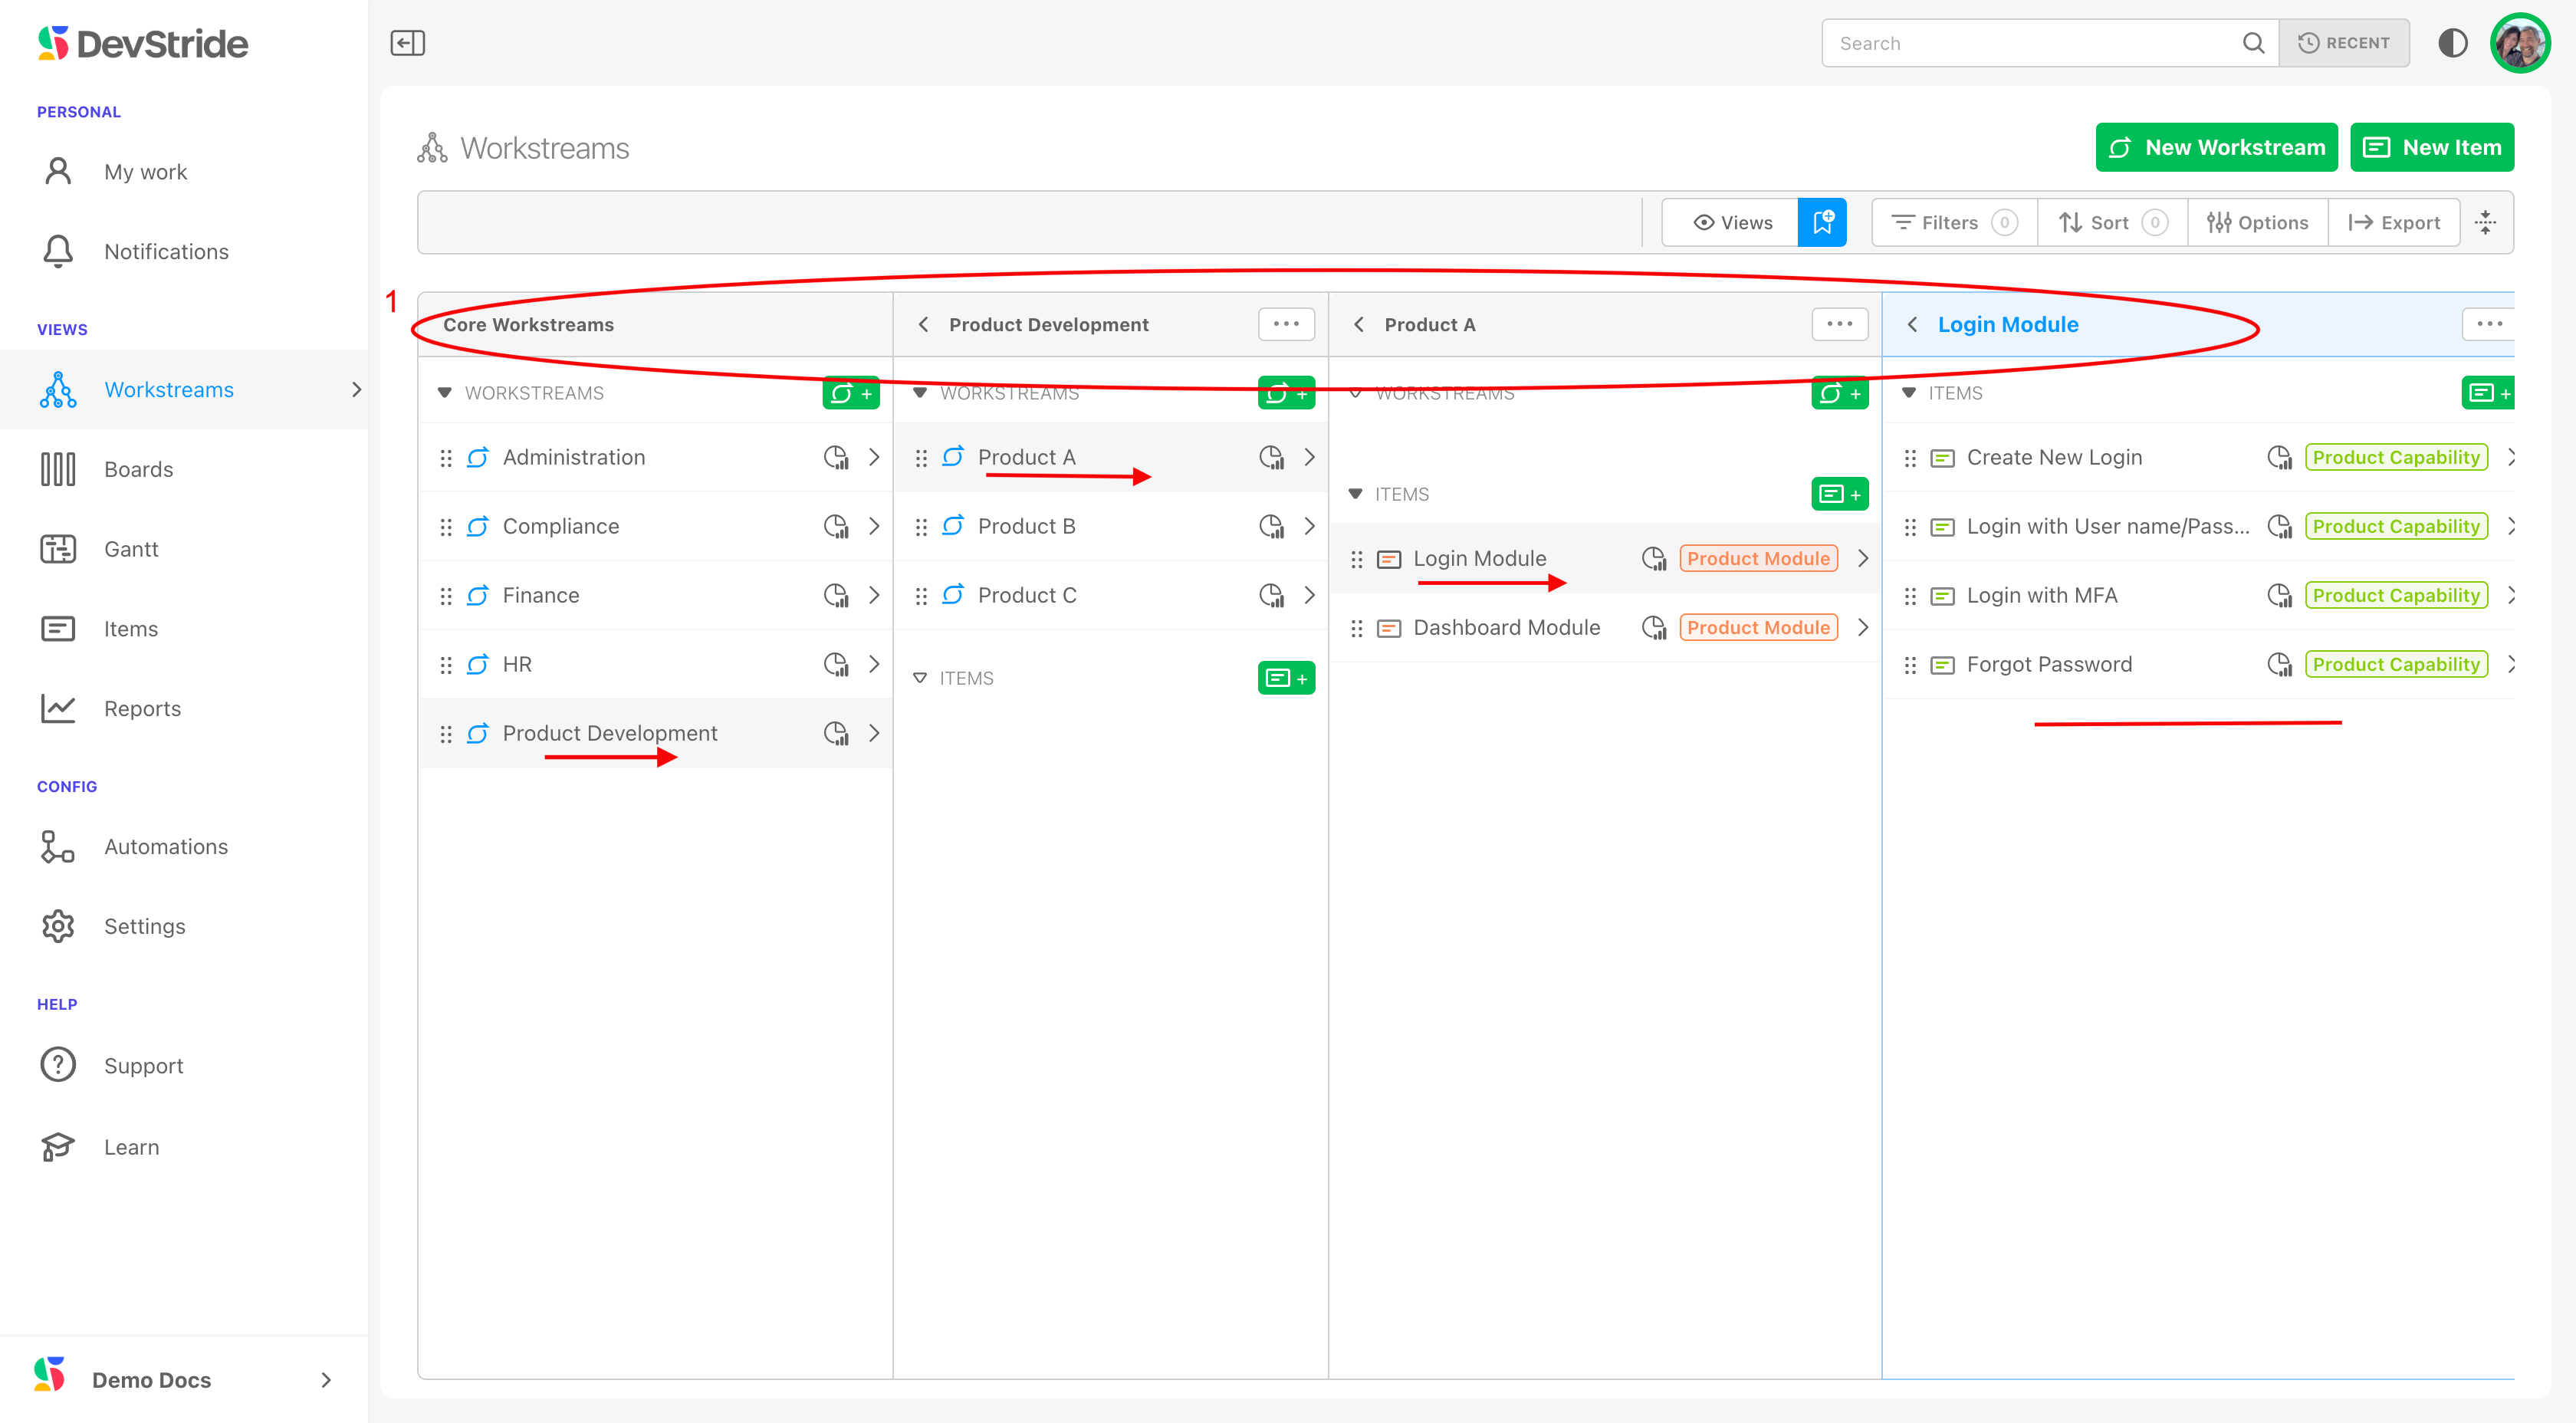
Go to Workstreams (1) and click on the Add Workstream icon (2). Name your core Workstream in the Create a Workstream pop up box and save it. Your new core workstream will display (3). To add a nested workstream, click on the arrow to the right of the Core Workstream name (4). Click on the Add Workstream icon in the panel that appears. (5).
The Create a Workstream box will pop up. Enter in the next Workstream's name. This box will auto-populate the location (7), but you can also change the location here. Click Save New Workstream (8).
You can subsequently add nested workstreams by clicking on the Create a Workstream icon to the right of each workstream panel.
Example continued:
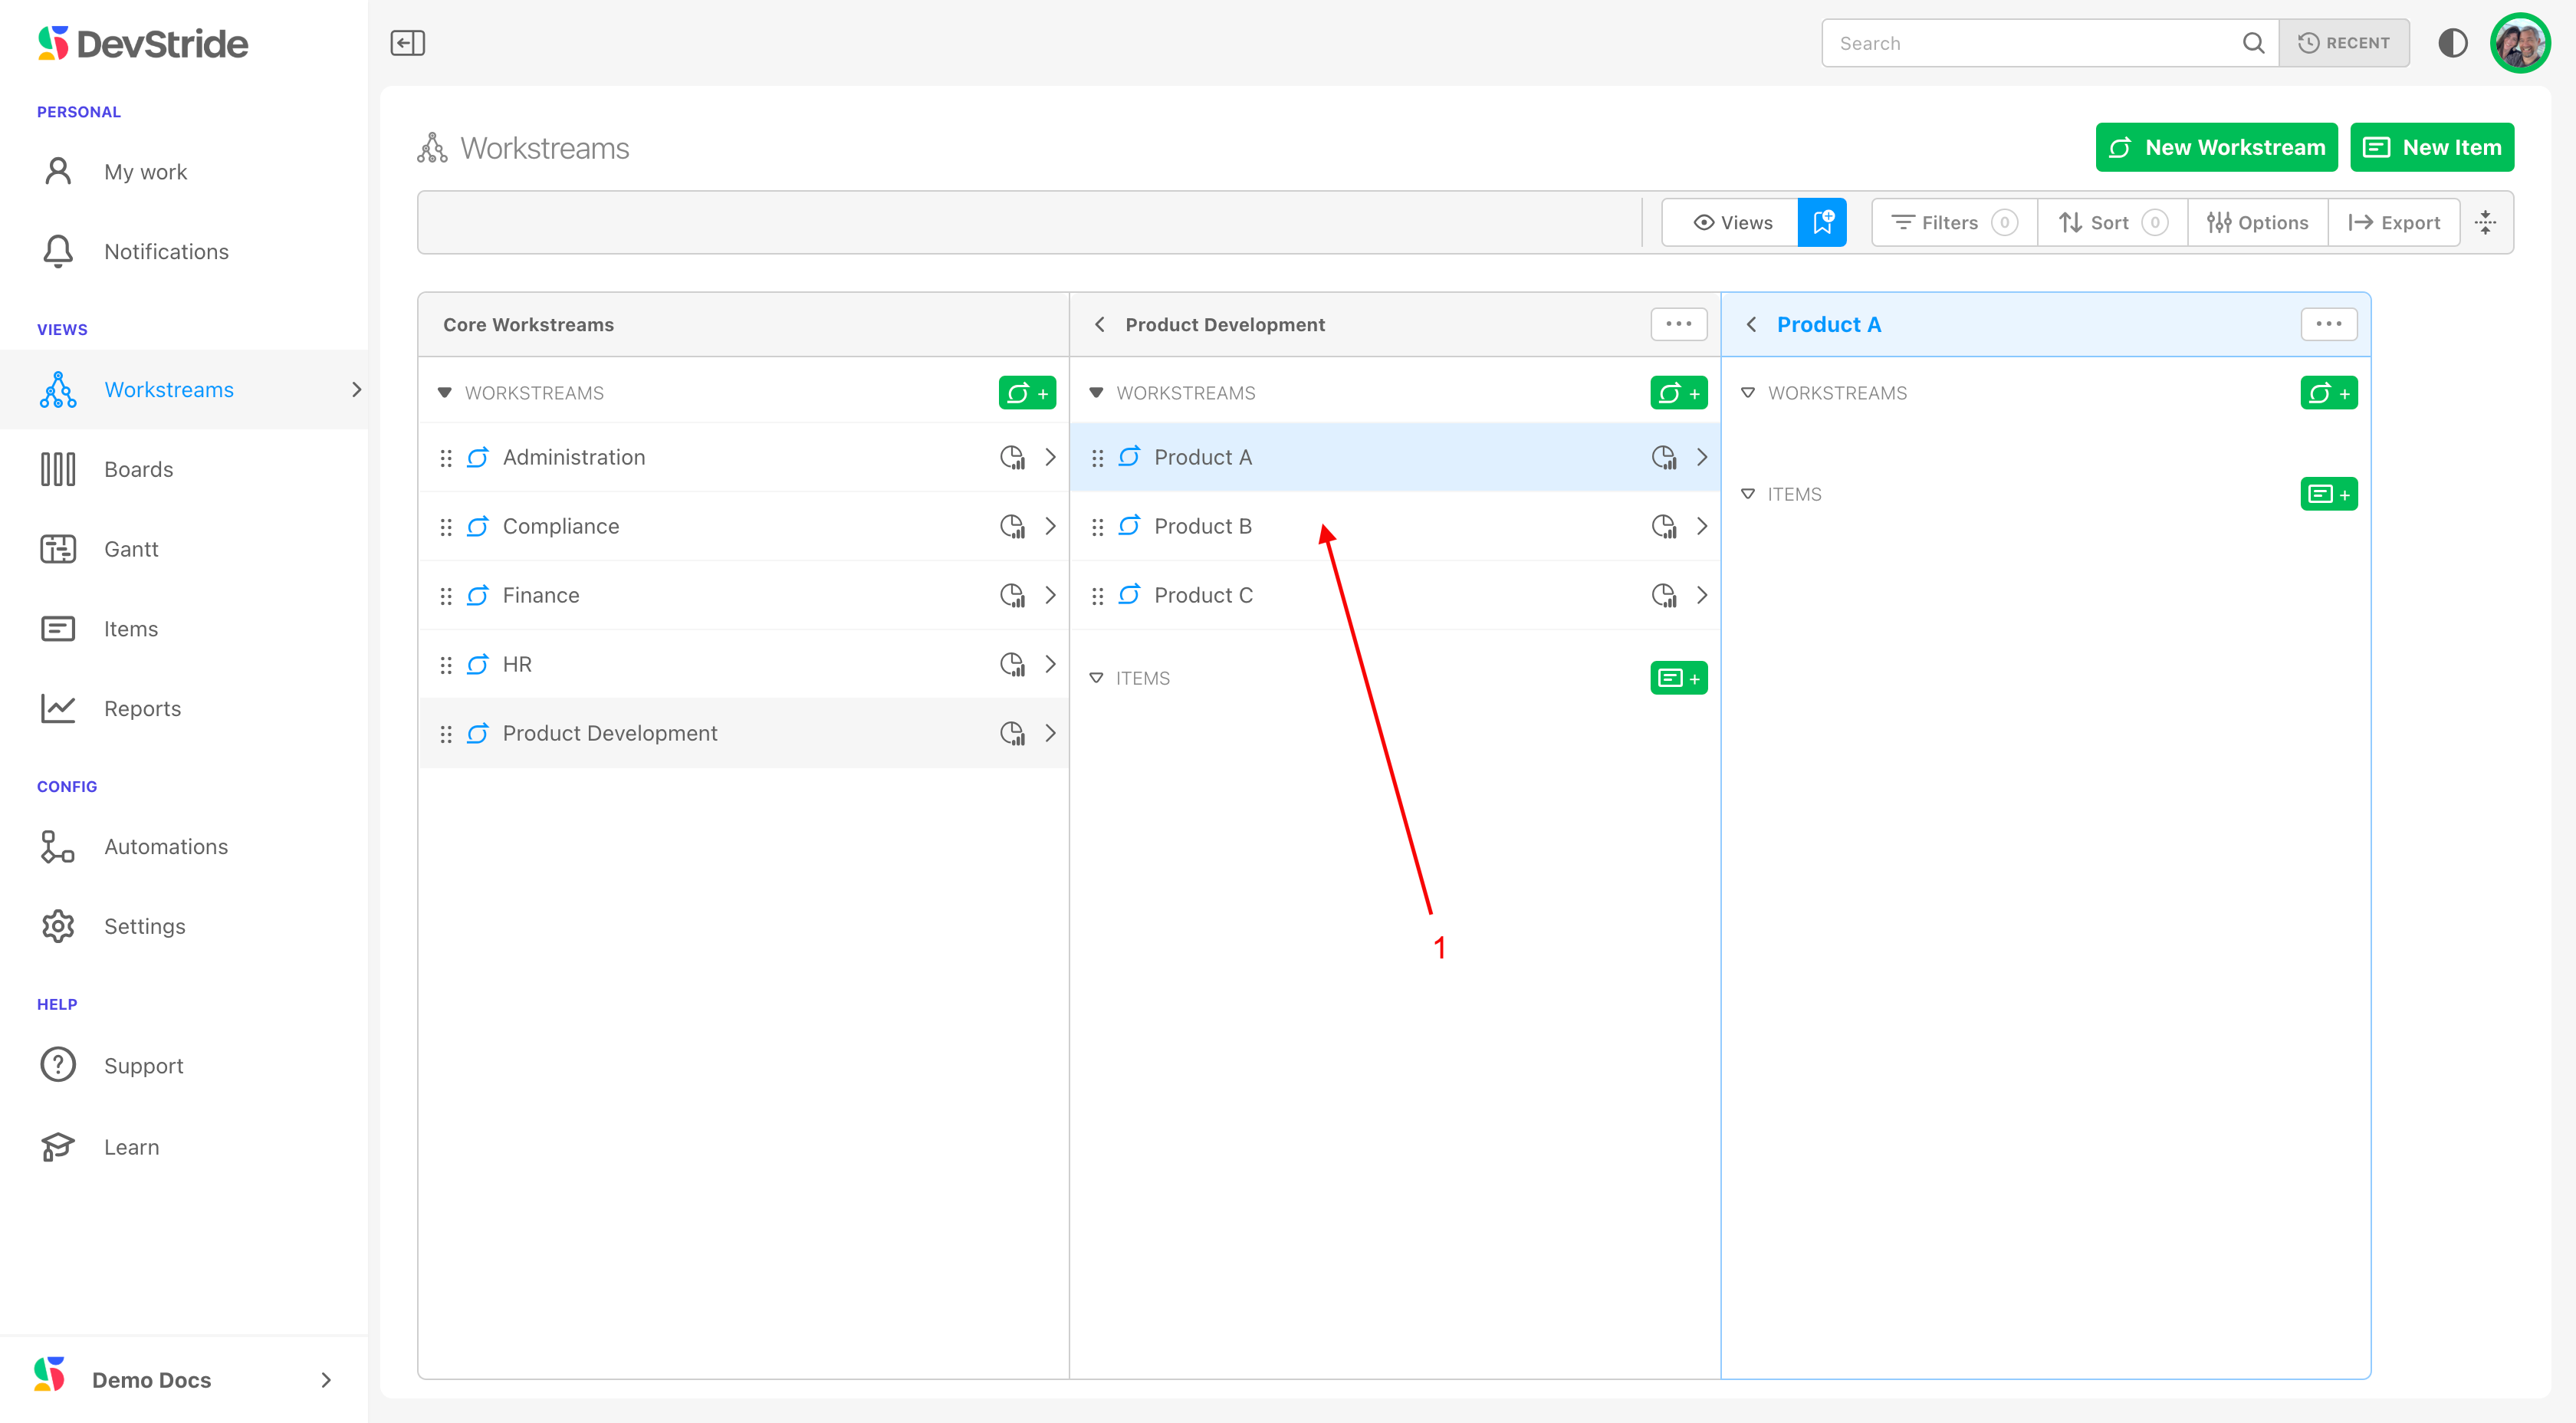
Back to our Product Development Workstream example, we might want to add nested workstreams that represent the products that are being worked on.
We've added Workstreams to represent 3 products that are being developed (1). Again, these workstreams represent the what of the work that is being tracked in the organization.
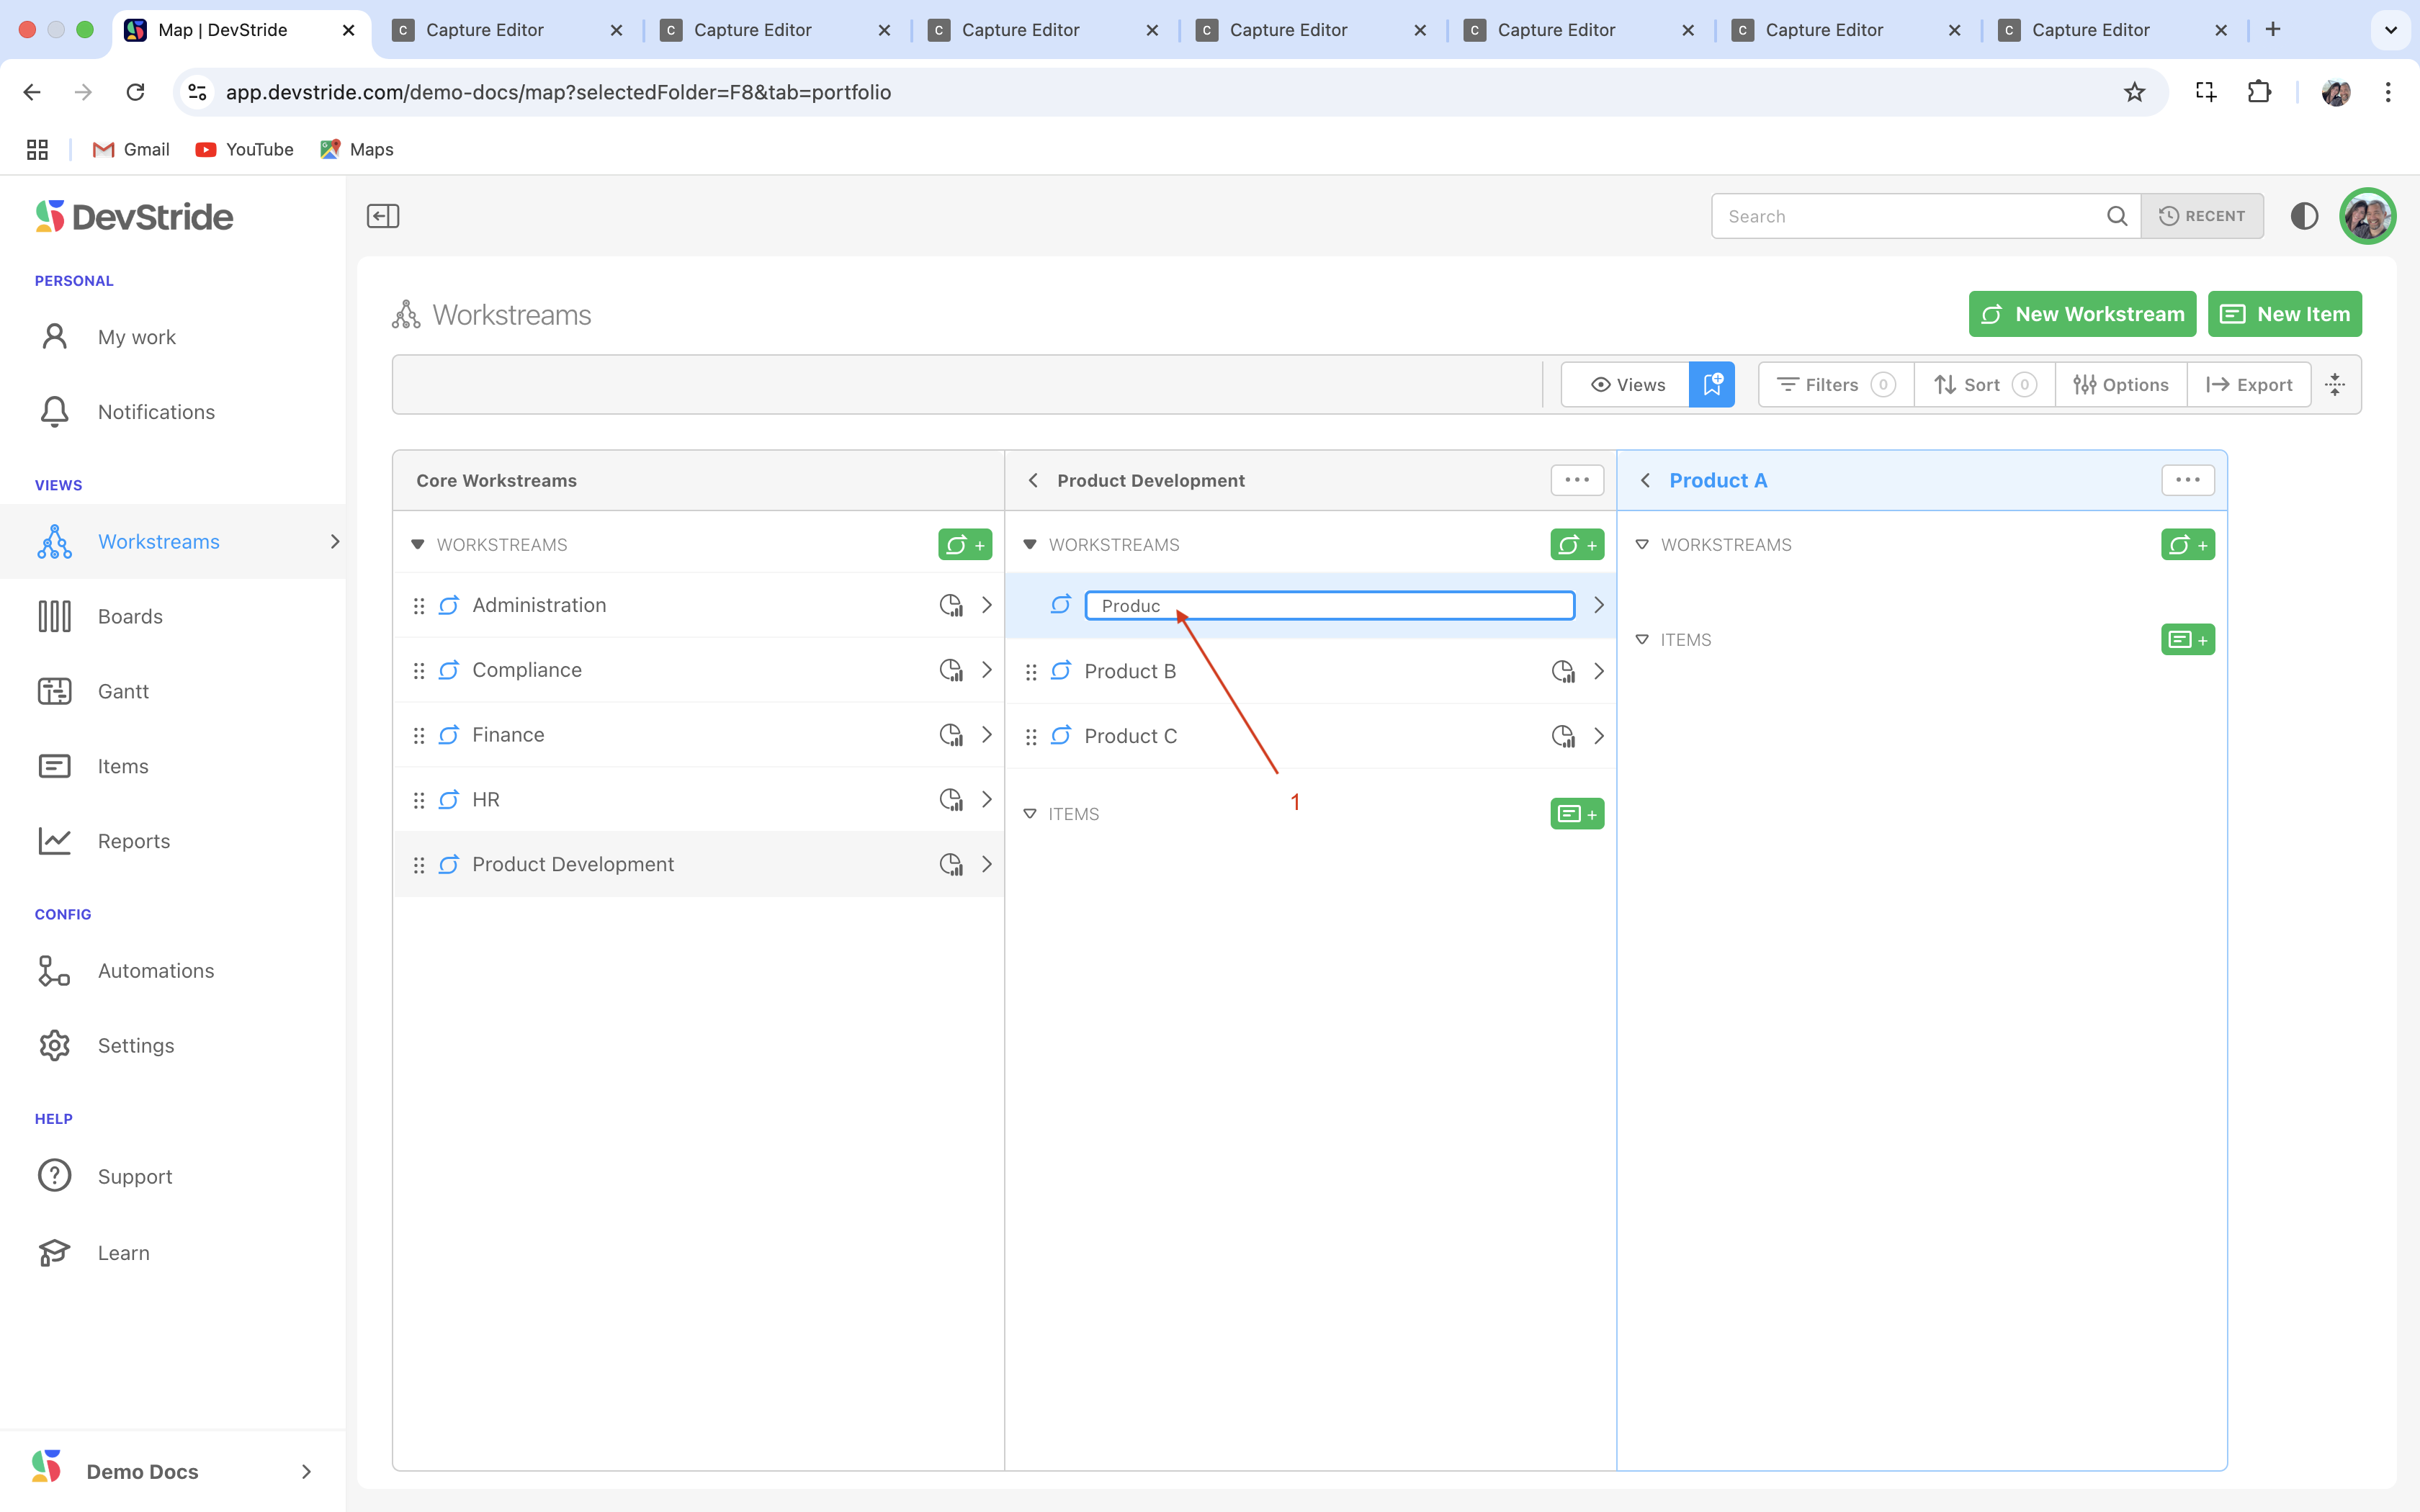
To edit any of the names, you can click inside the name of the Workstream (1) and edit it:
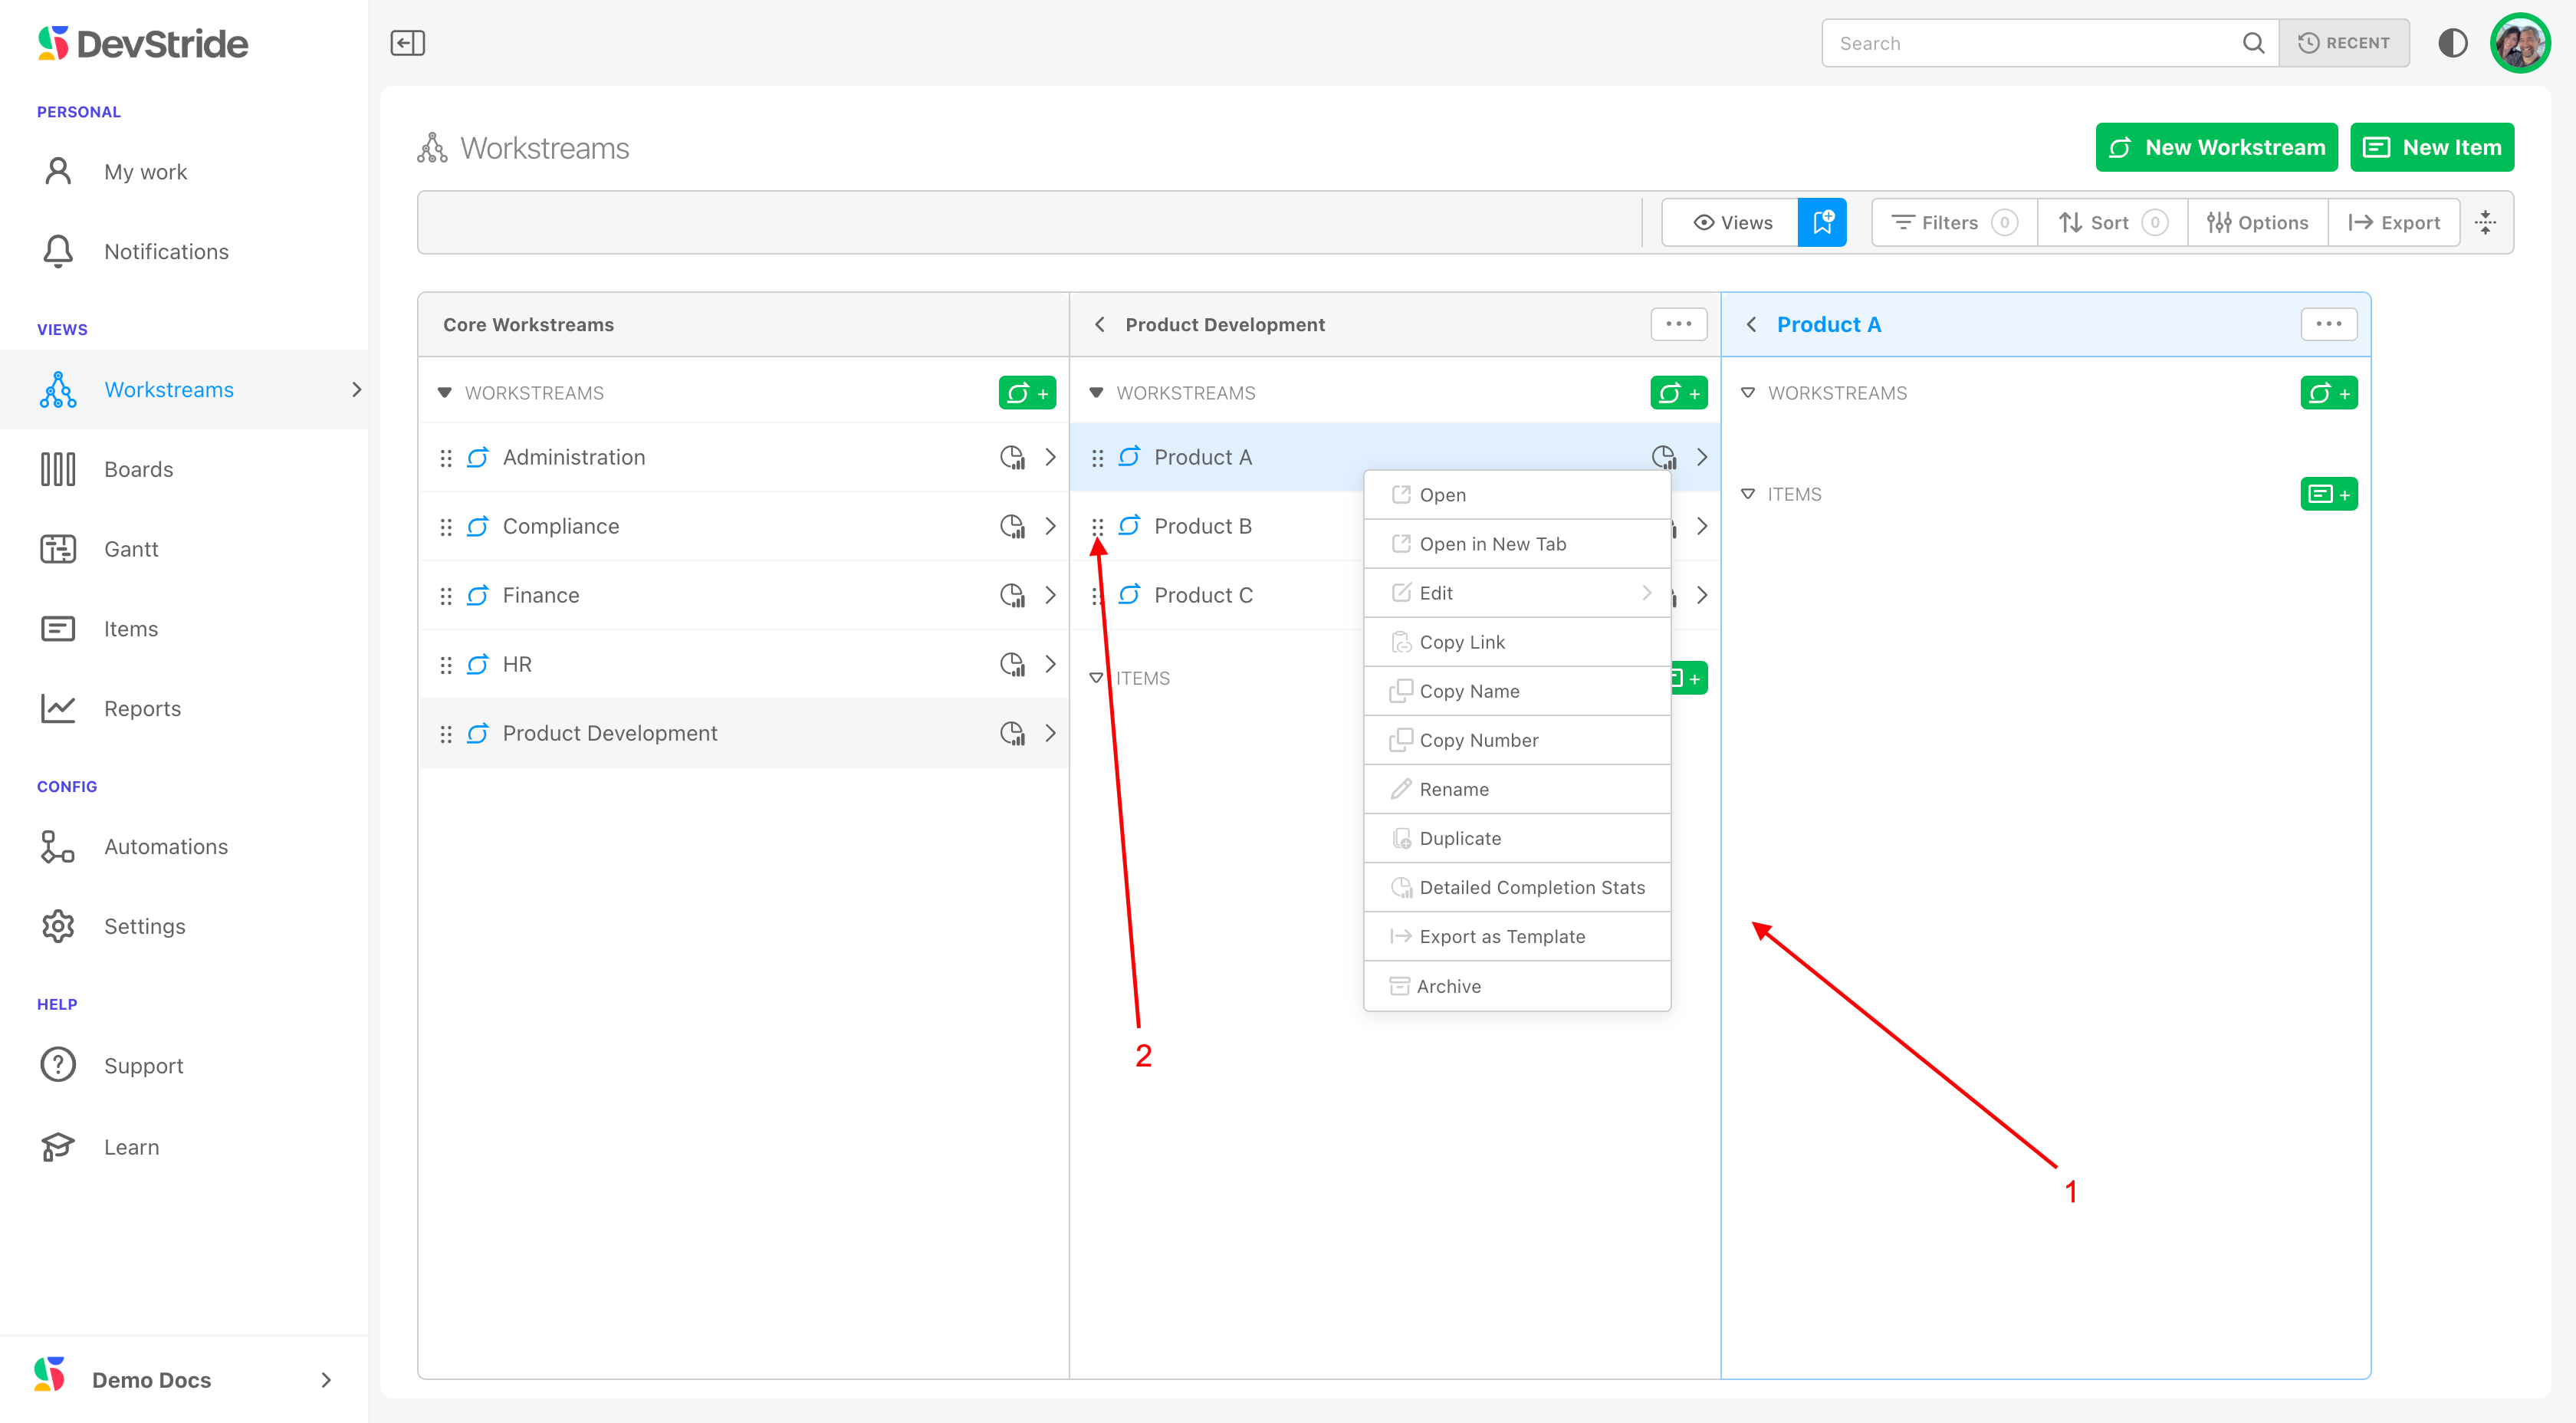
You can take these other actions (1) on the workstream by right clicking on the workstream name. You can also reorder the way your workstreams display by clicking on the grab bar and moving them around (2):
Step 2: Add Items to Workstreams
What this is:
Now that you have defined both your workstreams and your item hierarchy, you can add items to your workstreams.
How to do it - using an example:
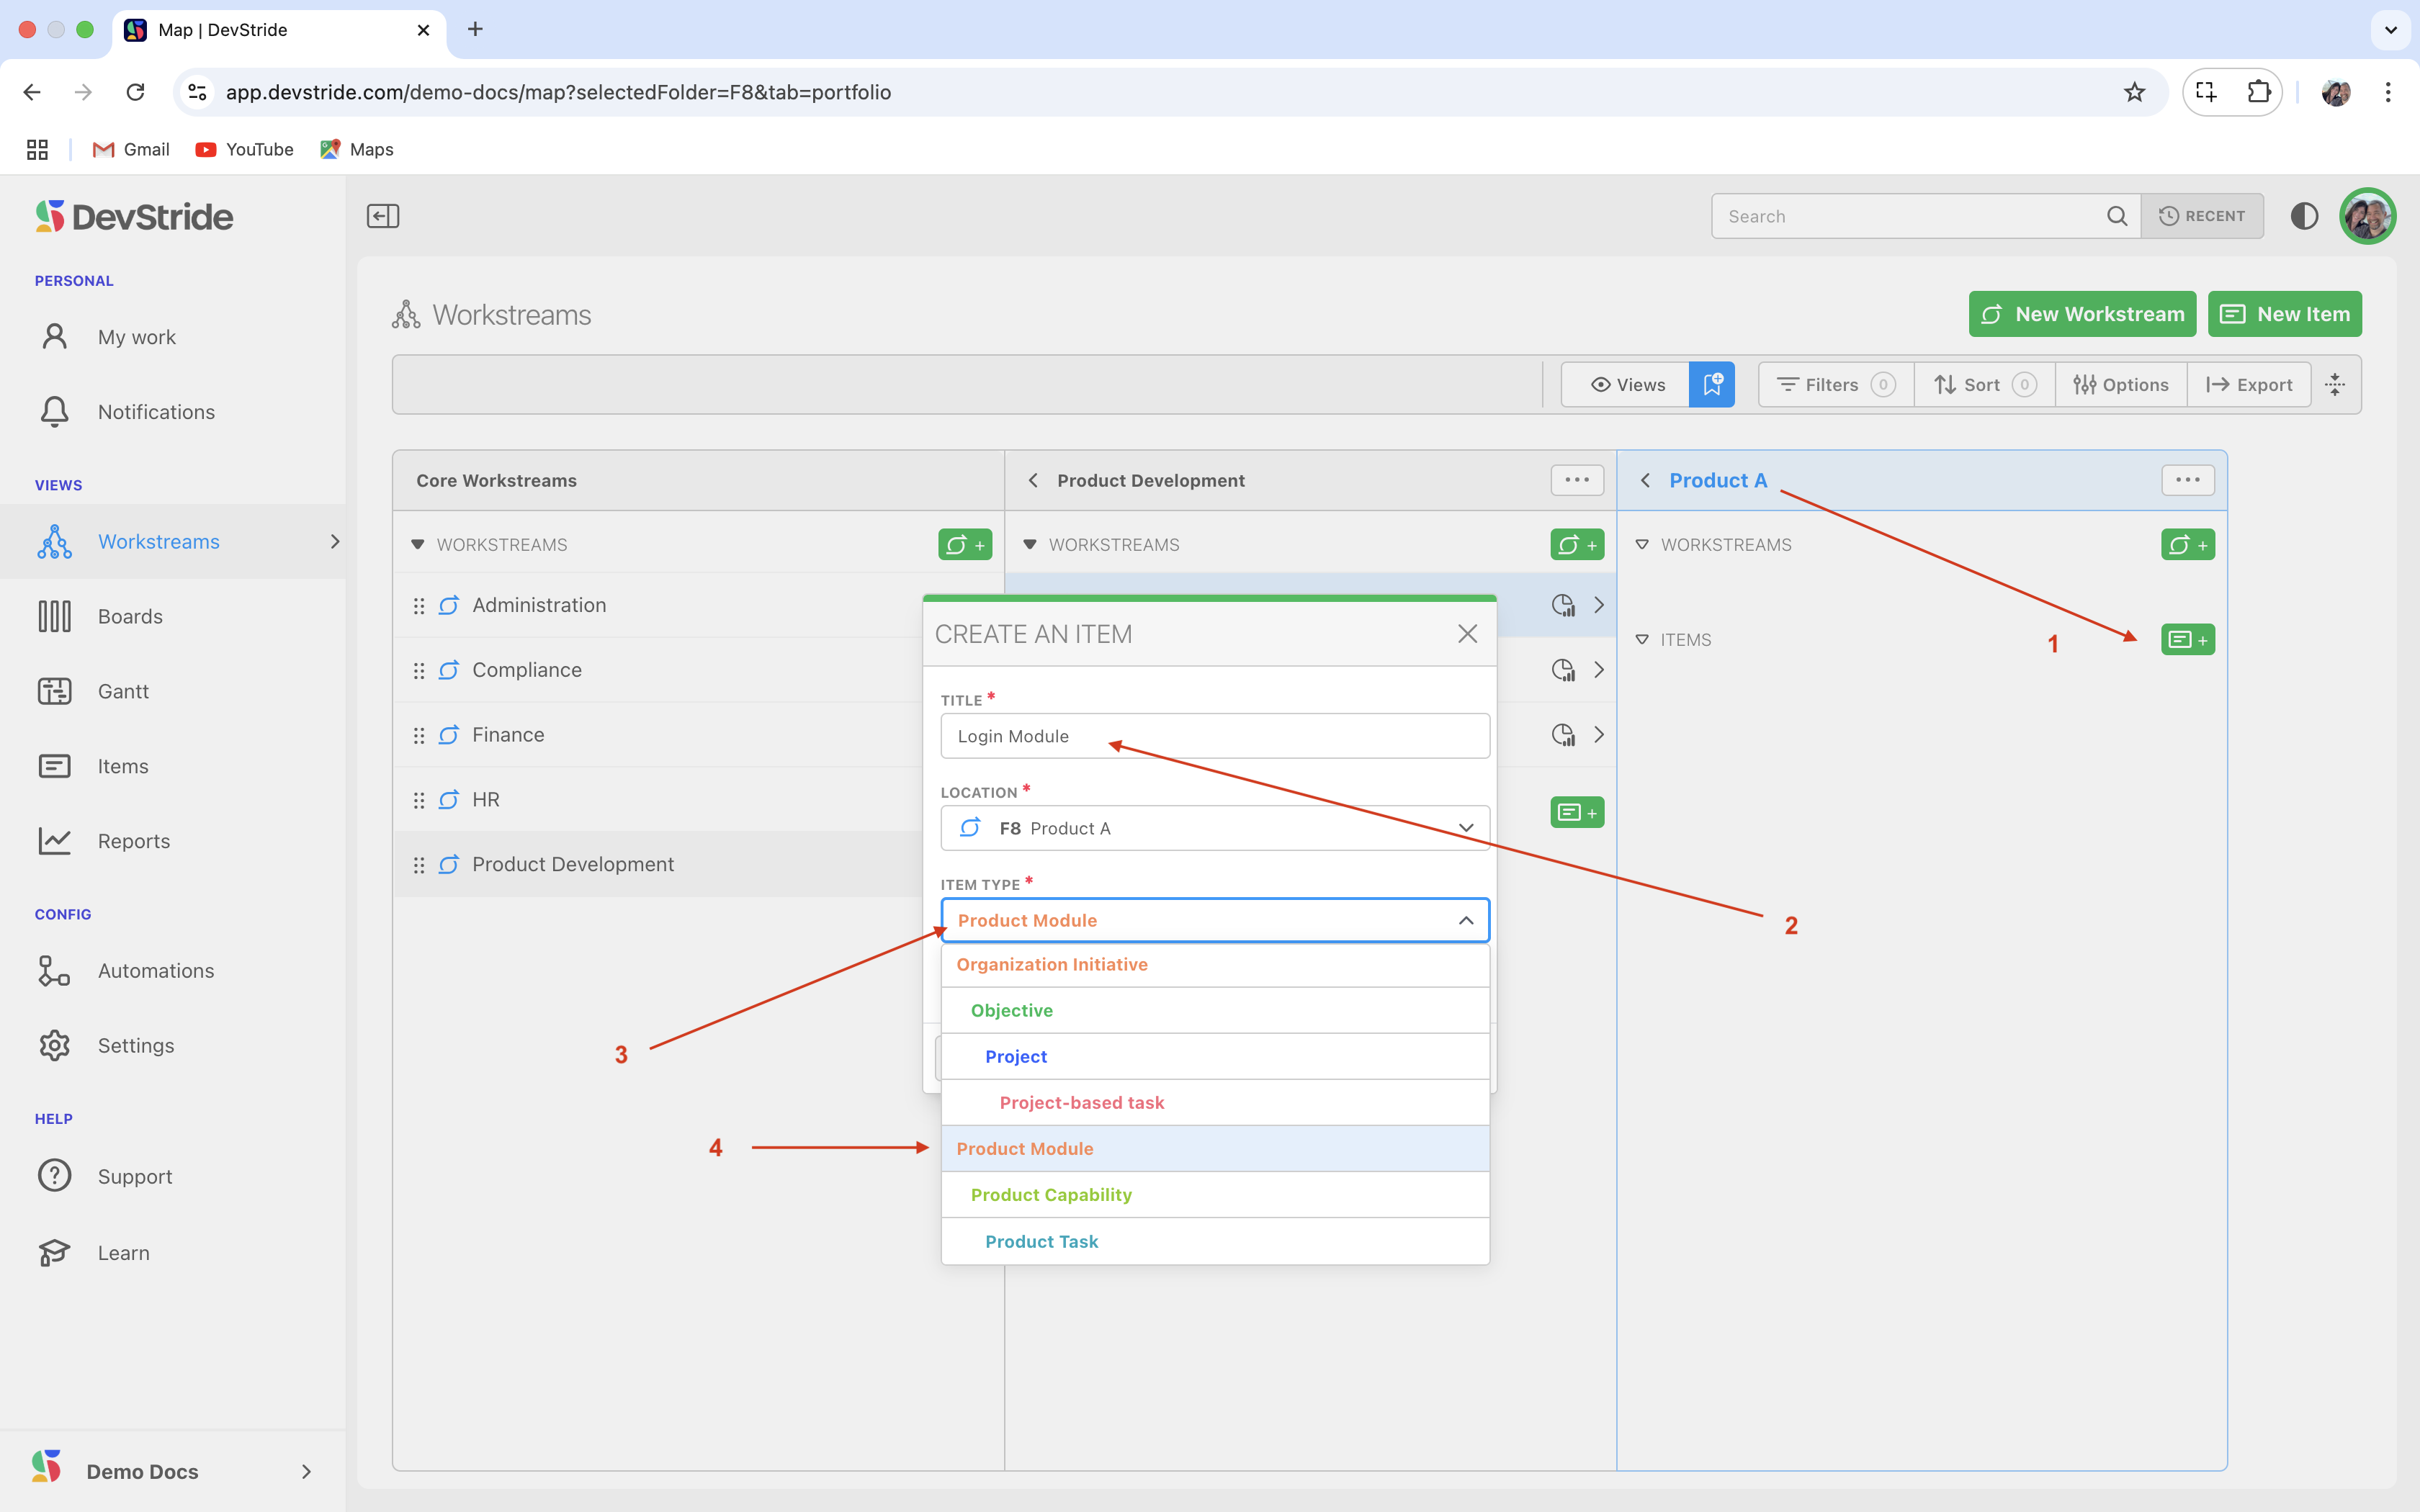
Returning to our example above, let's say we would like to identify work to be done in Product A, including a Login module with Capabilities and Tasks under it.
Do do this, let's create the Login Module item first. From the panel with your Workstream name (in this case—Product A), click on the Add Item icon. (1)
Type in a title for your item. For our example, we are creating a Login Module (2).
You can name it anything you want. Module does not have to be in the name.
Then we choose the item type. Because this is an item at the top of the product development hierarchy that we created, we will make the item type Product Module (3-4).
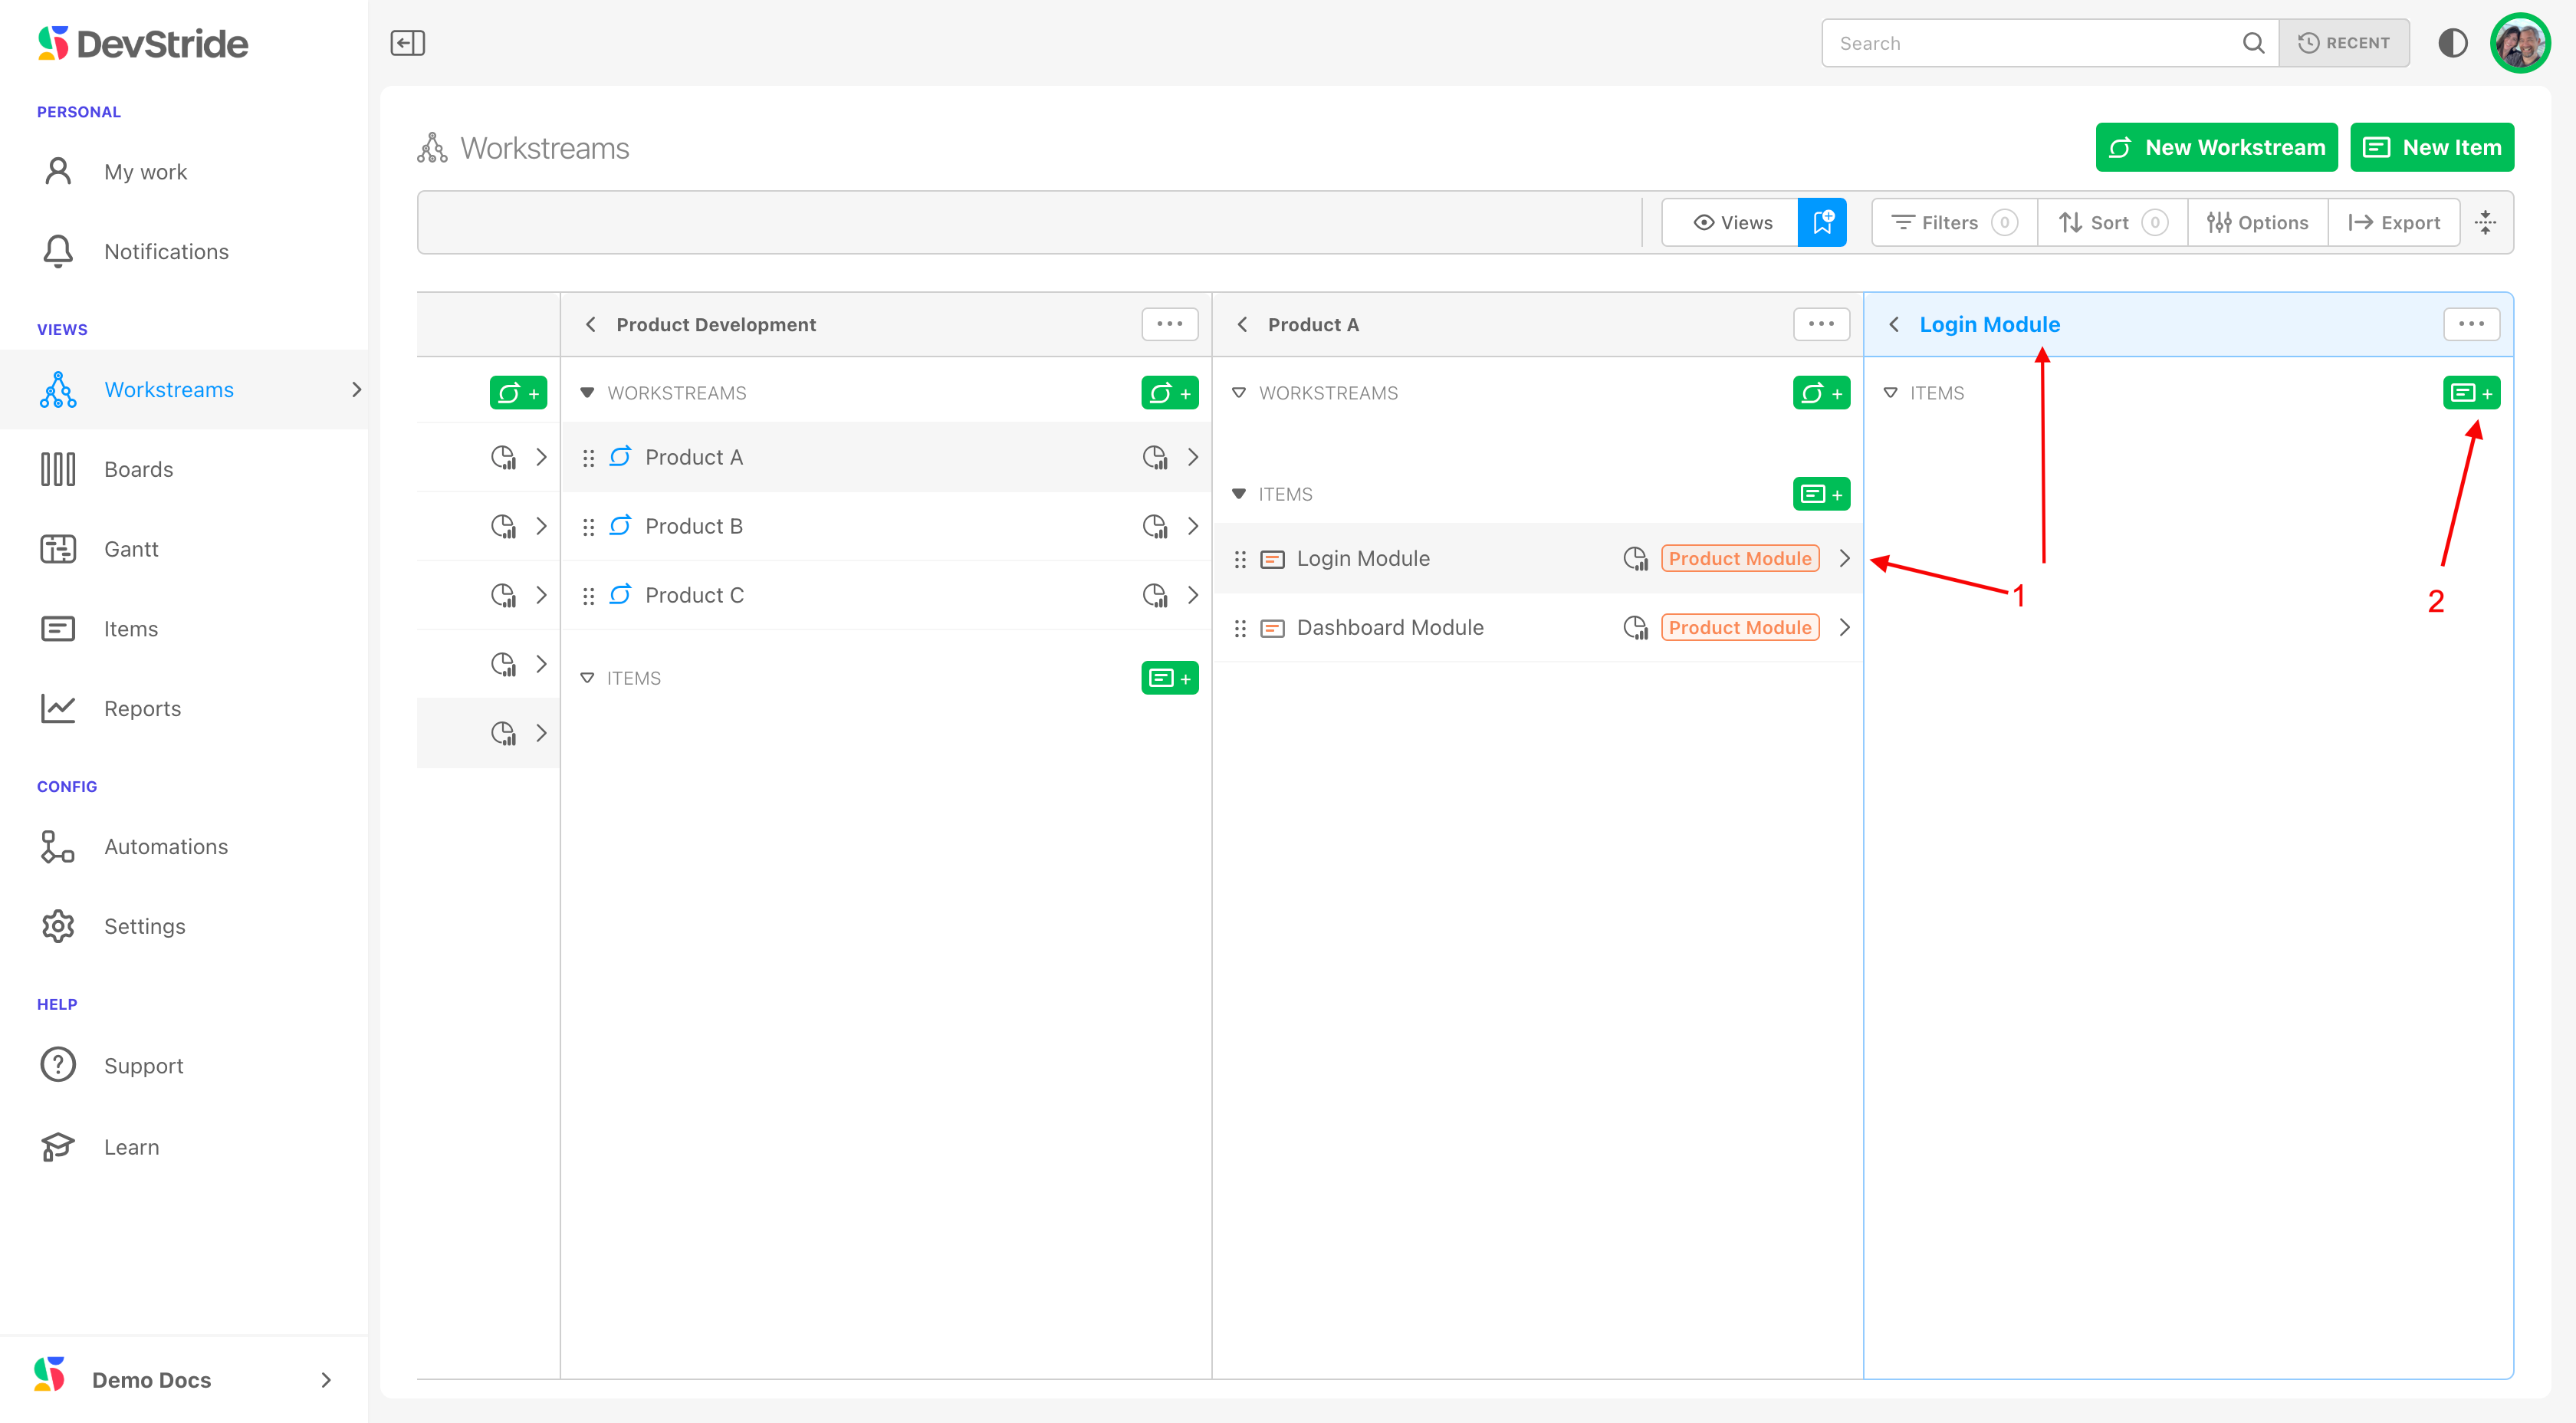
Now the other item types in our example - like Product Capabilities and Product Task items - can be nested underneath it.
To do this, we can add the next level of granularity down. In our example, we will add an item under Login Module. Click on the "Login Module >" row (1). And then click on add item in the Login Module's panel to create a nested item (2).
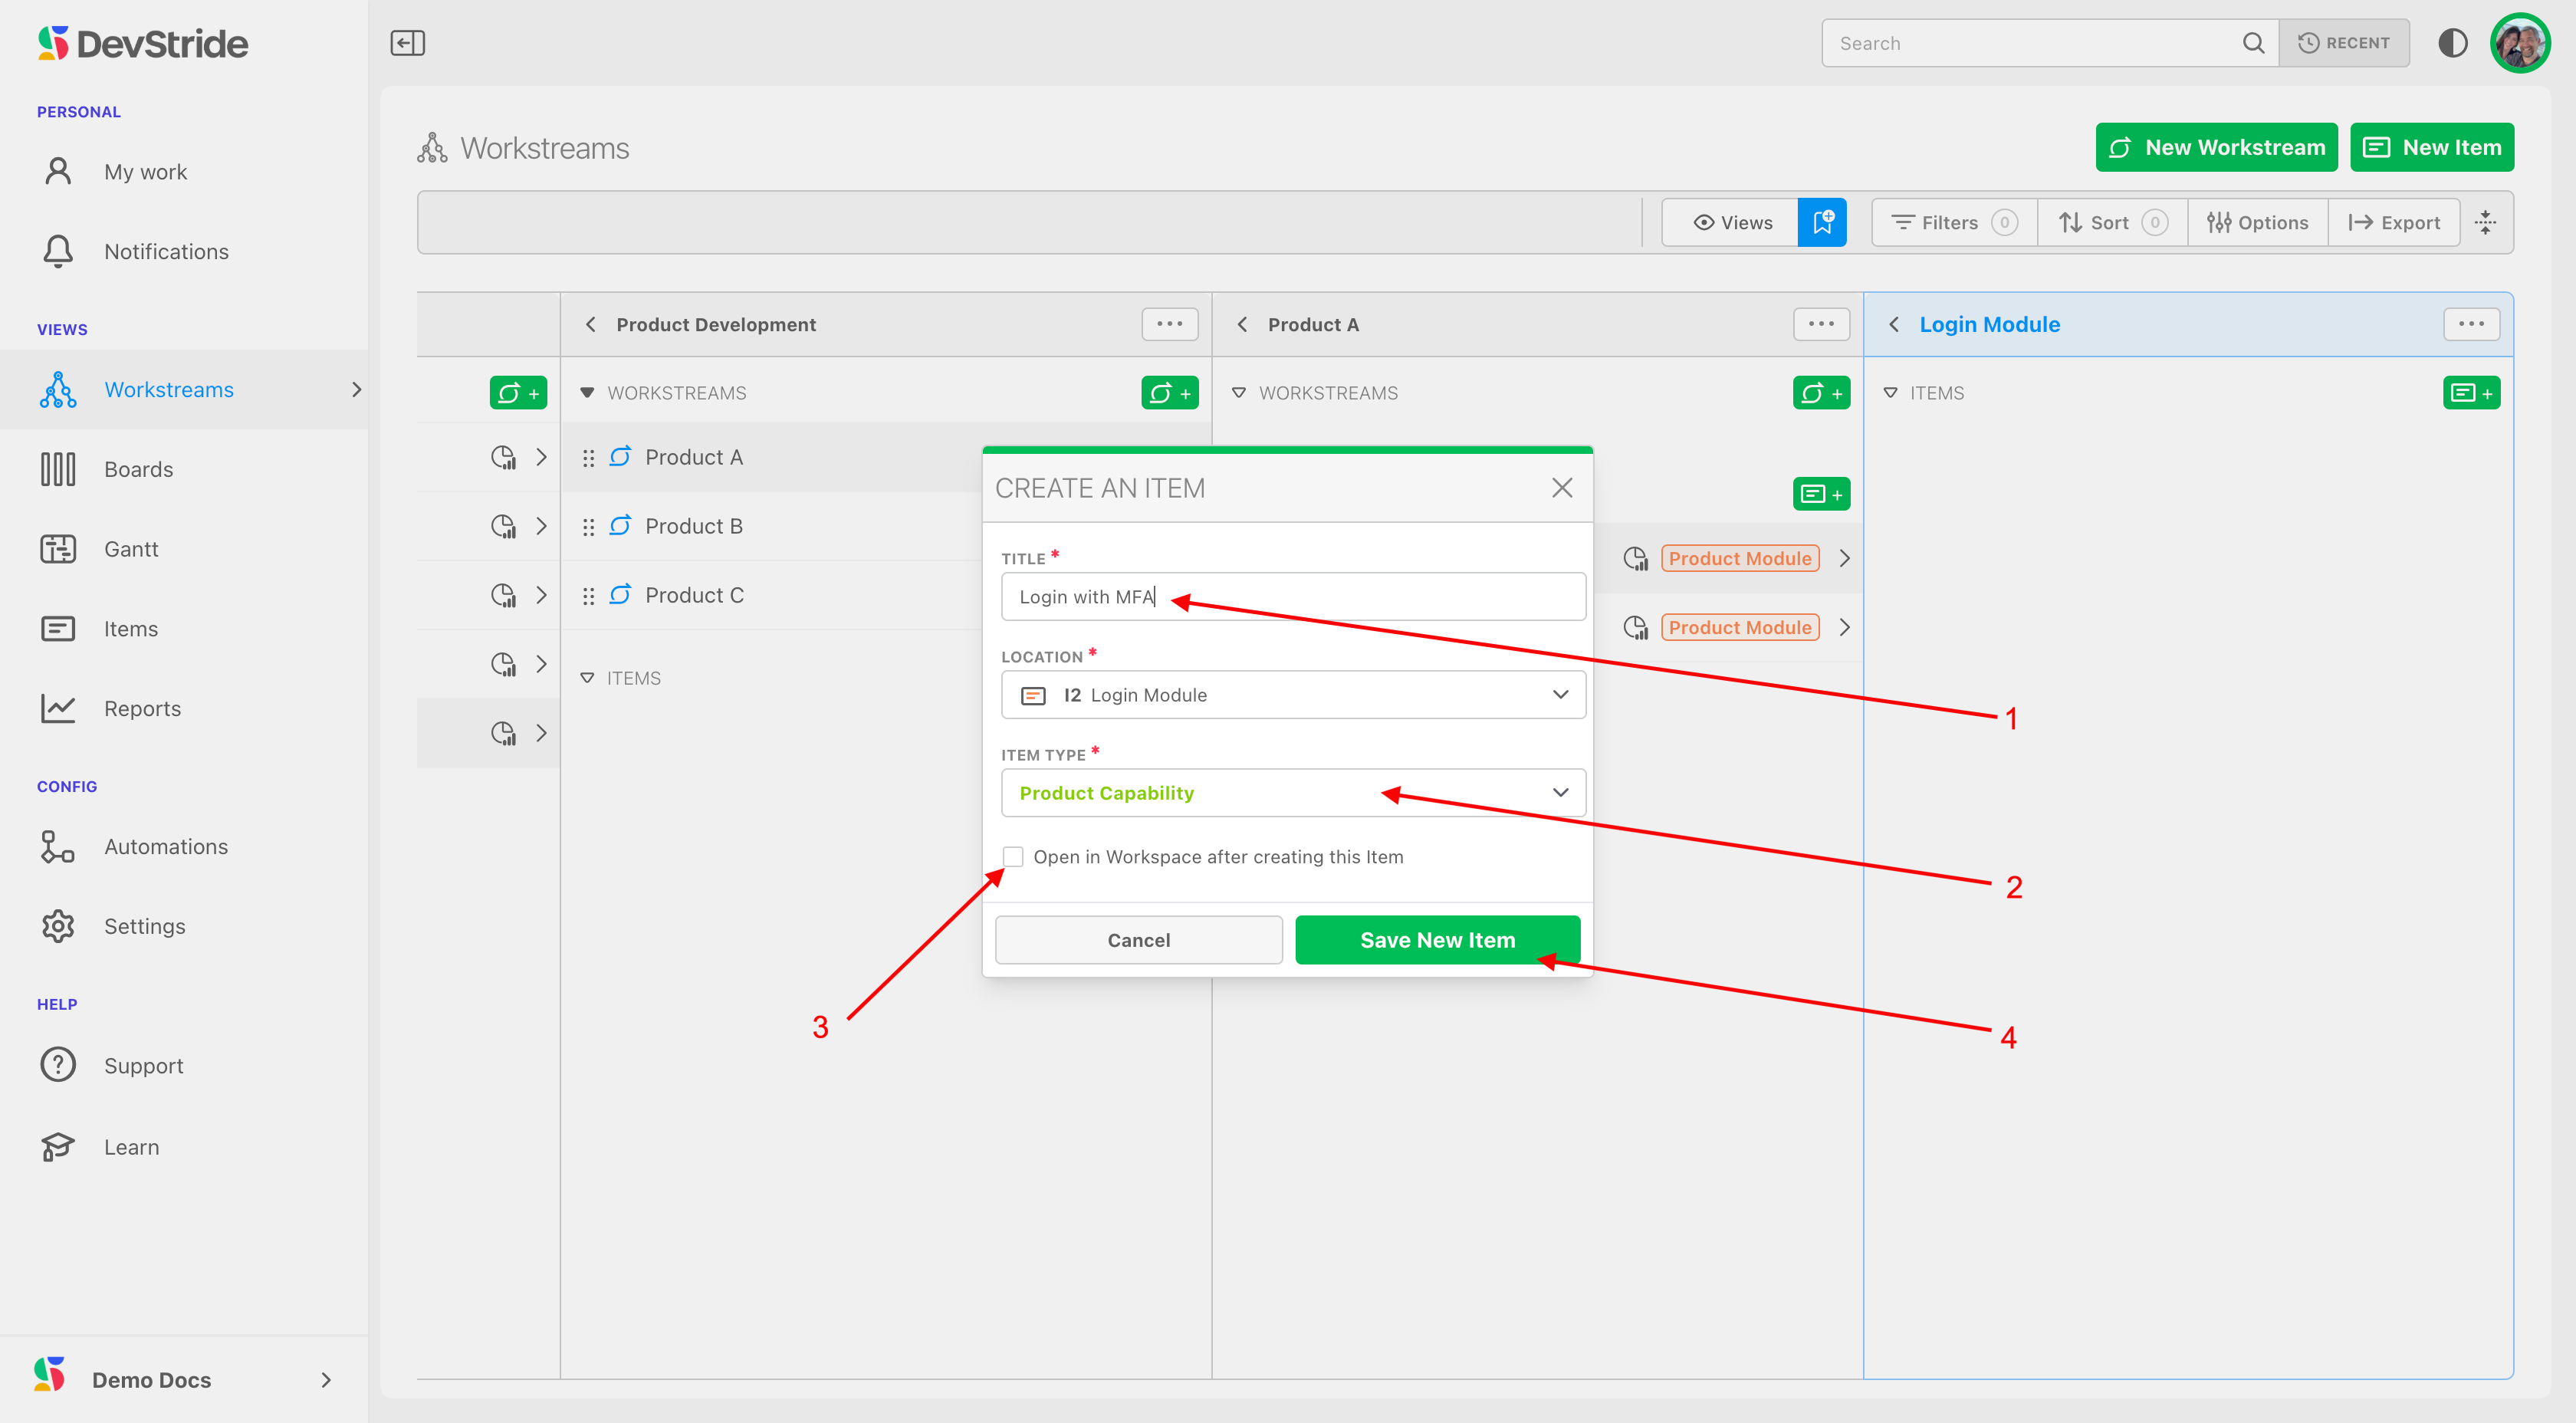
We will name the capability we want to track. In our example, we call it Login with MFA (1). Because we have added an item inside a module, the next item type down, Product Capability, is auto-populated (2).
If you would like to further describe this item using its workspace, you can open this item's workspace by clicking on the available box (3). The workspace for this new item will open once you click Save New Item. You can also open the item any time to add information to its workspace.
Click Save New Item (4).
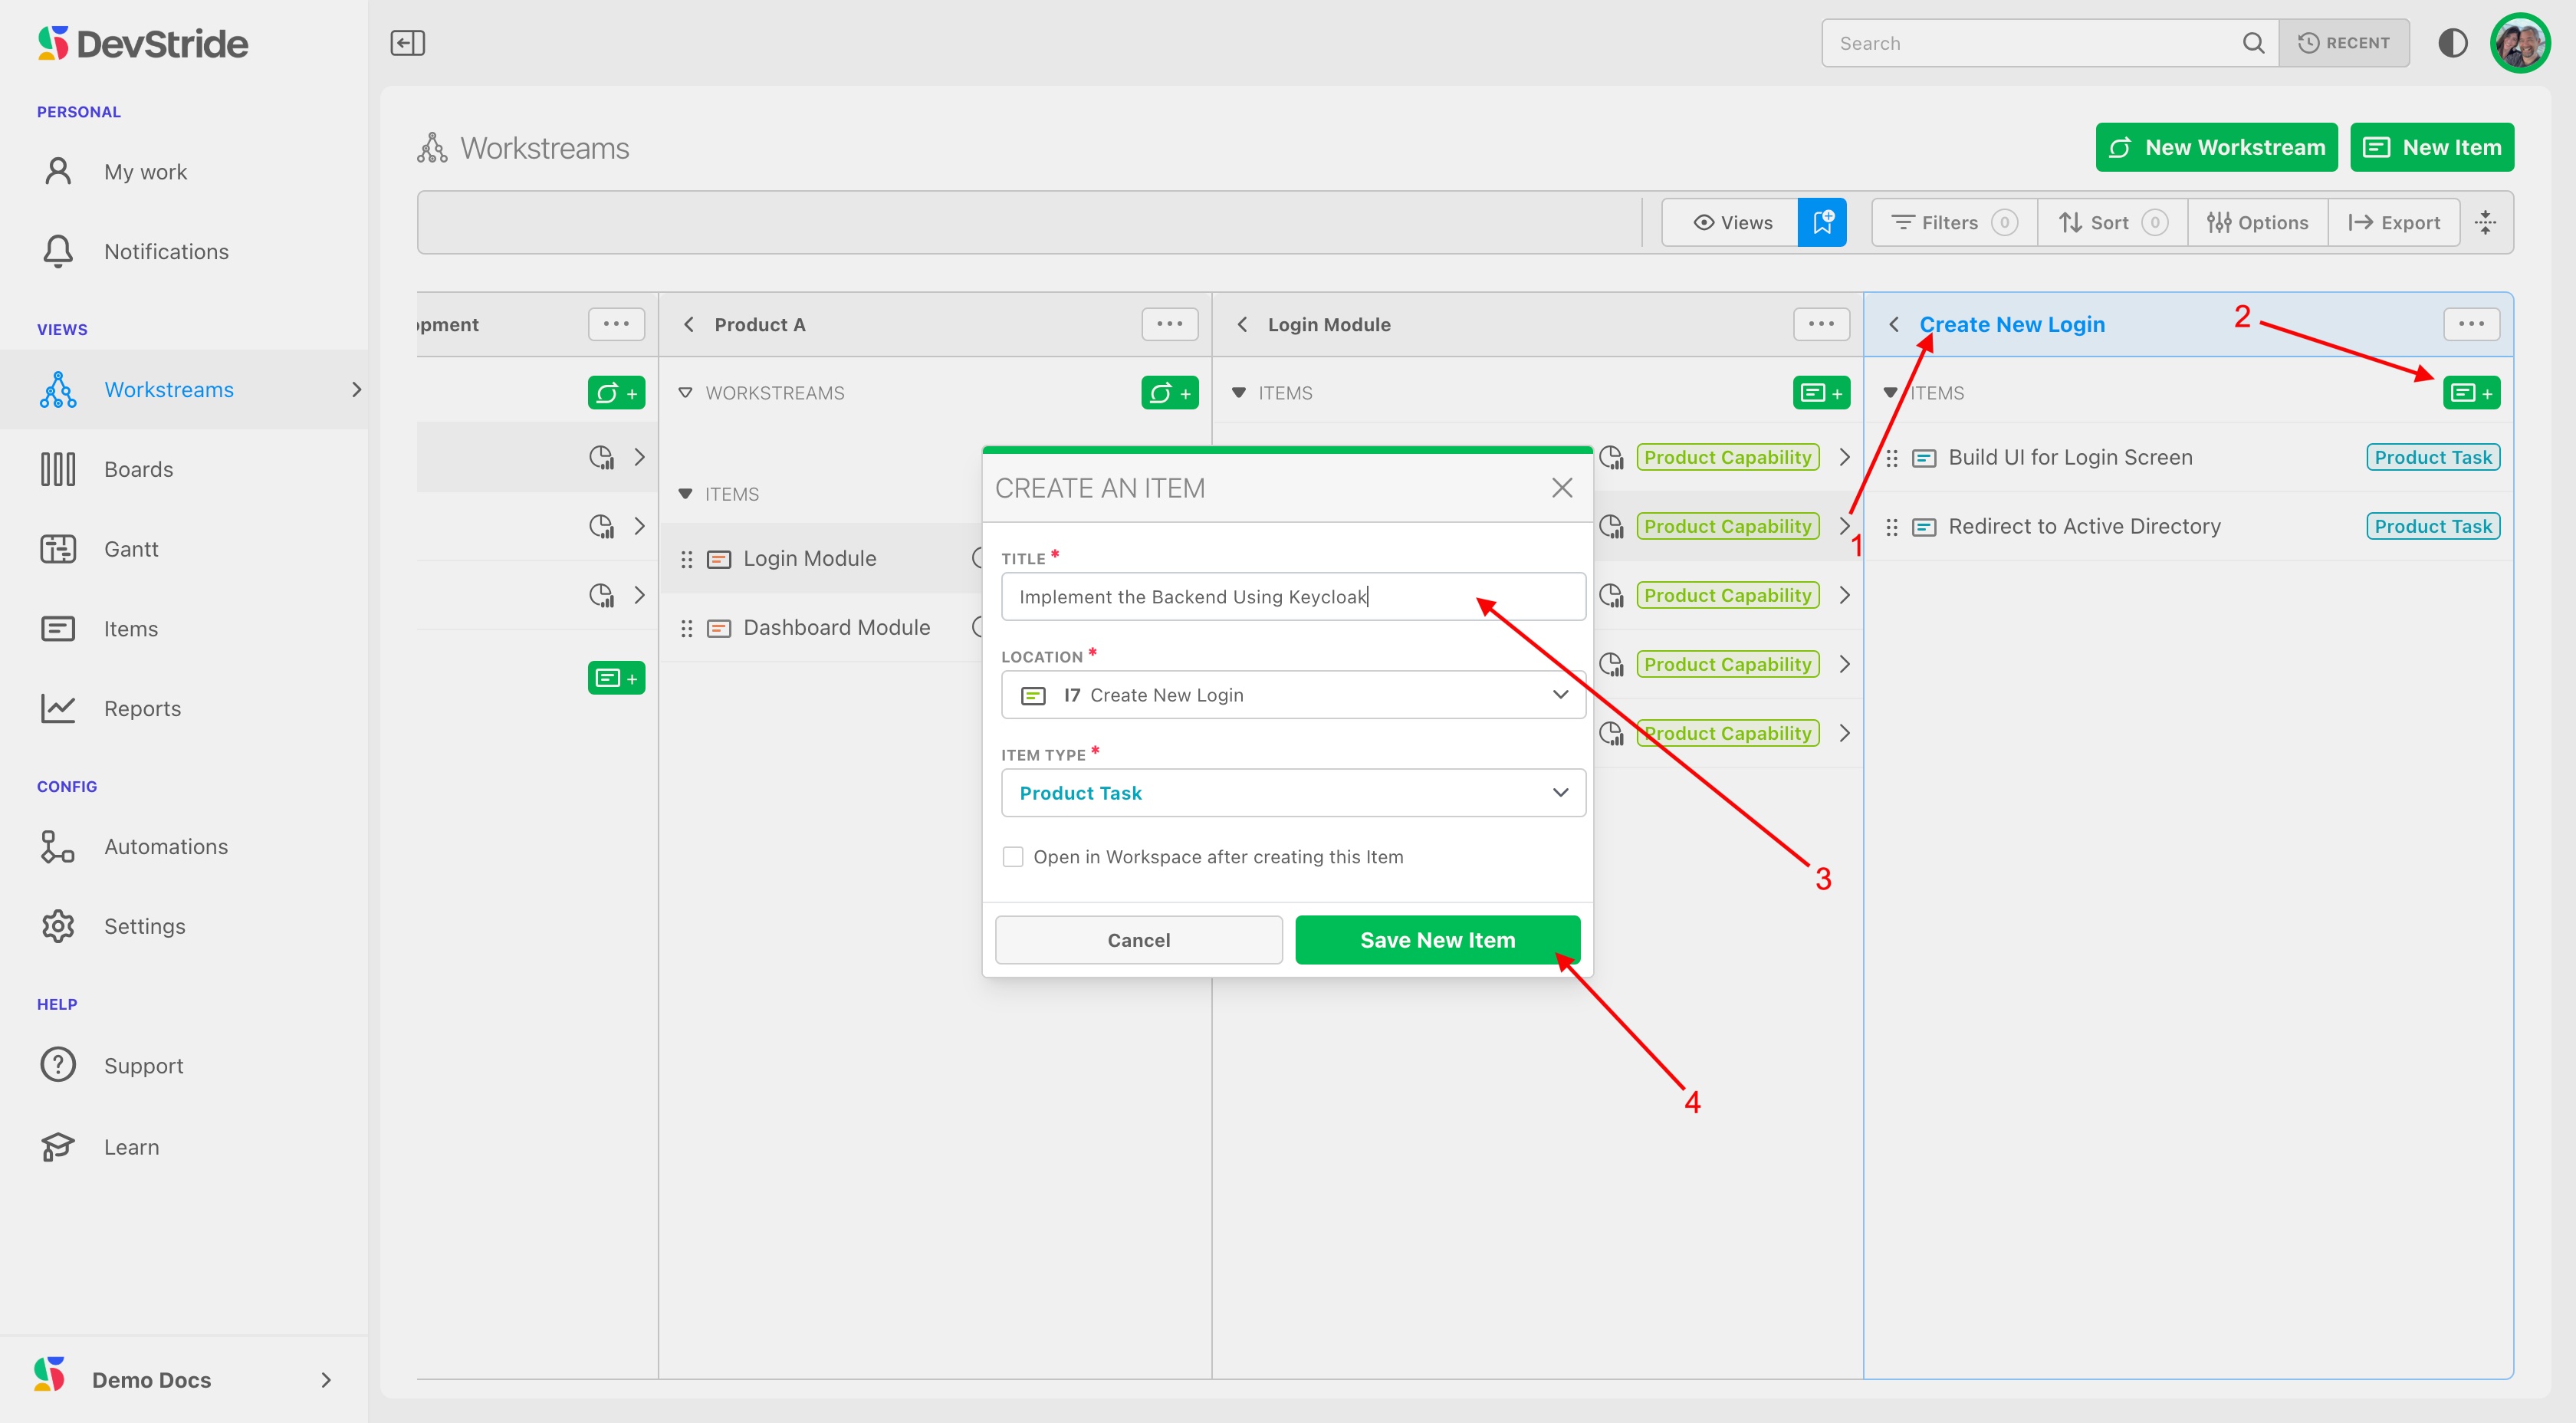
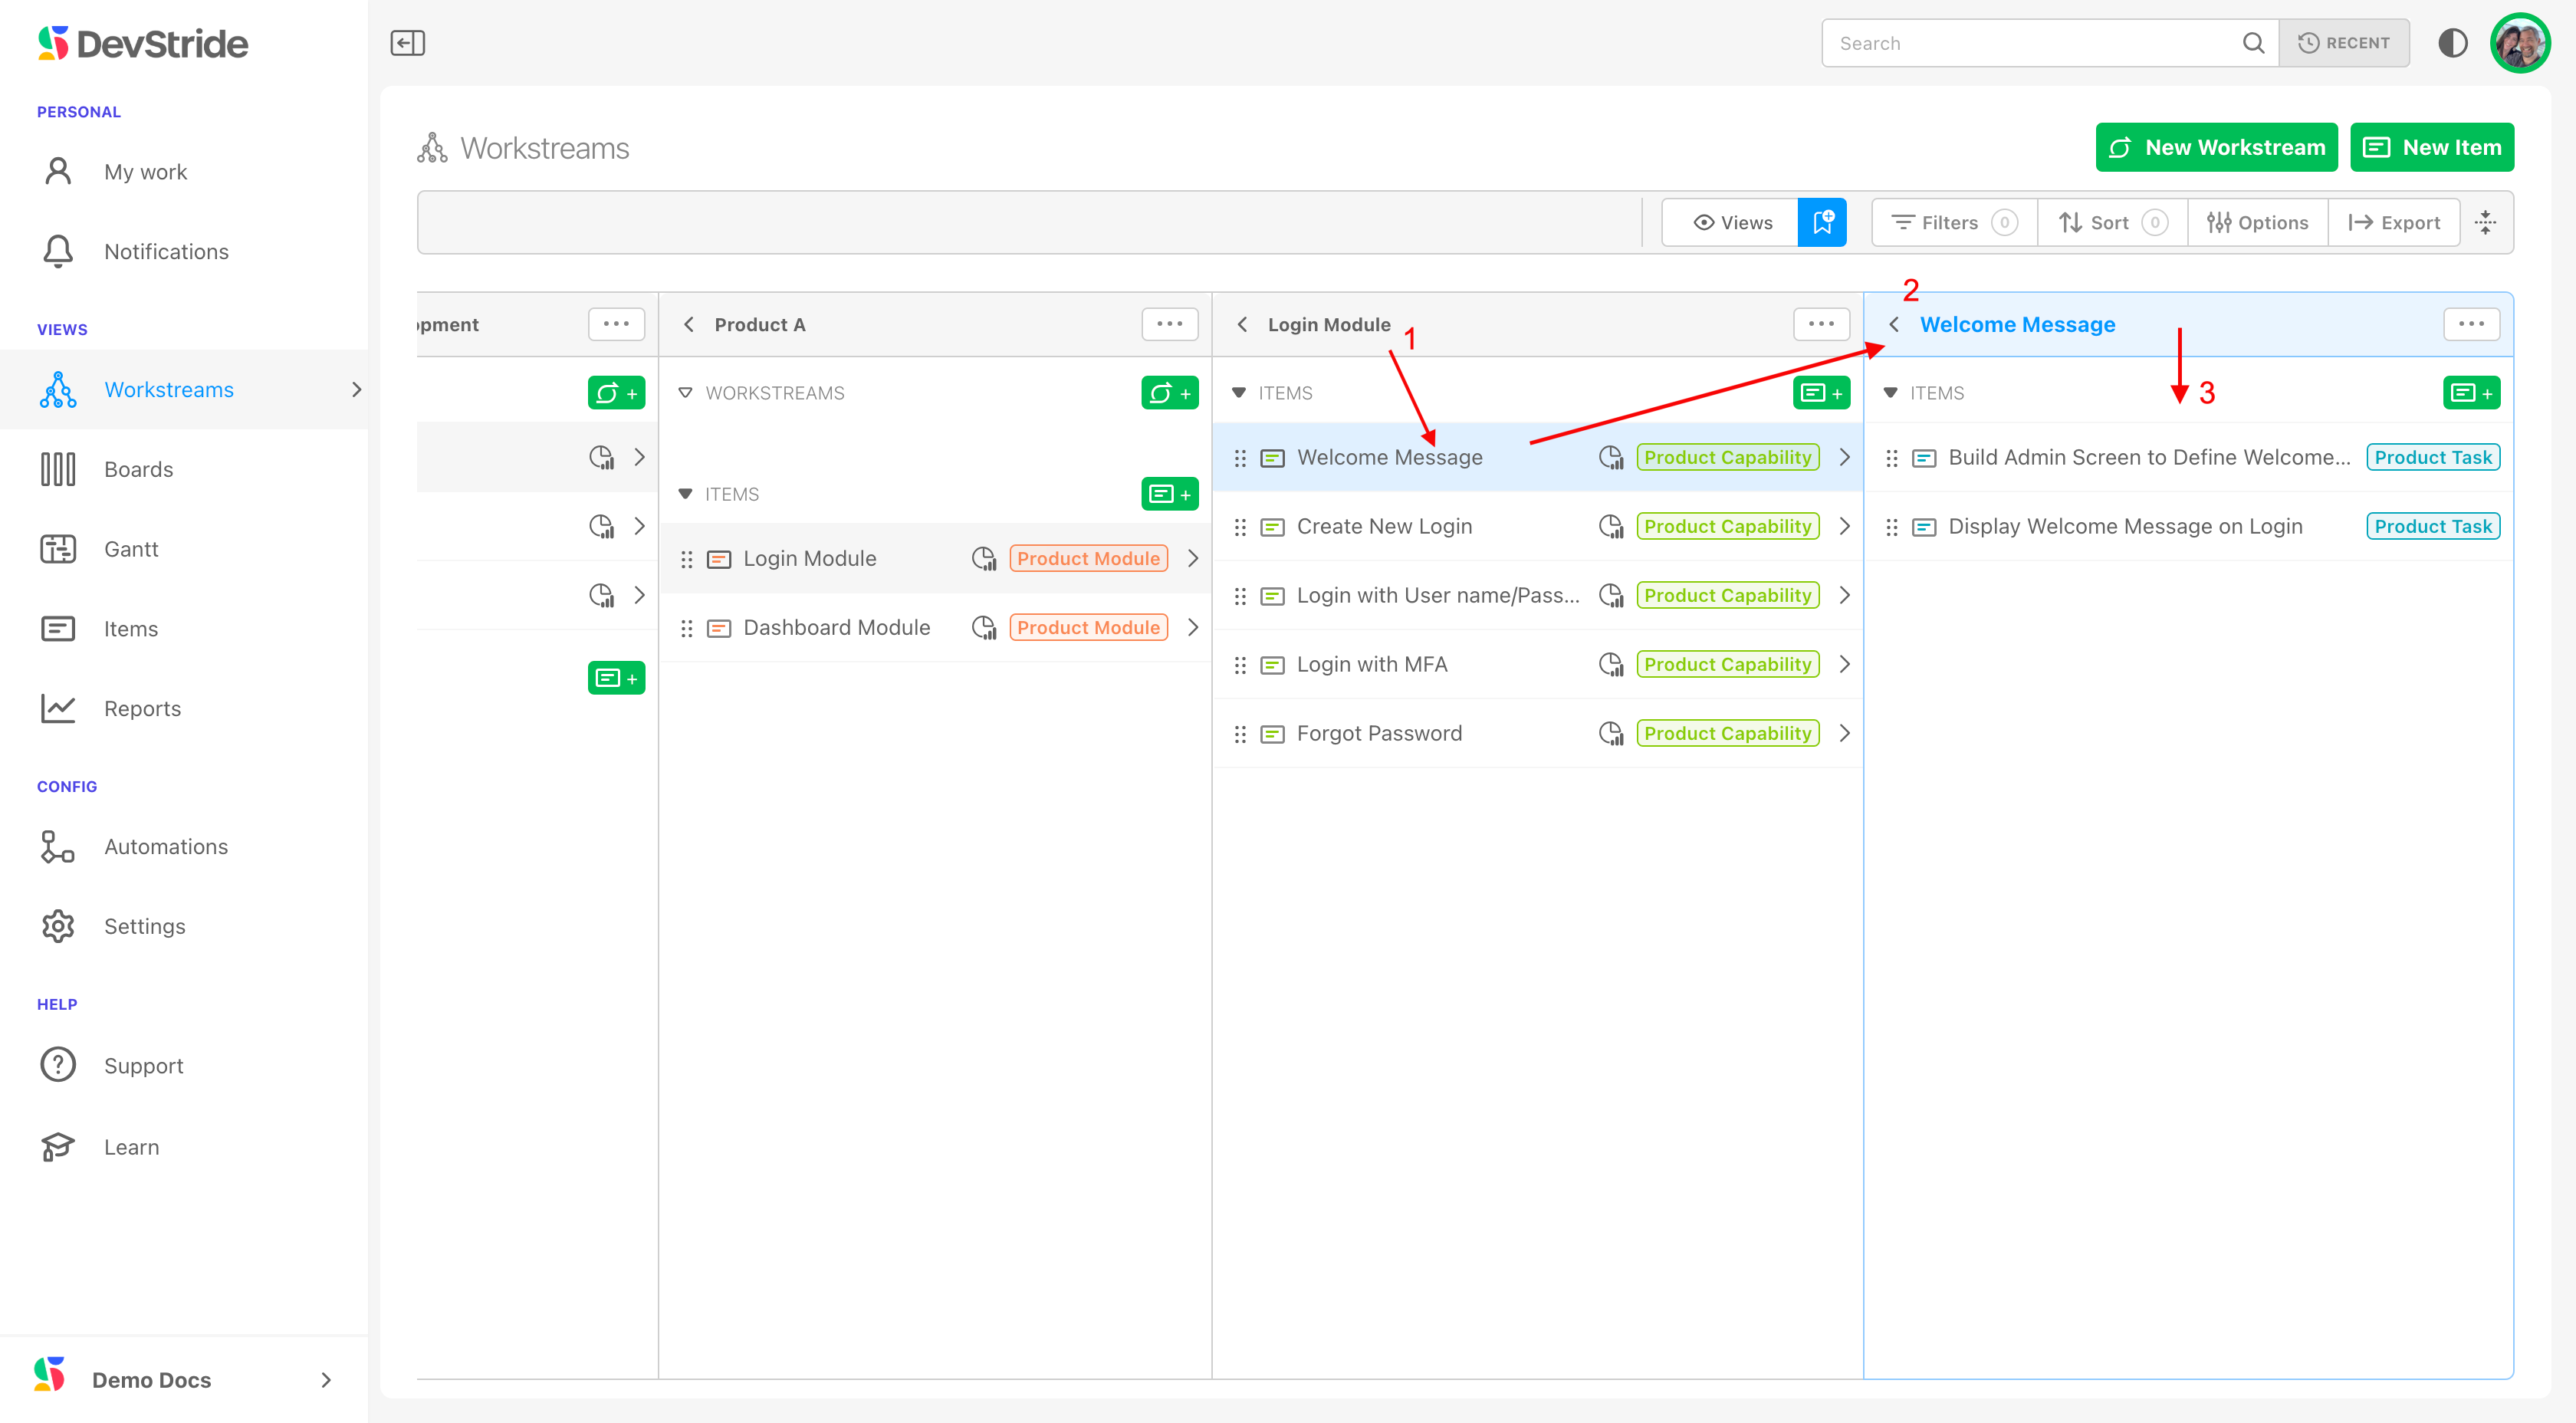
In our example, since Capabilities are right above tasks in our hierarchy, we are ready to add our individual tasks. To add tasks, go to any Capability (1) and click on Add Item (2) to add Tasks (3-4) to the Capability. Like this:
What this Gives You
Now that we have set up a series of items, you can see how the hierarchy works for you. Look at the flow of information in your Workstream map here:
The advantage of a Workstream map is that you can see all the work that goes into Product A, for example. All of the things—or work—in Product A rolls up into it. You will be able to see estimates for all the work, the level of effort required, completion progress, defects, etc. for Product A.
A Map You can Update with a Simple Drag and Drop
It is perfectly natural that your Workstreams and the work inside them will change as initiatives evolve.
DevStride easily accommodates these changes.
Example:
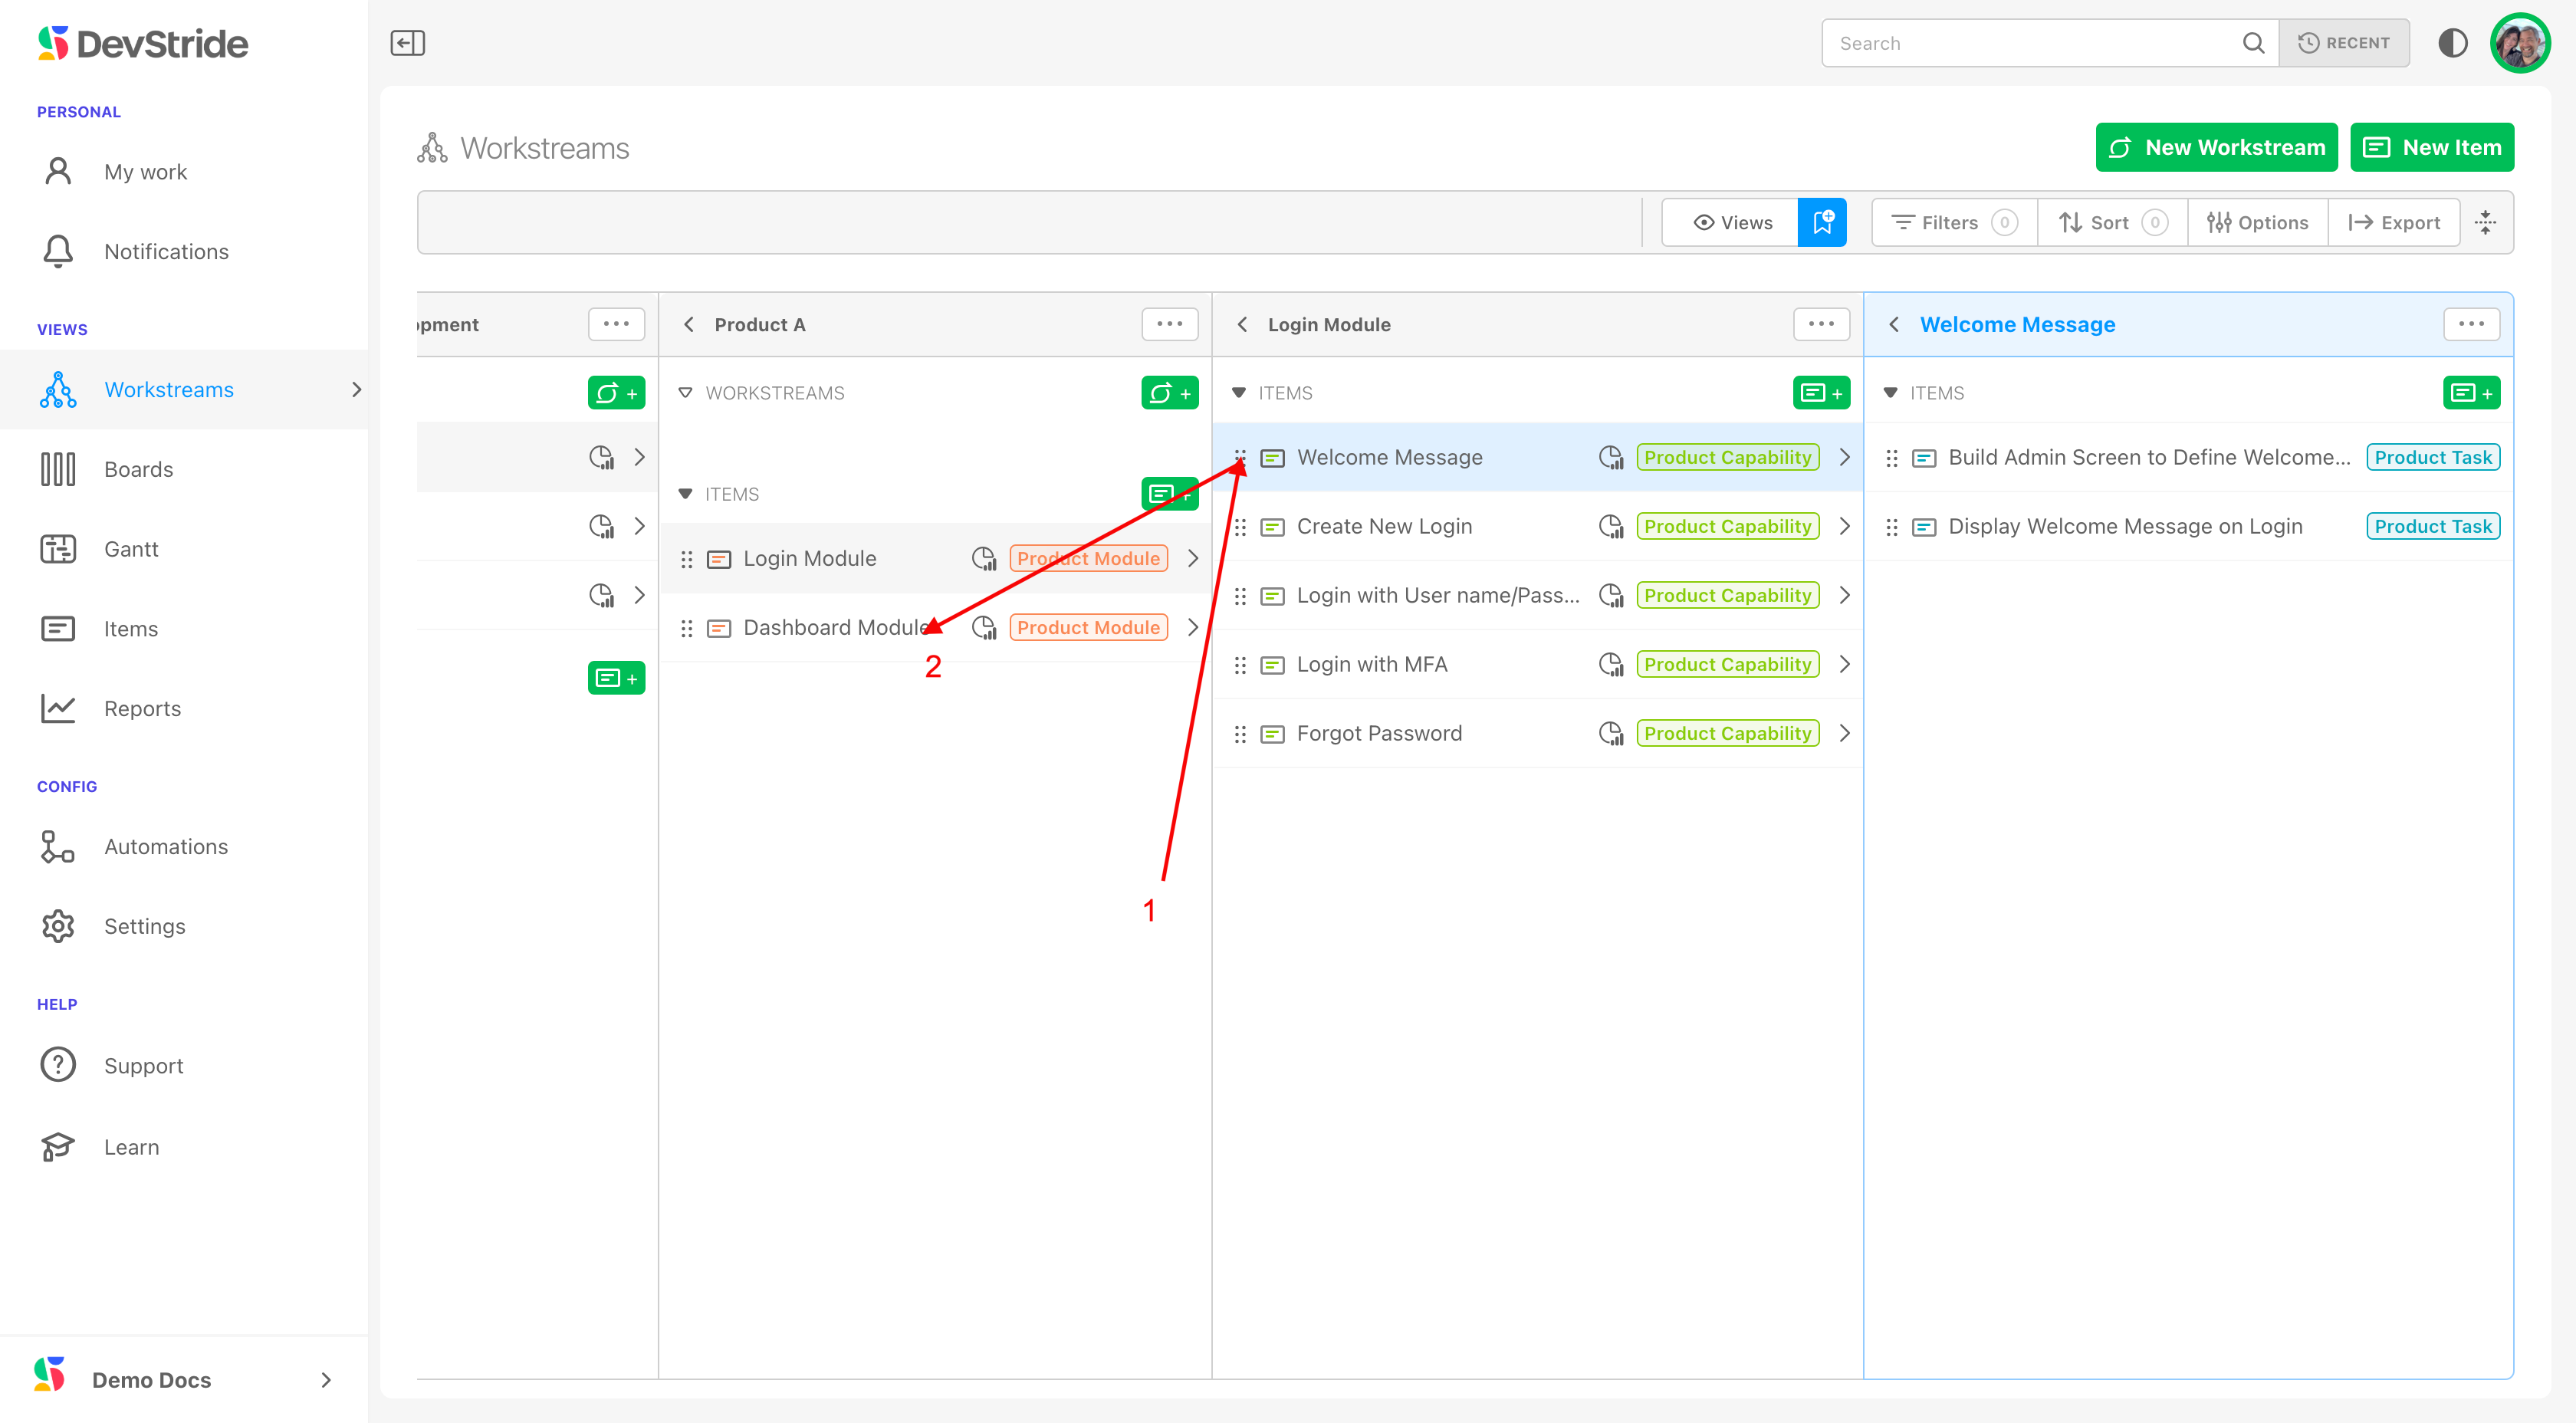
In the example below, we have Tasks (3) under the Welcome Message Capability (2) that is currently housed under the Login module.
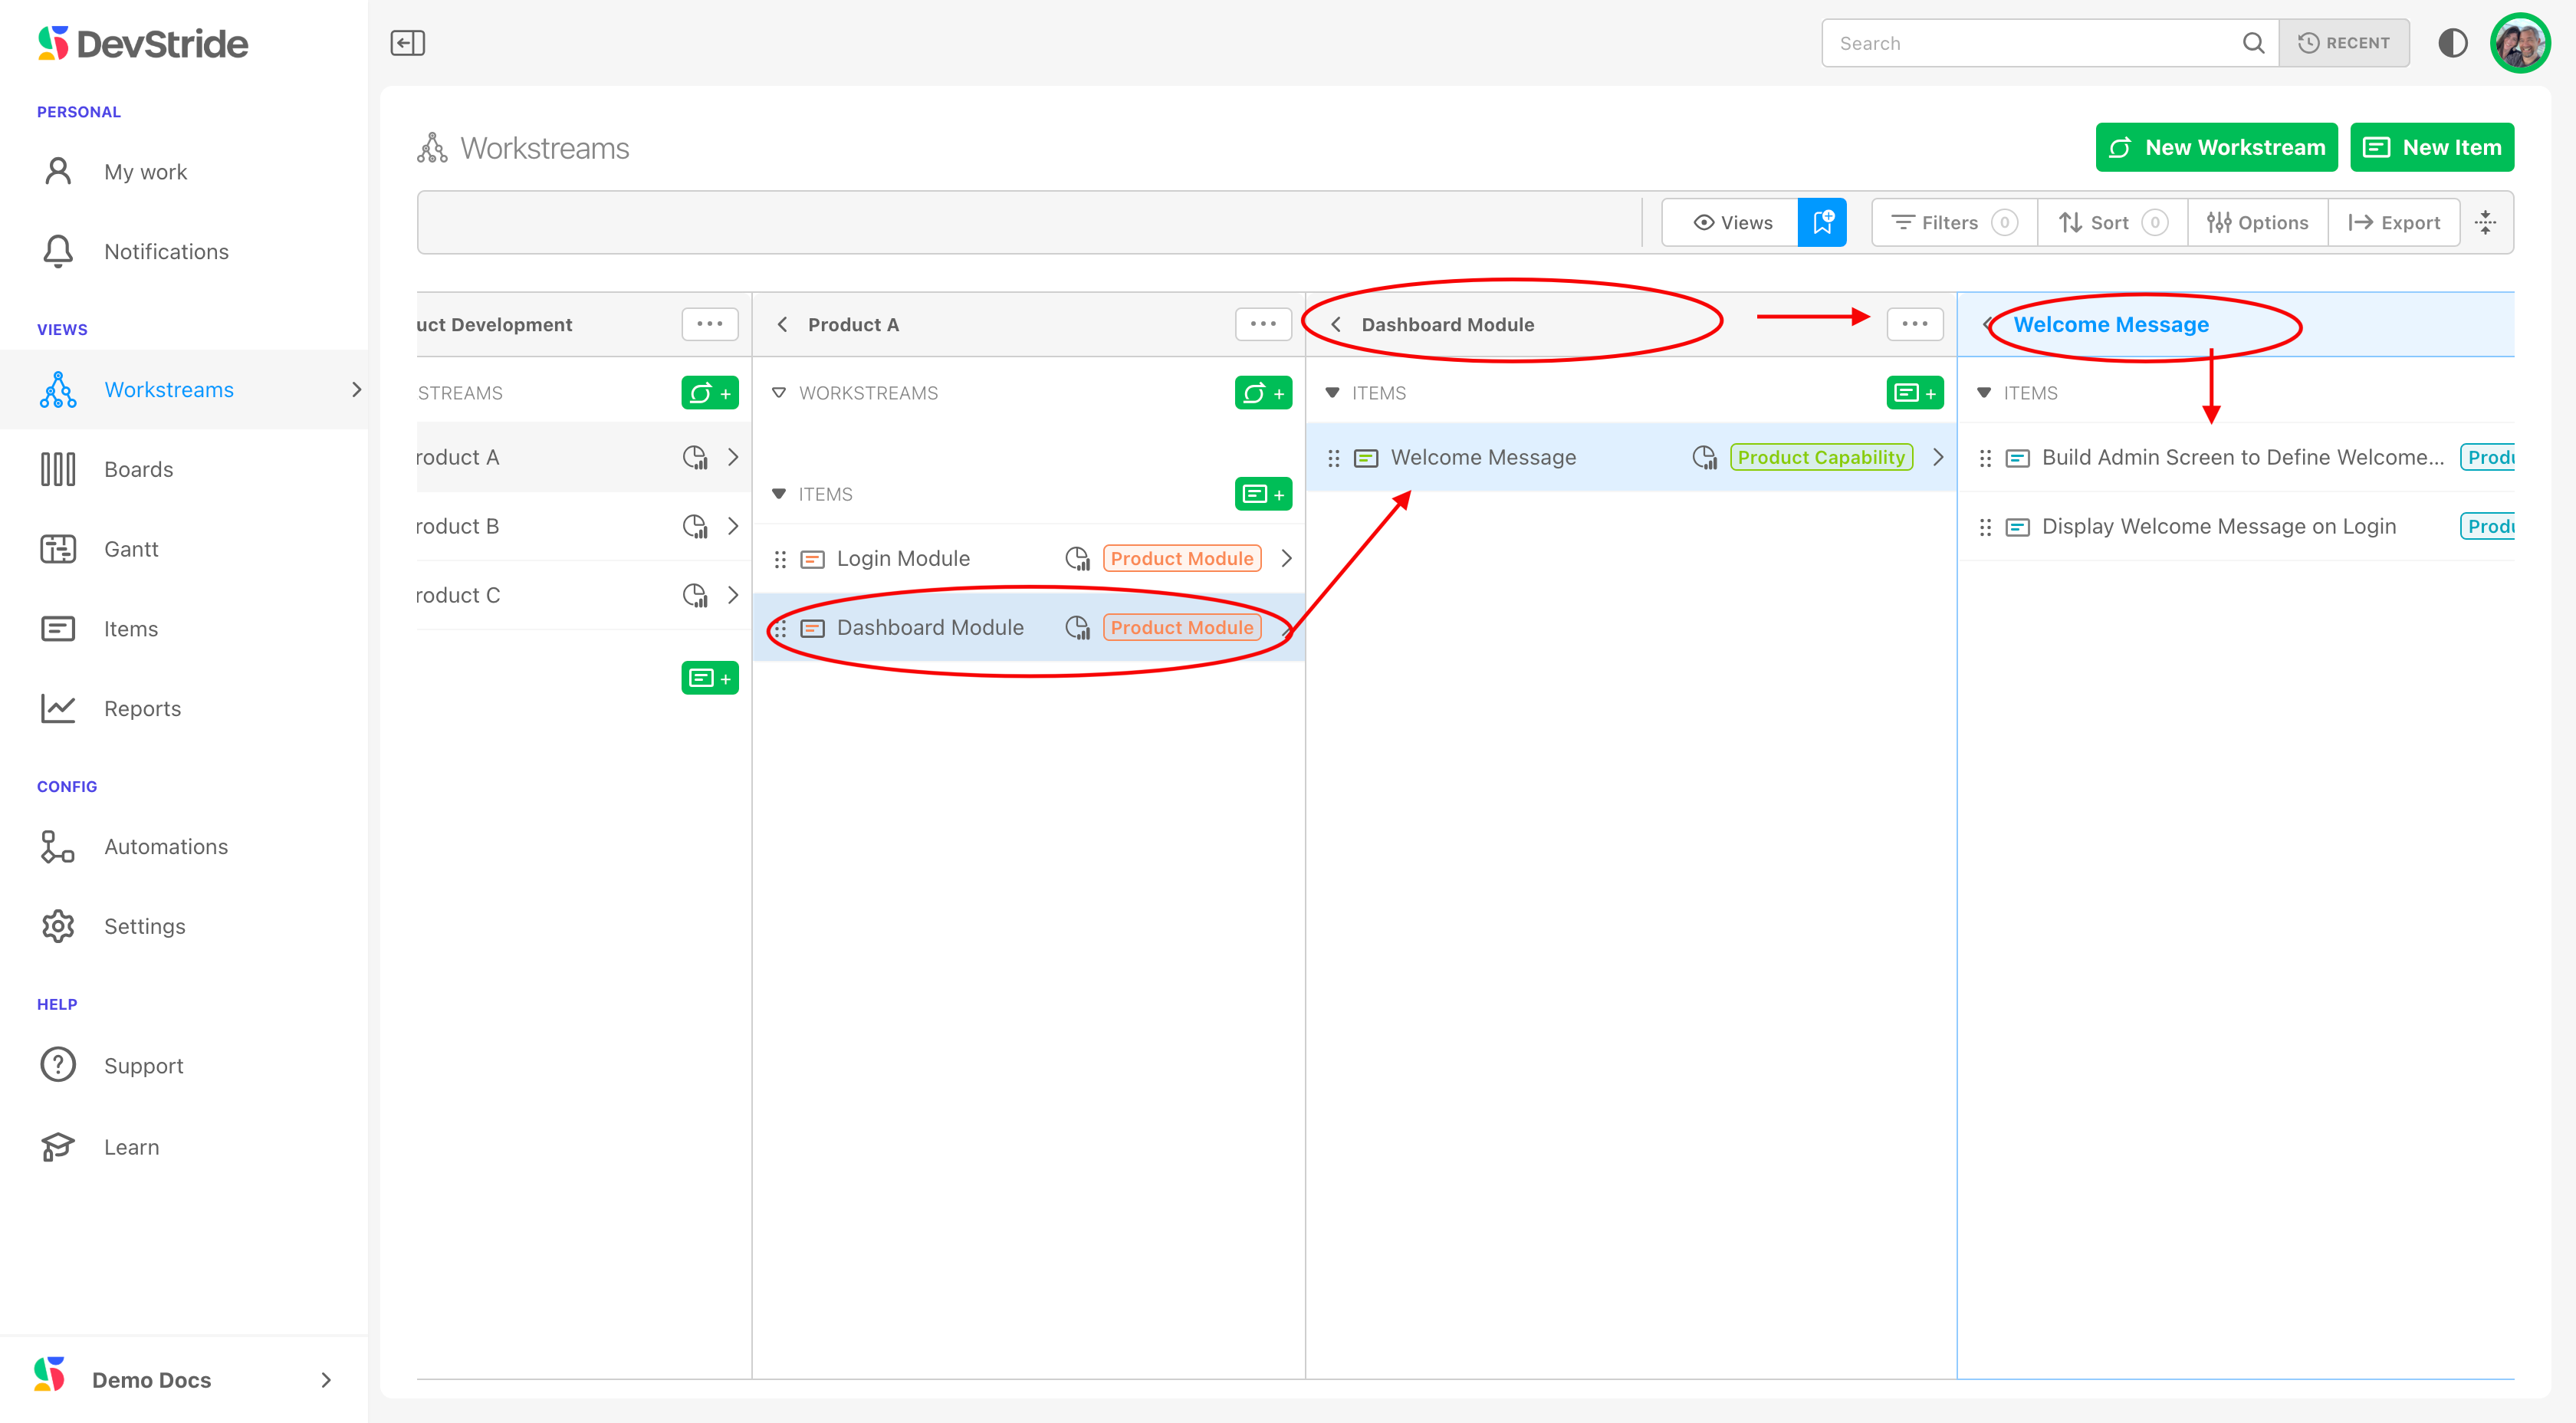
If we decide that we really want to manage the Welcome Message Capability under the Dashboard Module instead, we can simply drag the Welcome Message Capability under Dashboard. This automatically reorganizes our Workstream.
All the Tasks associated with the Capability will move with it, including all the data, reporting, and everything else associated with that Capability.
Click on the dotted grab bar (1) and drag it to the location you want it (2).
Like this:
This reorganizes the Workstream. In our example, the Capability (Welcome Message) and its Tasks have been moved from the Login module to the Dashboard module.
Important note on reorganizing your workstreams
When you want to reorganize something in your workstream, DevStride protects your item hierarchy. That means you can't try to nest an item that is higher in your hierarchy under a lower hierarchy item type. Here, you couldn't drag a Module under Task, for example.
:::
How Big Work Gets Done
DevStride decomposes work from the top-level portfolio down to individual tasks. The data model it uses enables visibility and predictability throughout the entire Workstream Map.
At the most granular level, work units are ultimately assigned to team members.
Next up: The Item Workspace Tour
Was this article helpful?