Admin Onboarding - Setting up Users and Teams
- 07 Apr 2025
- 5 Minutes to read
- Contributors

- Print
- DarkLight
Admin Onboarding - Setting up Users and Teams
- Updated on 07 Apr 2025
- 5 Minutes to read
- Contributors
- Print
- DarkLight
Article summary
Did you find this summary helpful?
Thank you for your feedback!
Next, you'll invite users and set up teams.
You can invite users to DevStride any time. They can be internal users or external, depending on your business rules. Users can then be grouped into teams, even before they accept your invitation.
Why it's important
DevStride is all about managing teams and collaboration to get great work done. Anyone who is doing work that you want to have visibility into should be added to a team in DevStride.
Step 1: Invite Users
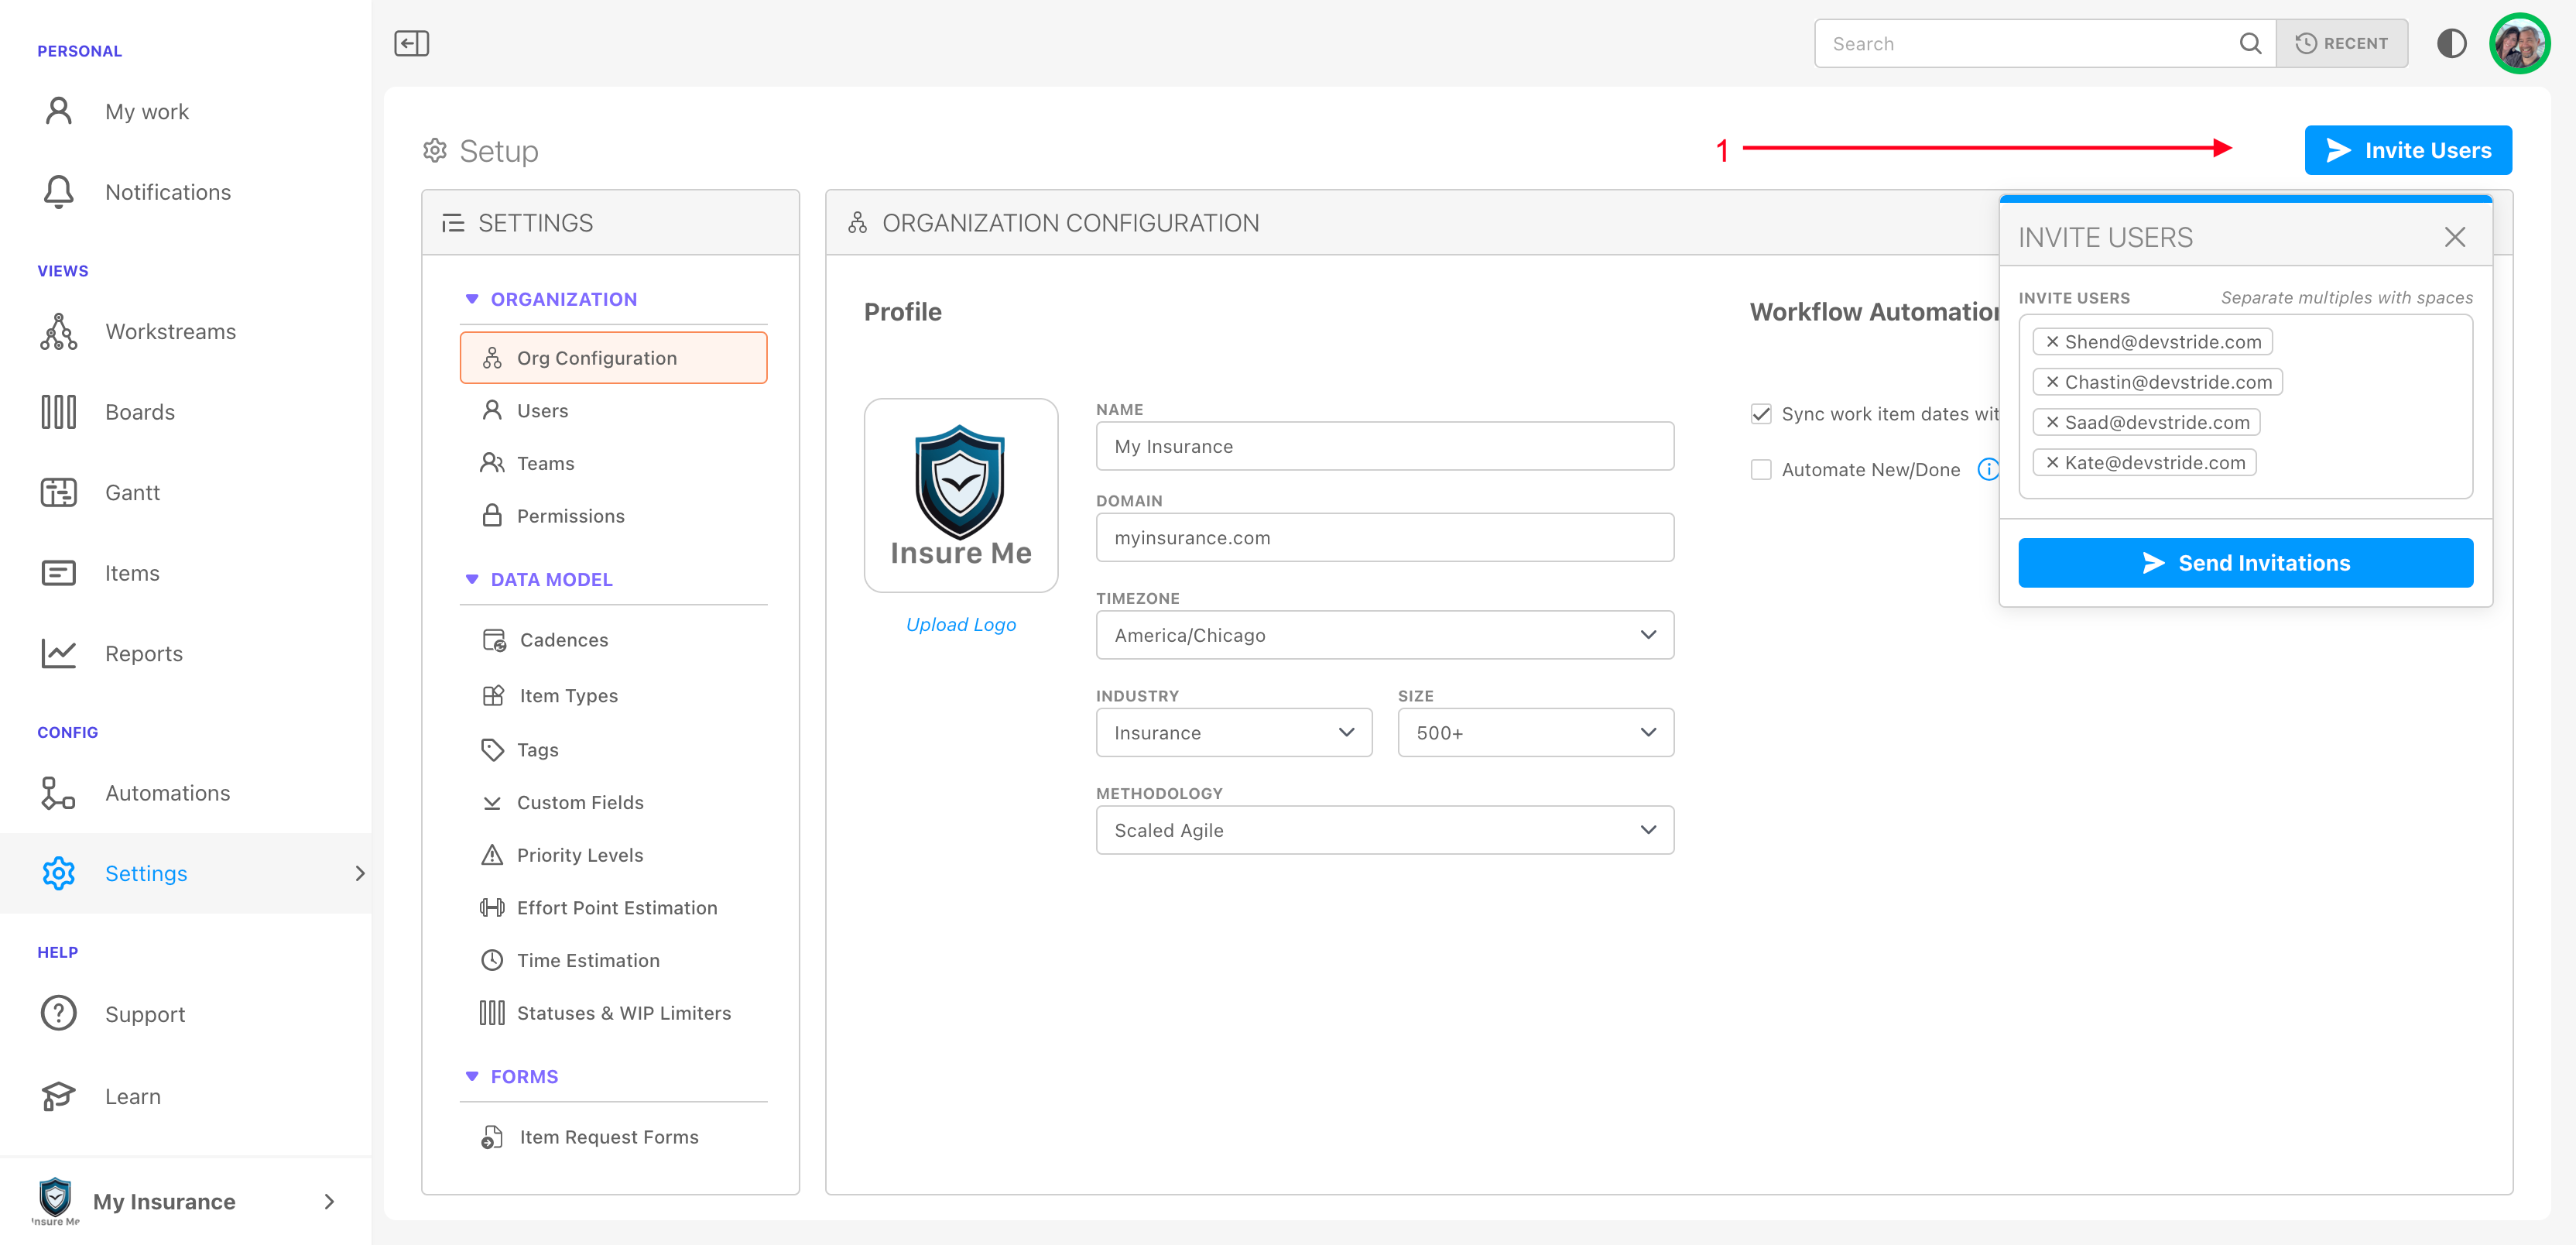
Click on Invite Users.(1) In the pop up box, separate multiple users with a space in between each email address.
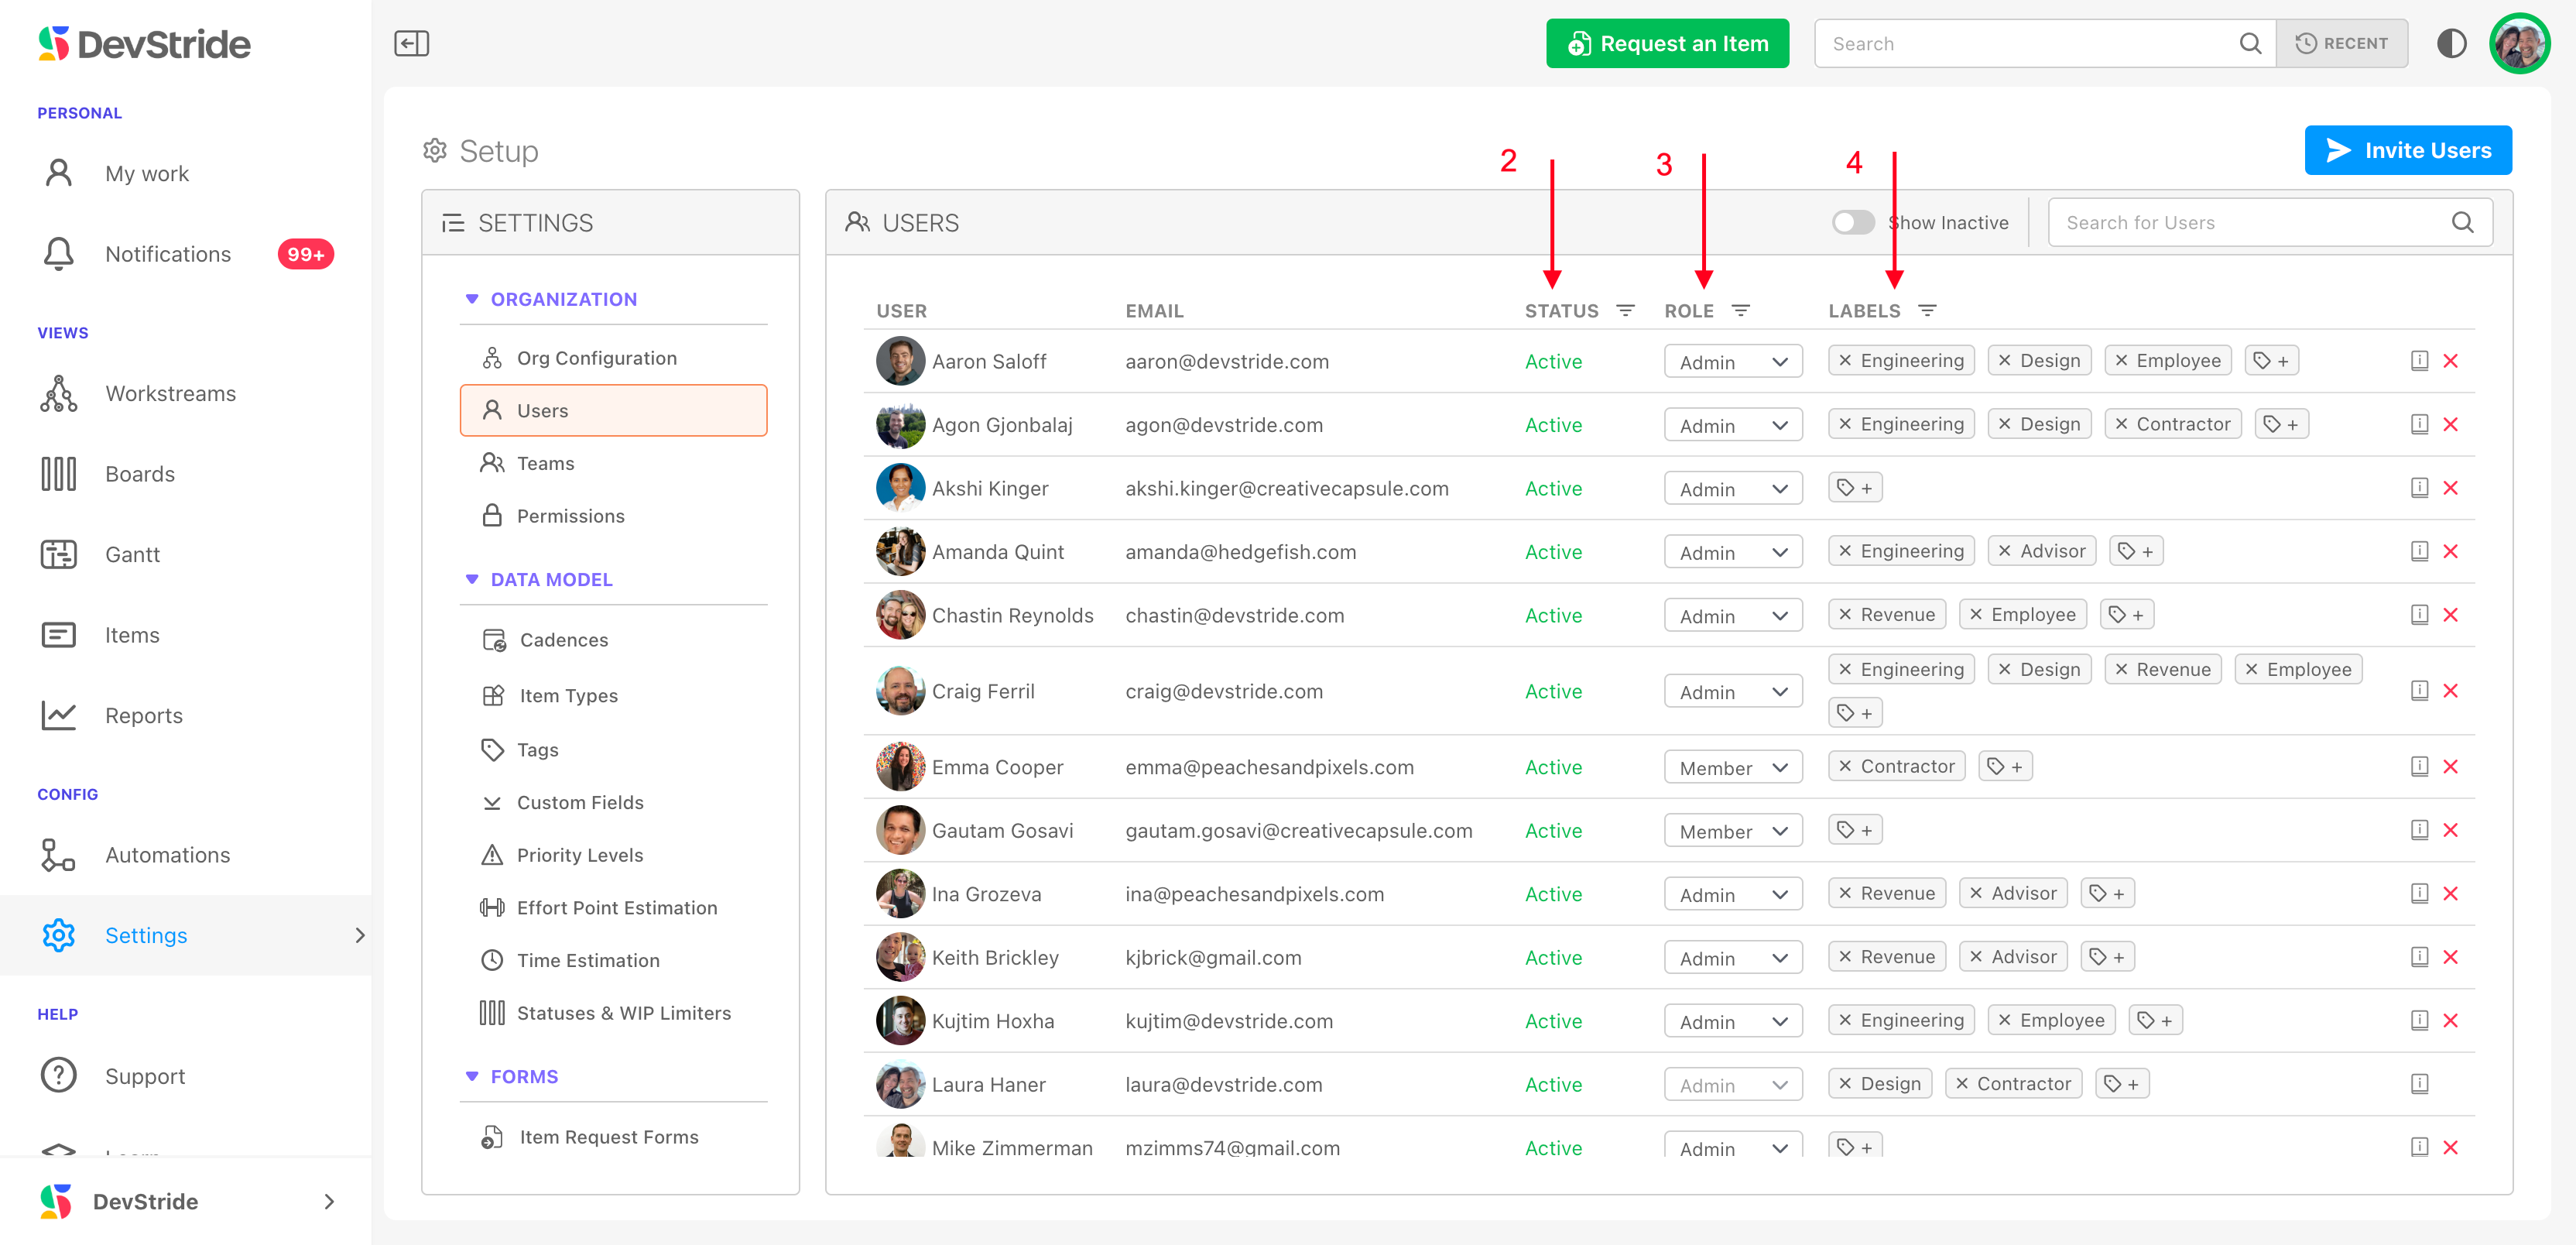
In the Users pane:
(2) Status - will let you know if the user is active in the system.
(3) Role - displays access level.
During initial set up, you will typically be identifying the people who will be setting up teams and doing administrative activities. That means you may designate several people with the admin role and its rights. The admin role does not have to be limited to a single individual.
While the default role is member, you can simply change the role to admin for each user who requires it. This will give your invited admin users the access they need from the start.
You can change rights for each user as needed.
(4) Labels - you can set up labels to further identify aspects of your team on this screen, such as whether they are contractors, customers, vendors, or part of a special skill group, etc.
Labels are most useful to large organizations who might want to filter the list that is displayed here. These labels are not used elsewhere in DevStride.
Notes
If you prefer, you can set up teams first, and then invite users. The order is up to you!
For more details, learn how to invite and add users.
Now it's time to set up your teams and associate each user with their team(s).
Step 2: Set Up Teams
What this is
Teams are simply working groups. They do not need to follow your organizational chart. They can be any group of people getting work done that achieves a common goal.
Why it's important
The goal in DevStride is that if there is a common set of work that a group needs to achieve, that work should be associated with a team.
What if there are multiple teams, and an individual is a member of more than one team? That's ok too! This type of arrangement often happens in a matrixed organization. Teams in DevStride are not meant to reflect a reporting structure.
You will want to create a team for each working group you want to be managed in DevStride. It is fine to assign the same user to multiple teams.
As the onboarding admin, you might not necessarily be the one managing the work of the teams created here. At this stage, we are simply setting up the system. Other individuals, including product leaders, project leaders, and self-directed teams can manage the work.
Teams can roll up from one level of the organization to another. There is no restriction here.
Example:
If you have engineers who work on multiple products, they may be part of 2 or 3 product teams in DevStride.
Those teams might roll up into a larger engineering program team, which then also roll up to a division made of up these program teams.
What this Gives You
The concept of teams in DevStride allows visibility into all the people in their appropriate working groups, across the entire organization.
There is no restriction in DevStride on the number of teams.
Again, the goal is that each group working on something in common has their own team. Anyone who works in DevStride should belong to at least one team.
Note:
We always launch DevStride with a default team, which uses the Organization name you set up. You can also delete the default team if you wish.You can use this default team name as one of your teams, or create as many teams as you need.
How to Do It
To Create a new team, click on New Team (3).
In the pop-up box, name the team. You can add users from this box, or can wait and add users to the team later.
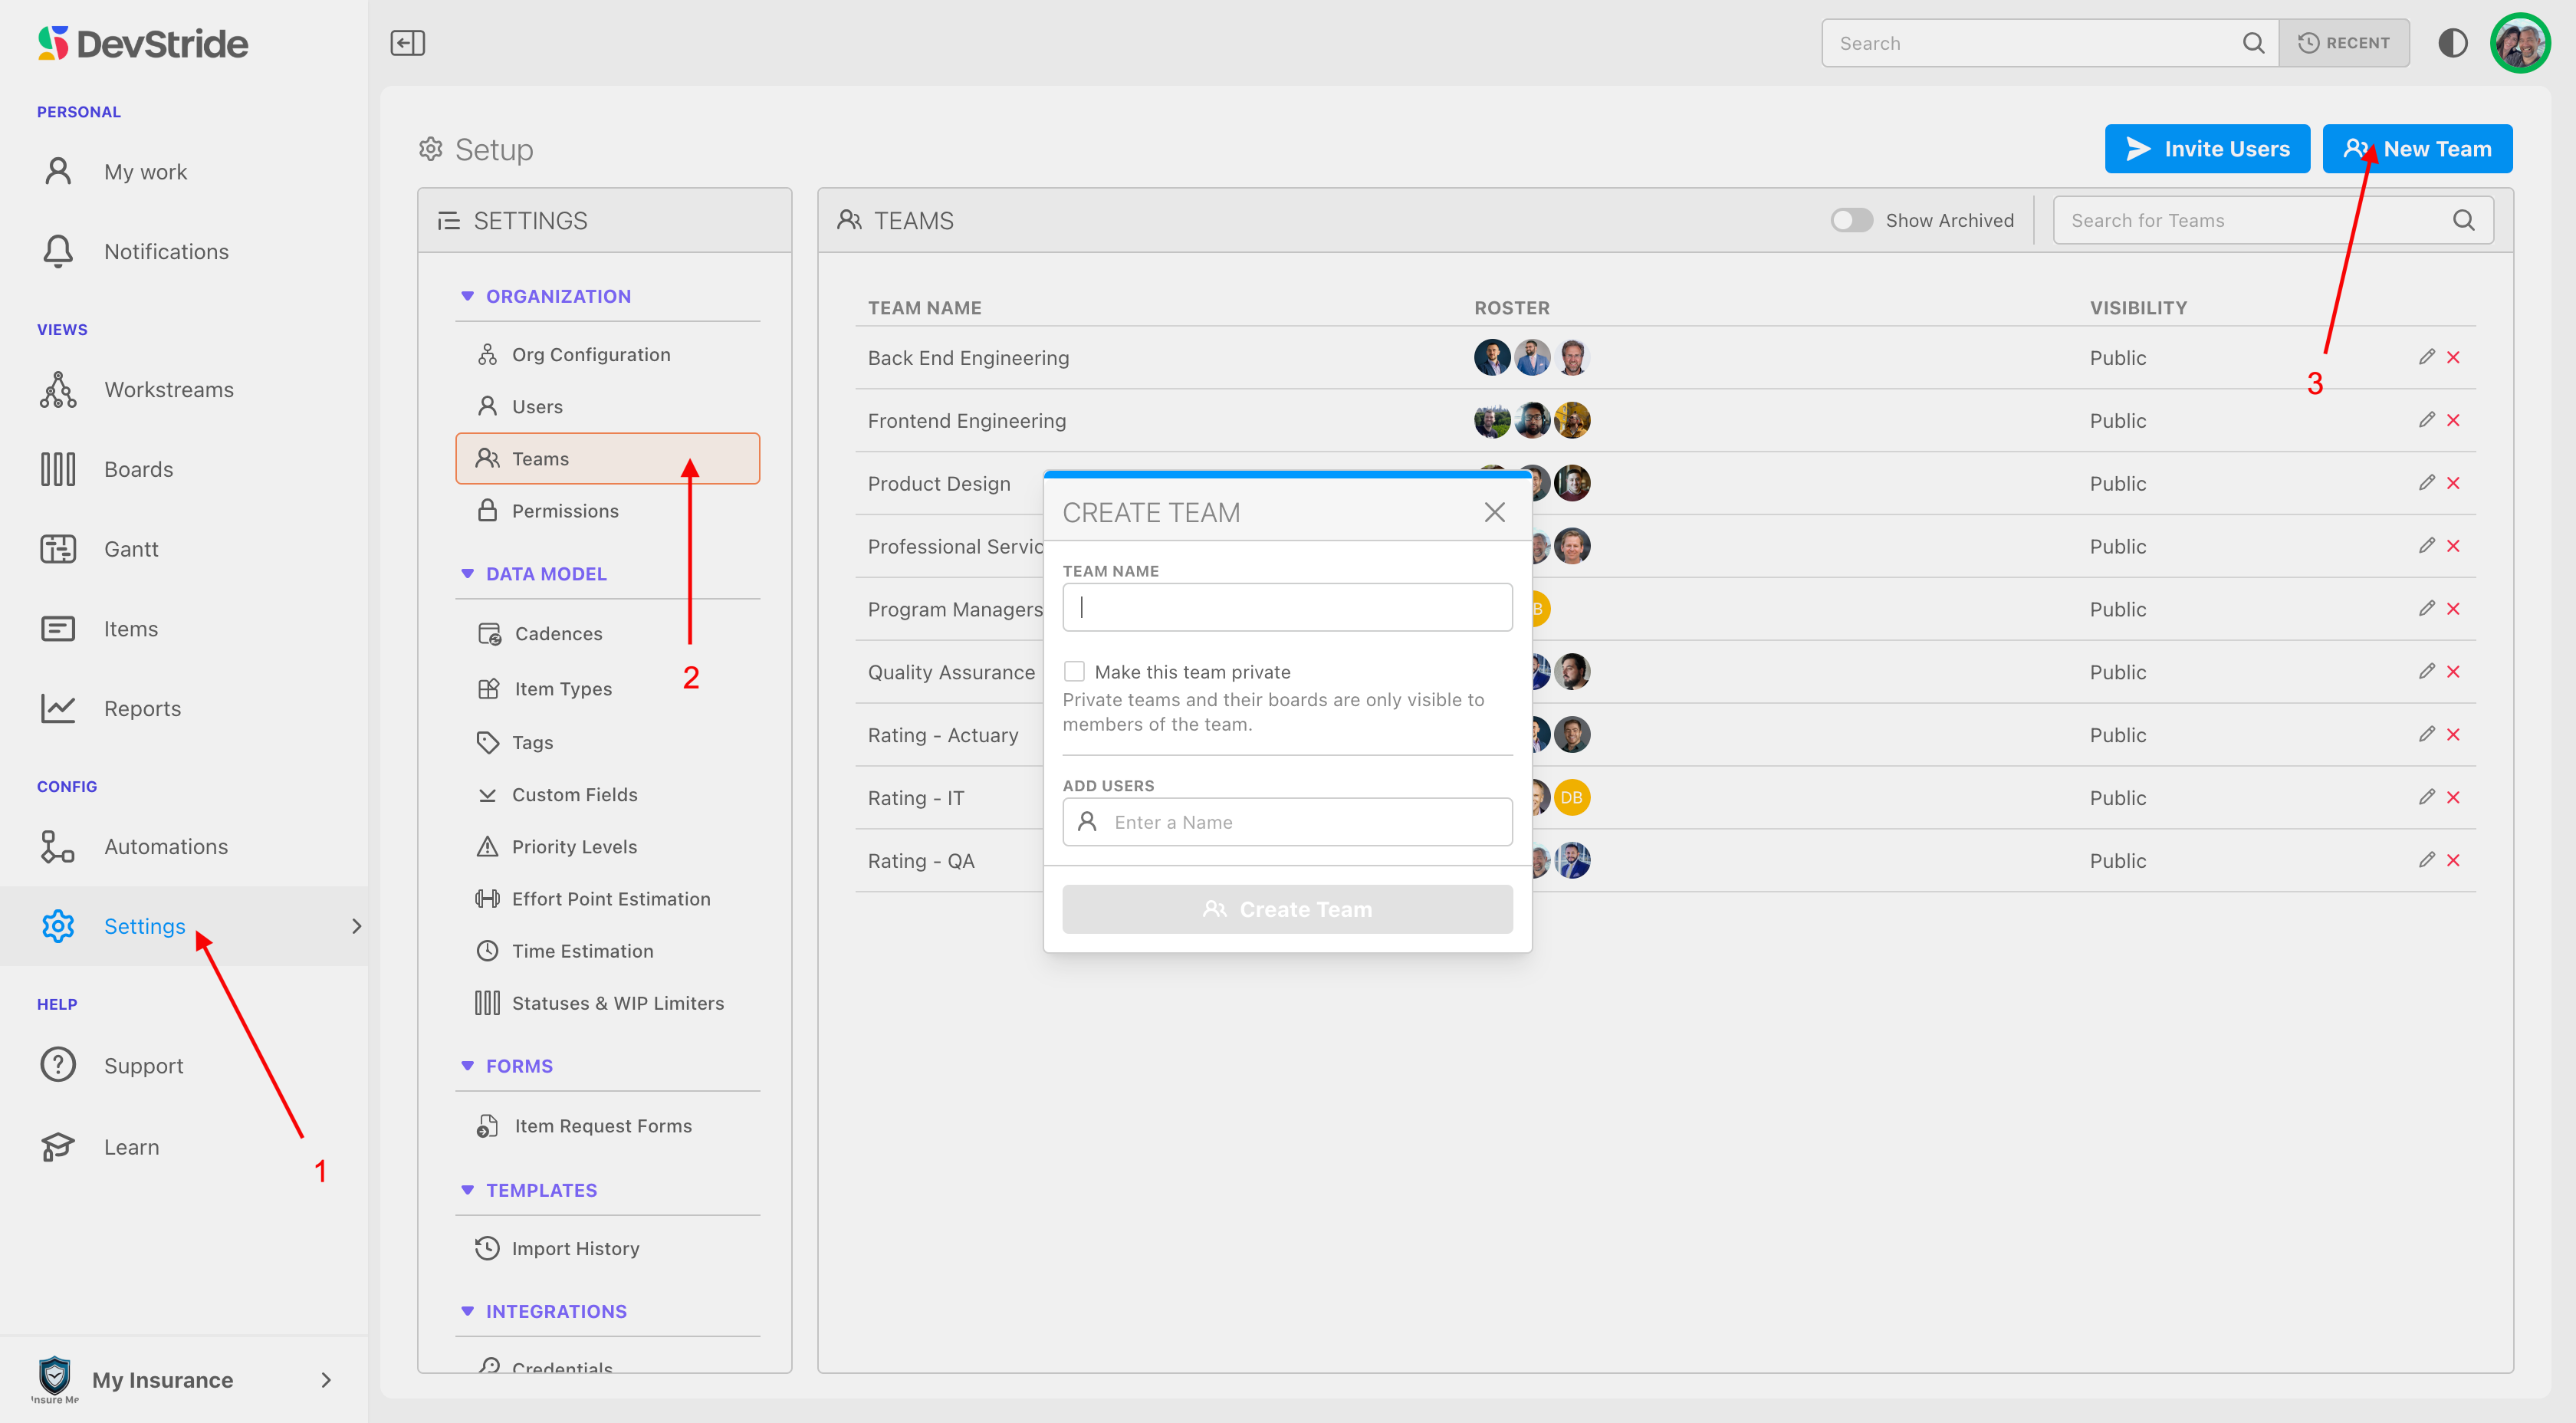
When adding users to an existing team (1), click the pencil to the far right of the team name (2). Fill in the information on the dialog box by selecting the user in the Add User dropdown (3), and click Update Team.

If you are unsure at this time who the team should be in your system, that is ok. You can add teams and team members at any time.
How we Use Teams in DevStride
Later in the onboarding guide we will go into more detail about how teams are assigned to the work as well as how to track when the work will be done. Following is an general overview of how teams are assigned to work.
Assigning Teams vs. Assigning Individuals
In DevStride, a work item—such as a Feature, Story, or Task—can be assigned to a team or to a specific individual within that team. Importantly, a team can even have zero members but still be used to show which group conceptually owns the work.
Assigning an “Empty” Team
Sometimes a team is defined to show ownership but doesn’t need individual members in DevStride. When you assign a work item to an empty team, it reflects that the work is owned by that team as a whole, even if no one in DevStride is explicitly listed as a member. This is not a placeholder—it’s simply a way to indicate responsibility without naming individuals.
Assigning an Entire Team With Members
If a team already has members in DevStride, you can still assign the entire team to the work item. This is useful when the team will collectively handle the work, and no single individual is required as a point of contact.
Assigning an Individual
When you know exactly who is responsible for a specific piece of work, first select the Team, then choose the individual from the team’s member list. This allows everyone to see exactly who owns the task.
By allowing both team-level and individual-level assignments (even if the team has no members), DevStride offers the flexibility to handle scenarios where collective ownership is desired, or where a single point of ownership is necessary.
Click here for more detailed instructions on managing teams and permissions.
Next Up: Configuring Your Work Model
Was this article helpful?