Admin Onboarding - Create Custom Status Collections
- 31 Mar 2025
- 2 Minutes to read
- Contributors

- Print
- DarkLight
Admin Onboarding - Create Custom Status Collections
- Updated on 31 Mar 2025
- 2 Minutes to read
- Contributors
- Print
- DarkLight
Article summary
Did you find this summary helpful?
Thank you for your feedback!
How to set up Custom Status Collections
Step 1: Set up Custom Statuses in Settings
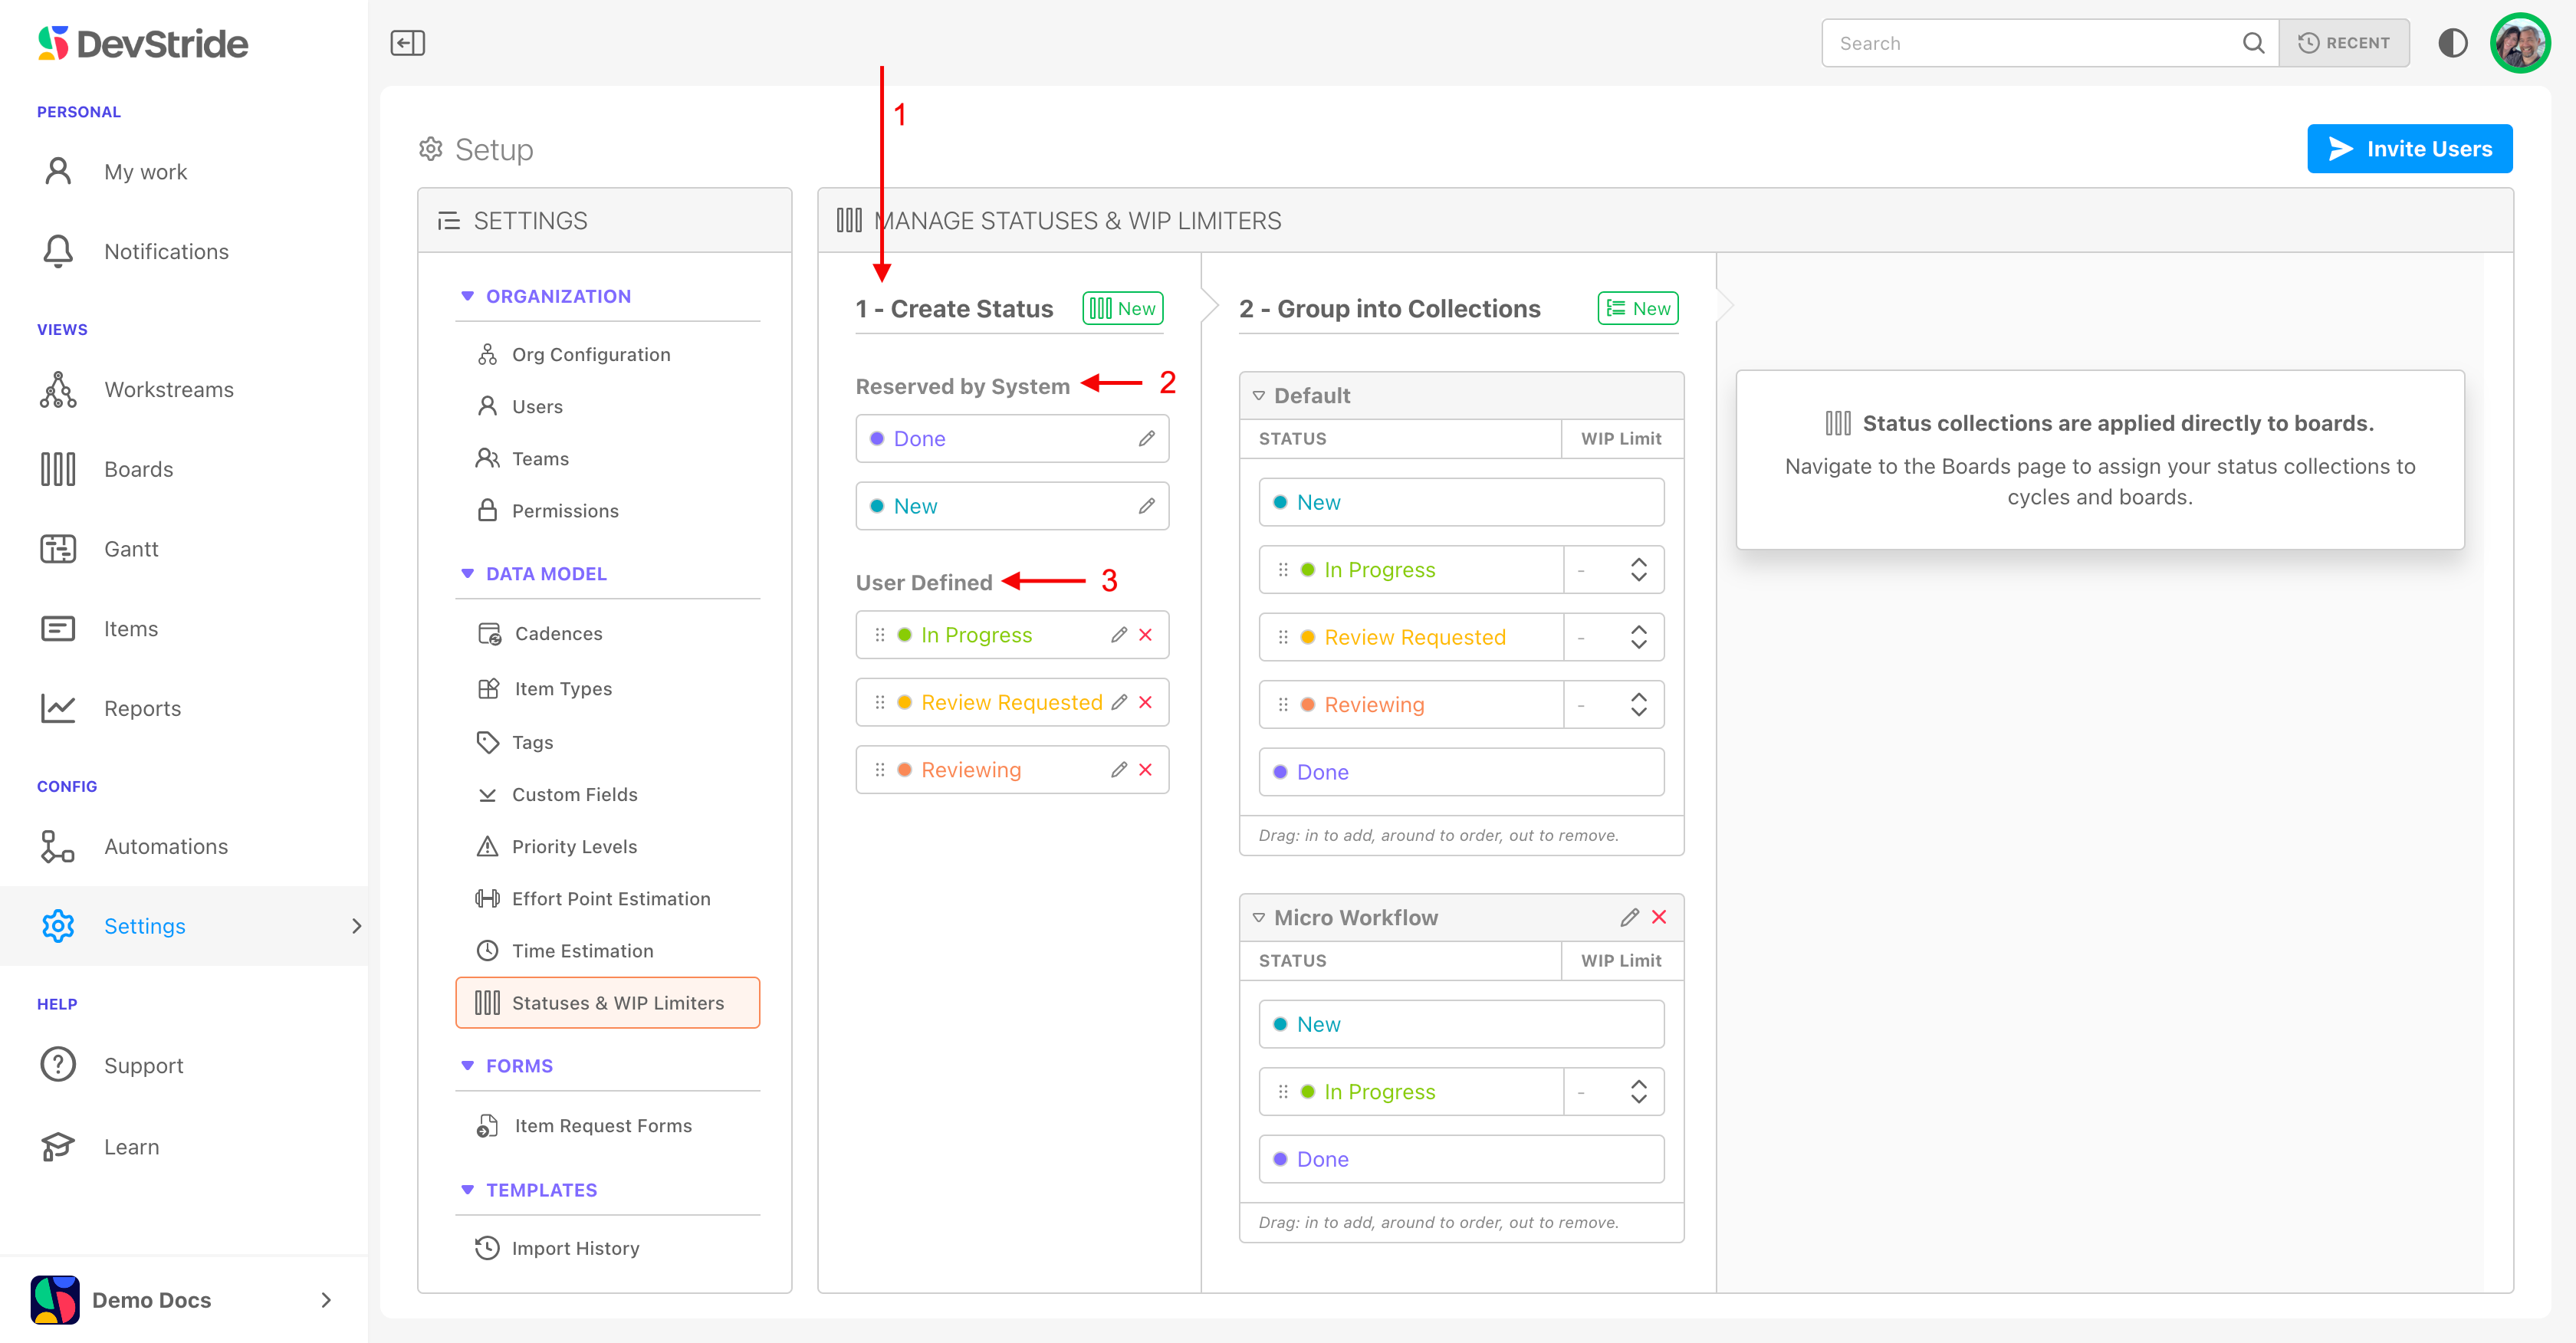
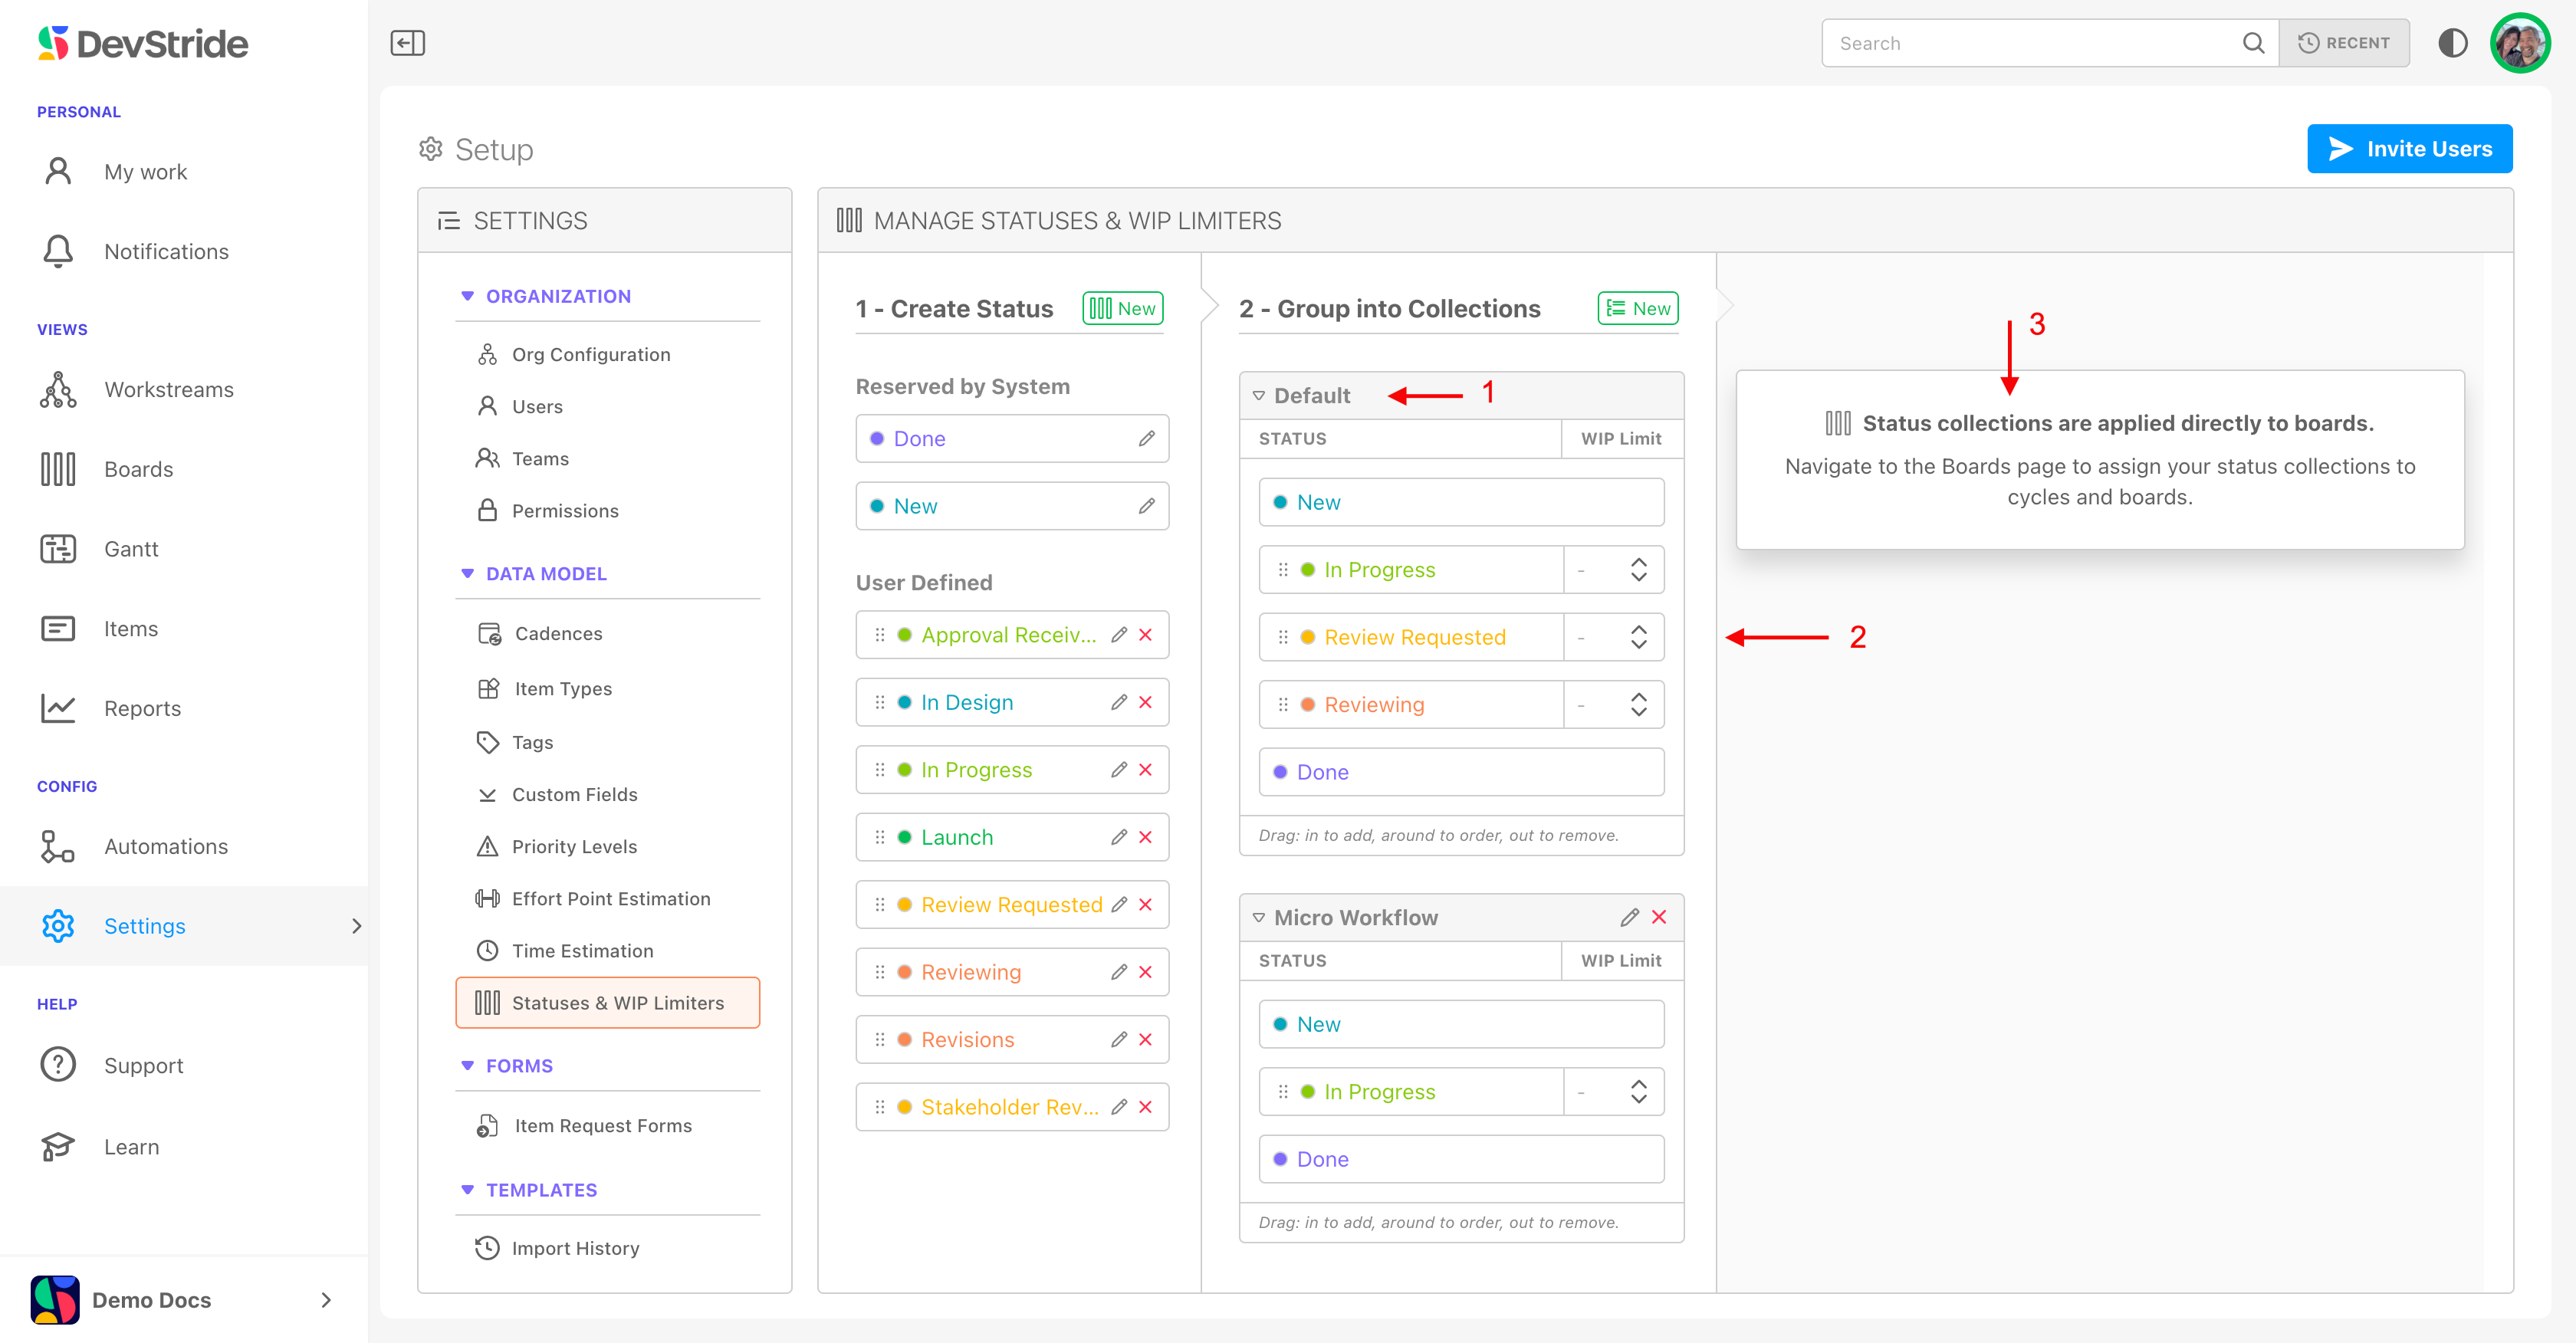
To add Custom Statuses to your global data model, go to Statuses and WIP Limiters in Settings.
As with all the other Settings, you can add to the the global list of Statuses on your left Create Statuses pane (1). This pane displays the statuses provided by the system (2) and has a separate category displaying user-defined statuses (3).
For our example, we will set up a status workflow for marketing. For this kind of work, we'd like to make sure we include the following stages, or statuses:
- New
- In Design
- Stakeholder Review
- Revisions
- Approval Received
- Launch
- Done
To create a custom status, click on the New icon (1) next to Create Status. For each status you want to create, fill in:
- Status name (2) : Type in the name you want to use for your tag. In our example below, we want to create a tag called Client, to be used for client approval of an item.
- Status color (3): Select the display color of the tag.

Click on Create Status.
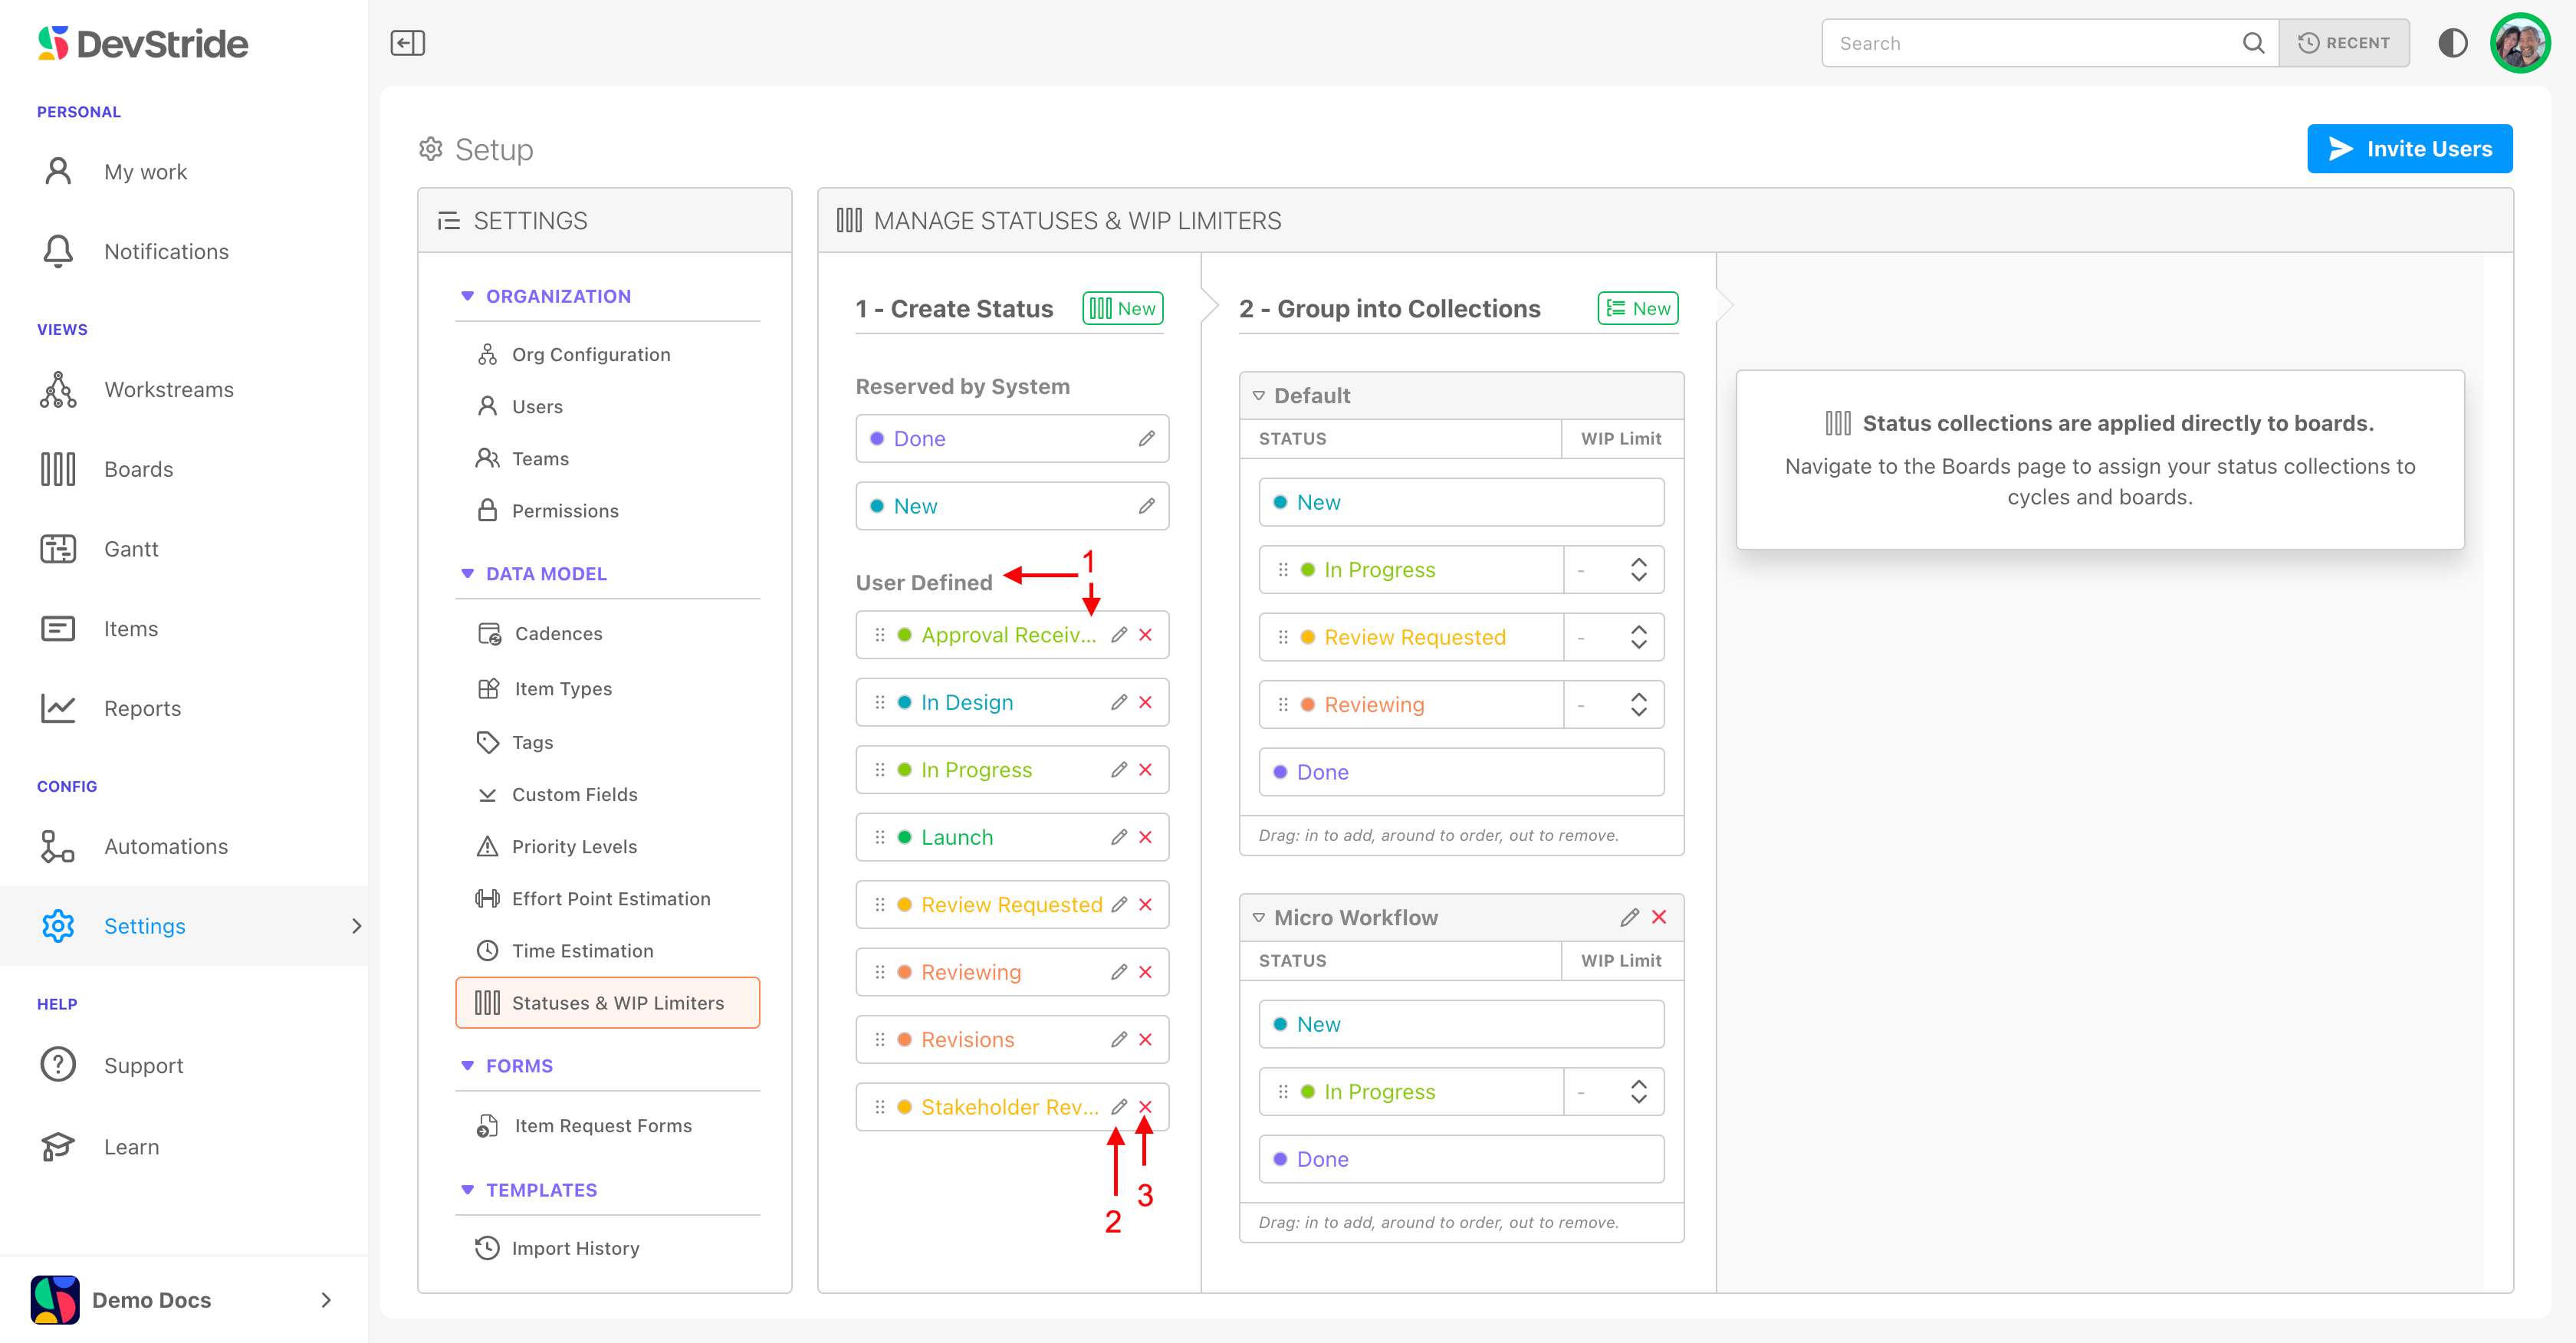
Here are our new user-defined status options (1) on the global list of available statuses. You can change their names or colors by clicking on the pencil icon (2). Remove the status by clicking the "x" (3). Edits are updated automatically throughout the system.
Step 2: Group Into Collections
After you have created the Statuses you wish to have available, you can group them into collections that are specific to your needs. (A collection groups statuses by context or workflow).
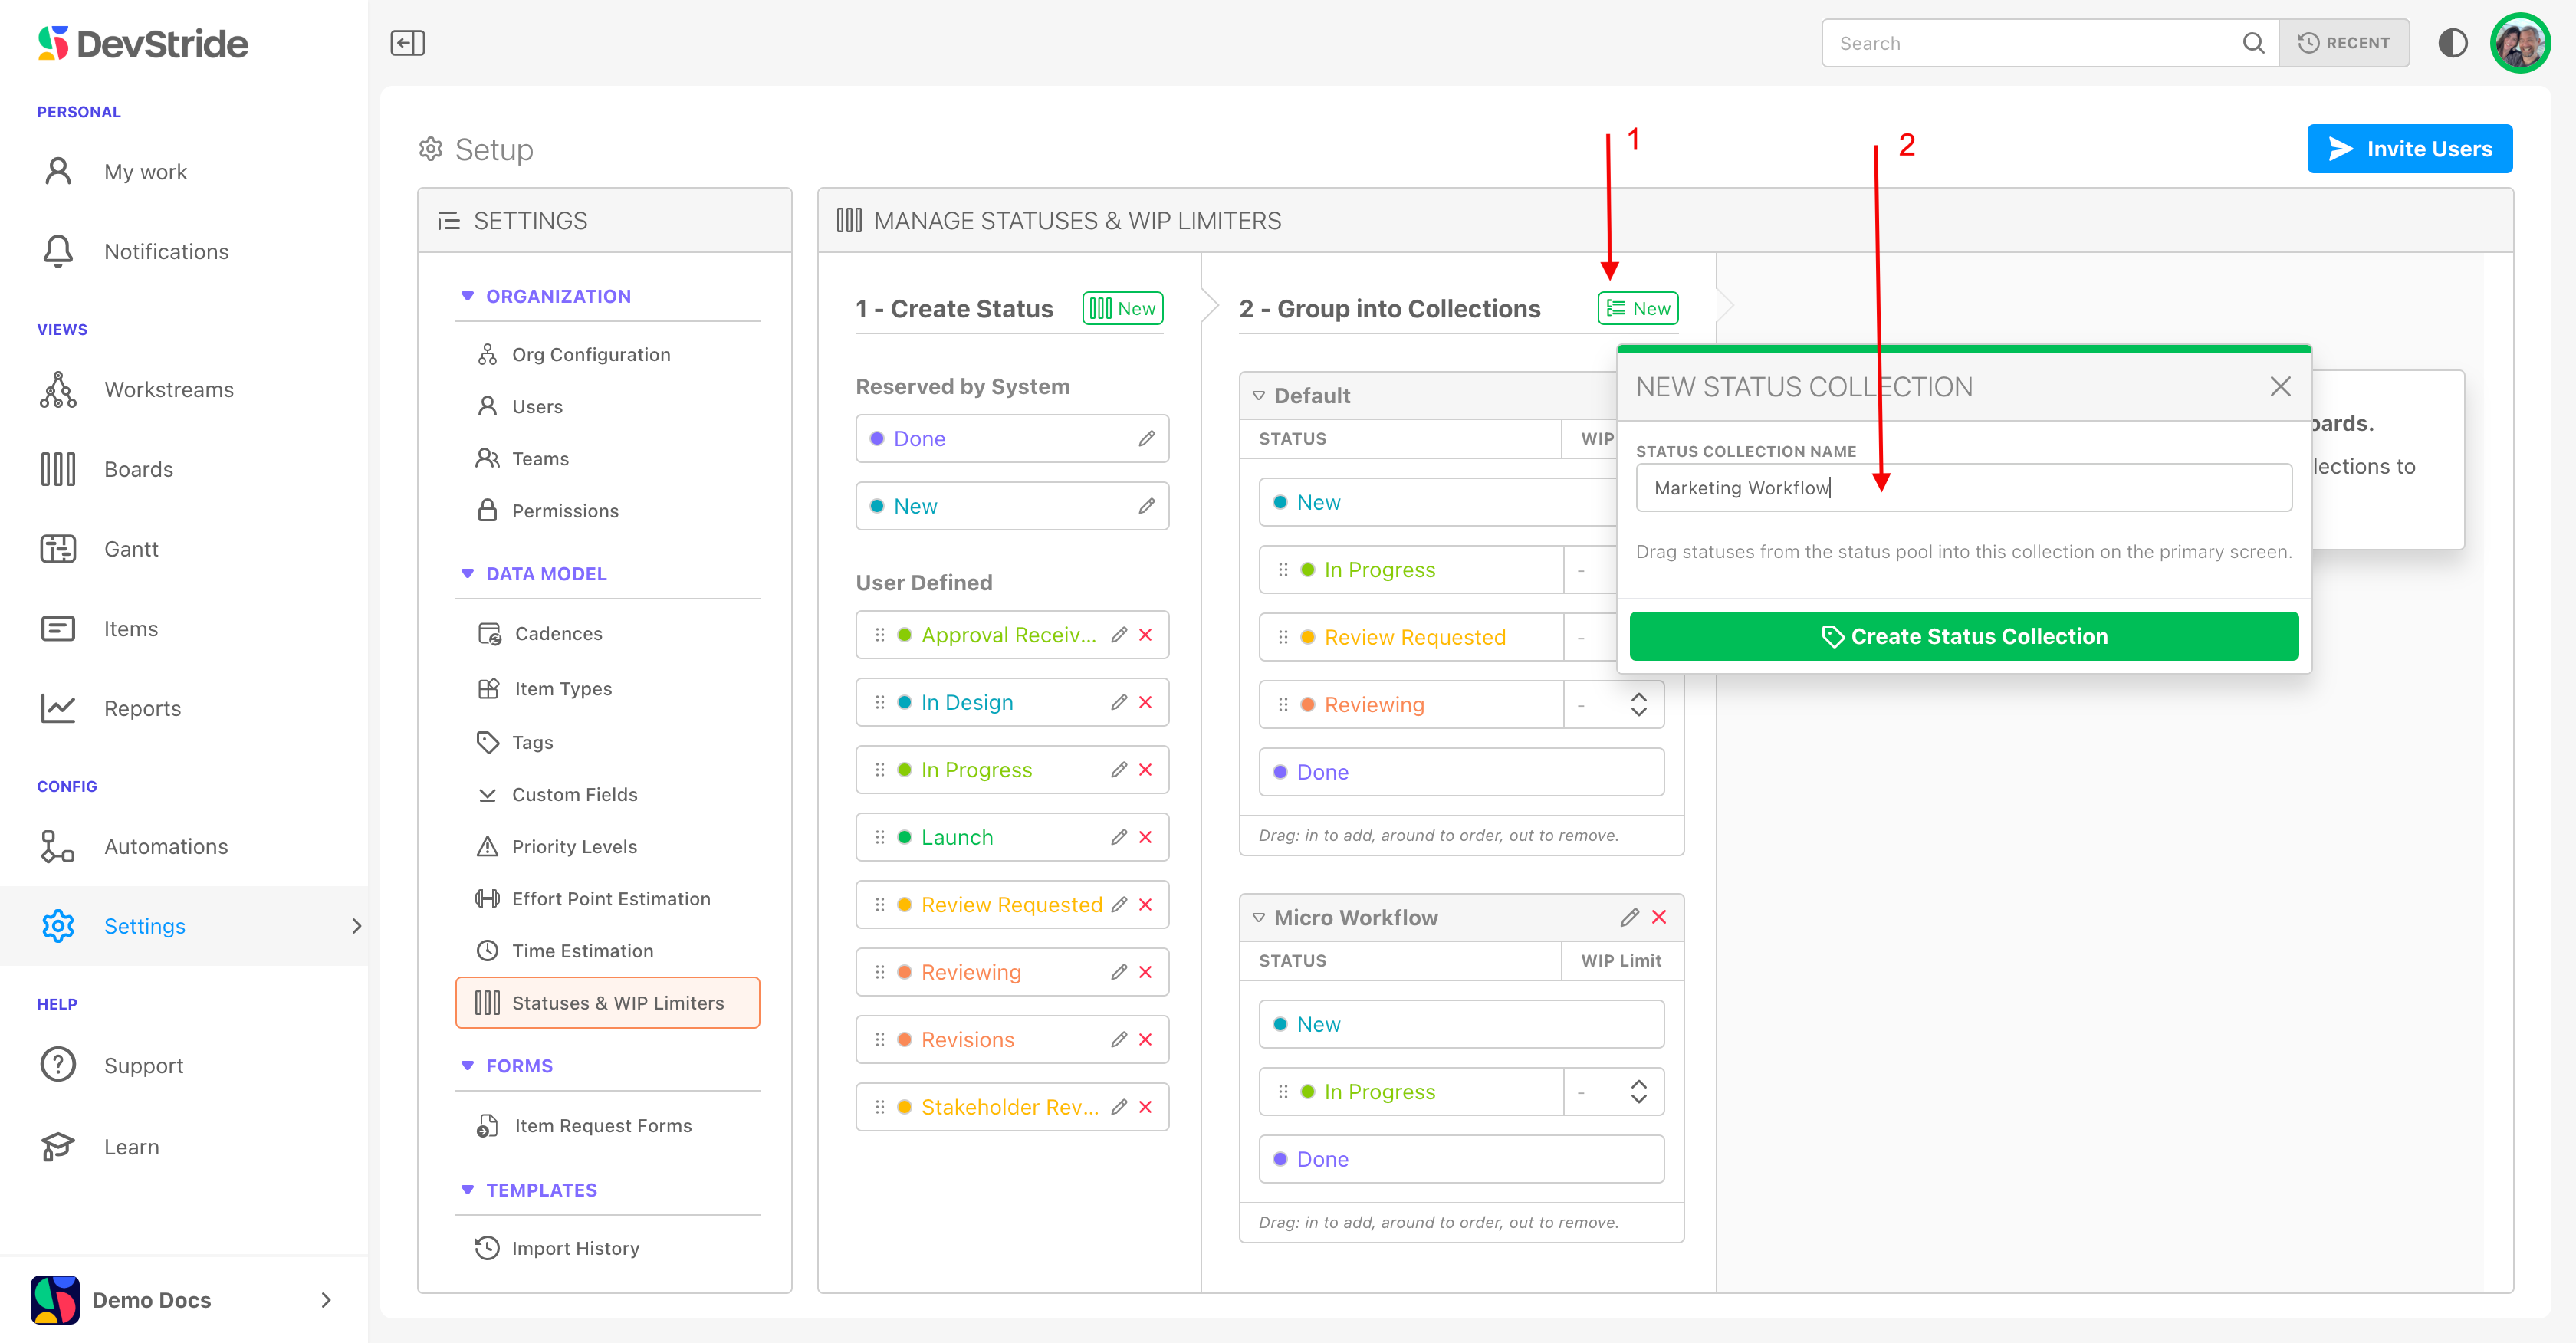
In our example, we create a Status Collection container called Marketing Workflow.
To do this, we click on the New icon (1), and enter in the name of our collection (2). Click Create Status Collection.
Now we can add the statuses we want in this collection. Drag and drop all the desired fields from the Create Statuses pane to the new Marketing Workflow collection (1).
This creates our populated collection container (1). Note that the system-supplied terminal statuses New and Done are automatically placed in this collection (2).
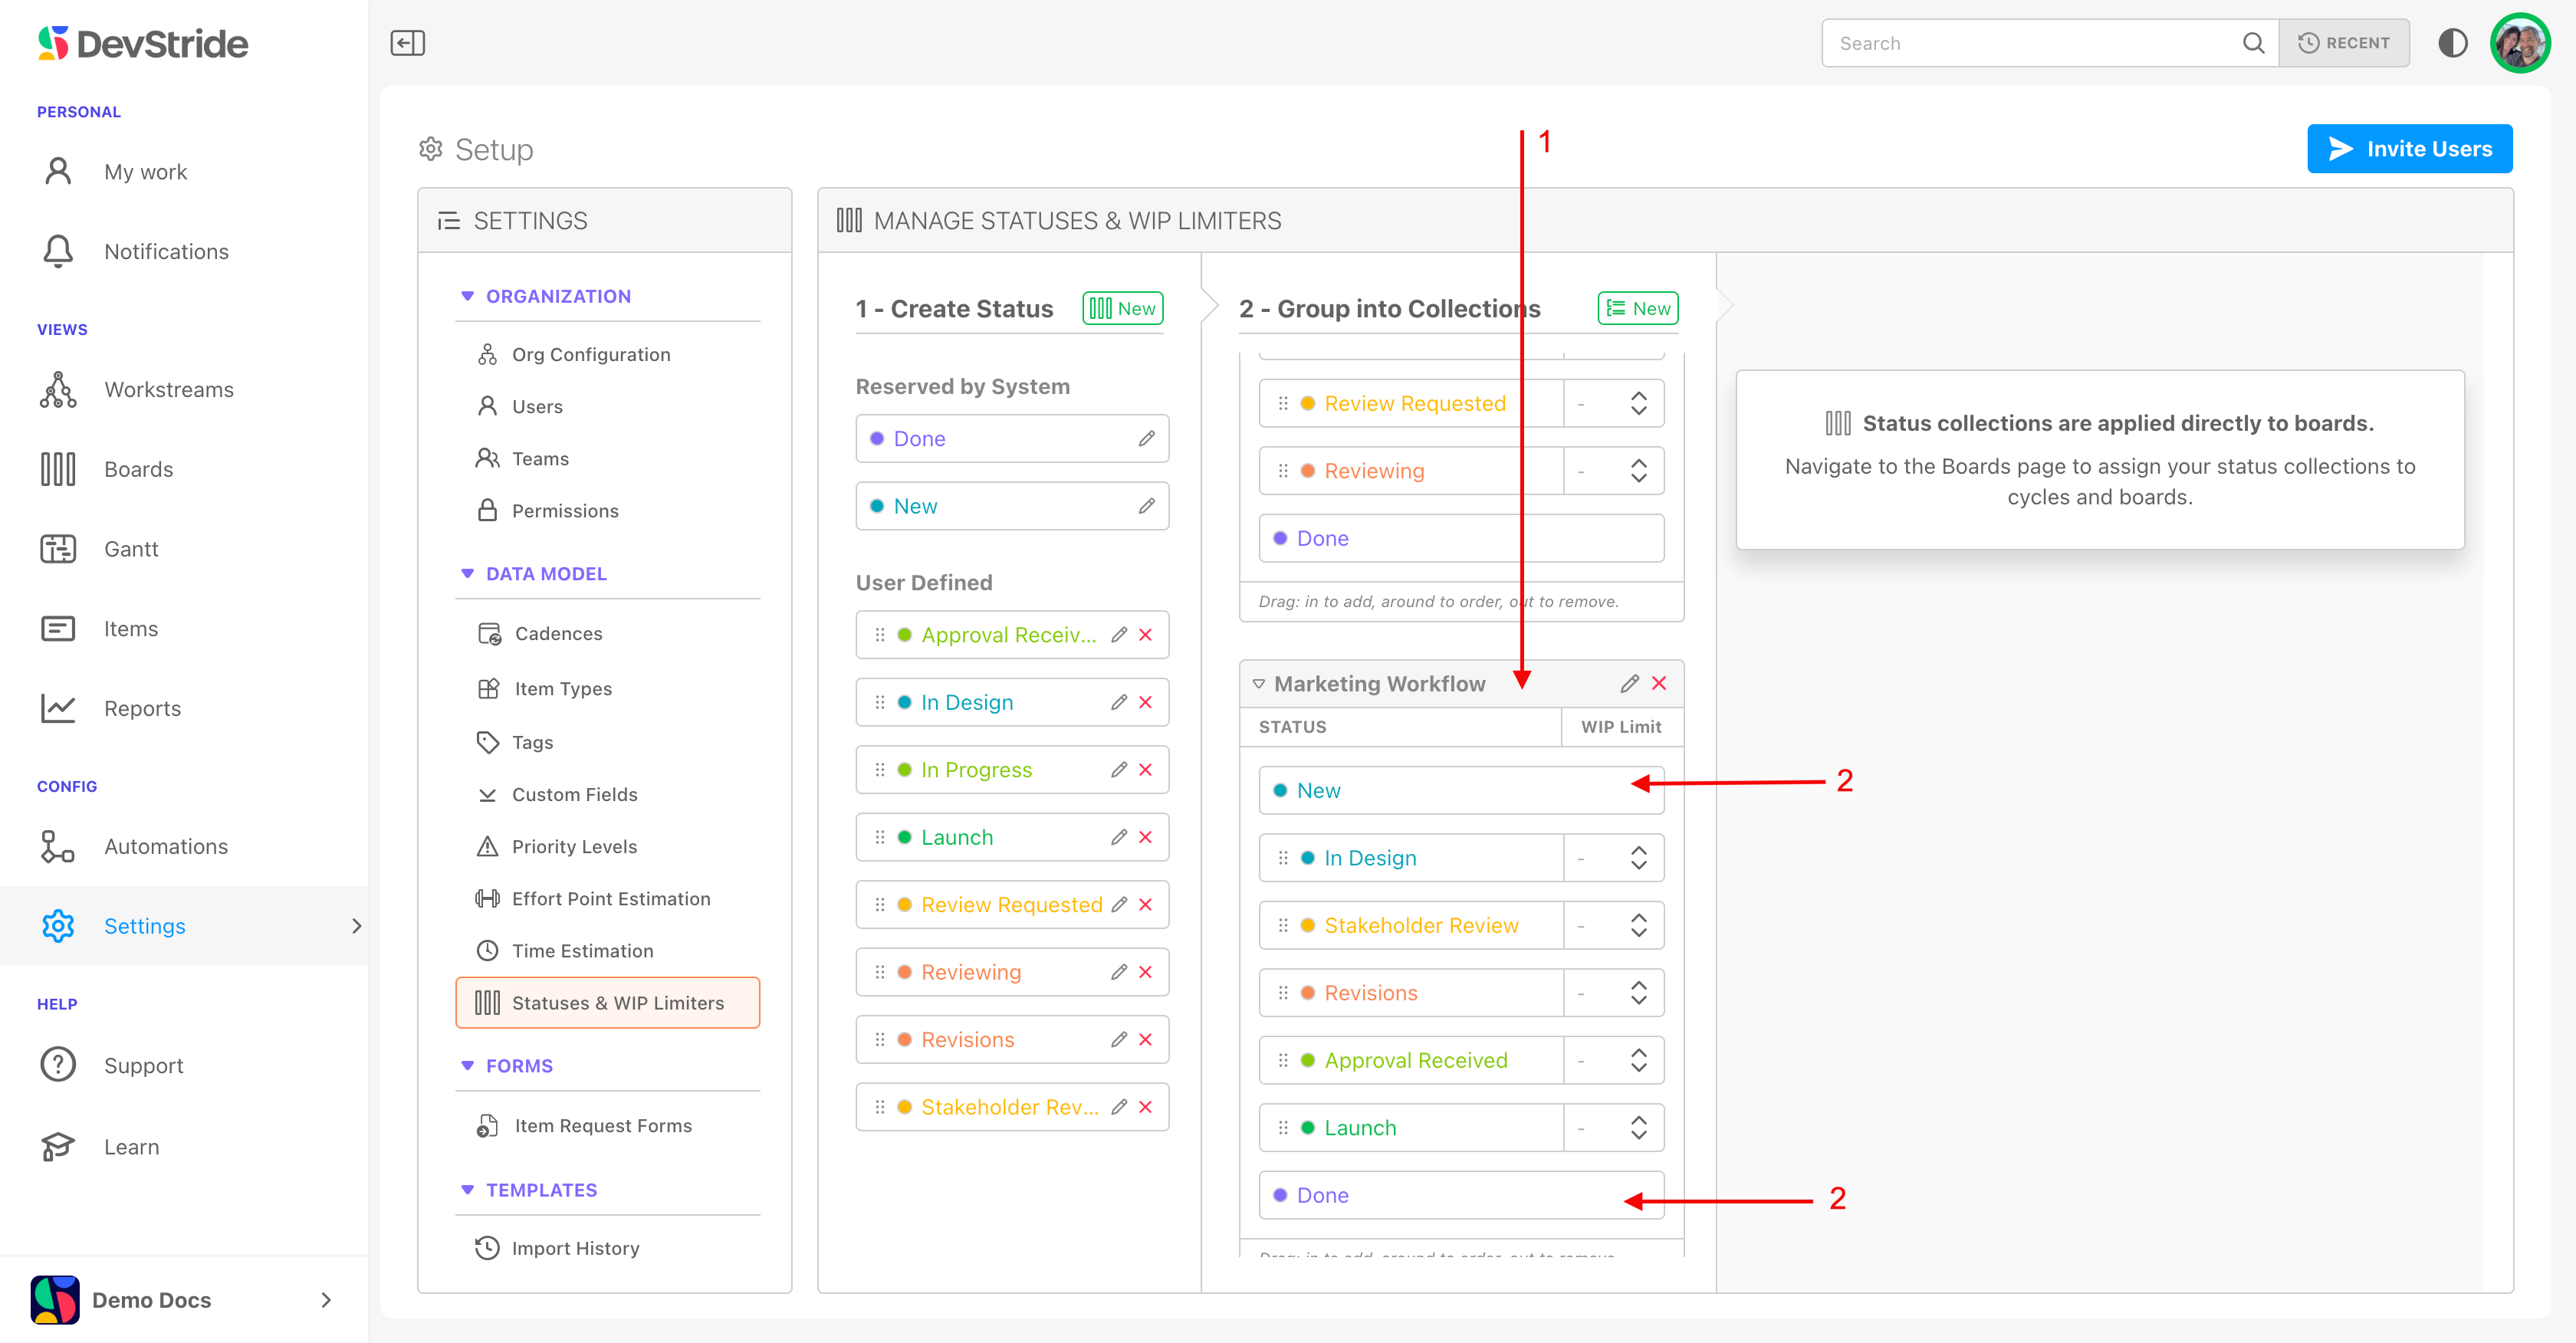
All the Statuses in the Marketing Workflow collection will now be available for use in any board we set up and assign this collection to so that we will be able to manage workflow through these stages.
Within each collection list, you can use the grab bars drag items in to add, around to order, and out to remove.
You can also easily add statuses to the default collection. You will need to follow the same path, adding them to your default collection (1). Any new statuses you add to the default collection (2) will automatically become available to all the boards using the default status collection.
Note: there is no additional step assigning the status to boards here (3). This happens on the boards page.
Step 3: Assign the desired status collection to the board
When creating a new board, you can set the workflow statuses you wish to use from the new board pop-up:
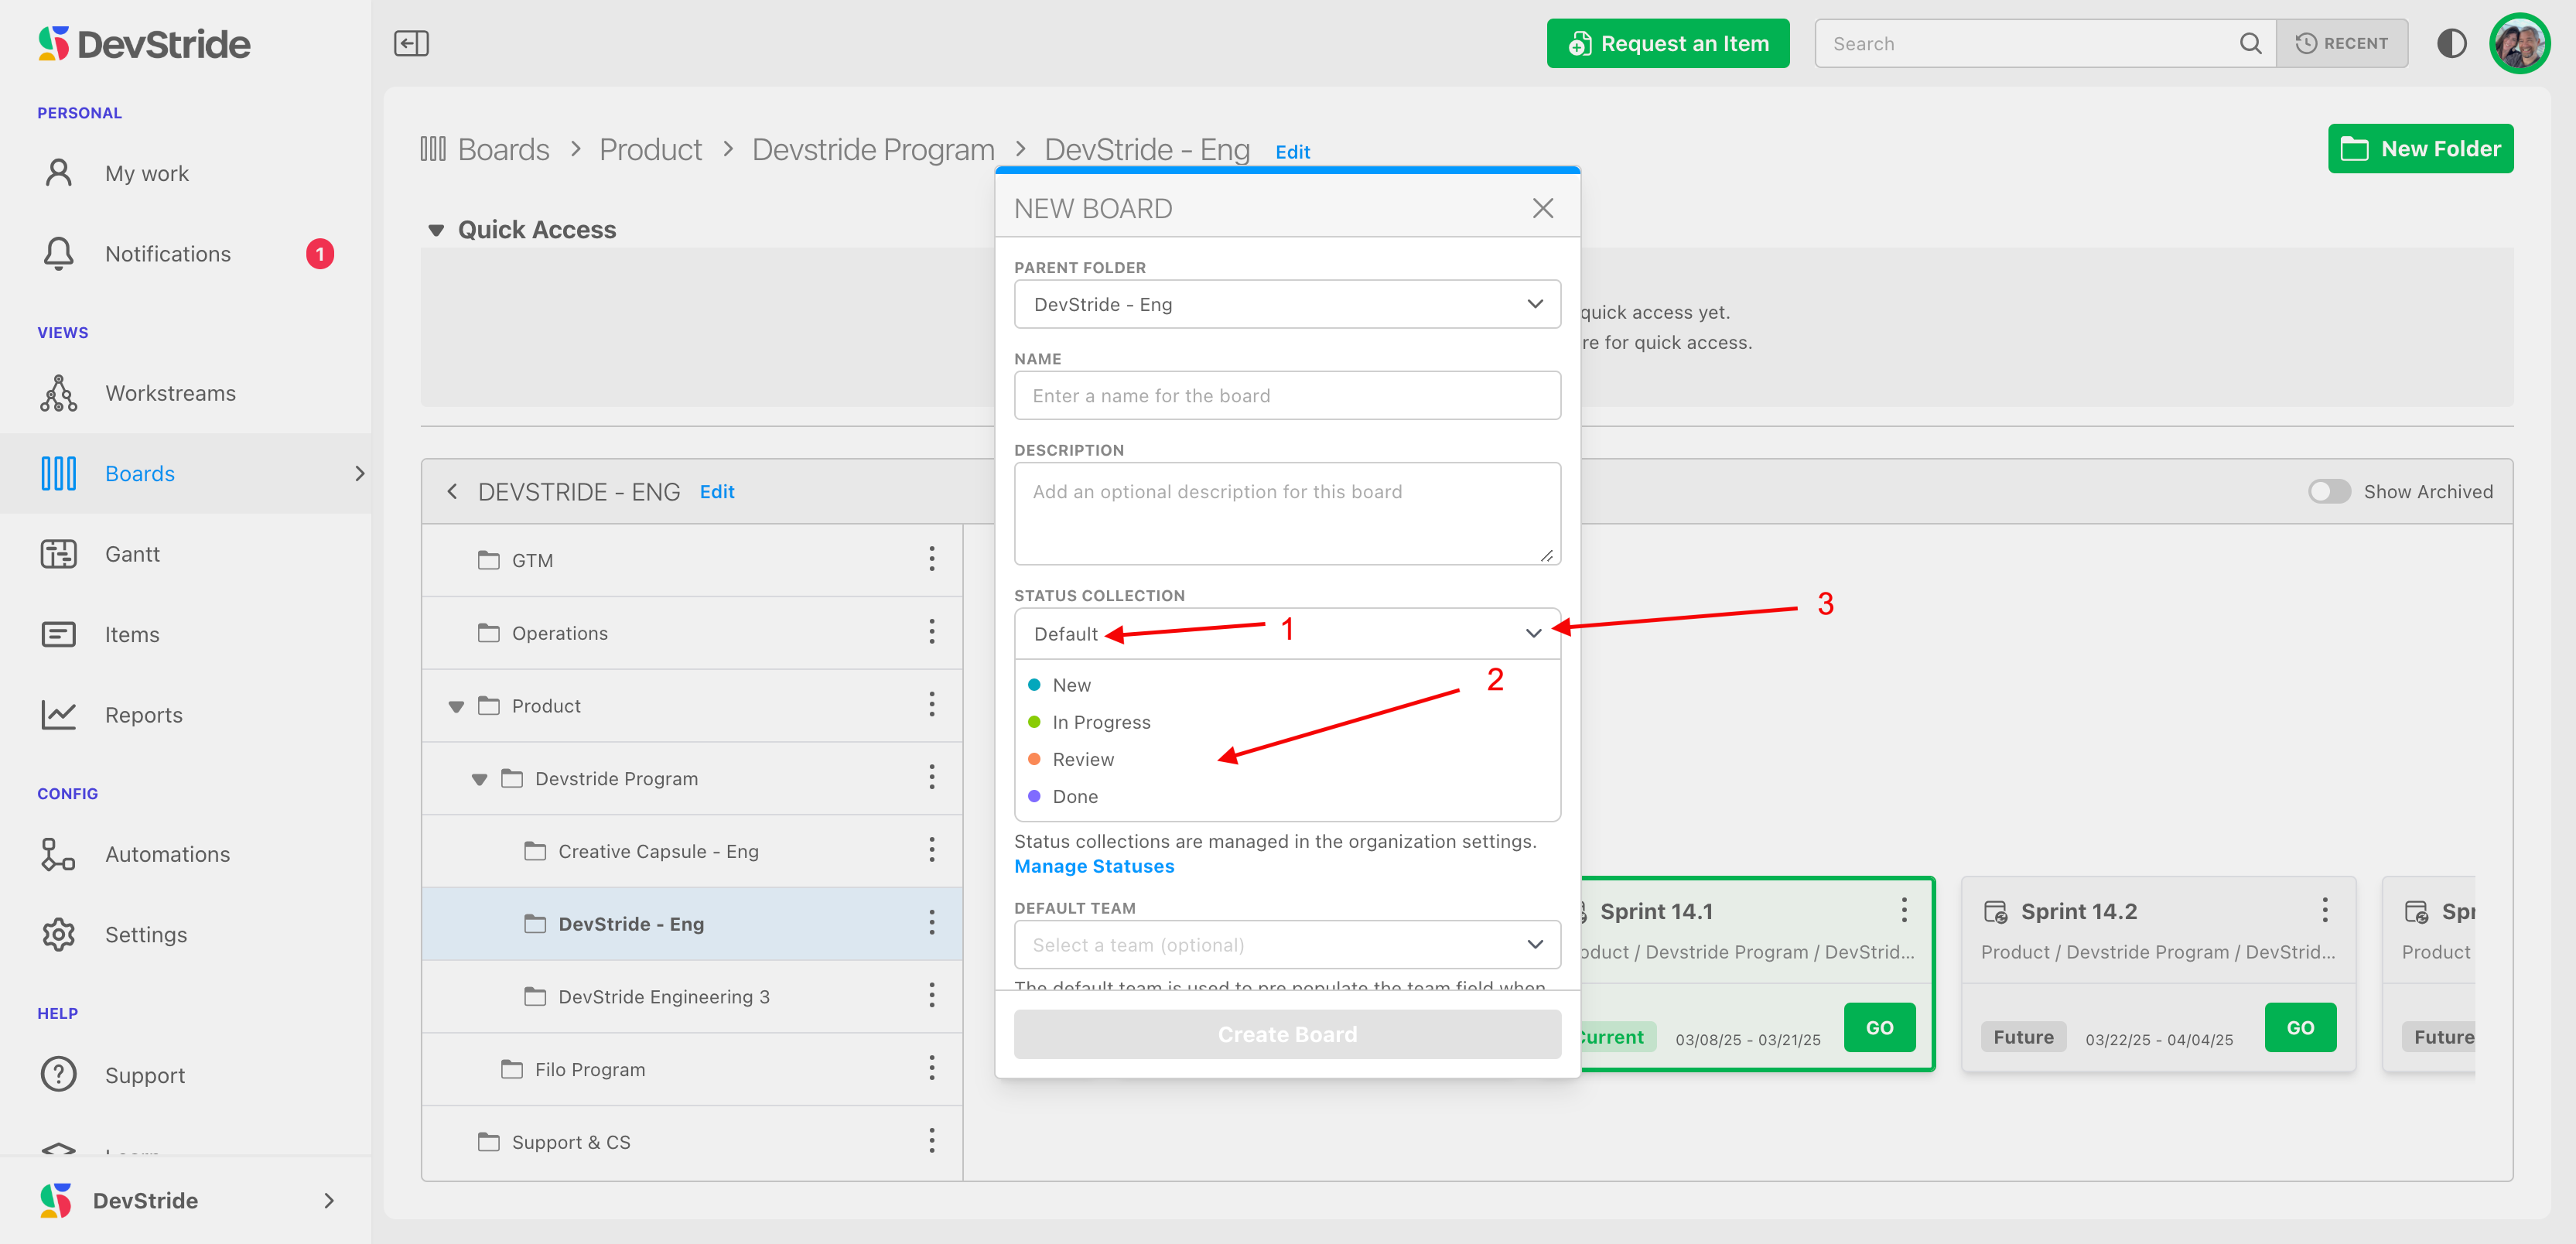
Select the status collection (1) you want to use for the board.
The default selection automatically displays. The statuses for that collection will display below it (2). To select a different status collection from those you have created in Settings, click on the drop down arrow (3).
Was this article helpful?