Using Cycle Boards
- 18 Jul 2025
- 6 Minutes to read
- Contributors

- Print
- DarkLight
Using Cycle Boards
- Updated on 18 Jul 2025
- 6 Minutes to read
- Contributors
- Print
- DarkLight
Article summary
Did you find this summary helpful?
Thank you for your feedback!
Overview
So far, we've set up cadences in Settings and we have reviewed the concept of folders for housing and organizing boards.
When you create a board, you can choose to make it a perpetual board - like a running list, or make it cycle-based by adding a cadence to it.
This article will cover how to set up and use cycle-based boards in the Plan Delivery Module.
What determines the "cycle" on a cycle board
Cadences are simply recurring cycles that are set up in Settings.
Cadence designate the cycle length - repeating every week, as two-week sprints, every month, multi-weeks of your choosing, quarterly, etc.
You can select from the cadences that you created in Settings when setting up a folder for your board.
Cadence's Time Boxing Drives Start/End Dates
If a board is cycle-based - in other words, has a cadence - then:
- Items on that board inherit the cycle length of the cadence.
- If the cadence also has timeboxes assigned to it, the board inherits the start and end dates of the cadence based on its time boxes.
Note: In the Gantt chart, DevStride automatically maps those items to the appropriate dates based on their board’s cadence assignment.
No Manual Date Entry Required
Applying time-boxed cadences removes the need for manually entering dates at the item level. Items assume the start and end date of the board's cycle. You can also easily change the dates if needed.
Go here to find out the steps for setting up Cadences and Time Boxes.
What this gives you
Planning becomes lightweight and consistent, driven by the cycle of the board it is in.
How to Create and Use Cycle-based Boards (also called cycles)
Step 0: What comes before - this article assumes you have:
- Defined the organization of the work to be done by setting up workstreams in Map Value
- Defined your item type hierarchy in Settings
- Created cadences in Settings
- Defined Your Folder Structure in Plan Delivery
If not, go through these easy corresponding steps with the following articles:
- Understanding Workstreams
- Setting Up Your Item Type Hierarchy
- Setting up Cadences
- Organizing Boards: Working Group Folders
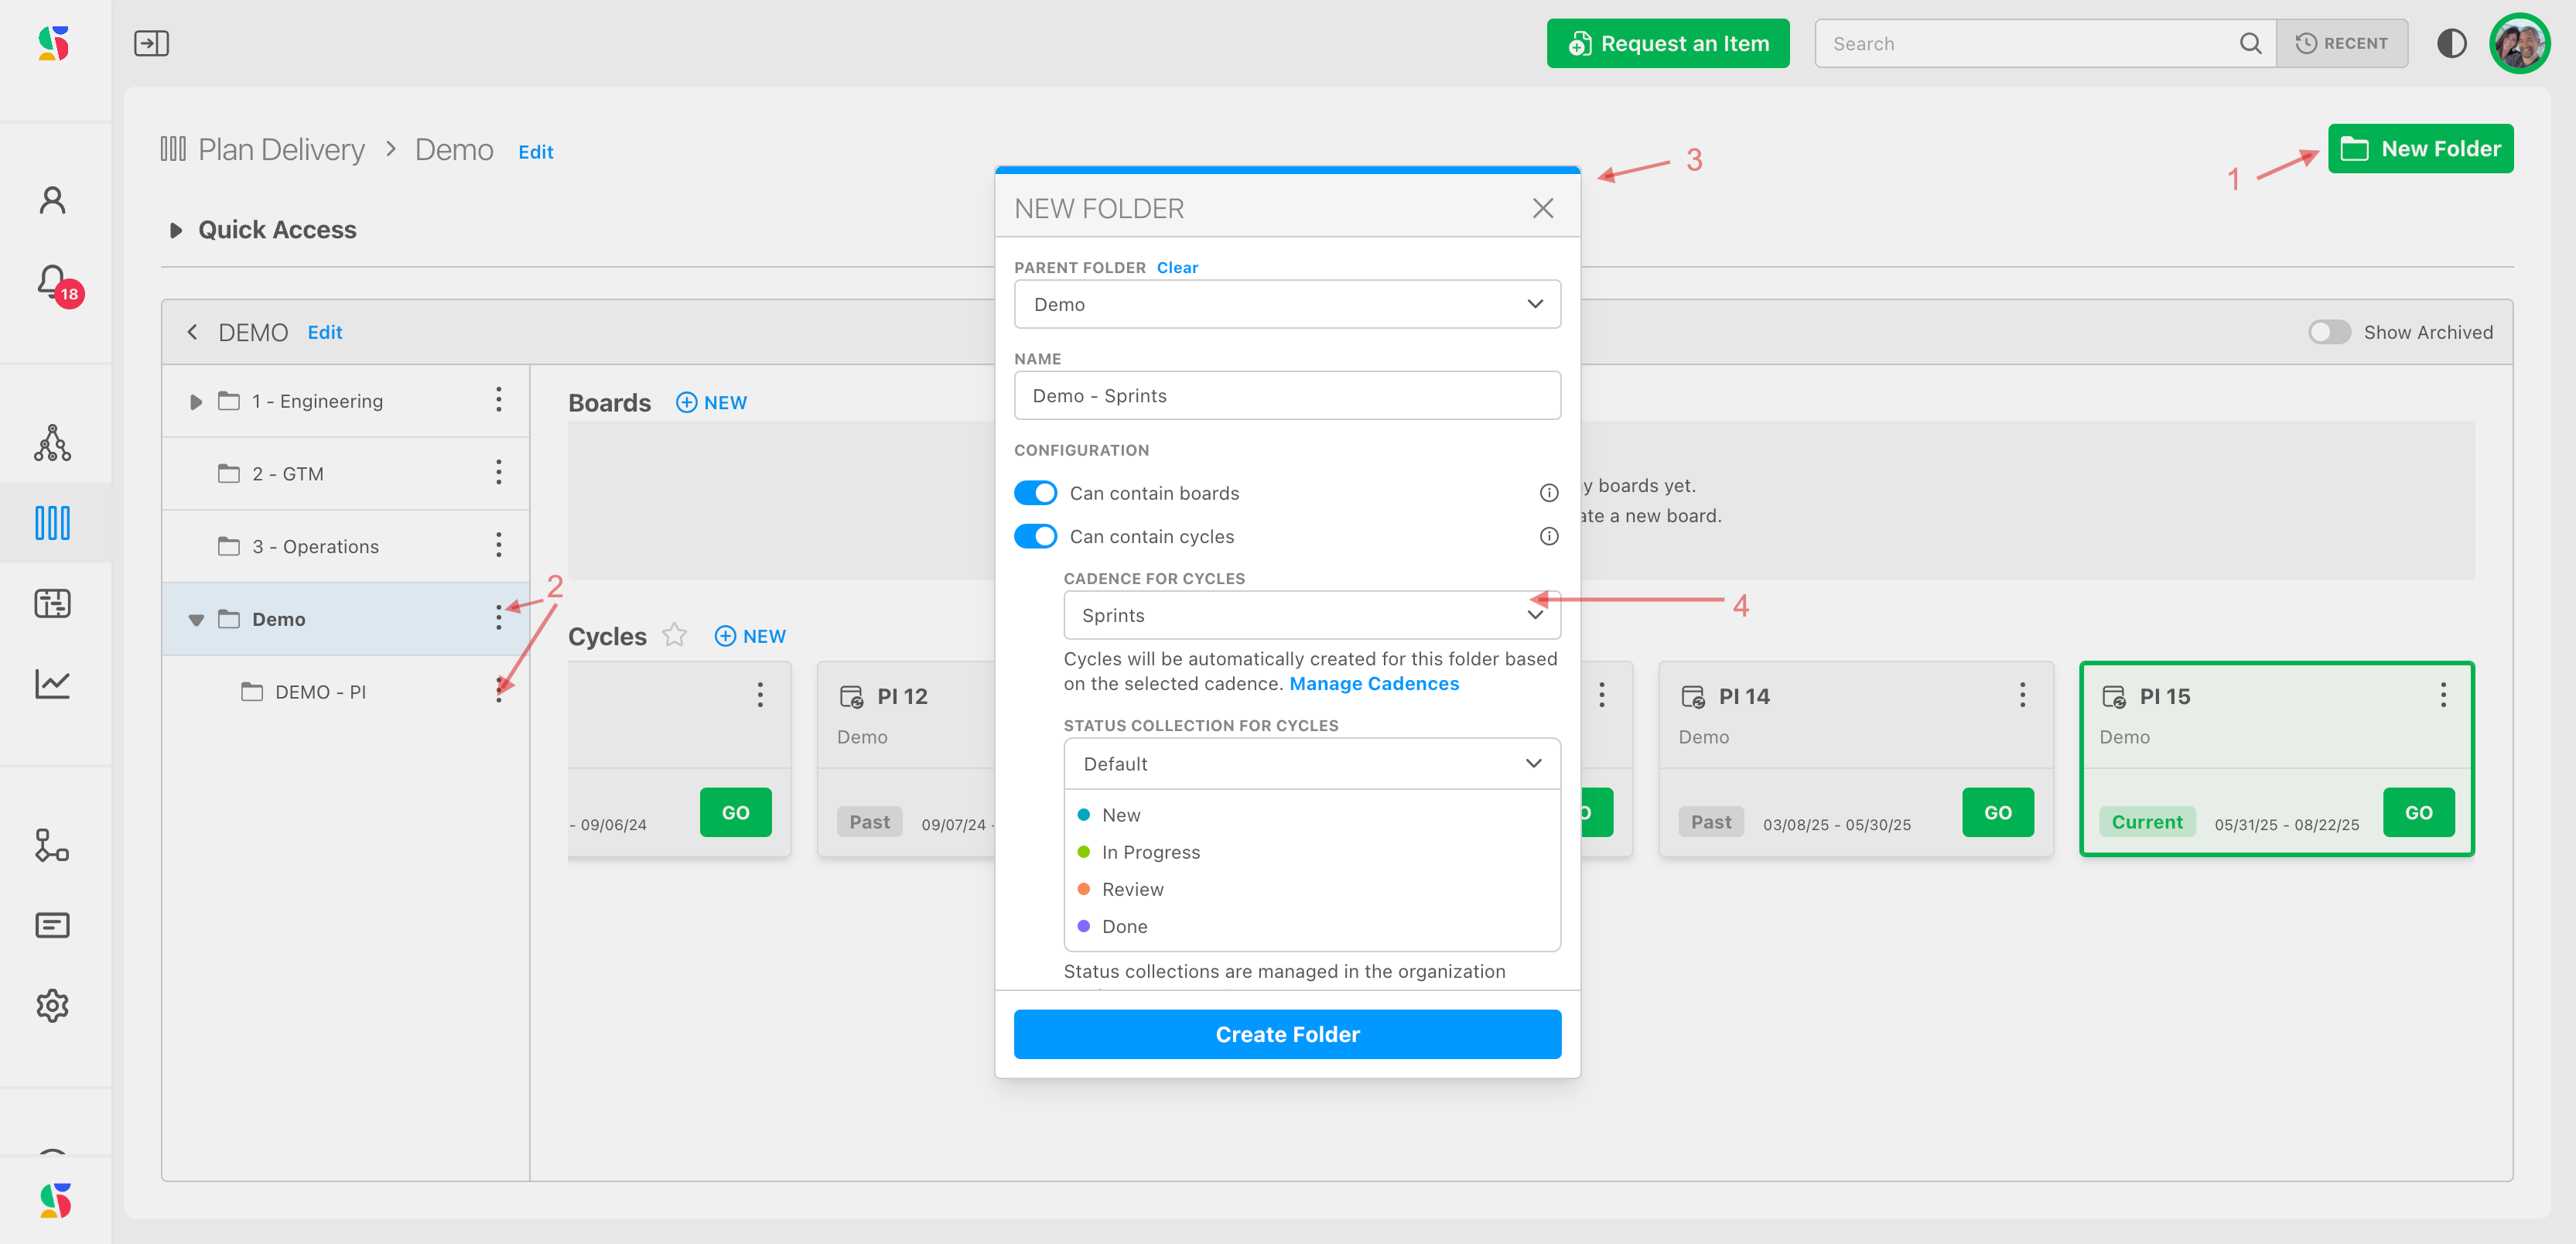
Step 1: If you have not already done so, create the folder in which you want to house your boards.
From Plan Delivery,create a folder (or navigate to one and select it if you have already created it).
Note: You can create a cycle in any level of your board folders - the root or sub-folders.
To create a new folder, click the New Folder icon (1) or use the kabob (2) next to the folder at the level where you want to add your cycle.
Fill in a name, description, and any required fields in the dialog box (3). Select your cadence here for the cycle boards that you will be housing in this folder (4). (cadences come from Settings).
The power - and flexibility - of Cadences
How you set up your cadences (regular, recurring periods of time for planning work) is very flexible in DevStride.
There are many ways you can choose to manage work in cycles.
For example, many development teams identify large features that should be worked on into their program increment cycle (PI) - this is usually a 12 week cycle. Then, the individual work items that help deliver that feature are pulled into shorter sprint cycles, made up of 2 weeks each.
As another example services functions and teams might want different types of cadences. These working groups can also create cycles of any size or duration they choose.
For instance, marketing organizations might want to create a cycle called Quarterly tied to the quarterly calendar where objectives are managed and then Monthly or bi-weekly cycles handle tasks individual tasks under that.
DevStride can accommodate any number of cadences for any number of working groups across the organization.
Dependency visualization in Plan Delivery views as well as across DevStride allows teams to see depencies and timings of other working groups, to watch for upstream and downstream effects.
What's more, using Track Progress, each team can see other team's work within the lens of their own cadence or through another team's cadence, creating outstanding visibility across working groups and projects.
Step 2: For work that is managed in defined periods, like sprints, periods, months, quarters, etc., assign items to a cycle board
When you are ready to identify when the work should be done in a given cycle(s), you can assign items to the appropriate cycle boards.
The items will inherit the due dates of any cycle boards you add them to. These due dates can be changed, but the idea is to manage the due dates to the timing of the cycle. If you know an item can't or shouldn't be completed inside that cycle period, it should be included in a different cycle.
You can add items to boards in several ways, including:
- Right from one of your board views (status, table or 2D)
- From the workstream
- From an open item
- From the gantt chart
- From the Manage Item module
- From reports
Here's how to assign items to boards from the various board views in the Plan Delivery module.
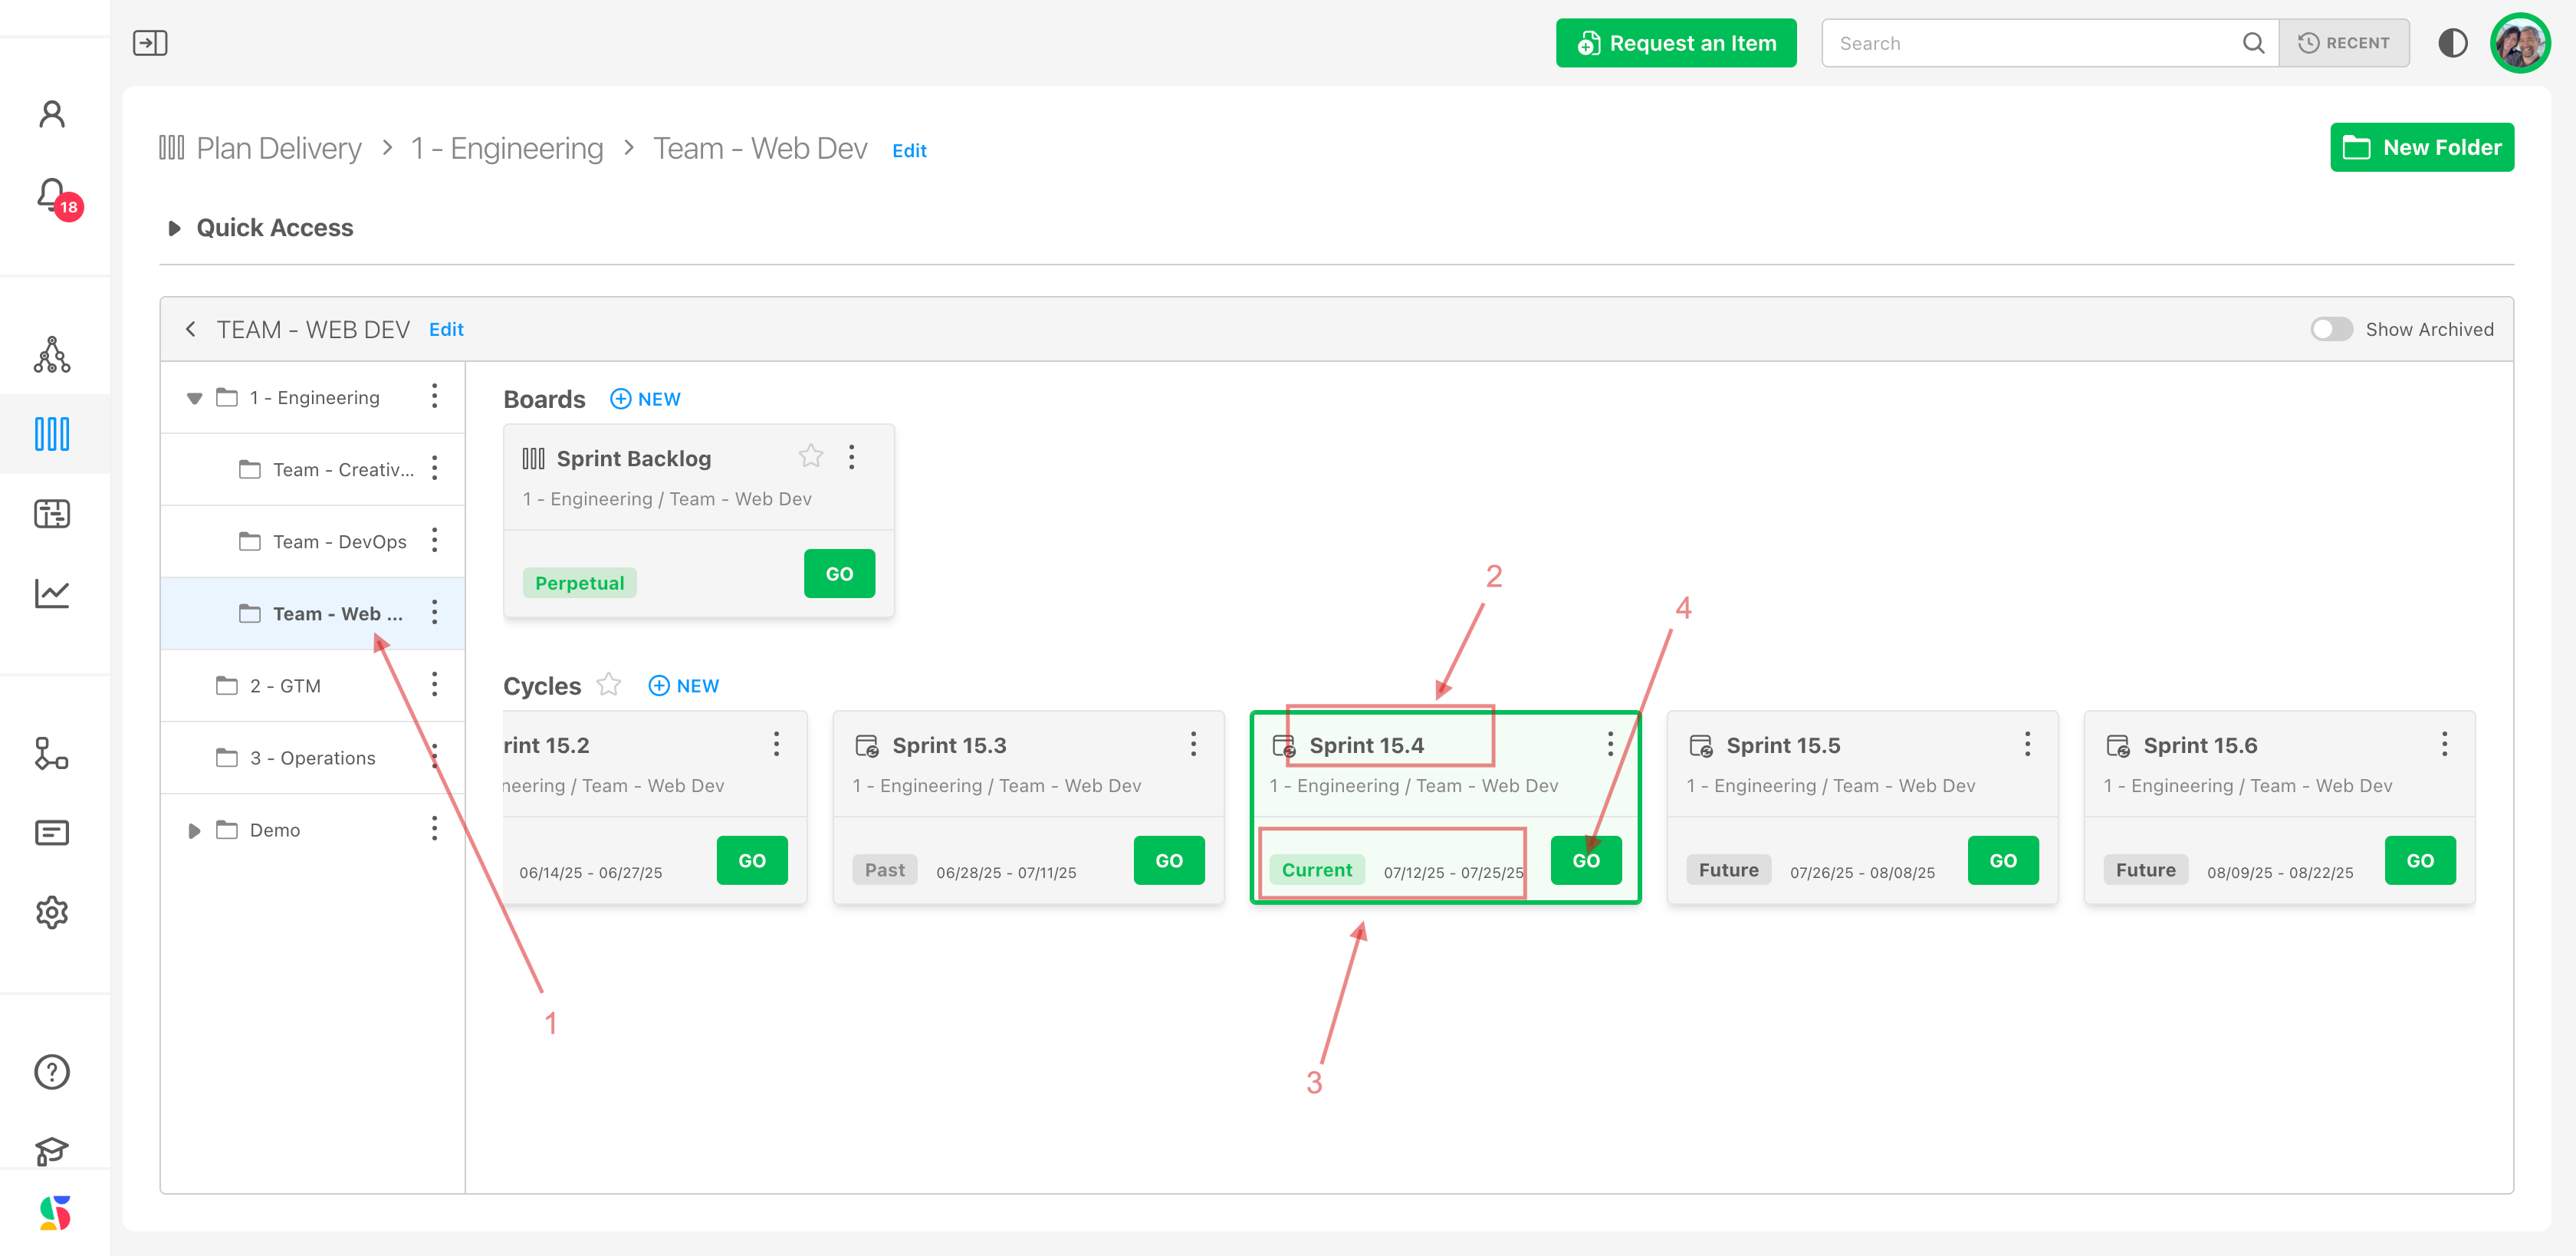
Navigate to the board you want to manage by clicking on the folder where it is housed (1).
Once you click on the folder, your perpetual and cycle boards for that folder display on the right.
Locate the the board you want to manage - if it's one of your cycle boards, the cycle number is displayed as the board name (2). The current board according to that day's date is marked as current (3).
Click the Go icon (4) to open the board.
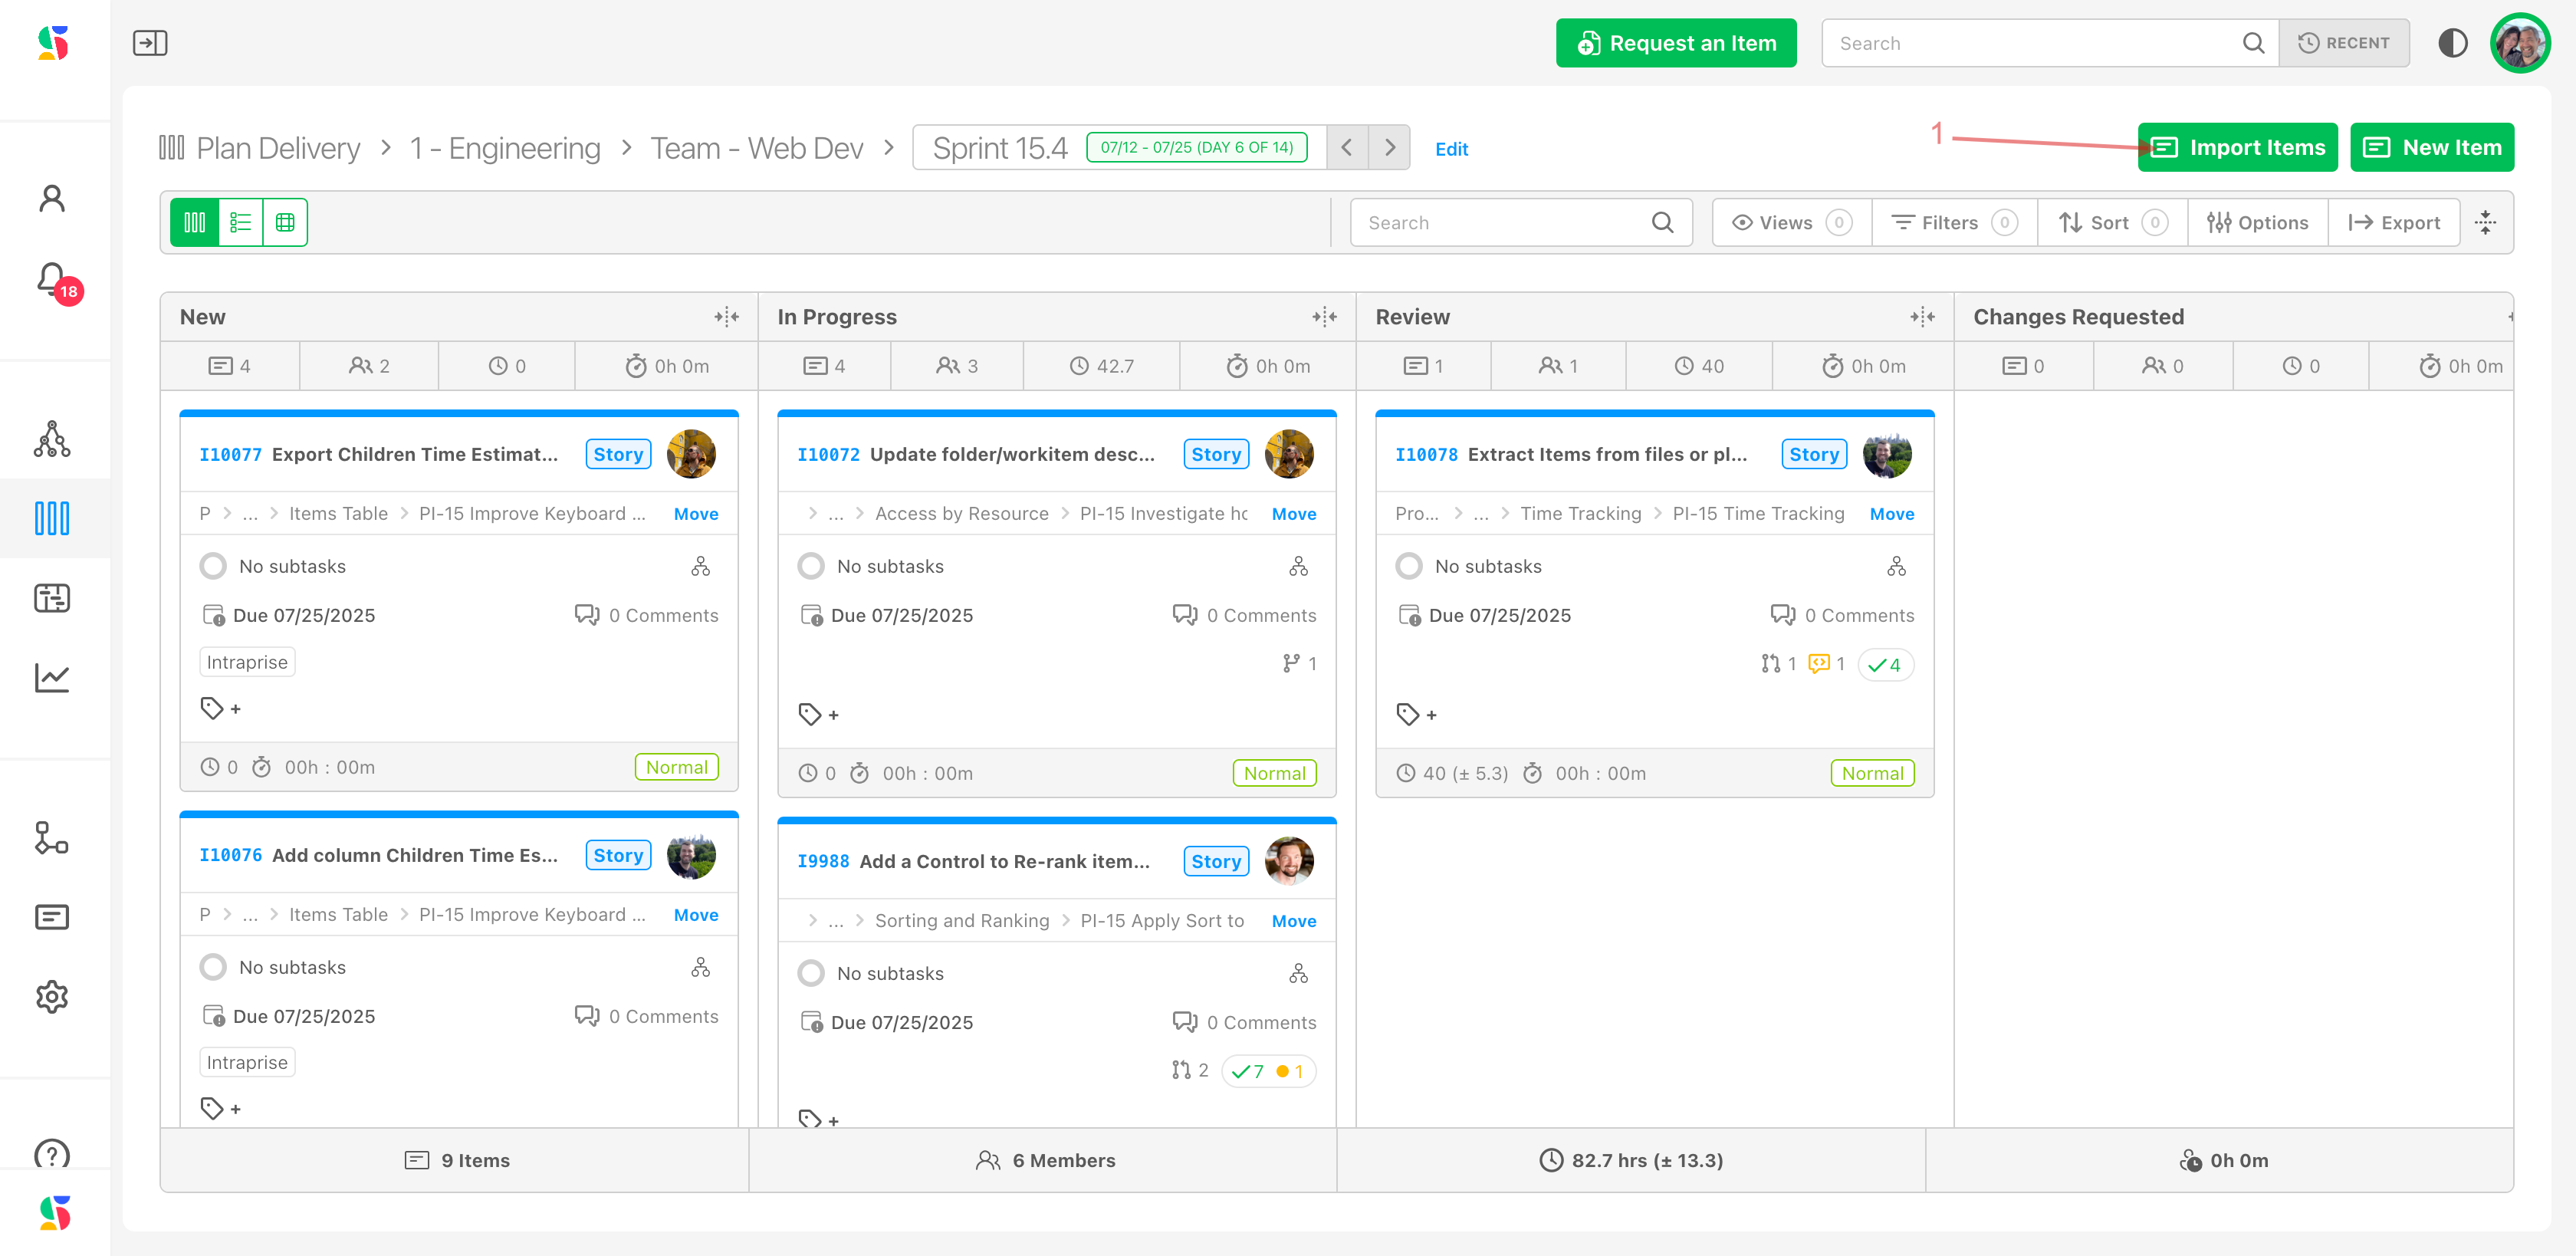
Ideally, you would have already defined what work has to be delivered by creating items in your Map Value module. If so, you can click on import items (1).
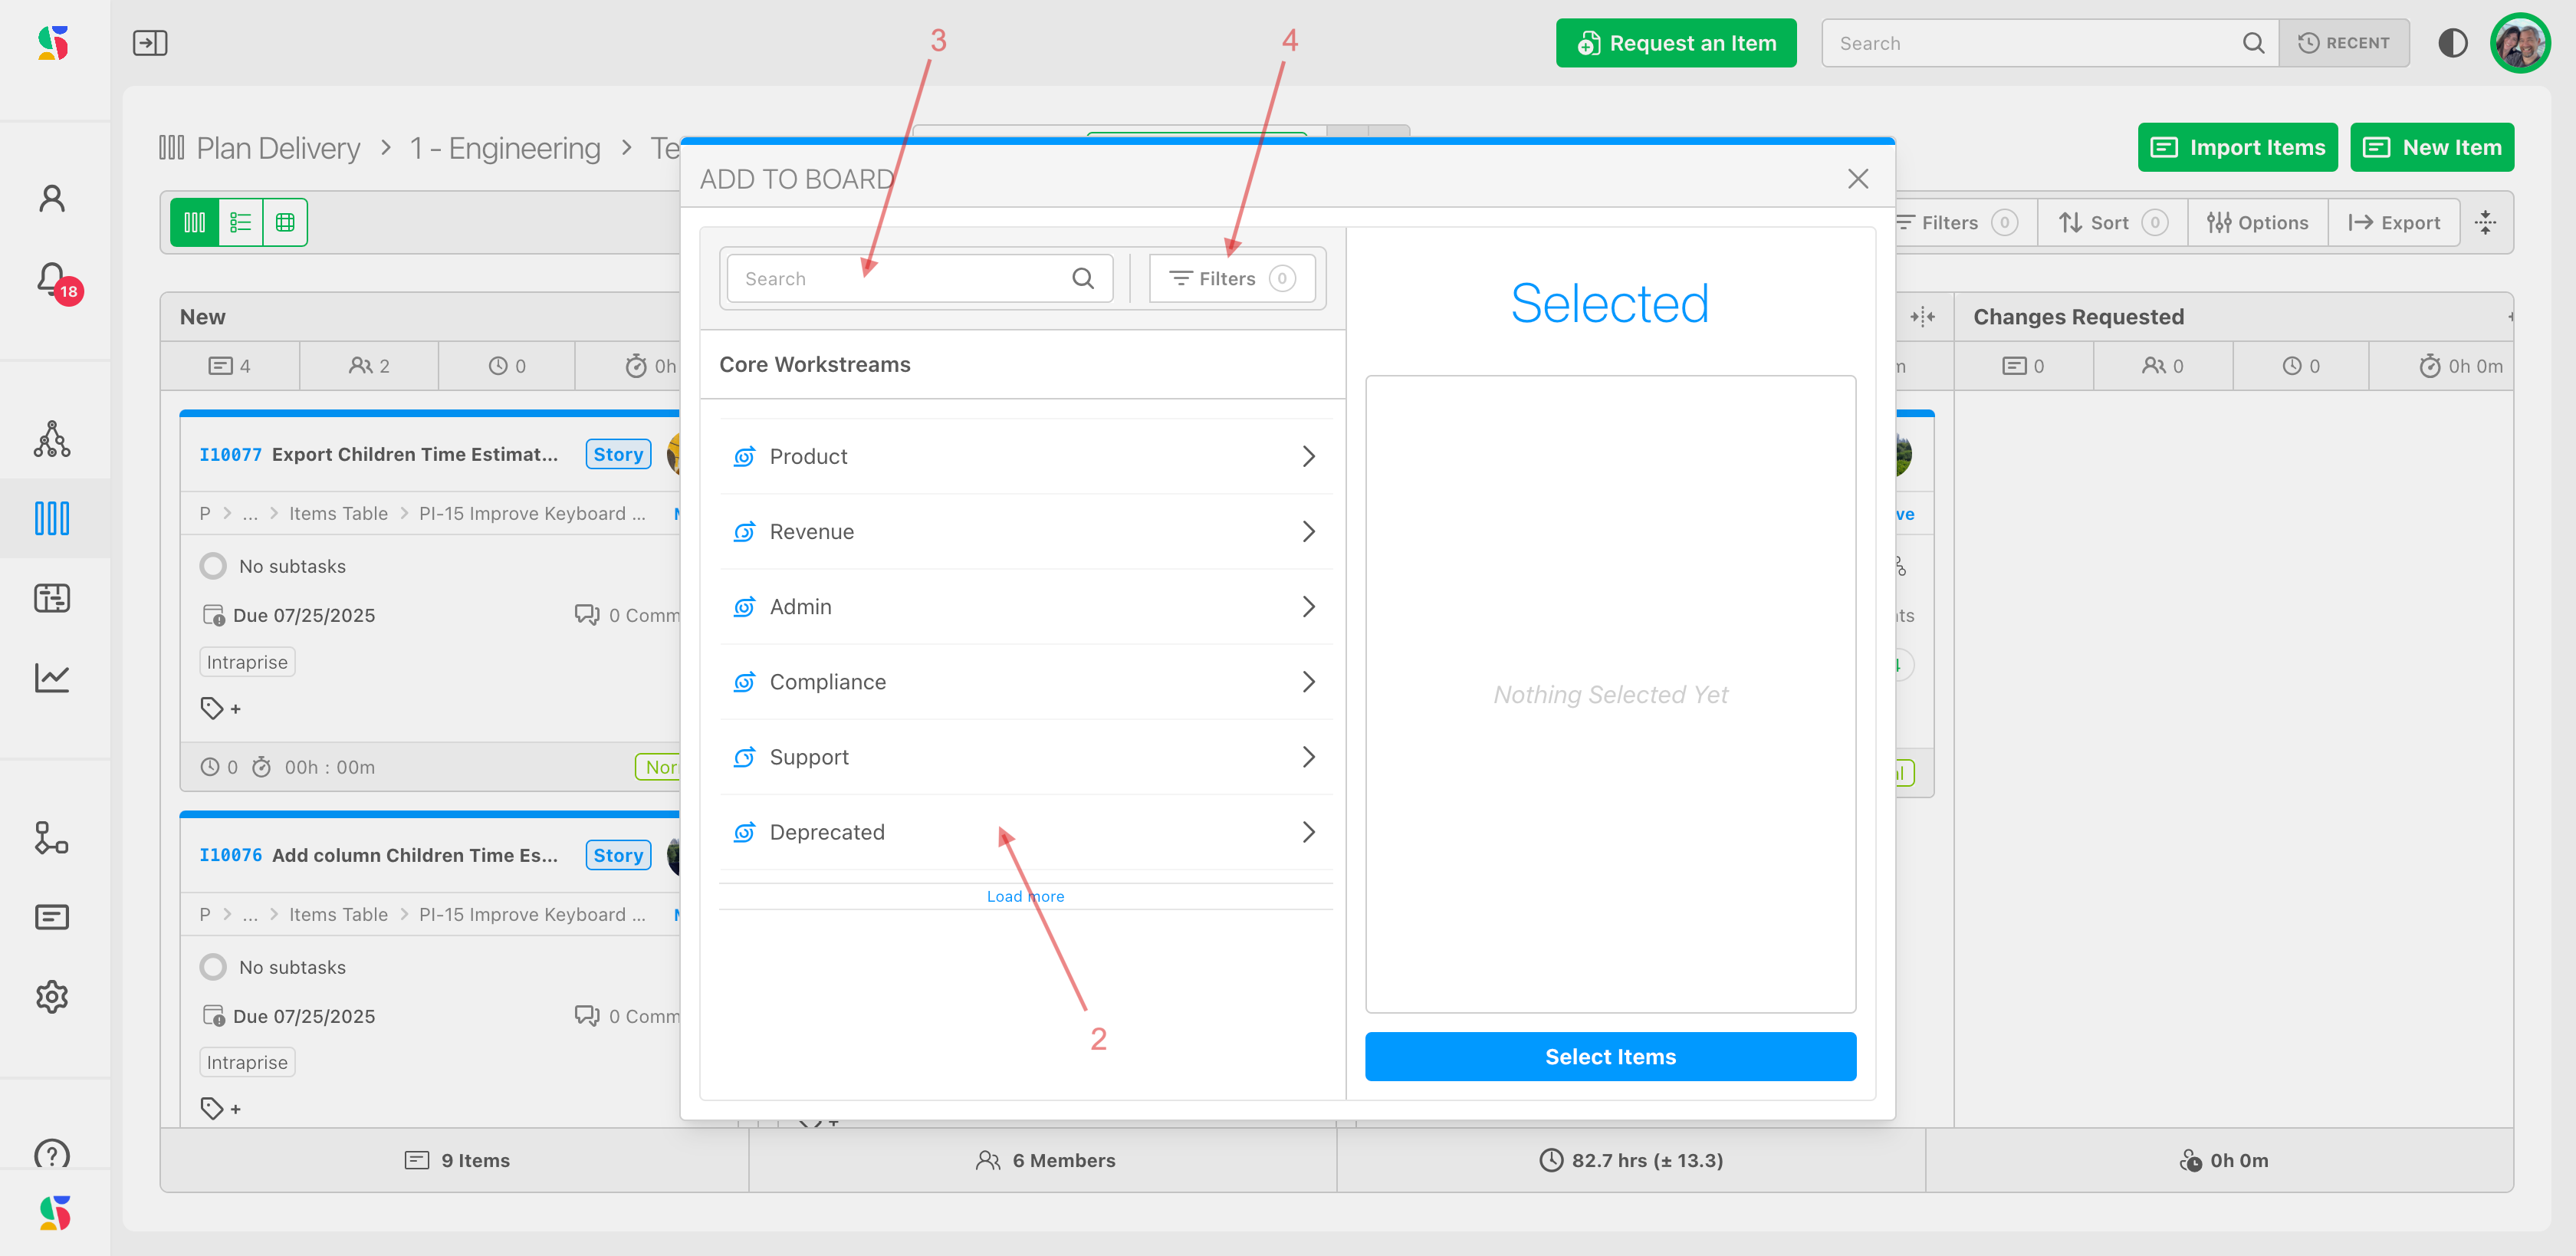
A dialogue box will open and you can locate the items you want to assign by navigating through the map (2), searching by keyword (3), or by using filters (4).
In the example below, we have navigated through the map to locate the group of items we want to add to the board. Here's how:
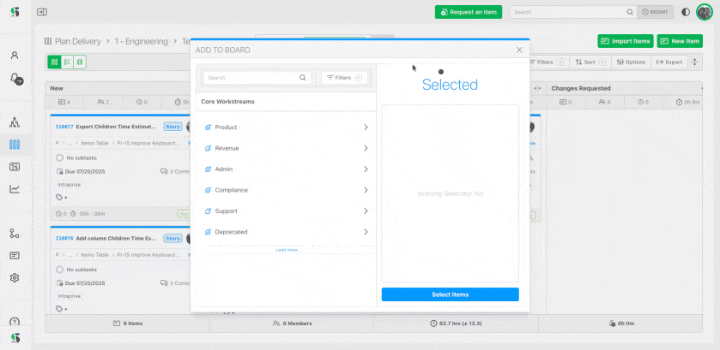
You can add items at whatever level of your hierarchy is appropriate for your board. Some teams like to have a board that tracks larger objectives for their quarterly cadence and then track a board with the specific tasks or stories for each sprint.
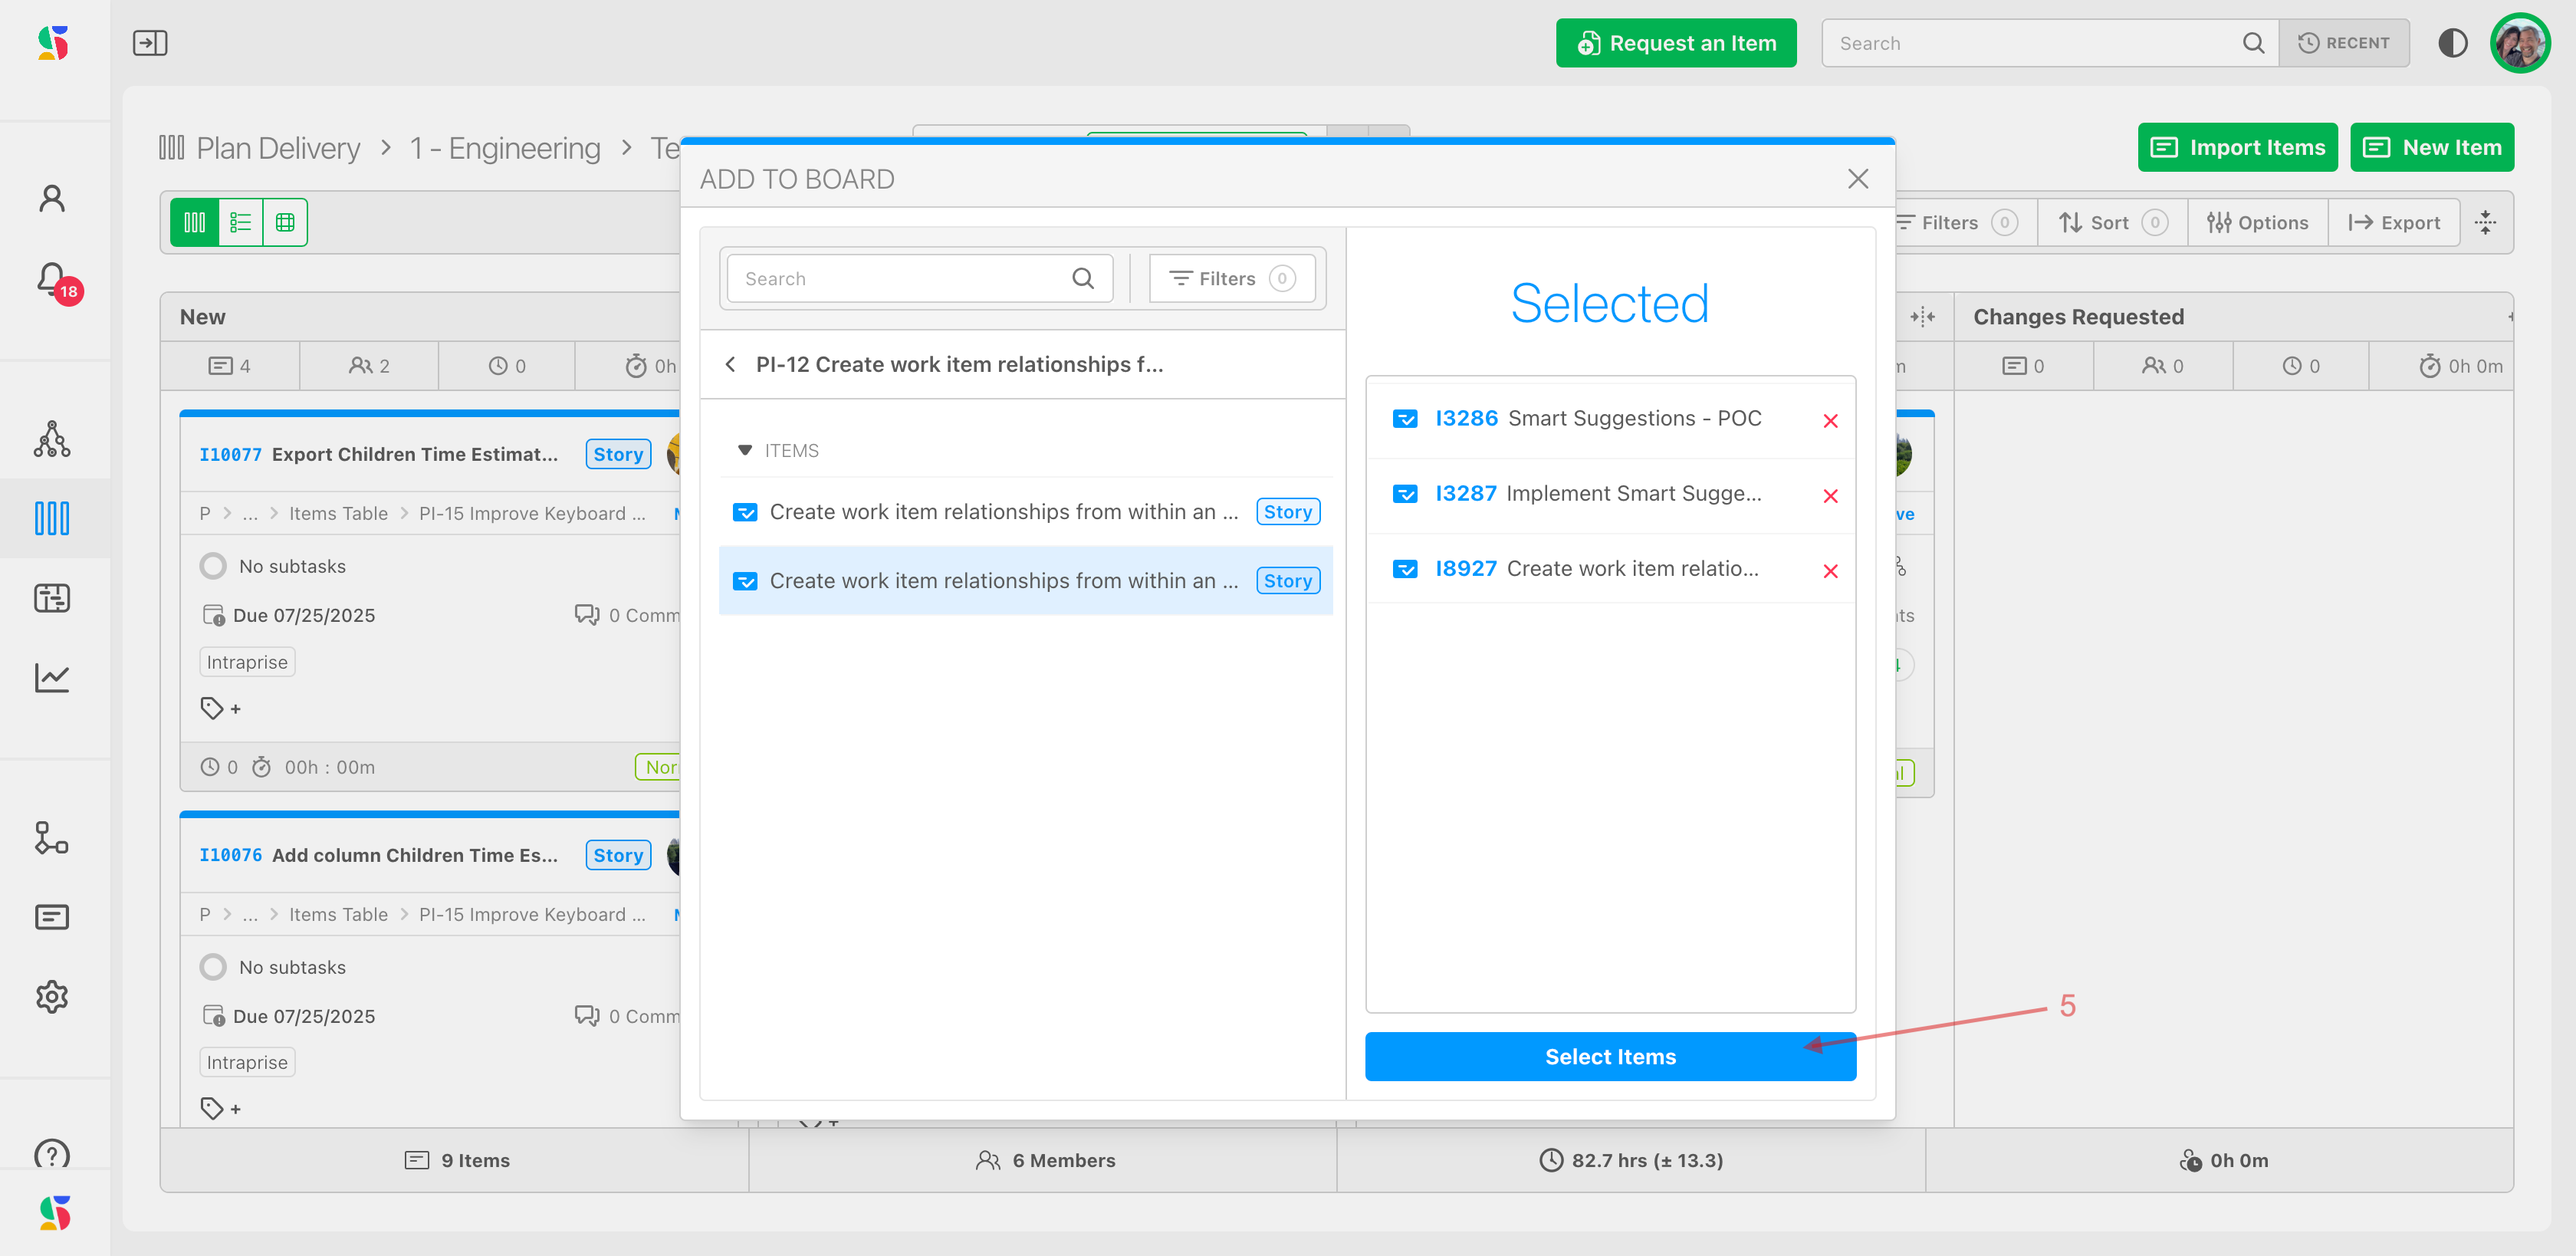
You can go back and add more items to a board from different locations in your map, as in here. Note there are already items in the right "selected side." You can navigate to other areas of your map and add more items:
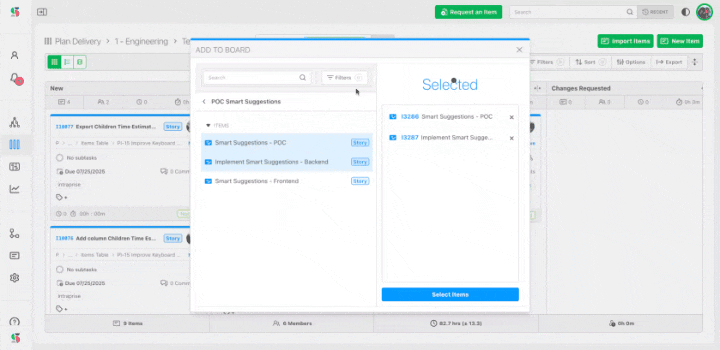
Once you have chosen items you want to add to your board, click Select Items (5).
You will now see all the items you selected on that board, in any view you wish to see.
Use the various views to see work committed to the board.
What if I think of new items that I want to assign and that aren't already in the Workstream in Map Value?
No problem! You can add them to the map OR right to here in Plan Devliery. Adding them here (via any view) will add them to the Map Value module as well.
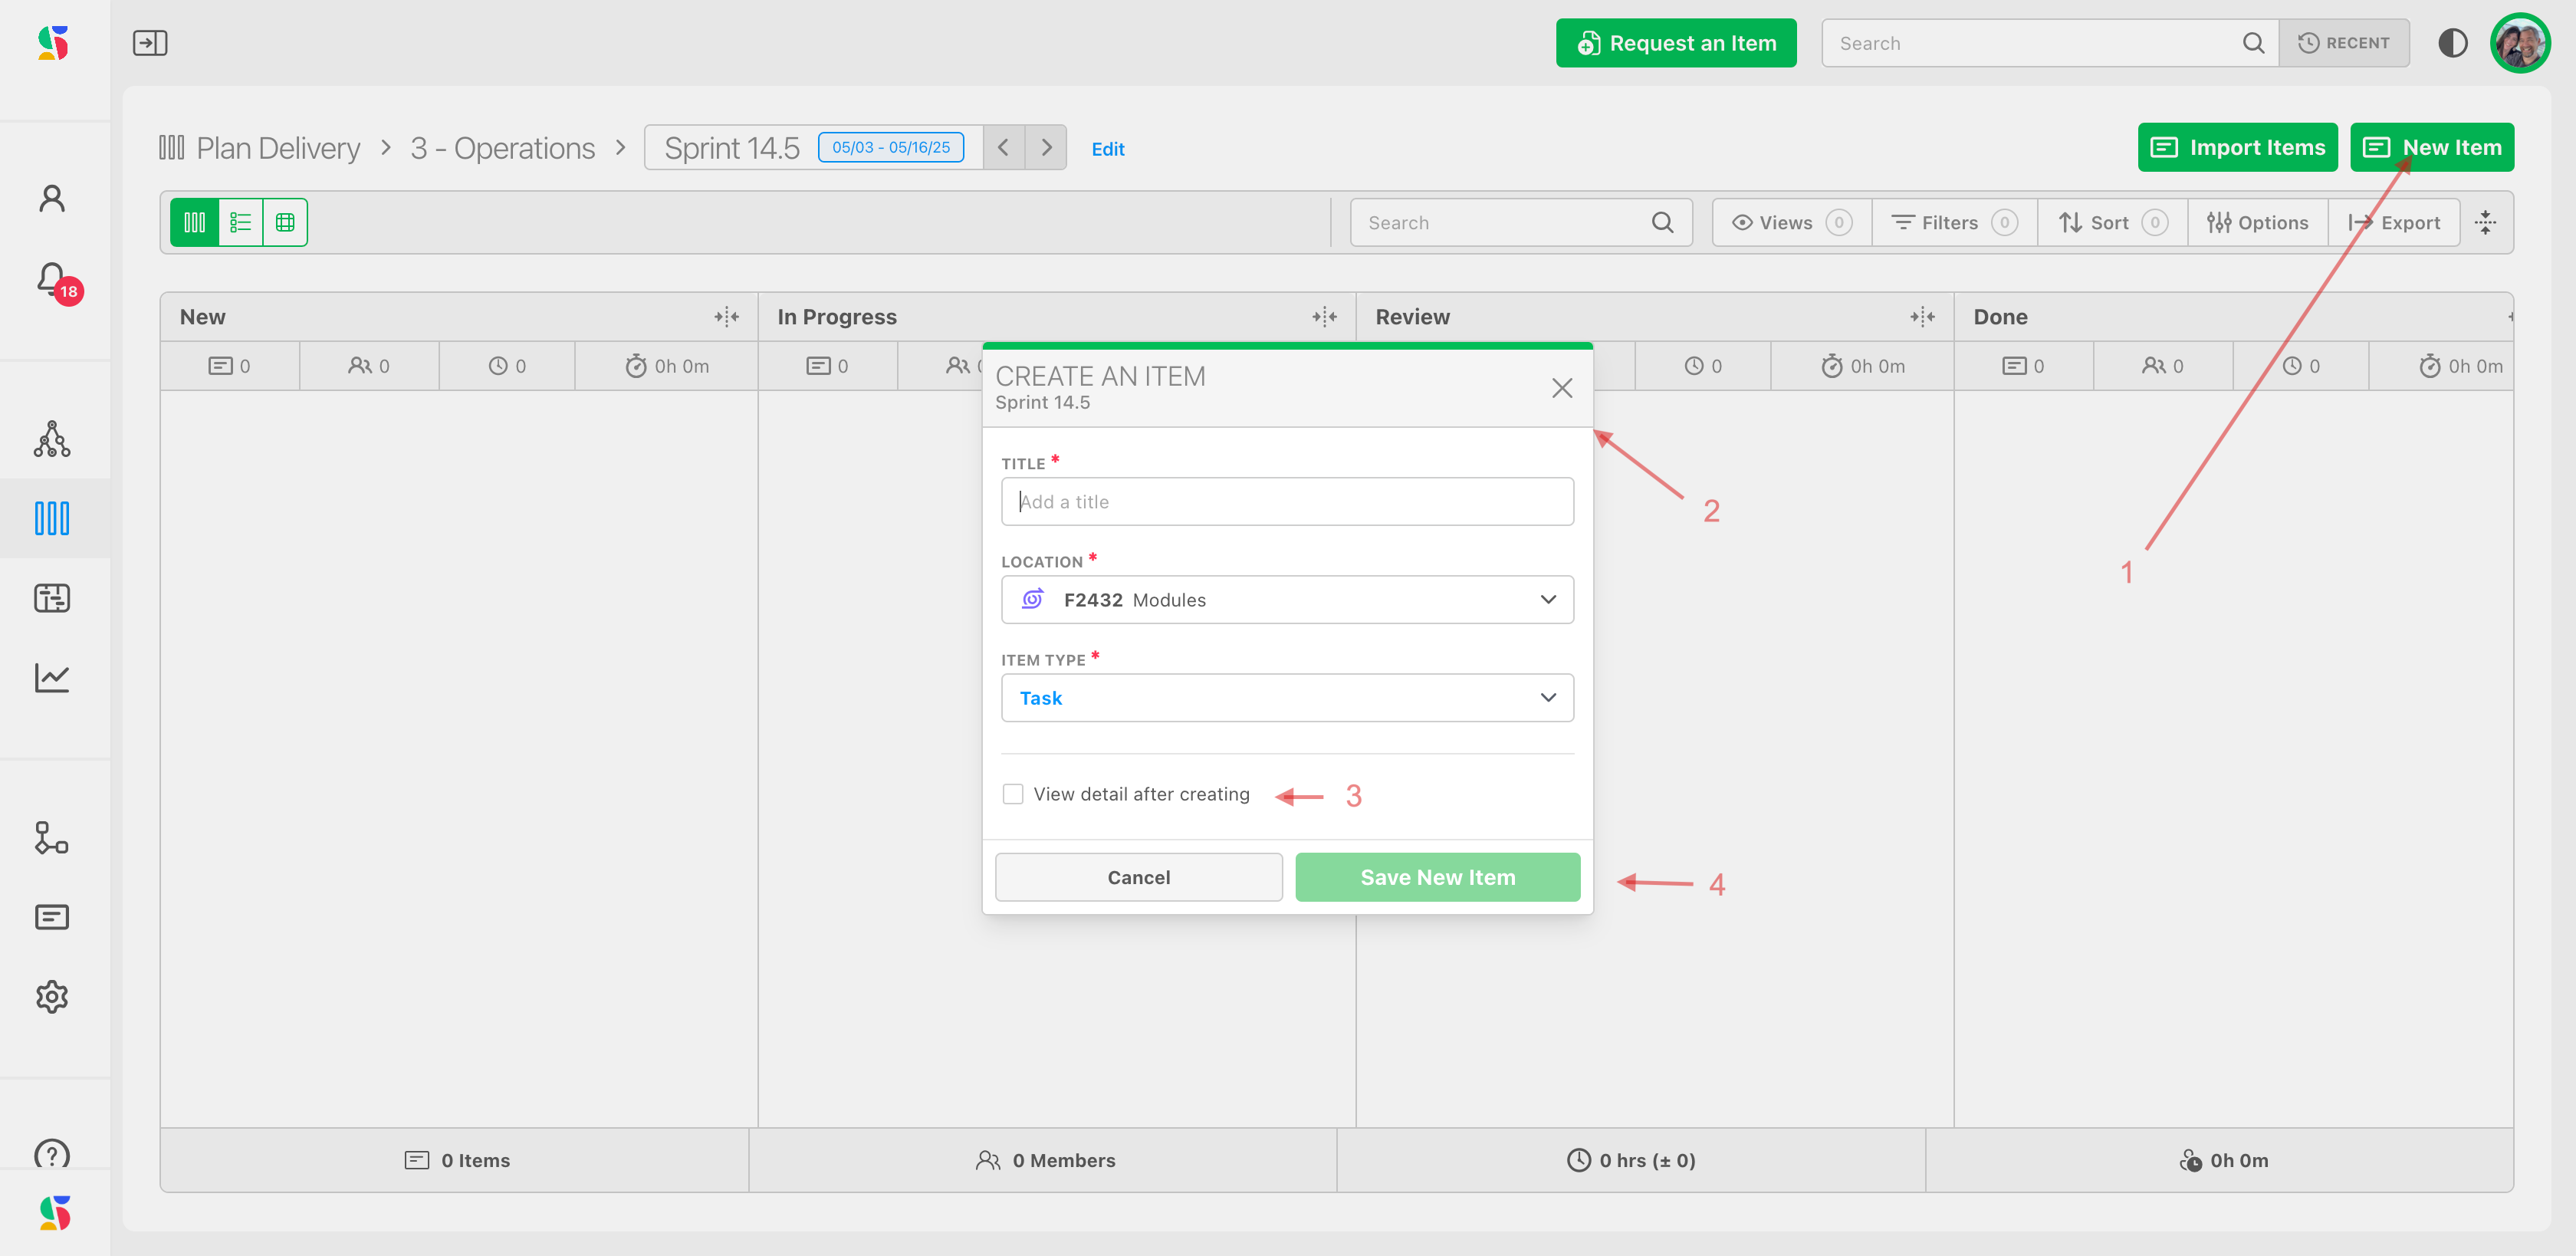
To add items directly from Plan Delivery, click on the New Item (1) icon from any view. The dialogue box will open.
Enter the name of the item you'd like to create.
Click on the down arrow of the location field to navigate to the place in the Workstream in Map Value you would like this item to be.
Select the item type for this item.
If you'd like to have the item open for you so that you can set additional details click the check box (3).
Once you assigned the items to a board, you can use it to track and move work, using any of 3 types of views, customizing them to help you work the way you'd like!
We will cover each of the 3 views next:
- Status view
- Table view
- 2D view
Was this article helpful?